
Banners
With Releva you can create beautiful and contextual Popups, positional Banners and Bars (we name them all Banners) for your website visitors without the need of a programmer or designer. Our users use Banners to
- grow their email list,
- retain their abandoning visitors,
- collect feedback,
- direct their visitors and clients to make the next purchase,
- send coupons & offers,
- and boost feedback for products.
You may also use product feeds, recommenders, and user profile properties to personalize your Banners.
You can set different Banner strategies for different pages on your shop. Releva comes pre-configured with Home, Category, Product, Cart, and Promotions pages.
If you want to create a new page, just click on “Create a new Page”:
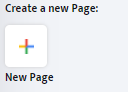
and then name your Page. Each created page “New page” can contain as many banners as you want, which you can activate or deactivate with the slider on the right-hand side:
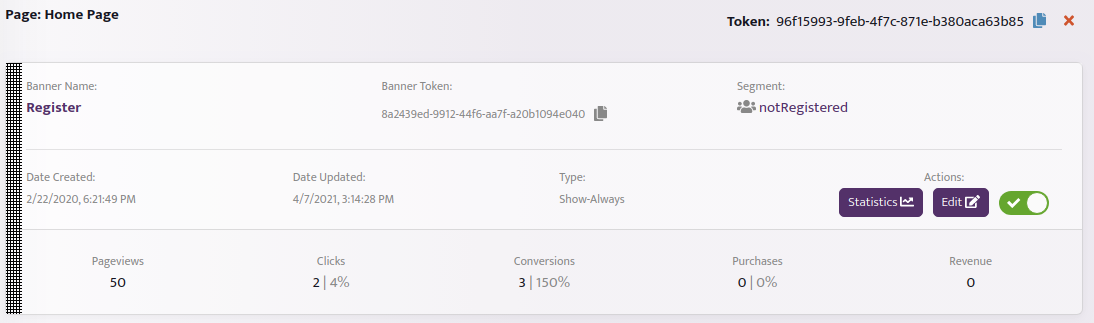
Banners are returned by Releva in the order that is set up in the Admin interface. For instance, the first banner for our Releva demo shop on its Home page will be Register and the second one Subscribe.
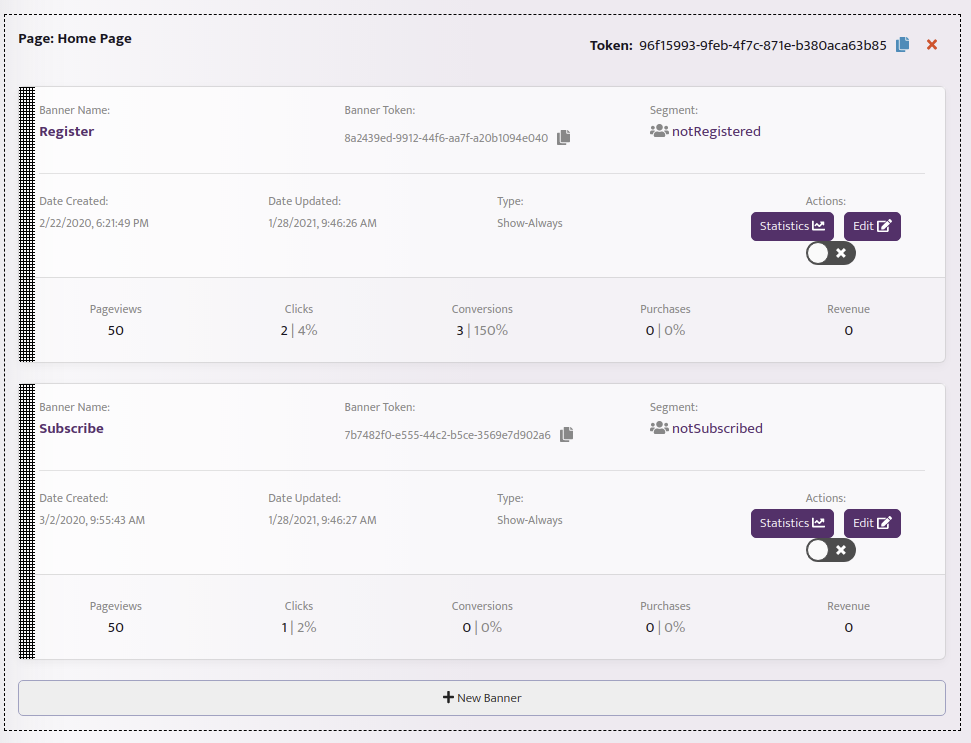
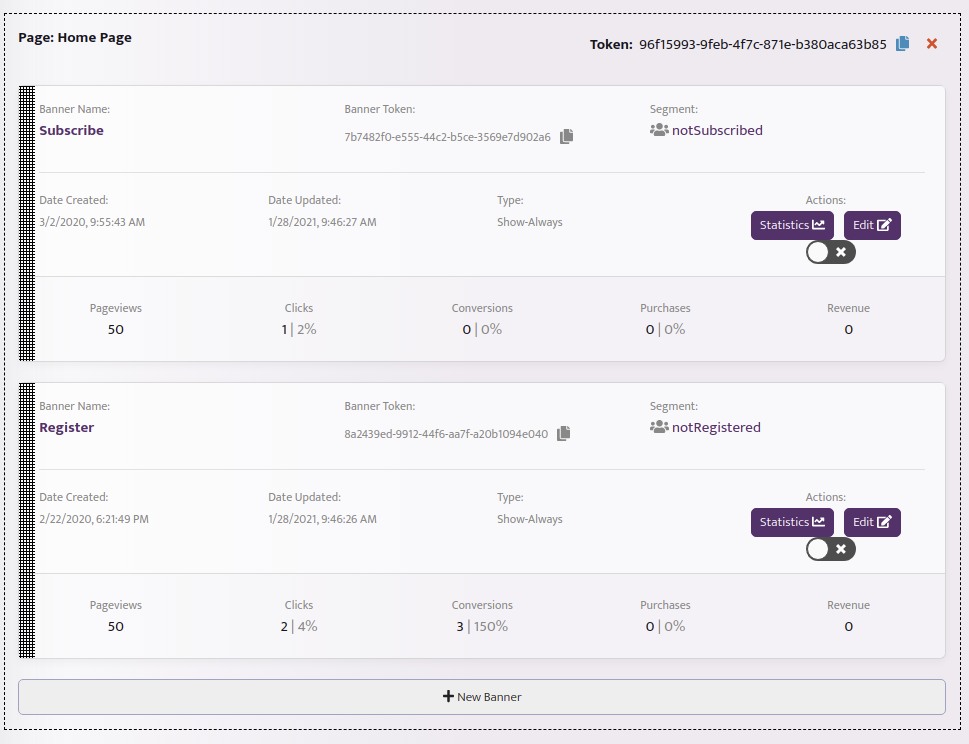
You can set the correct order by handling the banner by the mesh on the left-hand side and dragging and dropping it to the right place. In the following example, we drag and drop the Subscribe banner before Register.
Statistics
We track various statistics for each one of the banners:
- pageviews – how many times this banner have been shown to users of the shop
- clicks – how many times a user of the shop clicked on this banner,
- conversions – home many times a user clicked on the banner and added products in their basket as a consequent event,
- purchases – how many times a user purchased the products after they added them to the basket,
- revenue – the amount of money in the currency of the shop generated from this banner.
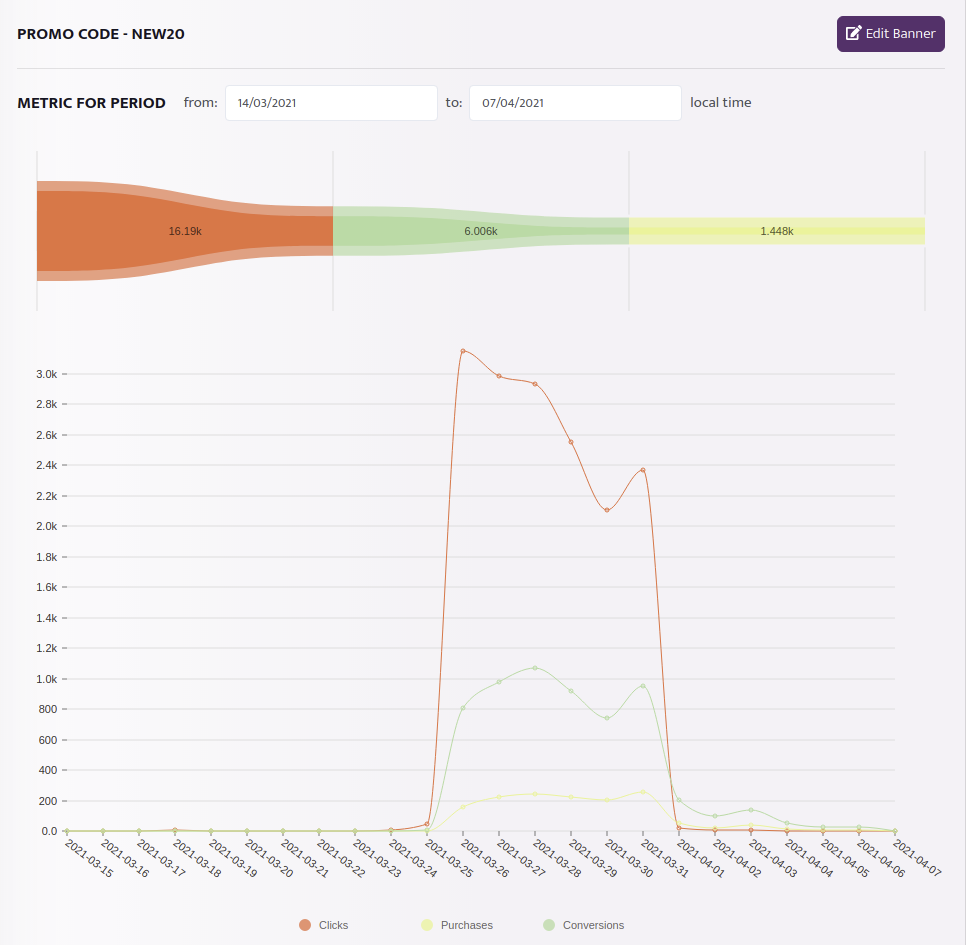
In addition, we visualize clicks, purchases, and conversions on a graph for each banner. In the following screenshot, you can see the funnel and concrete number per day.
Create a new banner
To create a new banner, you need to click on the button “New Banner” at the bottom of the area of each page.

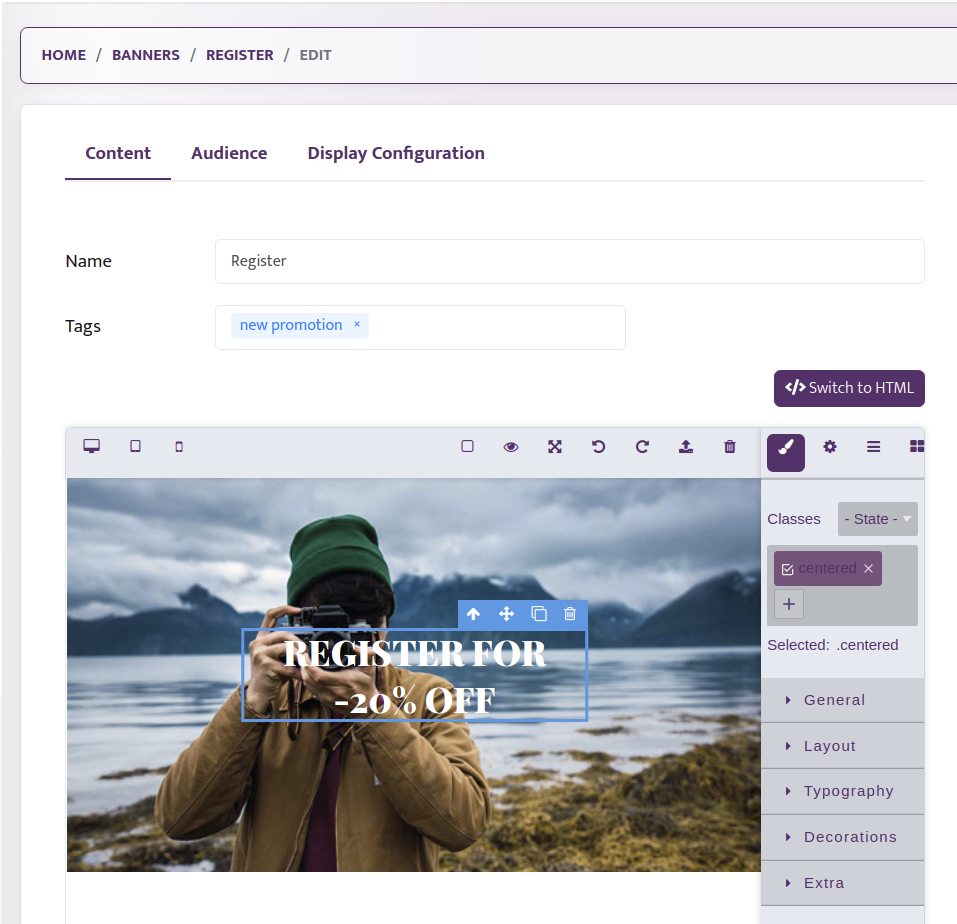
On the first tab out three, you need to add the name of your Banner (as it will appear in the Releva Admin interface), the Tags (keywords), and the creative. You can visually create your banner or you may choose to code it in HTML.
Tags property is used to associate keywords with banners. As tags are returned in the banner object of the response by our JavaScript SDK, you can define a visualization strategy and customize the display of banners using keywords. You can define tags by writing in the text field and hitting ‘Enter’.
On the second tab, you may want to define the segment and other Audience related settings such as showing your banner to first-time visitors and what would be the strategy to show the banner if we have already a click on it.
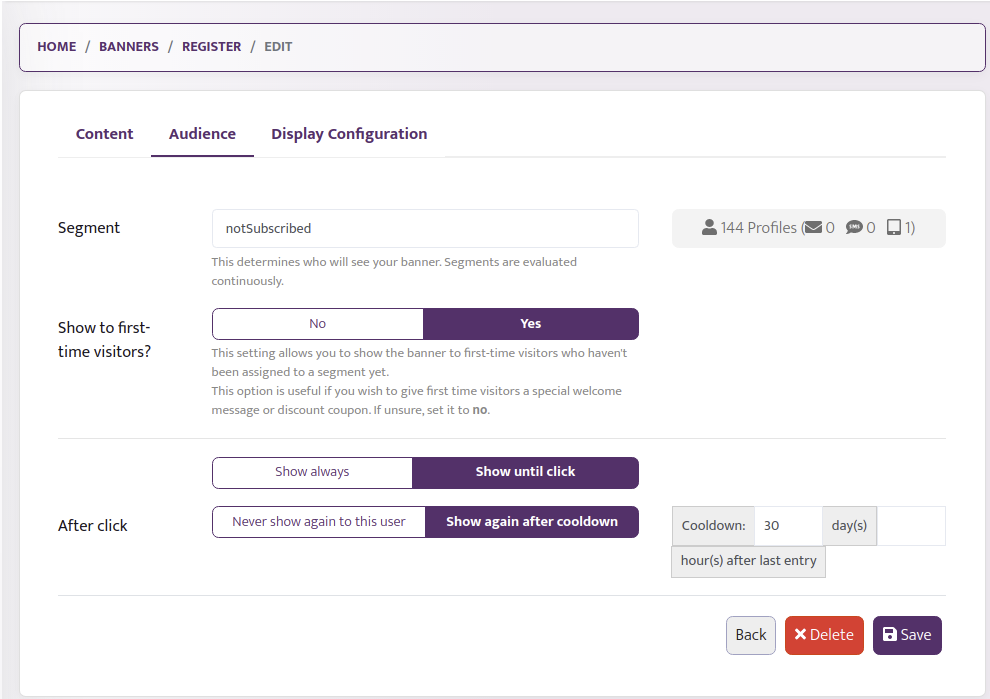
Segment property defines the segment of users that will see the actual Banner. On the right-hand side, you will all profiles matching the segment. Note that you need to define your segment prior to choosing it on this screen in the Segments tool.
First-time visitors property defines if new users will be able to see this banner independently of the segment configuration.
Type property defines how many times the banner can be seen by your users. The Show always strategy will show the banner, no matter if the user already clicked on the banner or not.

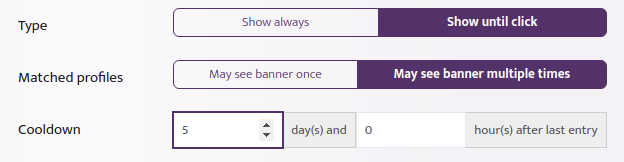
The banner can be seen multiple times and if you select the Show until click option, you will have the ability to configure it to show up only until the click of the particular user, or users may see it multiple times. Configuration of the banner to be seen multiple times follosw:

In addition, you may want the user to see the banner until click and then to show it up again after 5 days. You can do this with the Cooldown property. The configuration for 5 days cooldown is:
On the third tab, you can define your display strategy.
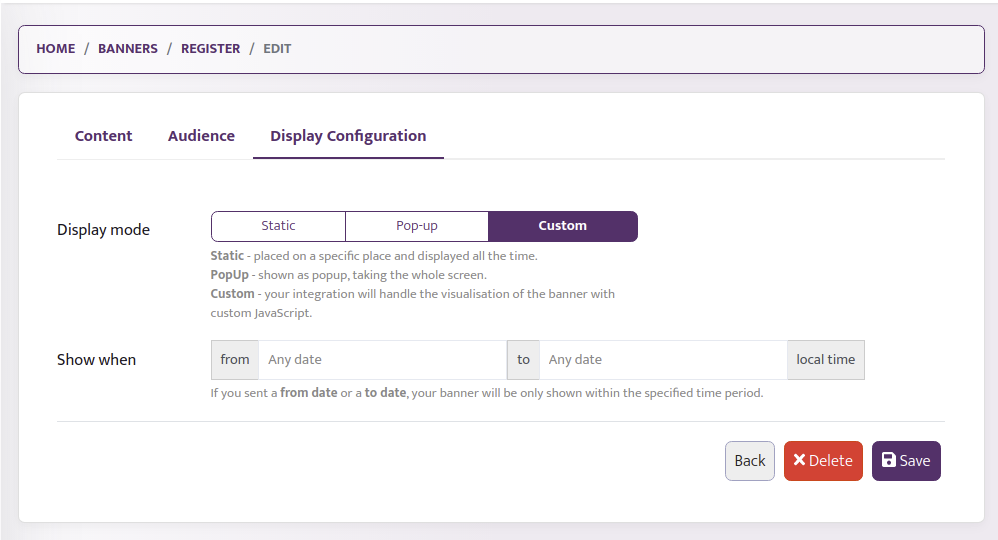
In Display mode, you will be able to set your Banner as Static (placed on a specific place and displayed as part of the web page), Pop-up (shown as popping up creative, taking up the whole scree) and Custom, where your integration with Releva will handle the visualization of with custom JavaScript code.
Show when?
Property defines the lifetime of the banner.

If you choose Static Banner you will have the following options:
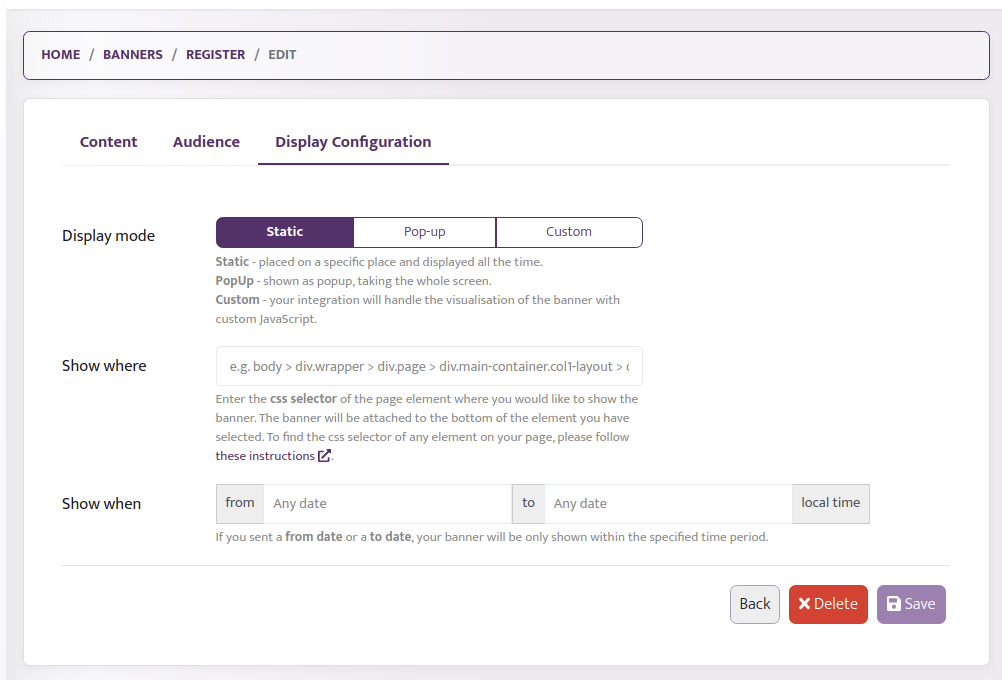
Show where – this is the CSS selector of the page element where you would like to show the banner. The banner will be attached to the bottom of the element you have selected. To find the CSS selector of any element on your page, please follow these instructions.
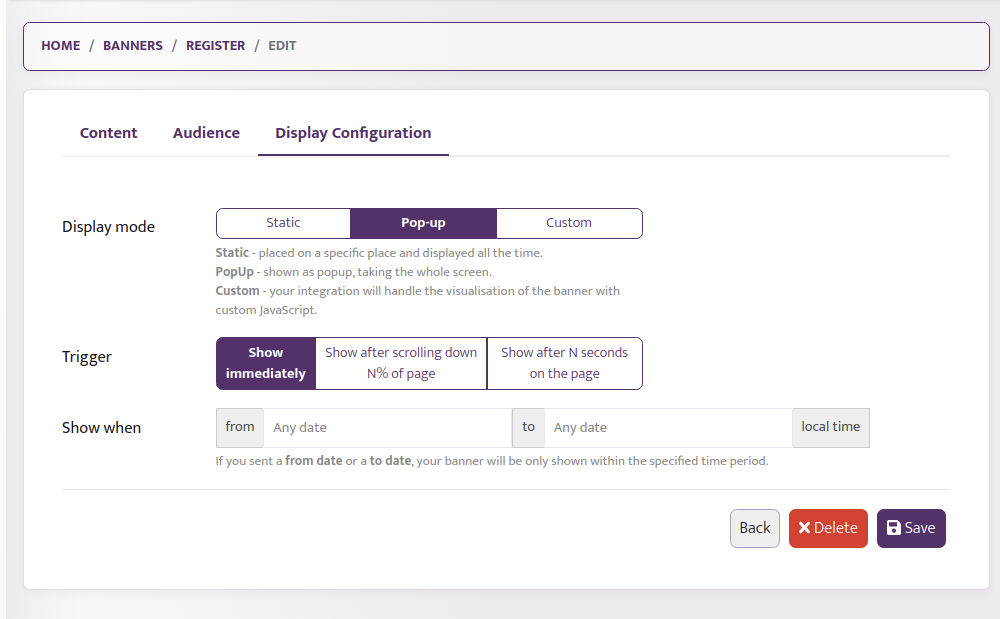
If you choose Pop-up Banner you will have the following options to show your Banner:
- immediately after a user opens a web page,
- after a user scrolls some percentage of a web page, or
- after N seconds of interaction of a user with a web page.
For option 2 (user scrolls), you will be able to configure the percentage of the scroll (10% in our case):

For option 3 (user interaction time), you will be able to configure the number of seconds:
