This article will guide you throuh the installation and initial set up of the Releva module in a few easy steps.
Step 1. Please go to Magento Connect manager and select the plugin zip file, and click upload. After you see the ‘cache cleaned successfully’ message, return to the admin page. You will need to log out and log back in to access the plugin configuration.


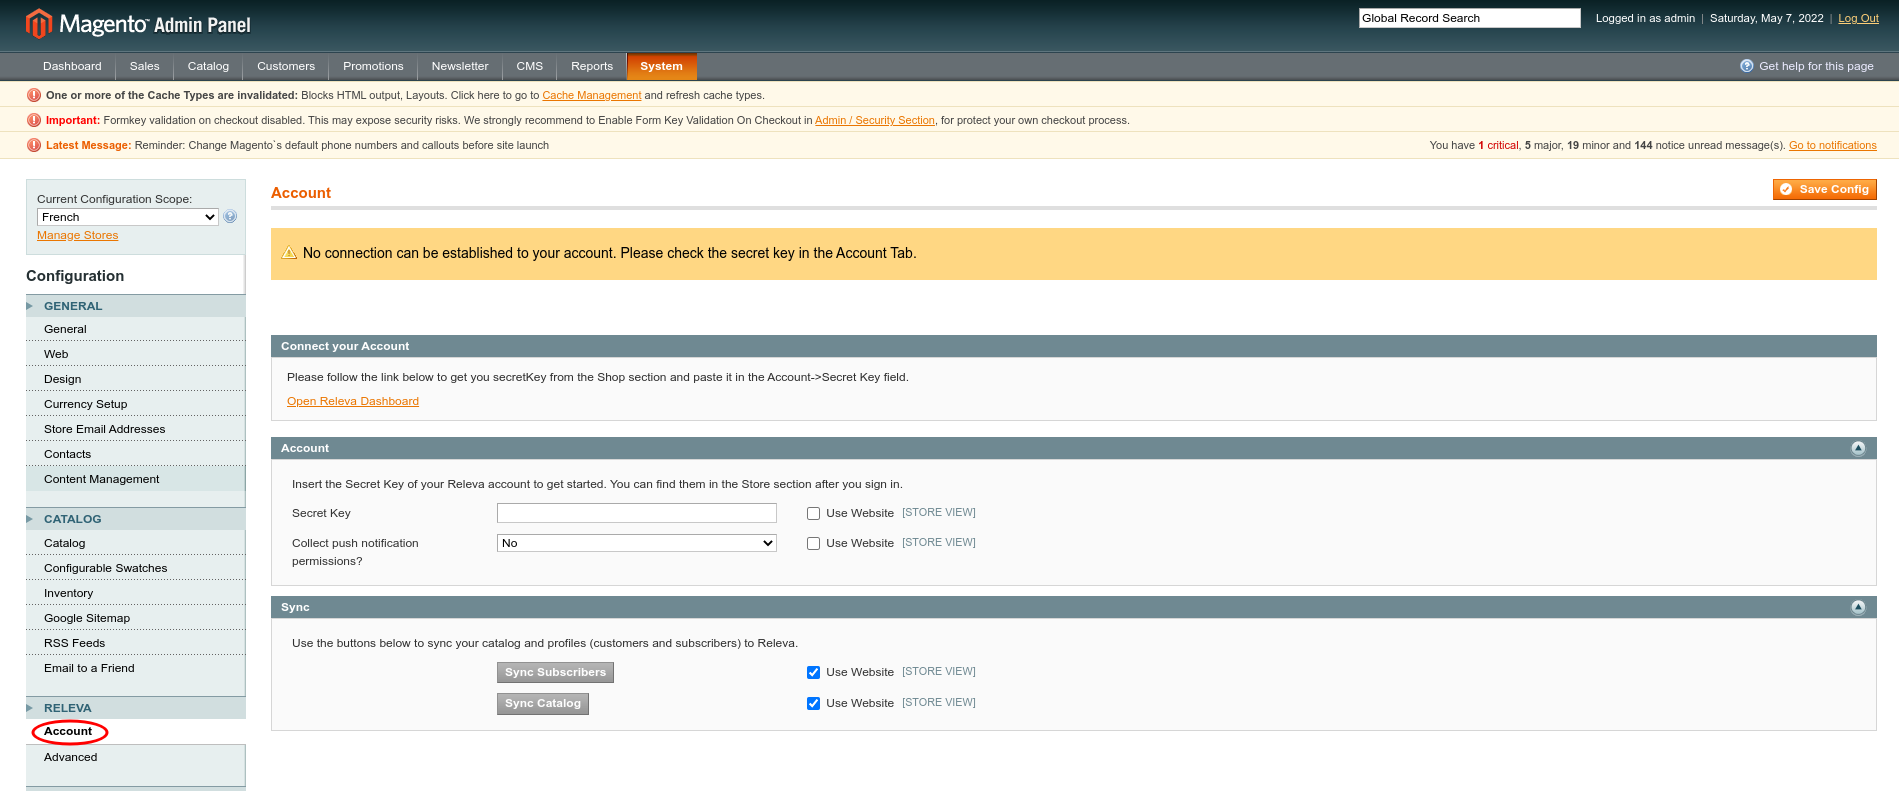
Step 2. After logging back into the Magento admin, please navigate to System -> Configuration. You will see a Releva section, click on the Account link under it. Please note that if you see a 404 message, you need to log out and then log back in.

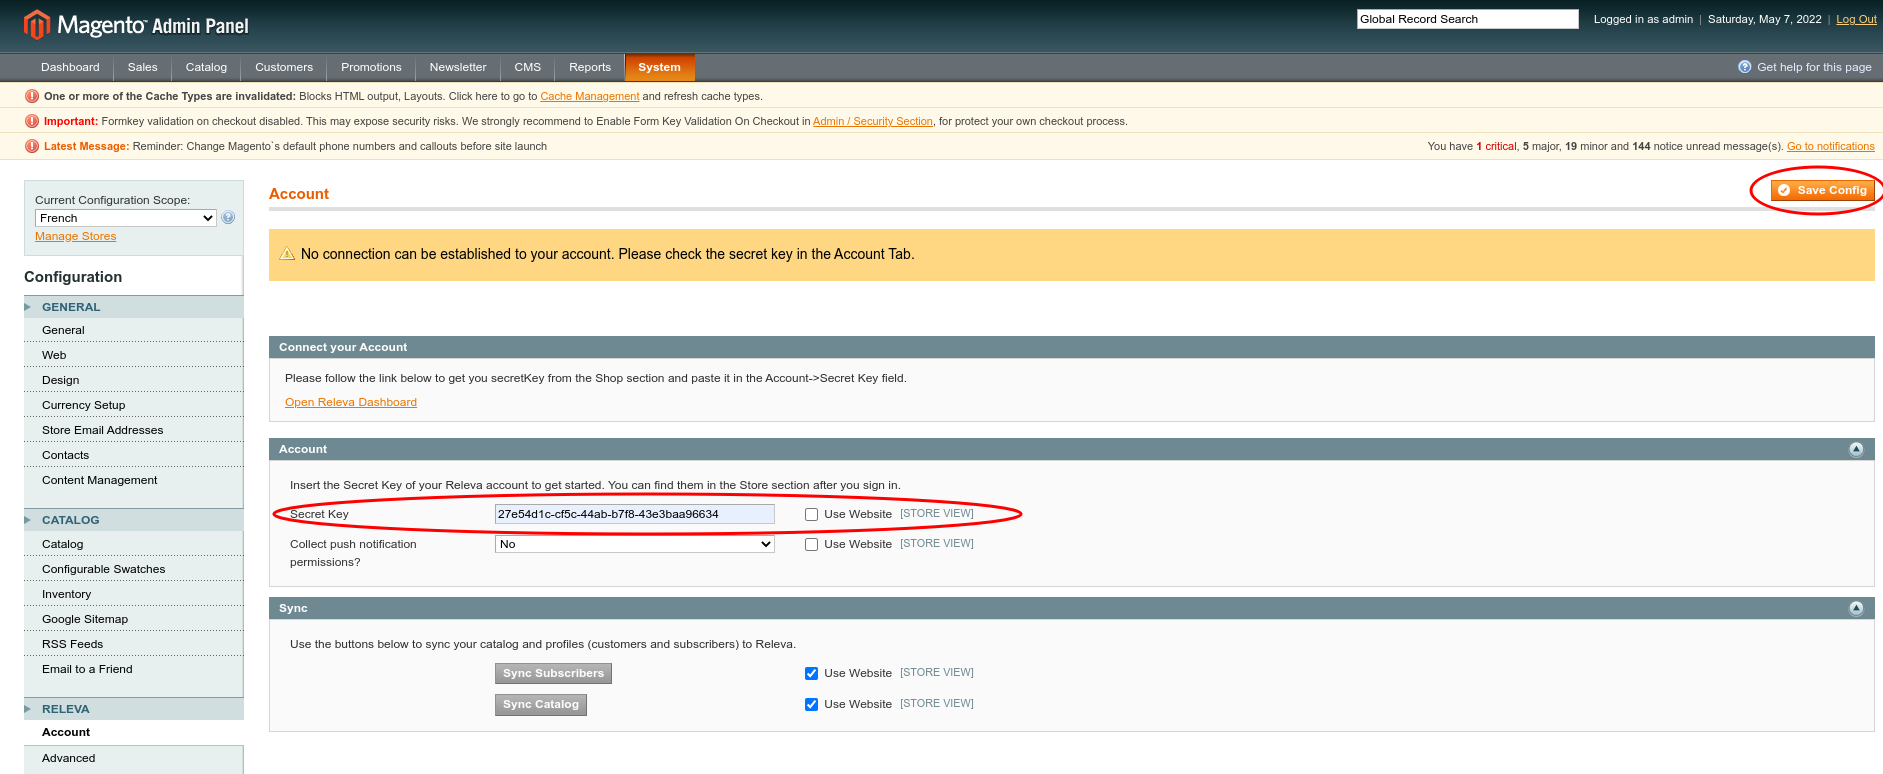
Step 3. Please paste your secret key in the Secret key field. If you intend to use push notifications with Releva, please also enable the collection of push notification permissions. Finally, click ‘Save’. Note: if you have multiple store views, please paste the secret key in your primary store view scope and not in the default config scope. If you wish to use Releva with multiple store views, please reach out to your account manager and request additional secret keys for your other store views.

Step 4. Go to System -> Cache Management and flush the Magento cache.

Congratulations! This concludes the installation of the Releva module on your shop. Please feel free to reach out to your account manager or email support@releva.ai in case you have trouble completing the installation. We are always happy to help!
A note about product images: depending on the product images, the images shown in recommenders may not match in size. You can set the image width and height globally from System- > Configuration -> Catalog -> Product Image or from Releva -> Advanced. After changing this, you need to re-sync the catalog from the System -> Configuration -> Releva -> Account section for changes to take effect.


