
Magento 2 Installation Guide
This article explains how to install and activate the Releva Magento 2 module.
Step 1. Please extract the contents of the plugin archive into <magento_root>/app/code/Releva/Releva.
Step 2. Inside a terminal, run magento module:enable Releva_Releva && magento setup:upgrade && magento setup:di:compile . Depending on your cache settings, you may also need to clear the cache.
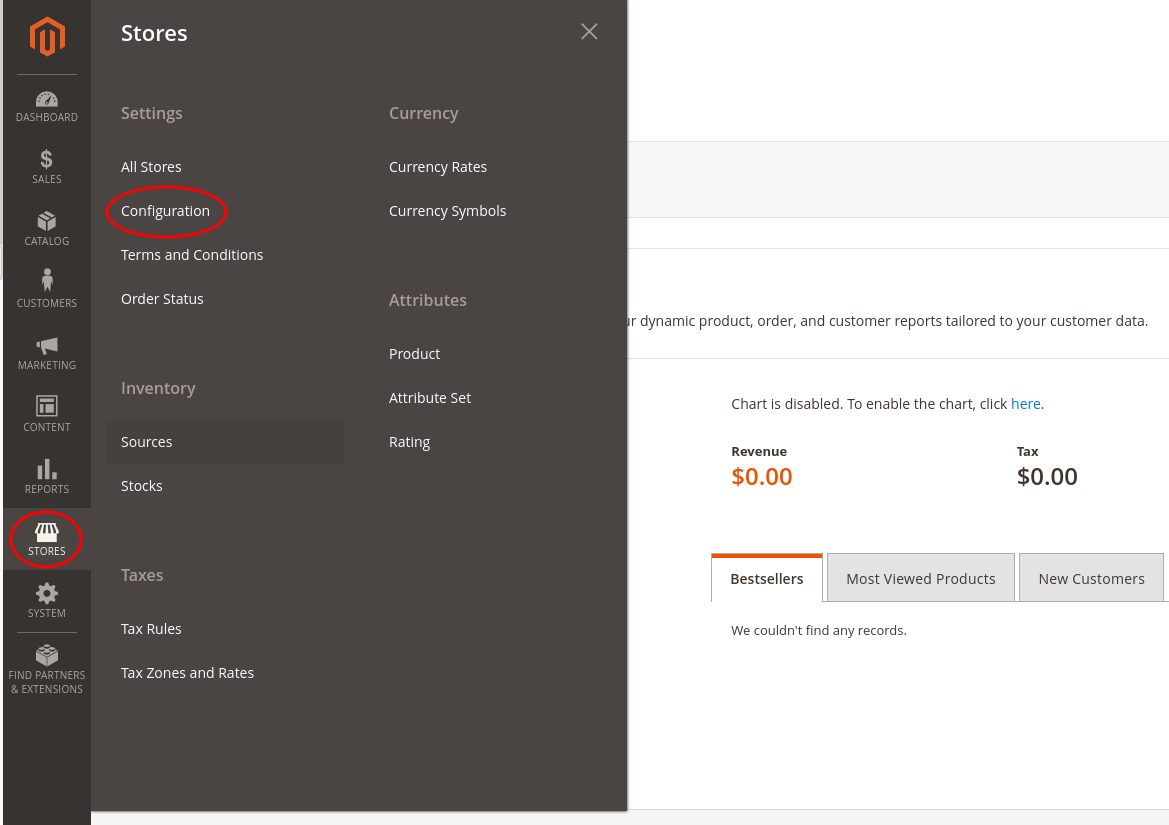
Step 3. Go to Store -> Configuration -> Releva -> Integration Settings.
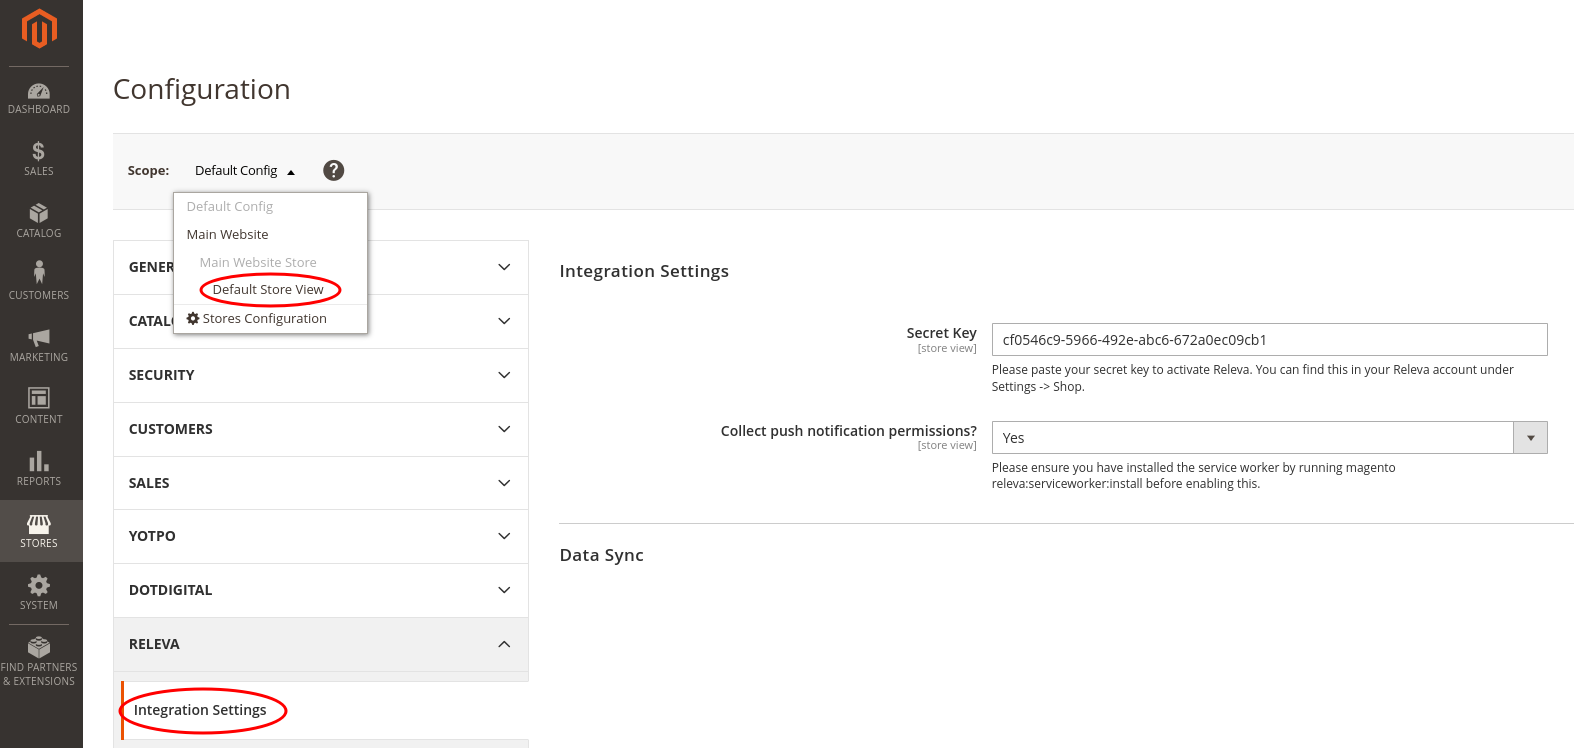
Step 4. Select the specific store view for which you would like to link Releva. Do not select default config if you have multiple store views as this will cause data for different stores to be mixed in Releva. If you would like to integrate multiple store views, please ask your account manager to provide you extra keys for the other store views.
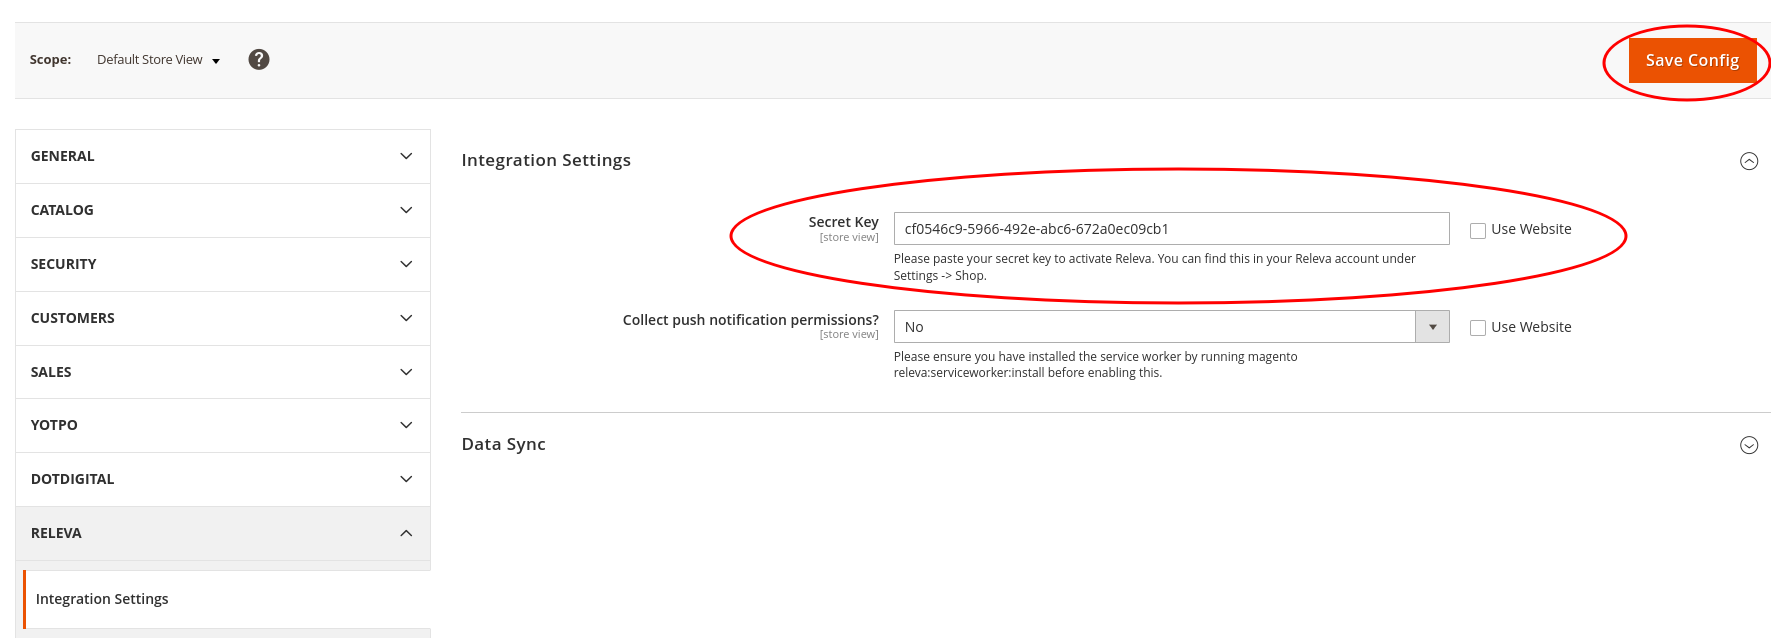
Step 5. Paste your Releva secret key and hit “Save”. Shoot us a message at support@releva.ai if you don’t have one! Once the configuration is saved, the Releva module will insert tracking and personalization blocks to all relevant pages. You may need to clear your Magento cache for changes to take effect.
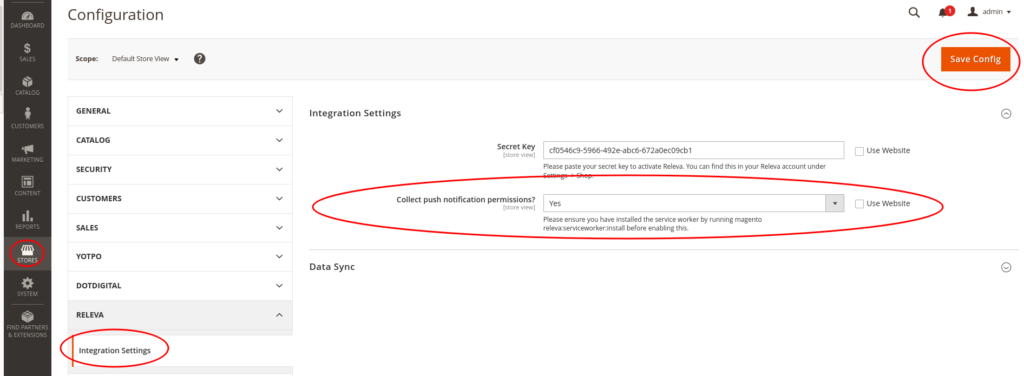
Step 6. If you do not intend to use Releva to send push notifications, you may skip this step. Please run magento releva:serviceworker:install and clear your cache. Then, from the Releva Integration settings page, enable the collection of push notification permissions and then clean your Magento cache.
Then ensure that the service worker has been successfully installed under https://your-shop.com/releva-service-worker.min.js. If it’s not there, ensure that you run magento releva:serviceworker:install as a user with sufficient permissions. If all else fails, upload the file releva-service-worker.min.js (includede with the module), put it in the root folder, and ensure that https://your-shop.com/releva-service-worker.min.js is accessible.
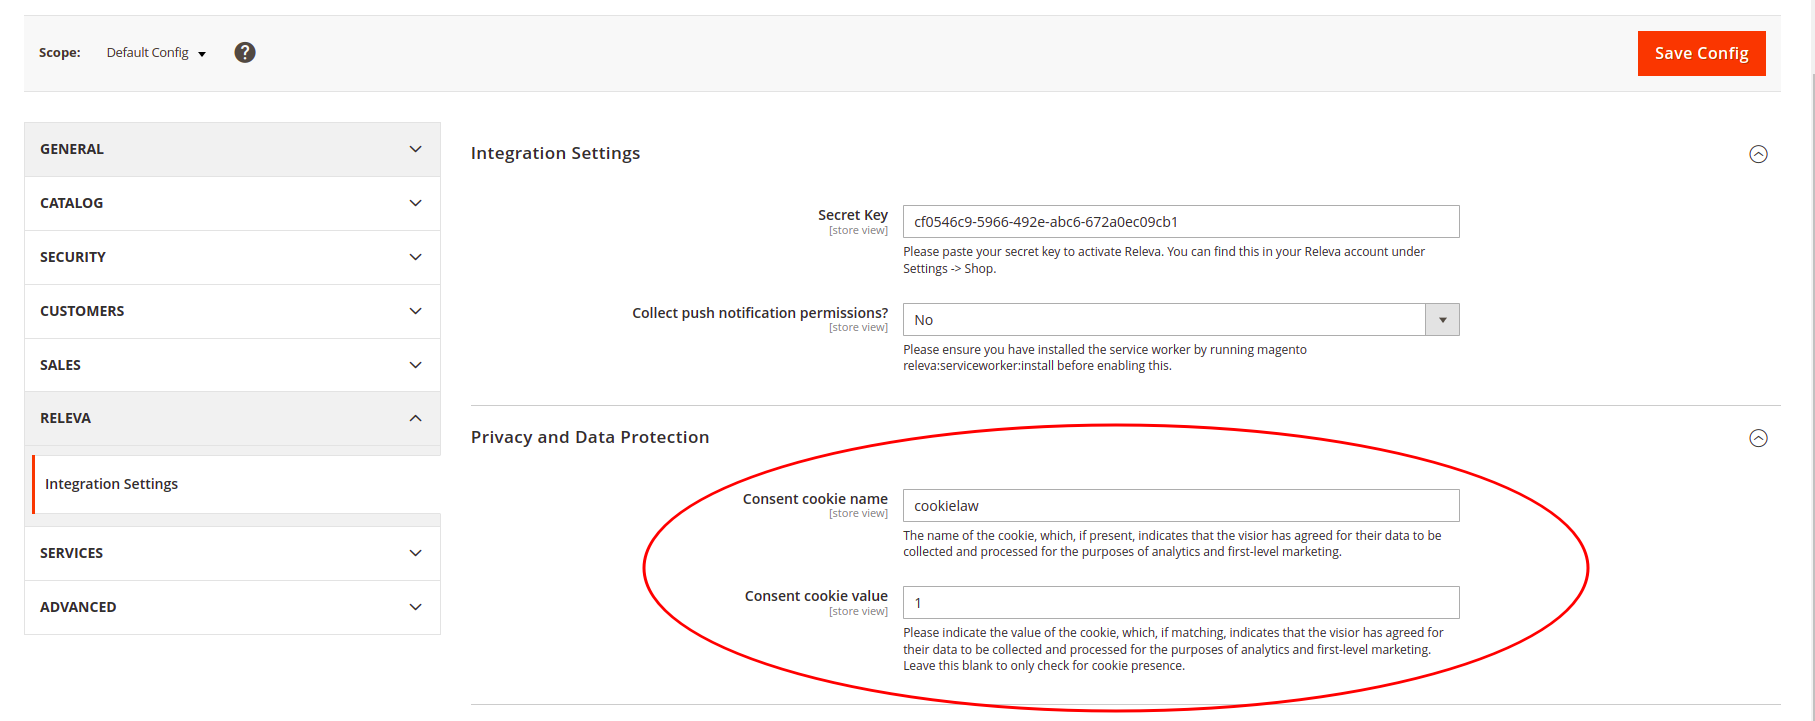
Step 7. Configure cookies used for cookie and data processing consent storage. Under the Privacy and Data Protection section, please add the name of the cookie which holds the consent status, and, optionally, the cookie value indicates that the visitor has granted consent for their data to be processed for first-level marketing and analytics purposes. For example, if accepting your cookie policy results in the visitor receiving a cookie named “cookielaw” with a value 1, you need to set the name and value as shown below.
Important!! You may skip this step if you are not subject to data protection laws such as GDPR, CCPA, etc. However, if you are subject to such laws and you fail to configure this section correctly, you may be subject to substantial fines. Releva will not take responsibility for issues caused by module misconfiguration.
Congratulations! The Releva module is now installed and active. Please reach out to your account manager and they will guide you through the next steps.
In case of any questions, please shoot us an email at support@releva.ai.