Using Facebook ads via Releva.ai
Creating a Facebook Pixel
To connect Releva with your Facebook Business Account you will need to have a Facebook Pixel. If you don’t have one you can use the instructions below to create it.
- Go to Meta Business Suite
- Select Settings
- You need to have access to the Business and to the ads account. We need both to connect.
- Select All Tools and then Events Manager
- Connect a New Data Source
- Pick Web and connect
- Name your Pixel
- Create Pixel
- Next step check for partner integration
- Enter website/ I don’t have a website
- Pick Conversions API and Meta Pixel (if available)
- Set Up Manually
- Select All Events
- Continue x3
- Our Pixel has been created
Connecting Facebook Pixel to the ad account
- Go to Business Settings
- Click on Data sources
- Select Pixels and pick the pixel you have created
- Select Connect Assets, then Ad Account, and finally Choose which one to create as an asset
- Here we connect the pixel to the ad account and the Facebook Setup is finished.
Connecting Facebook Pixel to Releva.ai
Once your Facebook Pixel has been created you will need to connect it to Releva.
- Open the Releva.ai admin panel
- Select Settings, then Shop, then Facebook
- Click on Connect Facebook to Releva
- Continue as
- Choose the Businesses you want Releva.ai to access
- Opt in to current Businesses only
- Choose the Pages you want Releva.ai to access (Opt in to current Pages only)
- And Save
Creating a Facebook ad in Releva
Now the initial setup is complete and if we want to create a Facebook campaign, we will need a few things.
The first step is to create a Facebook Product Set, which can be a set of products optimized for a specific segment or a full product set.
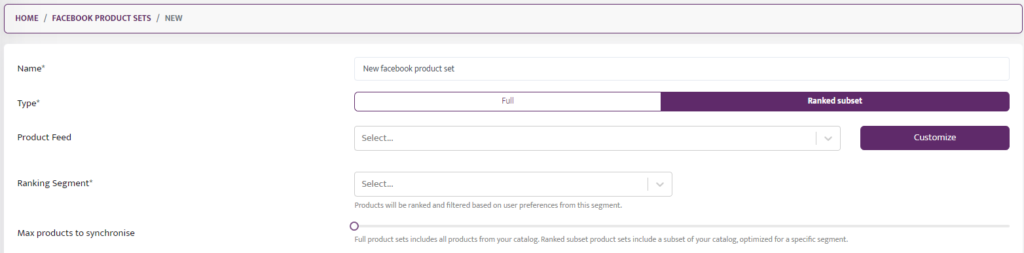
Full product sets include all products from your catalog. Ranked subset product sets include a subset of your catalog, optimized for a specific segment.
This is the connection between our catalog and the Facebook product set. Later Facebook can optimize this product set even further. This helps clients who have too many products and Facebook might not be able to choose the correct products to show. We can limit the choice of products Facebook has using our data and algorithms. This allows us to advertise products on Facebook.
Next, we go into Marketing Channels and create a Facebook Ad.
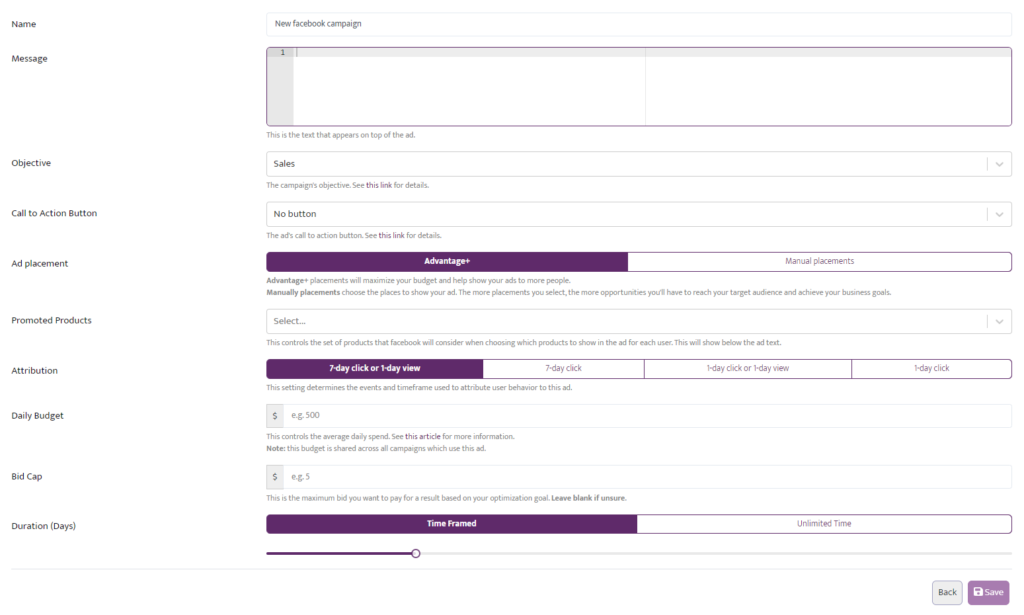
- Pick the Name of the Facebook Campaign (must be unique).
- Create an Ad Message
- Select the Objective of the campaign More information in this link: Facebook Ad objectives
- Select the Call to Action Button. More information in this link: What are Call-to-Action Buttons in Meta Ads Manager
Select the Ad placement.
Advantage+ placements will maximize your budget and help show your ads to more people.
Manually placements choose the places to show your ad. The more placements you select, the more opportunities you’ll have to reach your target audience and achieve your business goals.
- Select the Product Set. This controls the set of products that Facebook will consider when choosing which products to show in the ad for each user. This will show below the ad text.
- Choose the Attribution. The Facebook ad conversion window is just a setting in your campaigns that tells Facebook how far back they should look to attribute conversions to an ad. There are two types of actions you can customize the conversion window for, an ad view and an ad click. For each action, you can set their own conversion windows.
7-day click or 1-day view – the algorithm will optimize for people who are likely to convert within 7 days after clicking on an ad or viewing it on the same day.
7-day click – the algorithm will optimize for people who are likely to convert 7 days after clicking on your ad respectively.
1-day click or 1-day view – the algorithm will optimize for people who are likely to convert within 1 day after clicking or viewing your ad.
1-day click – the algorithm will optimize for people who are likely to convert on the same day they clicked on your ad.
- Add a Daily Budget This controls the average daily spend. See this article for more information.
Note: this budget is shared across all campaigns which use this ad.
Check out this link for more information: Facebook Ad Budgets - Set the Bid Cap, which is the maximum bid you want to pay for a result based on your optimization goal. Leave blank if unsure.
- Set the Duration of the campaign. This decides how long the ad campaign will take.
The created Facebook Ad can be used in two ways- Workflows and Campaigns.
Note. If you are sending a Facebook ad from Workflows on a specific day, it will be active for the set duration of the ad starting from the first day which is selected in the Workflow.
Creating a Facebook Ad Campaign through Releva.ai
- You need to go to the Campaigns section and then click on One Off
- Click on the New Campaign button in the top right corner
- You need to name the campaign and select Facebook Ad from the Message menu
- The Facebook Ad menu has a dropdown bar in which you can select the already created Facebook Ad that you want to use.
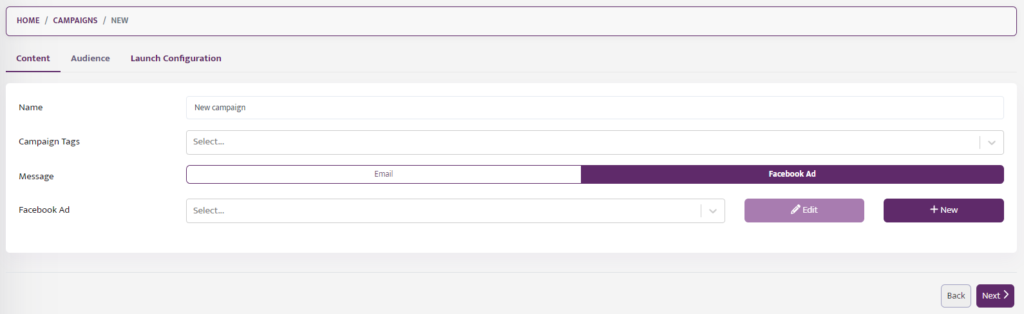
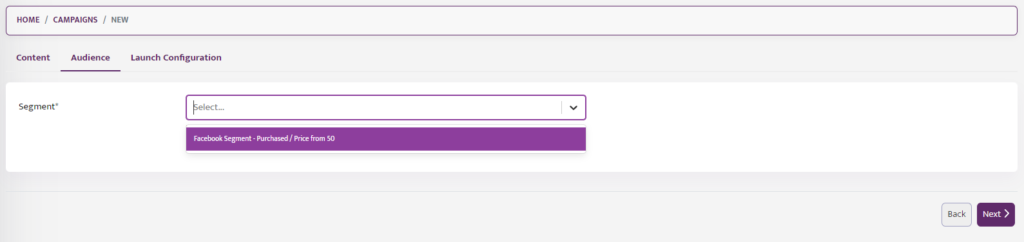
In the Audience Menu, you need to select the already created Facebook Segment.
Finally, in the Launch Configuration menu, you can choose a start time for your campaign. This is useful in case you want to prepare a promotional campaign on Thursday afternoon, but have it launched at midnight automatically. All you need to do is prepare your campaign during the daytime, set a start date using this setting, and then launch your campaign. It will wait until the start date before it starts sending messages.
Once you are ready with the setup of the Facebook campaign you need to save it by clicking on the button in the right corner.
Please note that a campaign should be activated afterward from the Launch button even if it has been set for a Delayed Start.
