

Create a product block
A product block shows a list of recommended products on your site: “Popular right now”, “You may also like” and so on. Each block belongs to a page (a page type of your shop such as the product page or the cart), takes its products from a product feed, and shows them to a segment. This guide creates a block on an existing page and leaves it switched off. It ends with the block placed on your shop and checked in debug mode, so you can see it before anyone else does. For how a block reaches your storefront, read How product blocks work.
Before you start
Section titled “Before you start”- Your storefront sends the page token of at least one Personalization page. If Product Blocks opens on New Page instead of a list, your shop has no pages yet: create one and ask your developer to send its token (see How product blocks work). Shops connected through a Releva plugin already have Homepage, Product page, Category page, Cart page and Search page.
- You have a product feed with the web scope, for example one made with Create a product feed.
- You have a Behavior segment for the audience. A segment with no rules means everyone.
- You have a layout if Releva should draw the block (Assets › Layouts, see How layouts work). Without a layout, your own code renders the products.
- You know the CSS selector of the element on your page where the block should go, or you will pick the place on your shop with Position on my site after saving.
- Your plan includes creating product blocks. If Save & Close shows a lock, ask your account owner to unlock it.
-
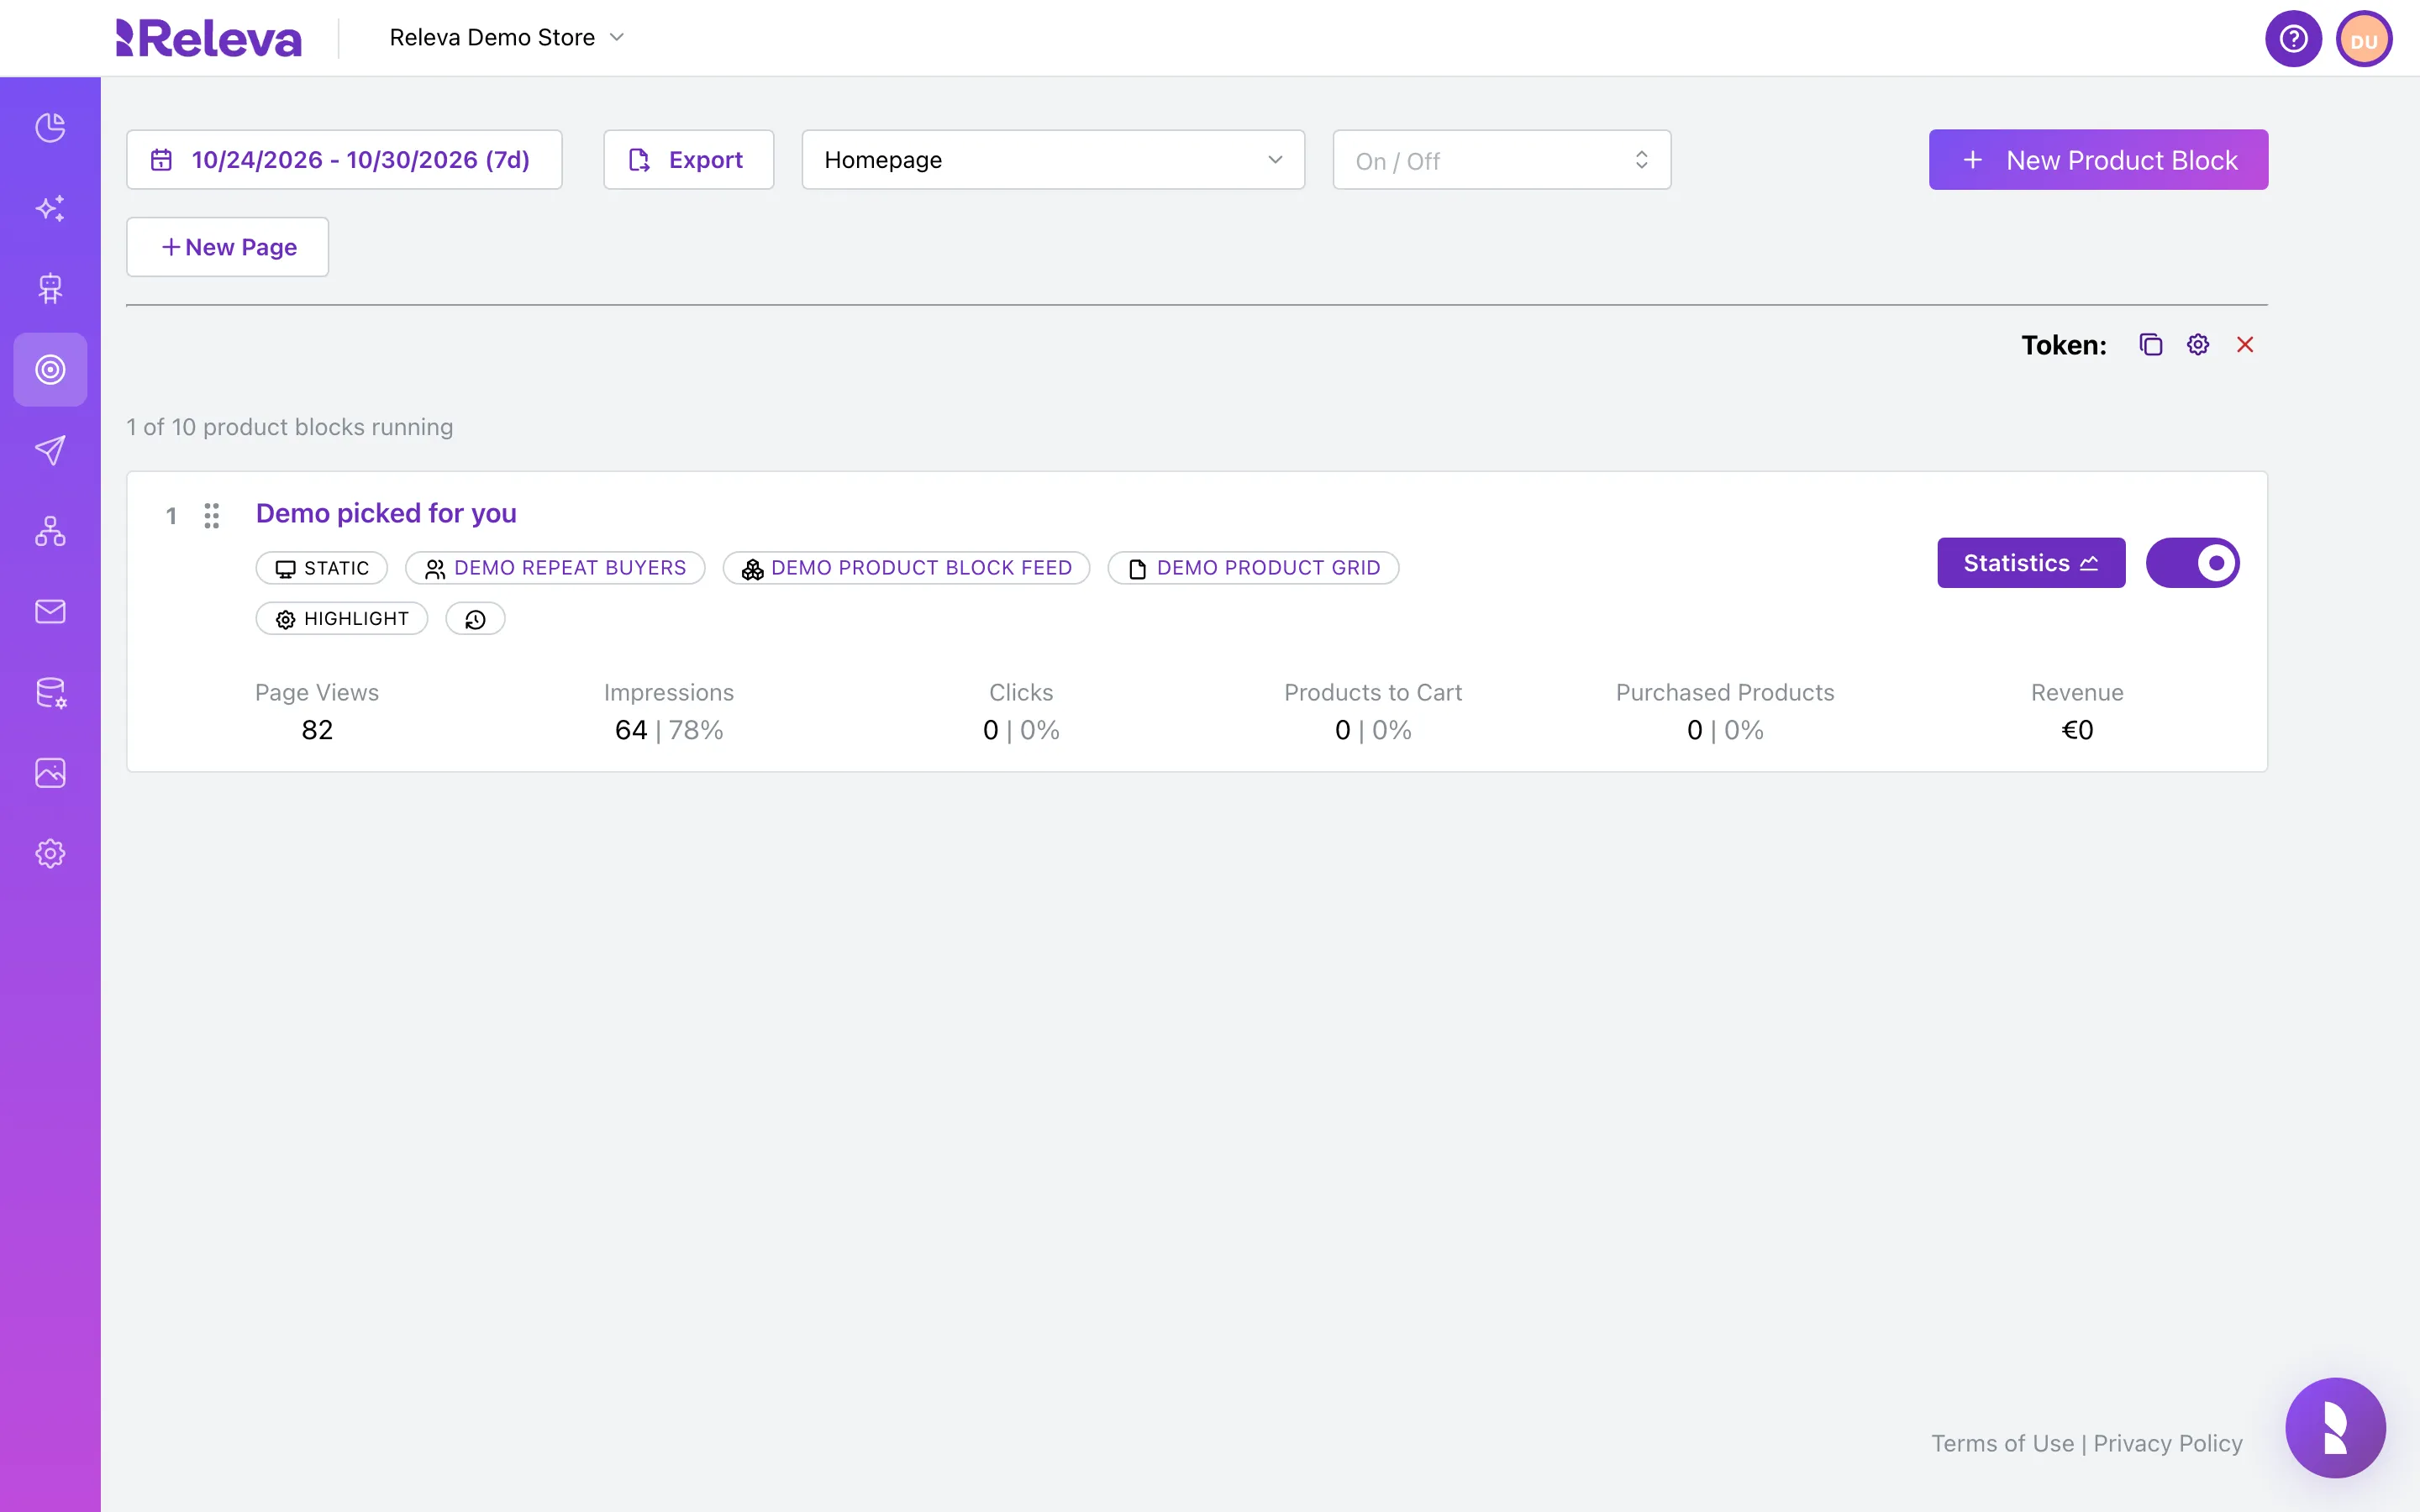
In the left menu, select Personalization › Product Blocks
The list opens on the first page of your shop with its blocks for the last 7 days.
-
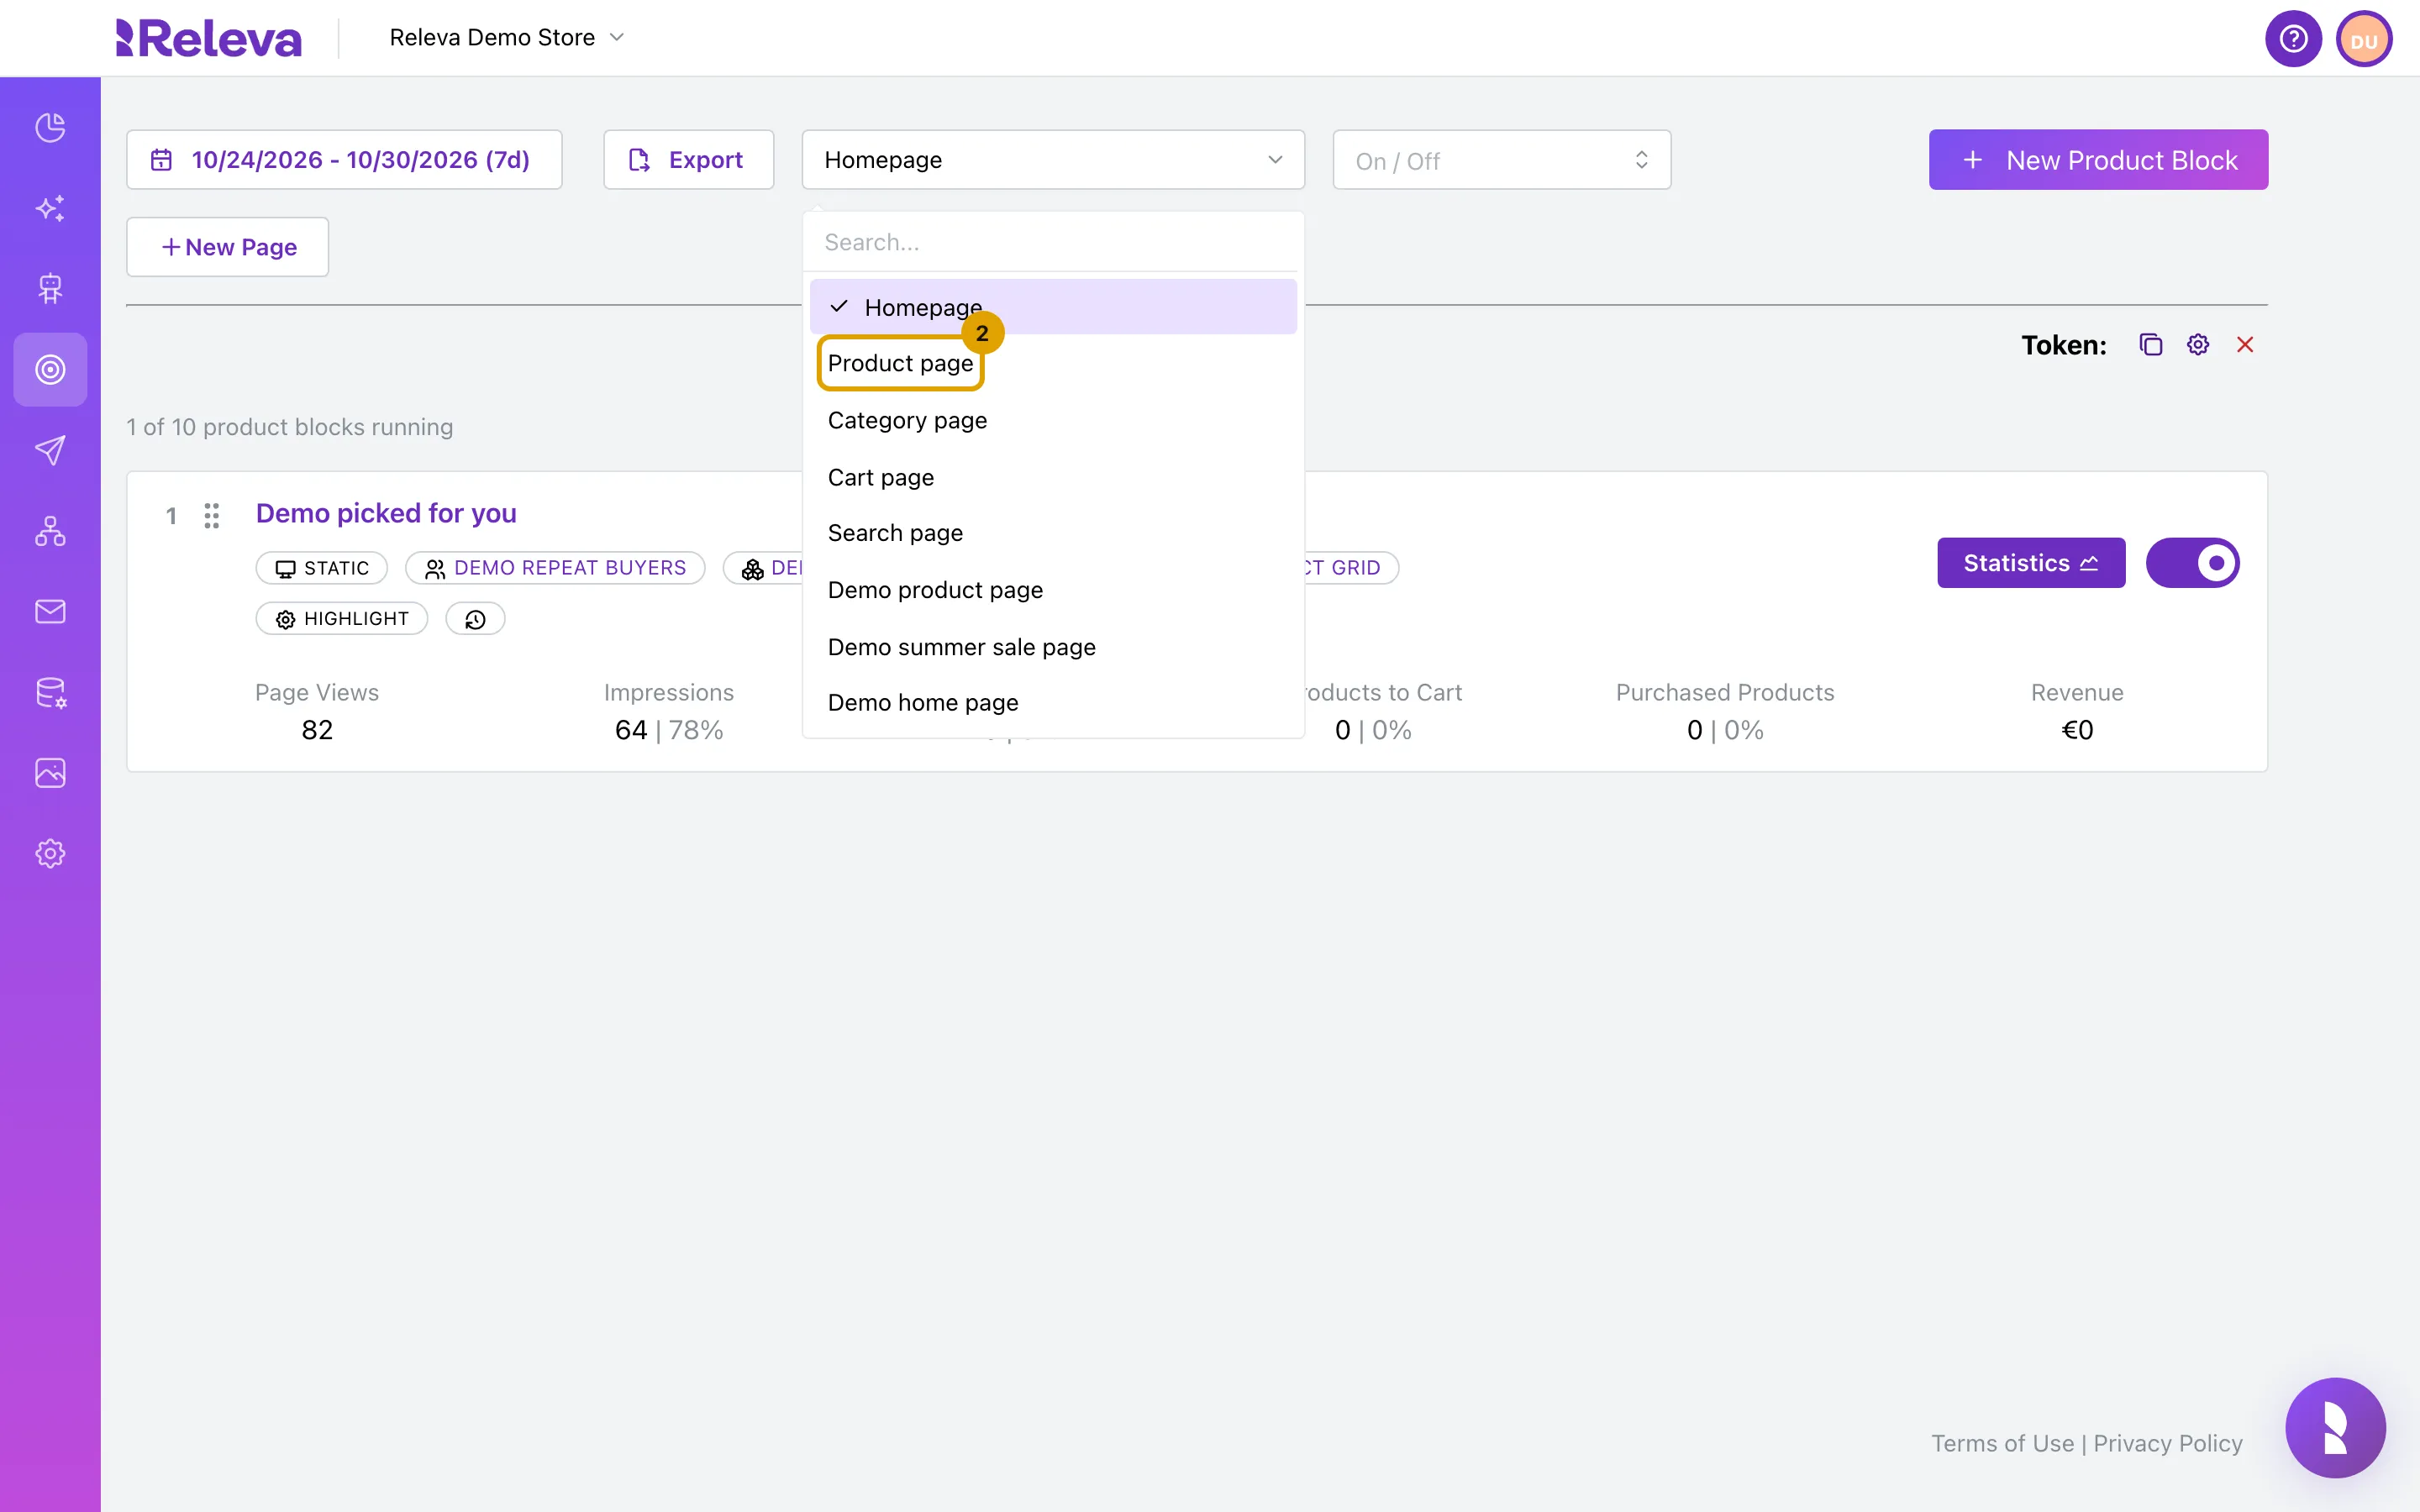
Open the page list next to the date range and select the page where the block should appear, for example Product page
-
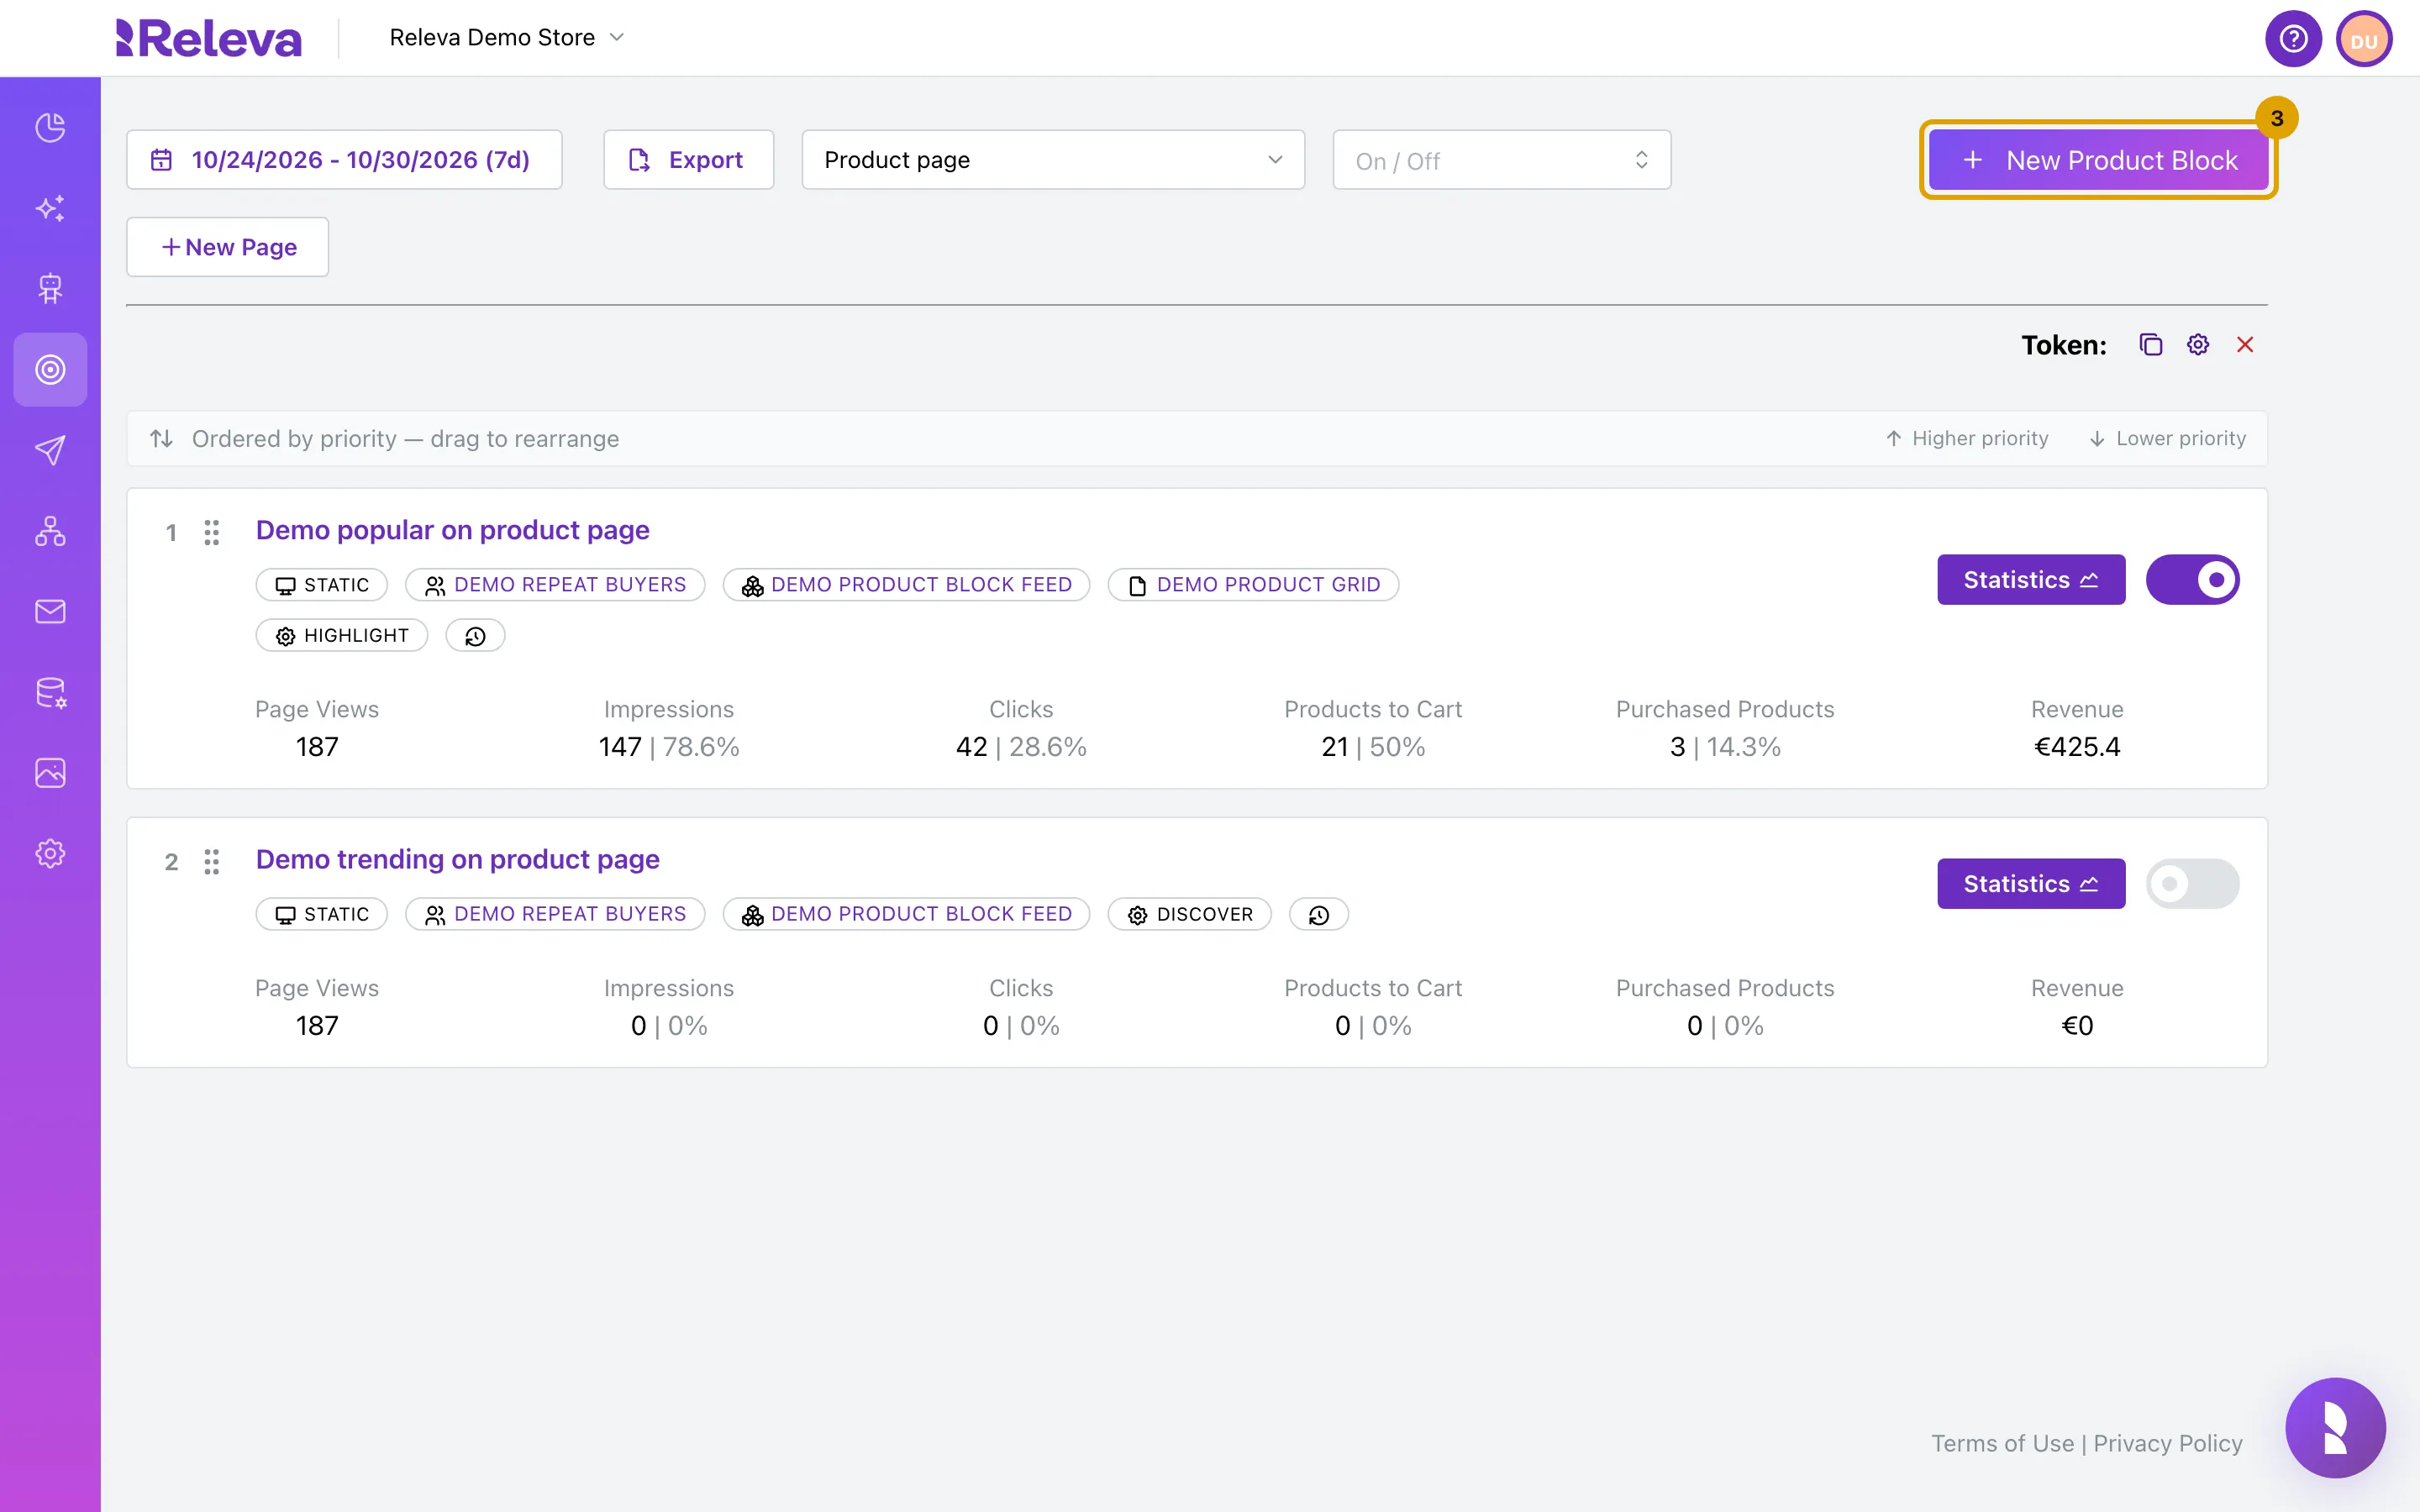
Select New Product Block
The line above the list, “1 of 10 product blocks running”, counts the blocks that are switched on against the page’s limit; it appears a moment after the list loads. The bar “Ordered by priority — drag to rearrange” lets you reorder the cards. New Product Block is disabled with a tooltip when the page is at its limit.
-
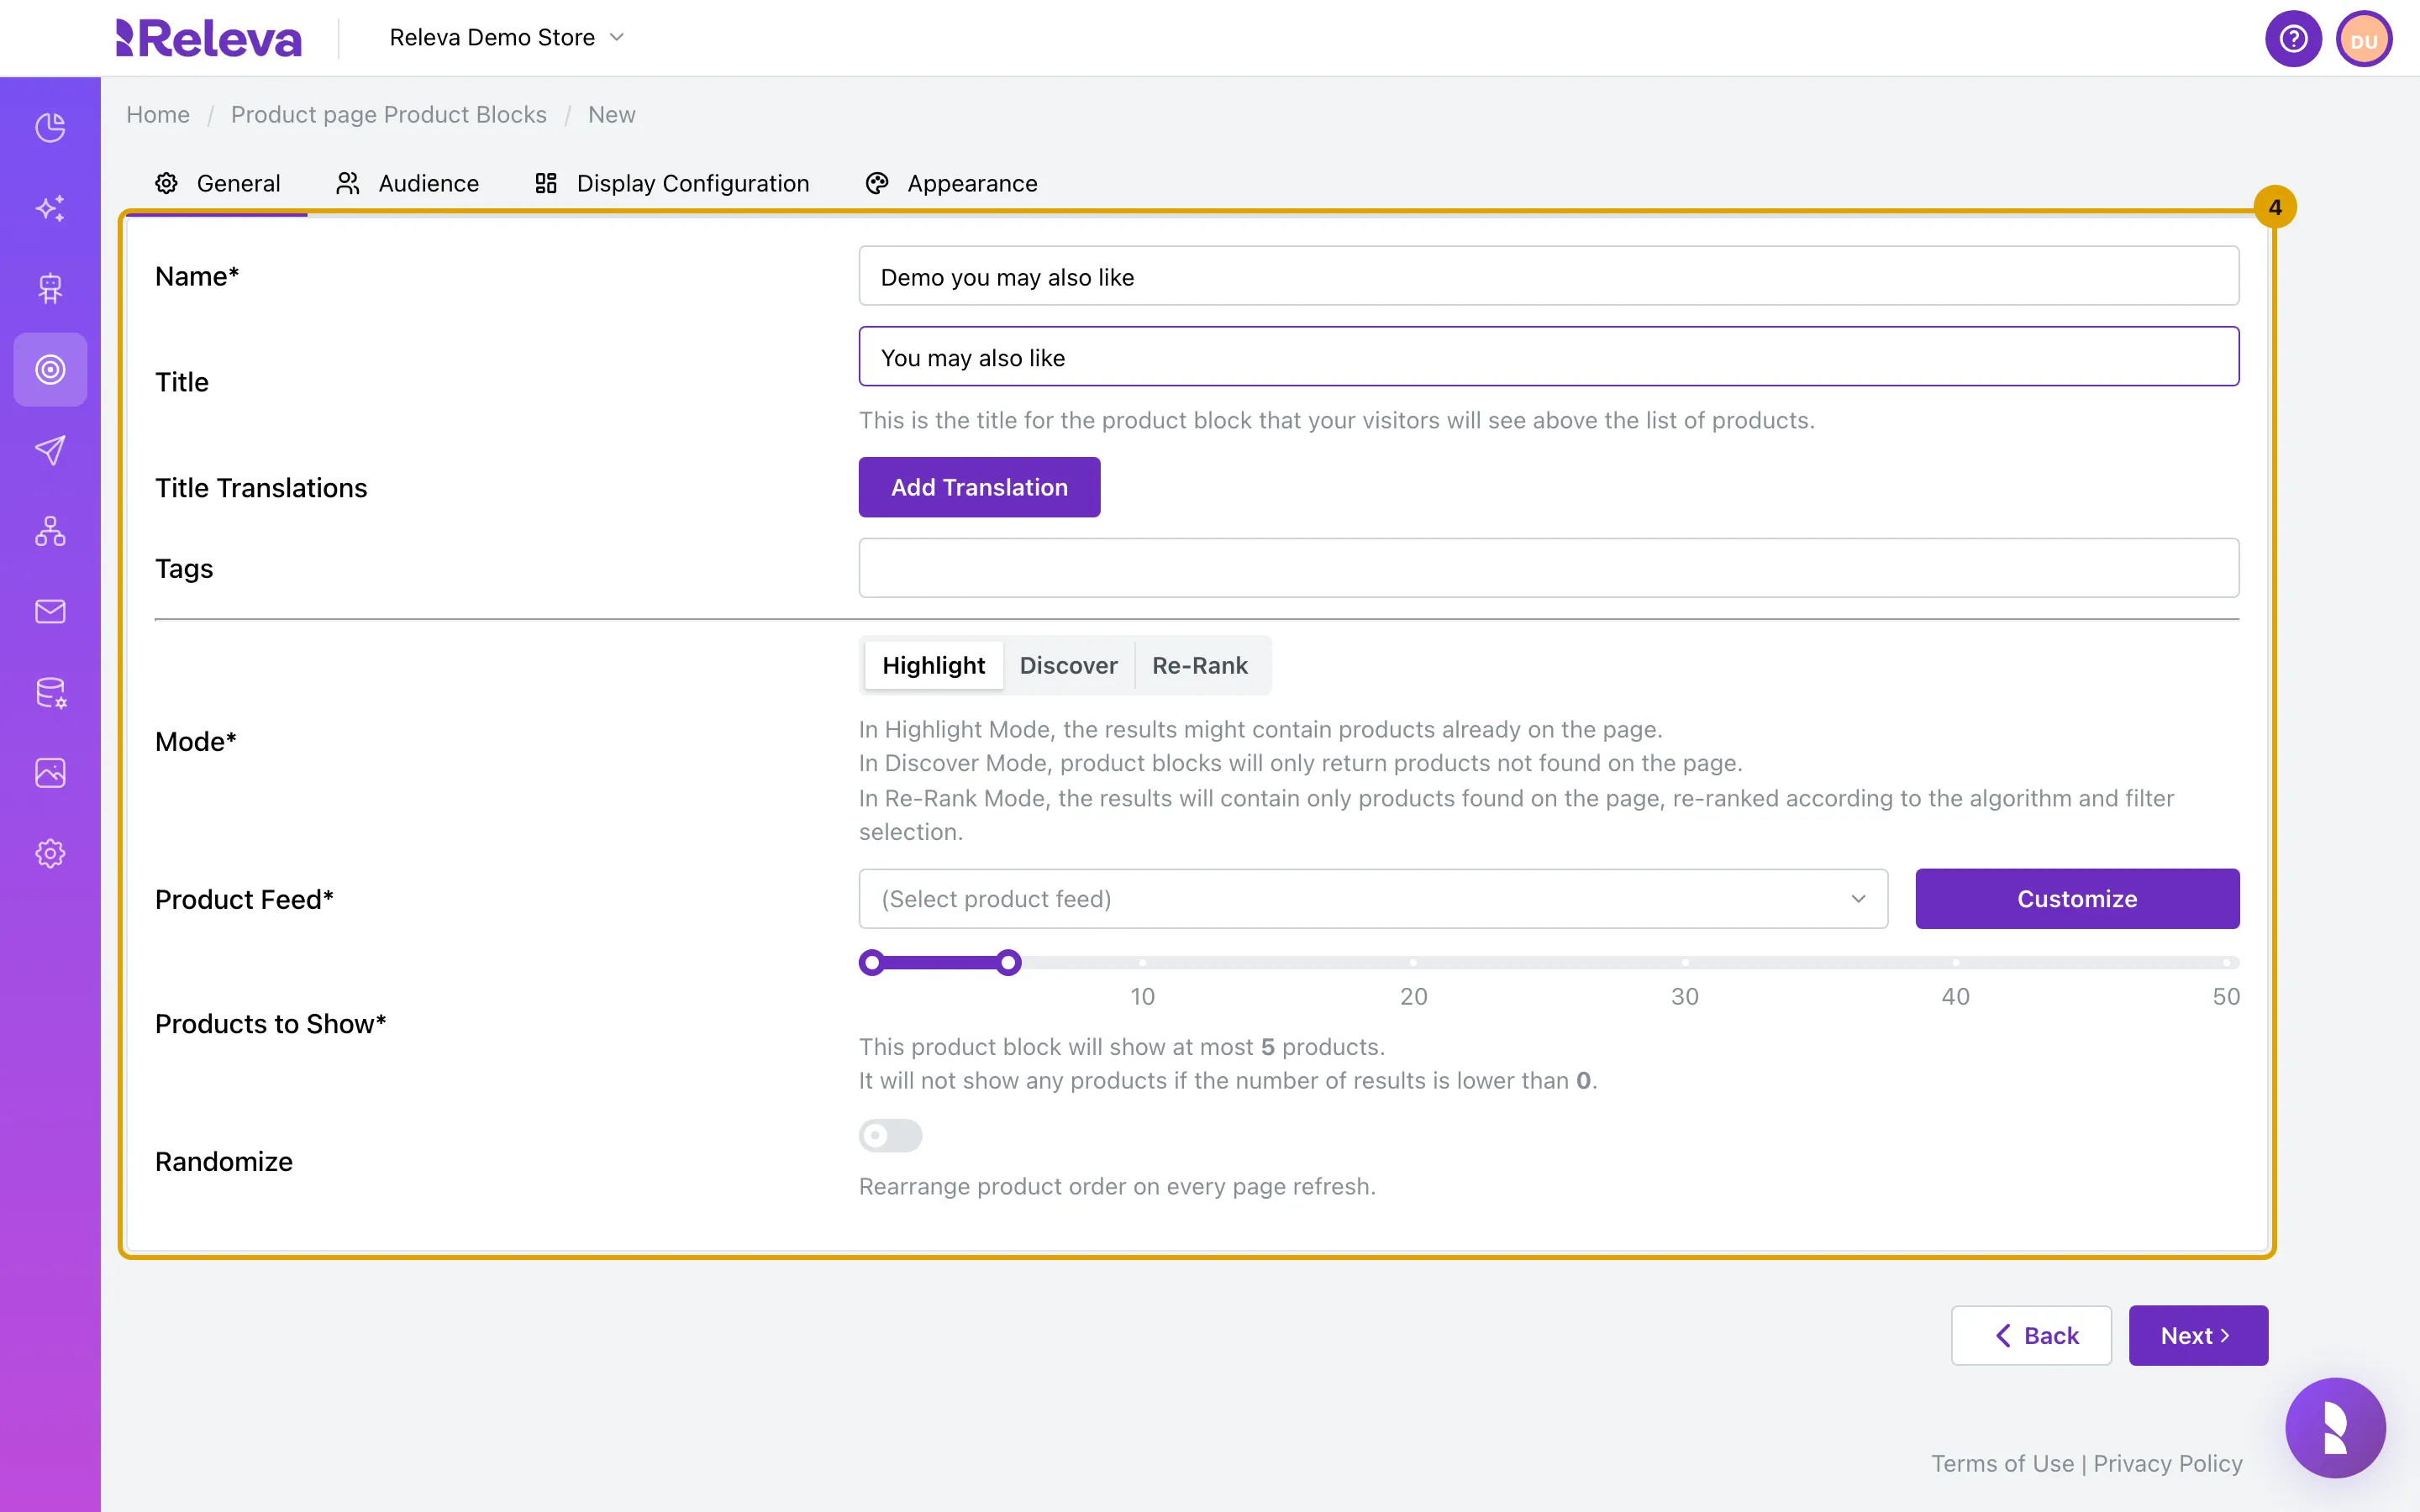
In Name, replace “Unique name” with a name you will recognise in the list. In Title, enter the heading your visitors see above the products, for example “You may also like”
Name is only shown in the admin. Title is what the layout prints above the products; use Add Translation under Title Translations to give it a text per locale.
-
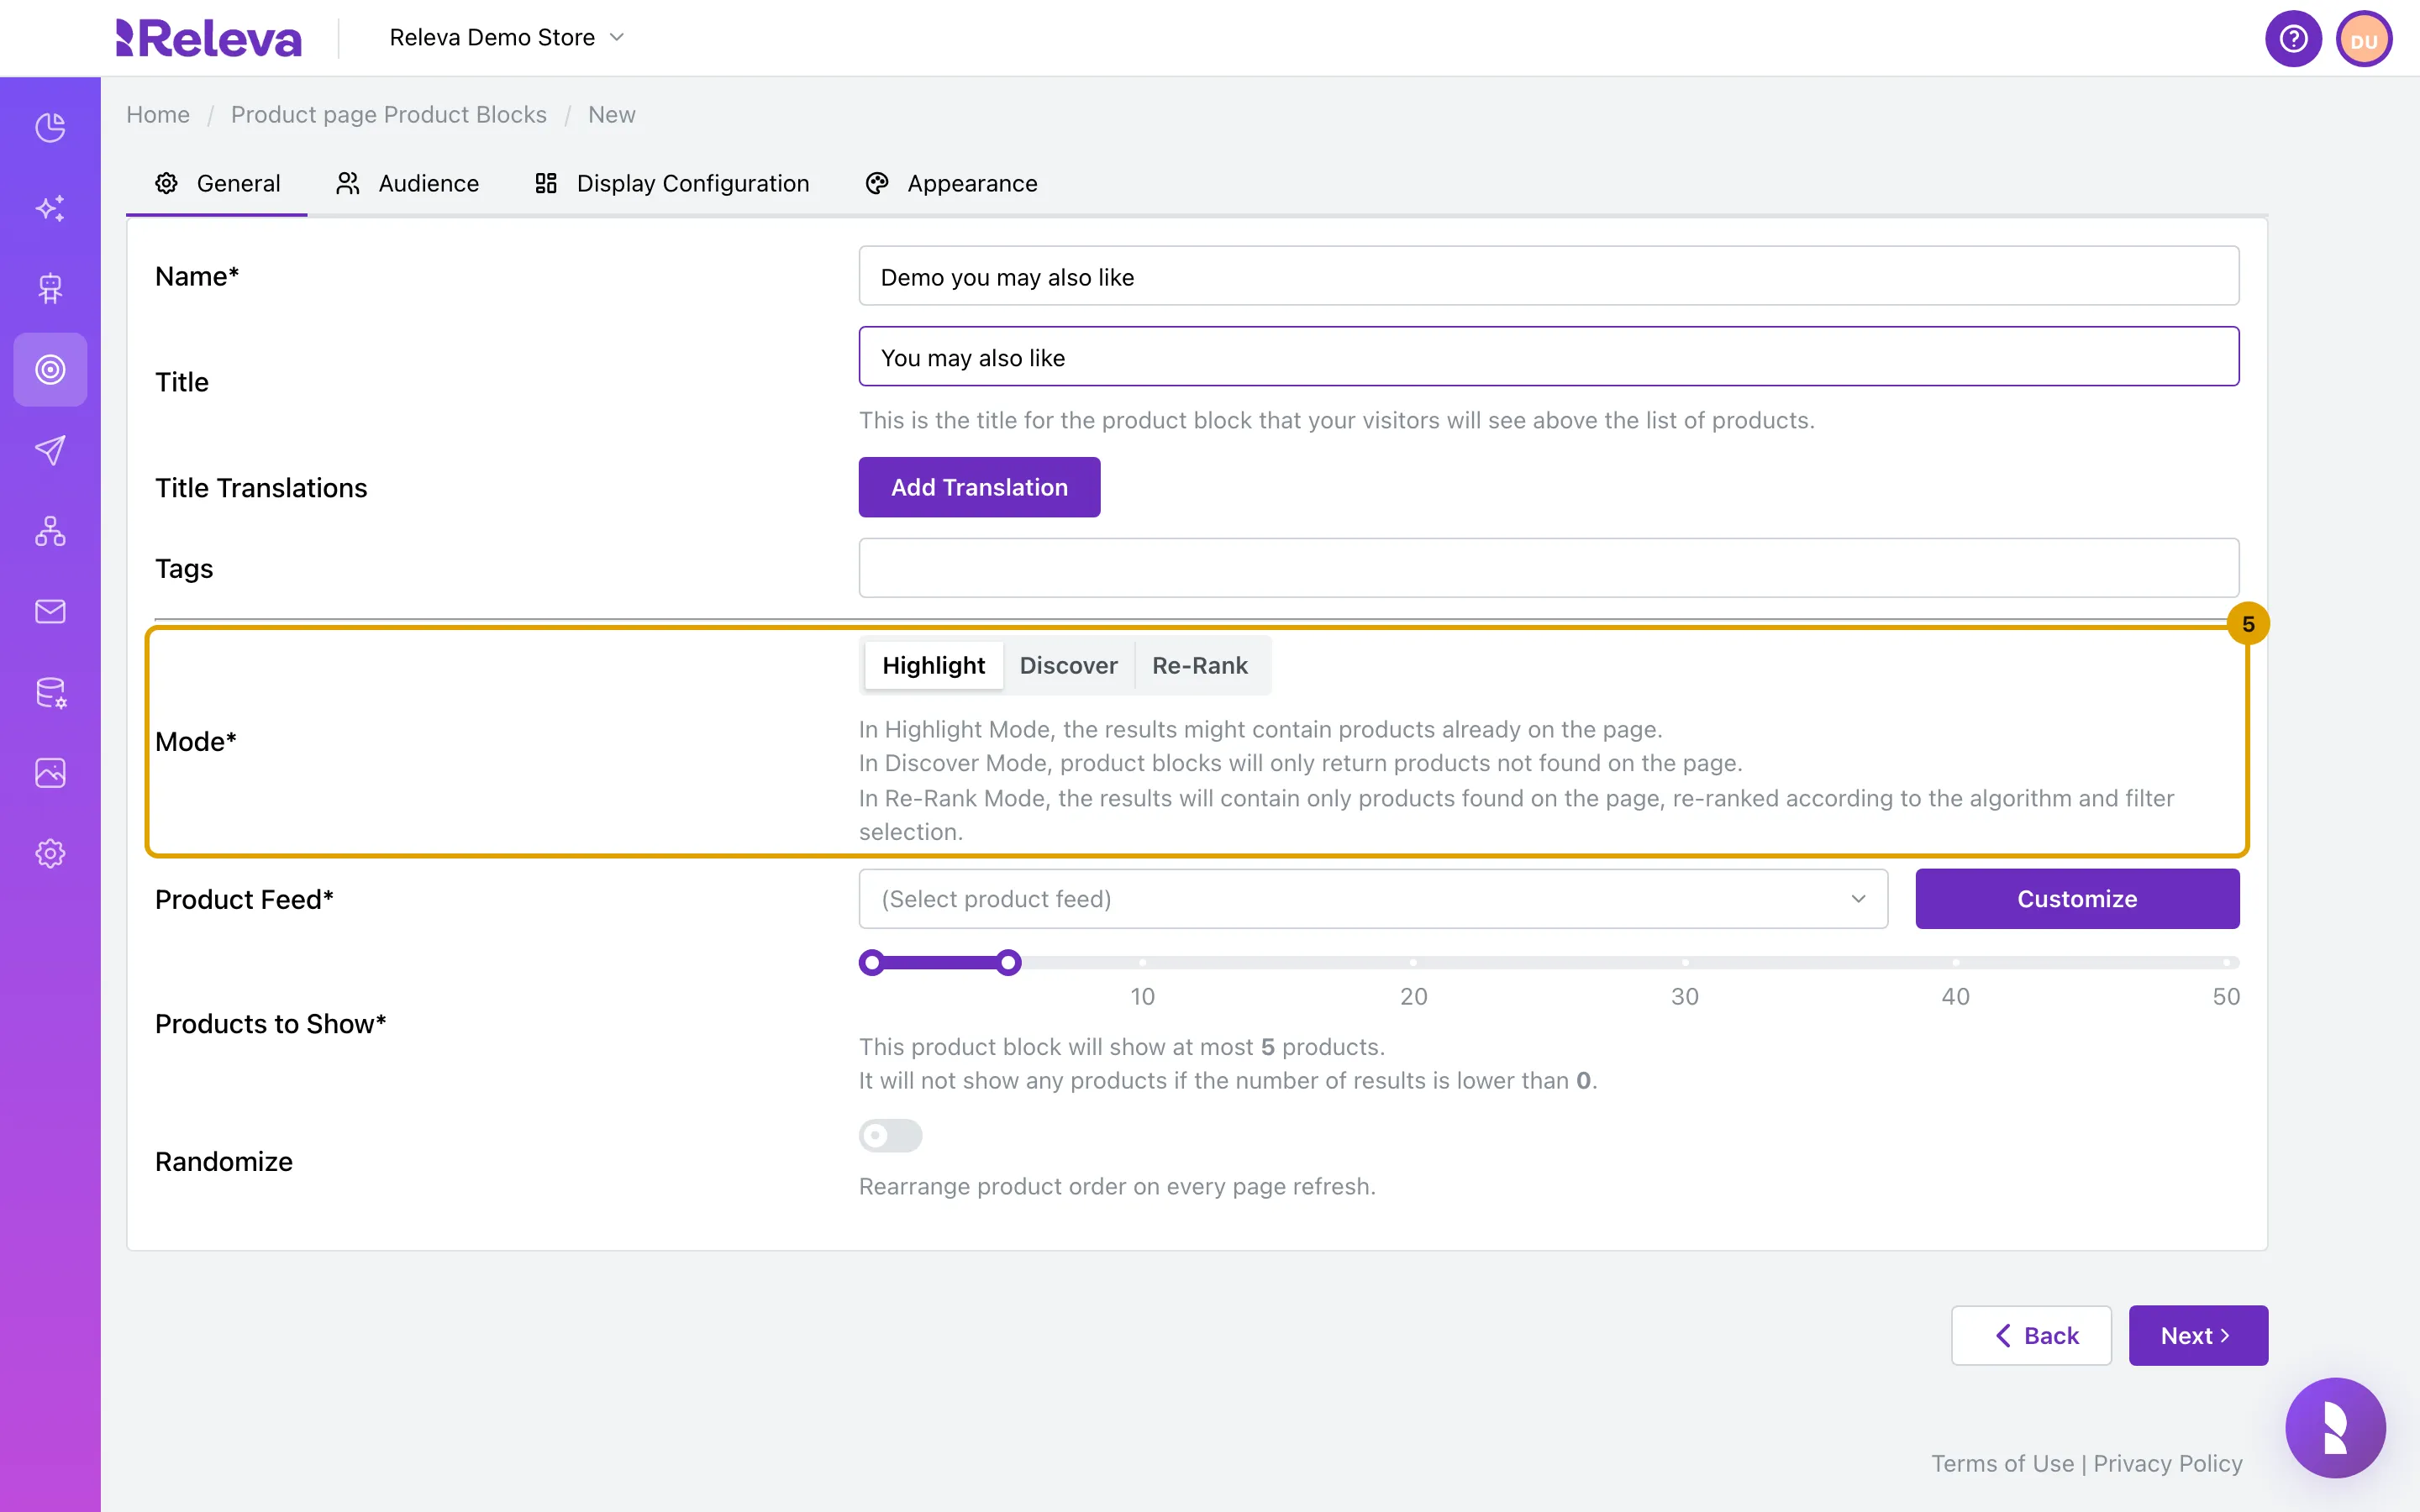
Under Mode, select Highlight to allow products already on the page, Discover to show only products that are not on the page, or Re-Rank to reorder the products already on the page
Discover and Re-Rank only work when your integration sends the ids of the products on the page. A Re-Rank block that receives no ids shows nothing.
-
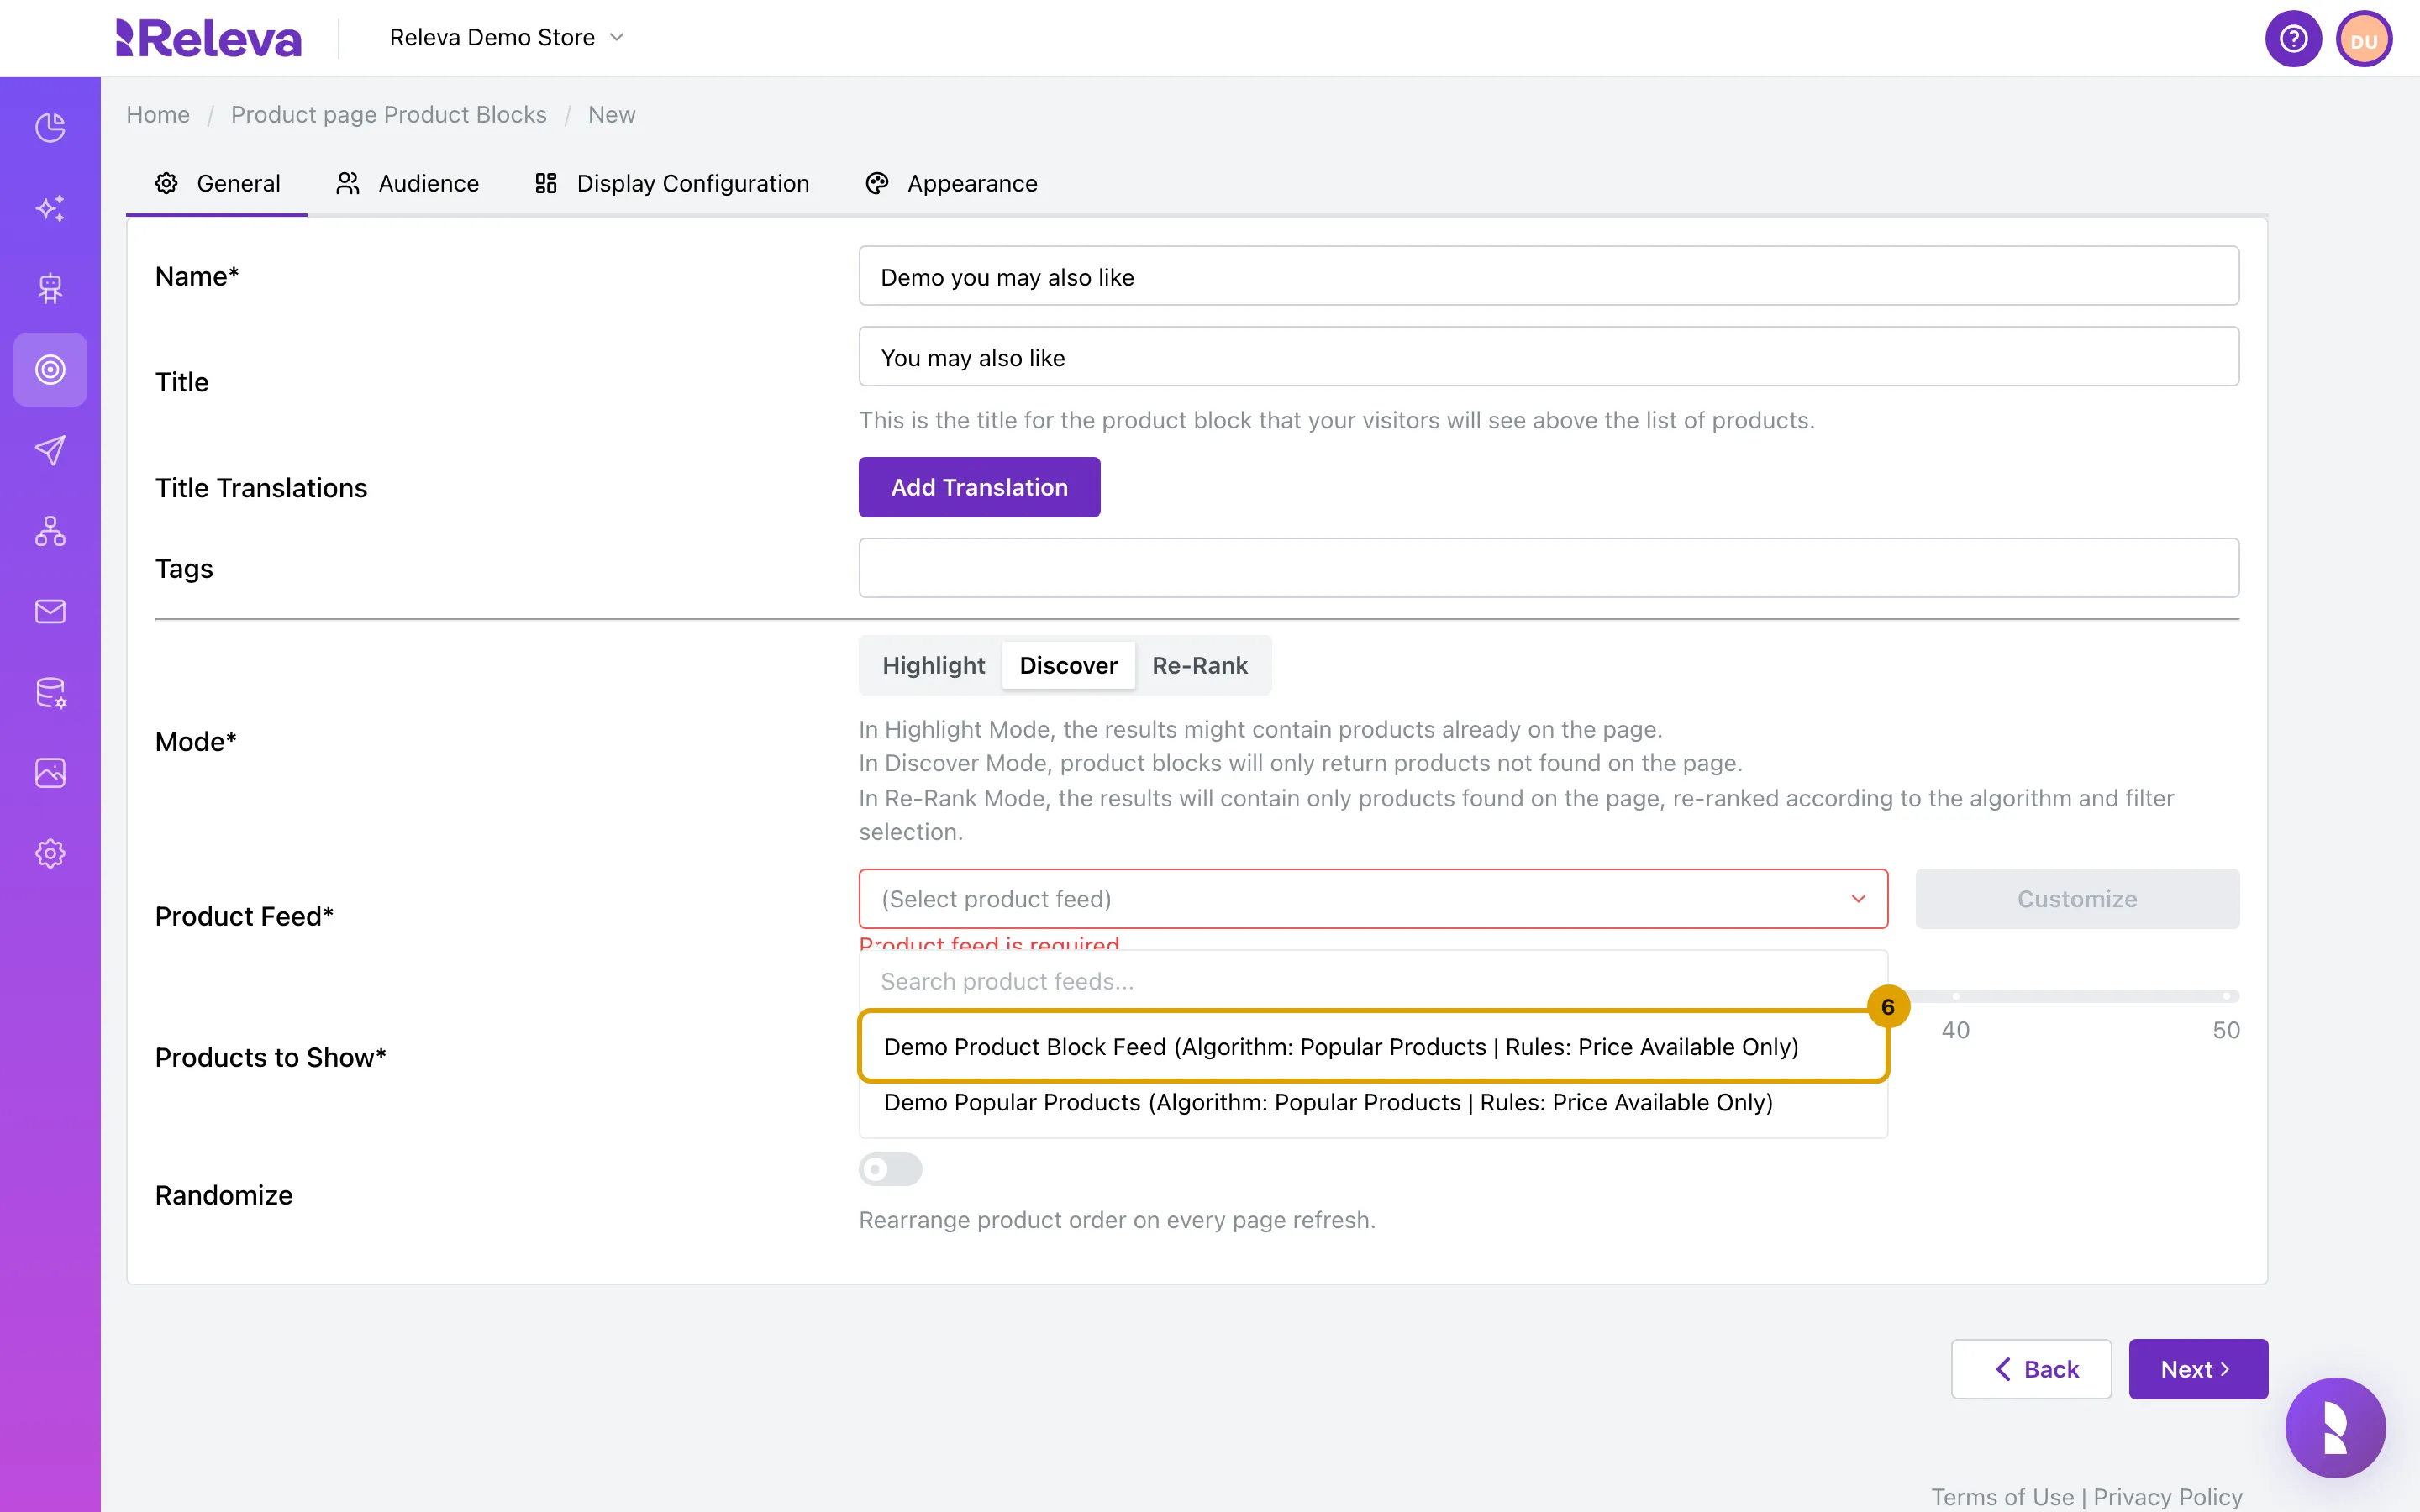
Under Product Feed, select the feed that picks and ranks the products. Then drag the two ends of Products to Show to set the most products to show and the fewest needed to show the block at all
Each option shows the feed’s algorithm and rules in brackets, for example “Demo Product Block Feed (Algorithm: Popular Products | Rules: Price Available Only)”. The block has no algorithm field of its own: the feed decides which products come back and in which order. To pick or change the algorithm, edit the feed; the algorithms are described in How product feeds work. The text under the slider repeats both numbers: “This product block will show at most 5 products. It will not show any products if the number of results is lower than 0.” A block that finds fewer products than the minimum is sent to the page empty. Turn on Randomize to shuffle the order on every page load.
-
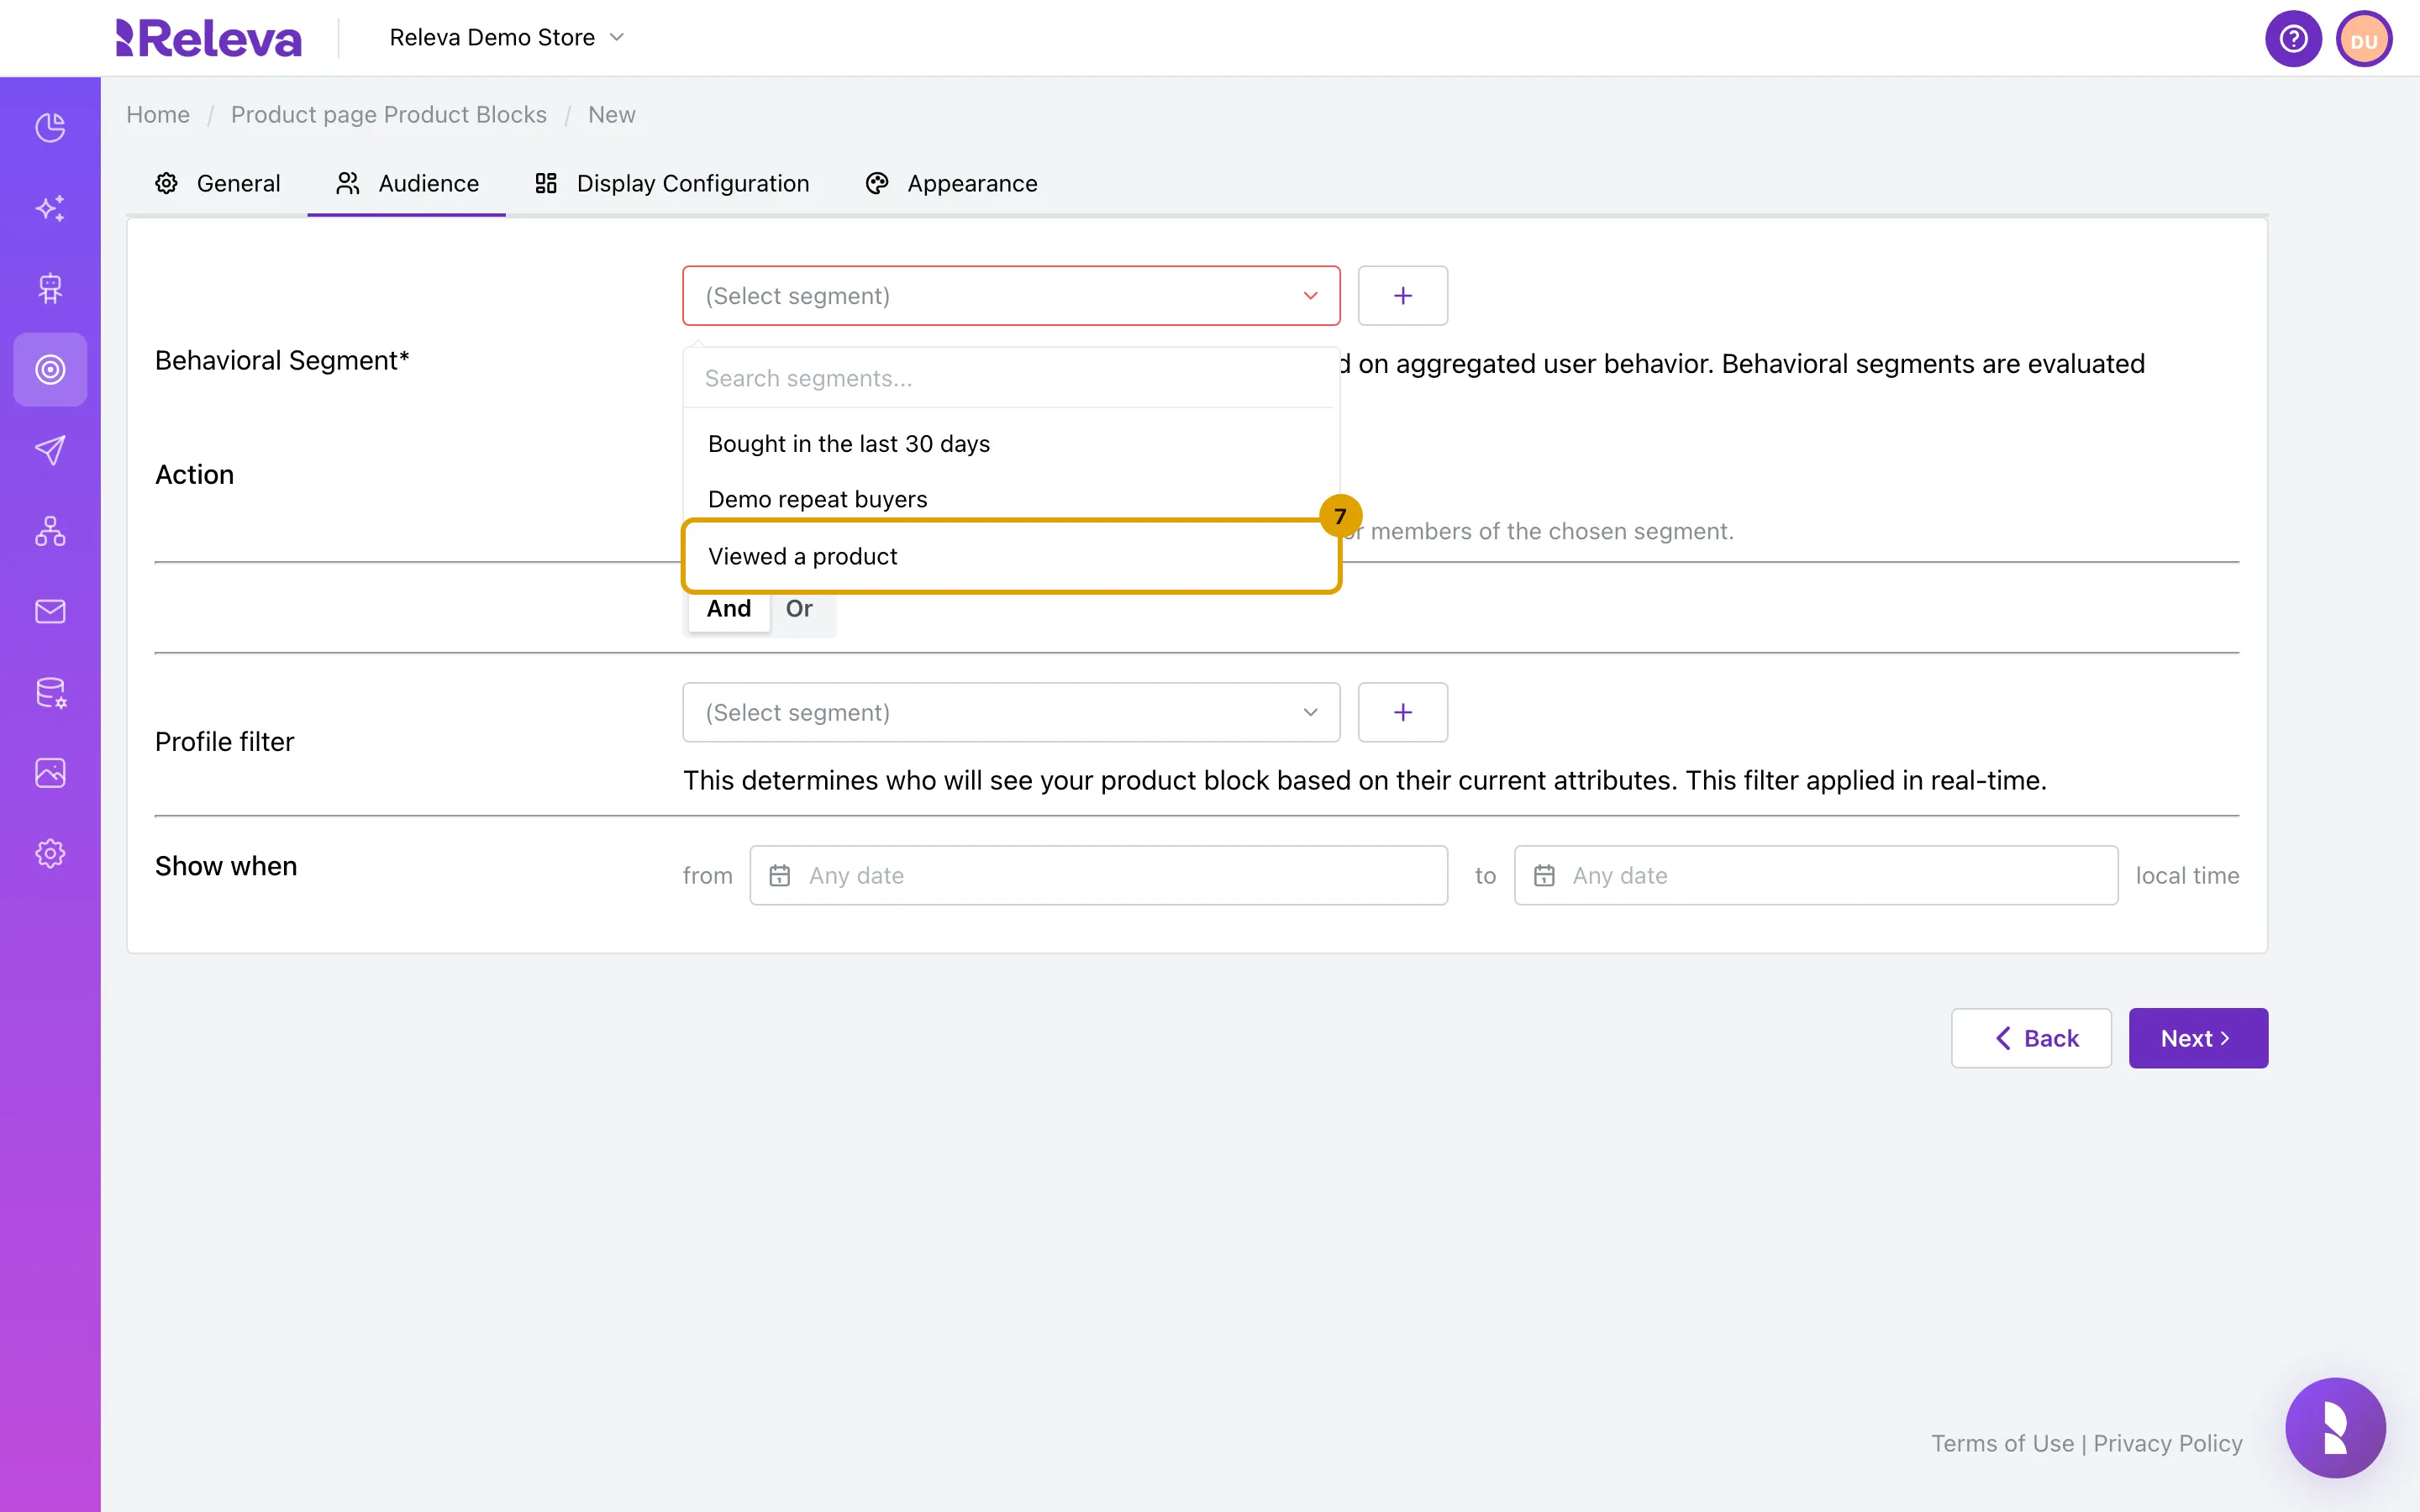
On Audience, under Behavioral Segment, select who should see the block, for example Viewed a product. Keep Action on Include, or select Exclude to hide the block from that segment
Only Behavior segments are listed. Profile filter adds an optional real-time condition on the profile’s attributes; And / Or sets how it combines with the segment. Show when schedules the block: outside the from / to dates it is not shown even when switched on.
-
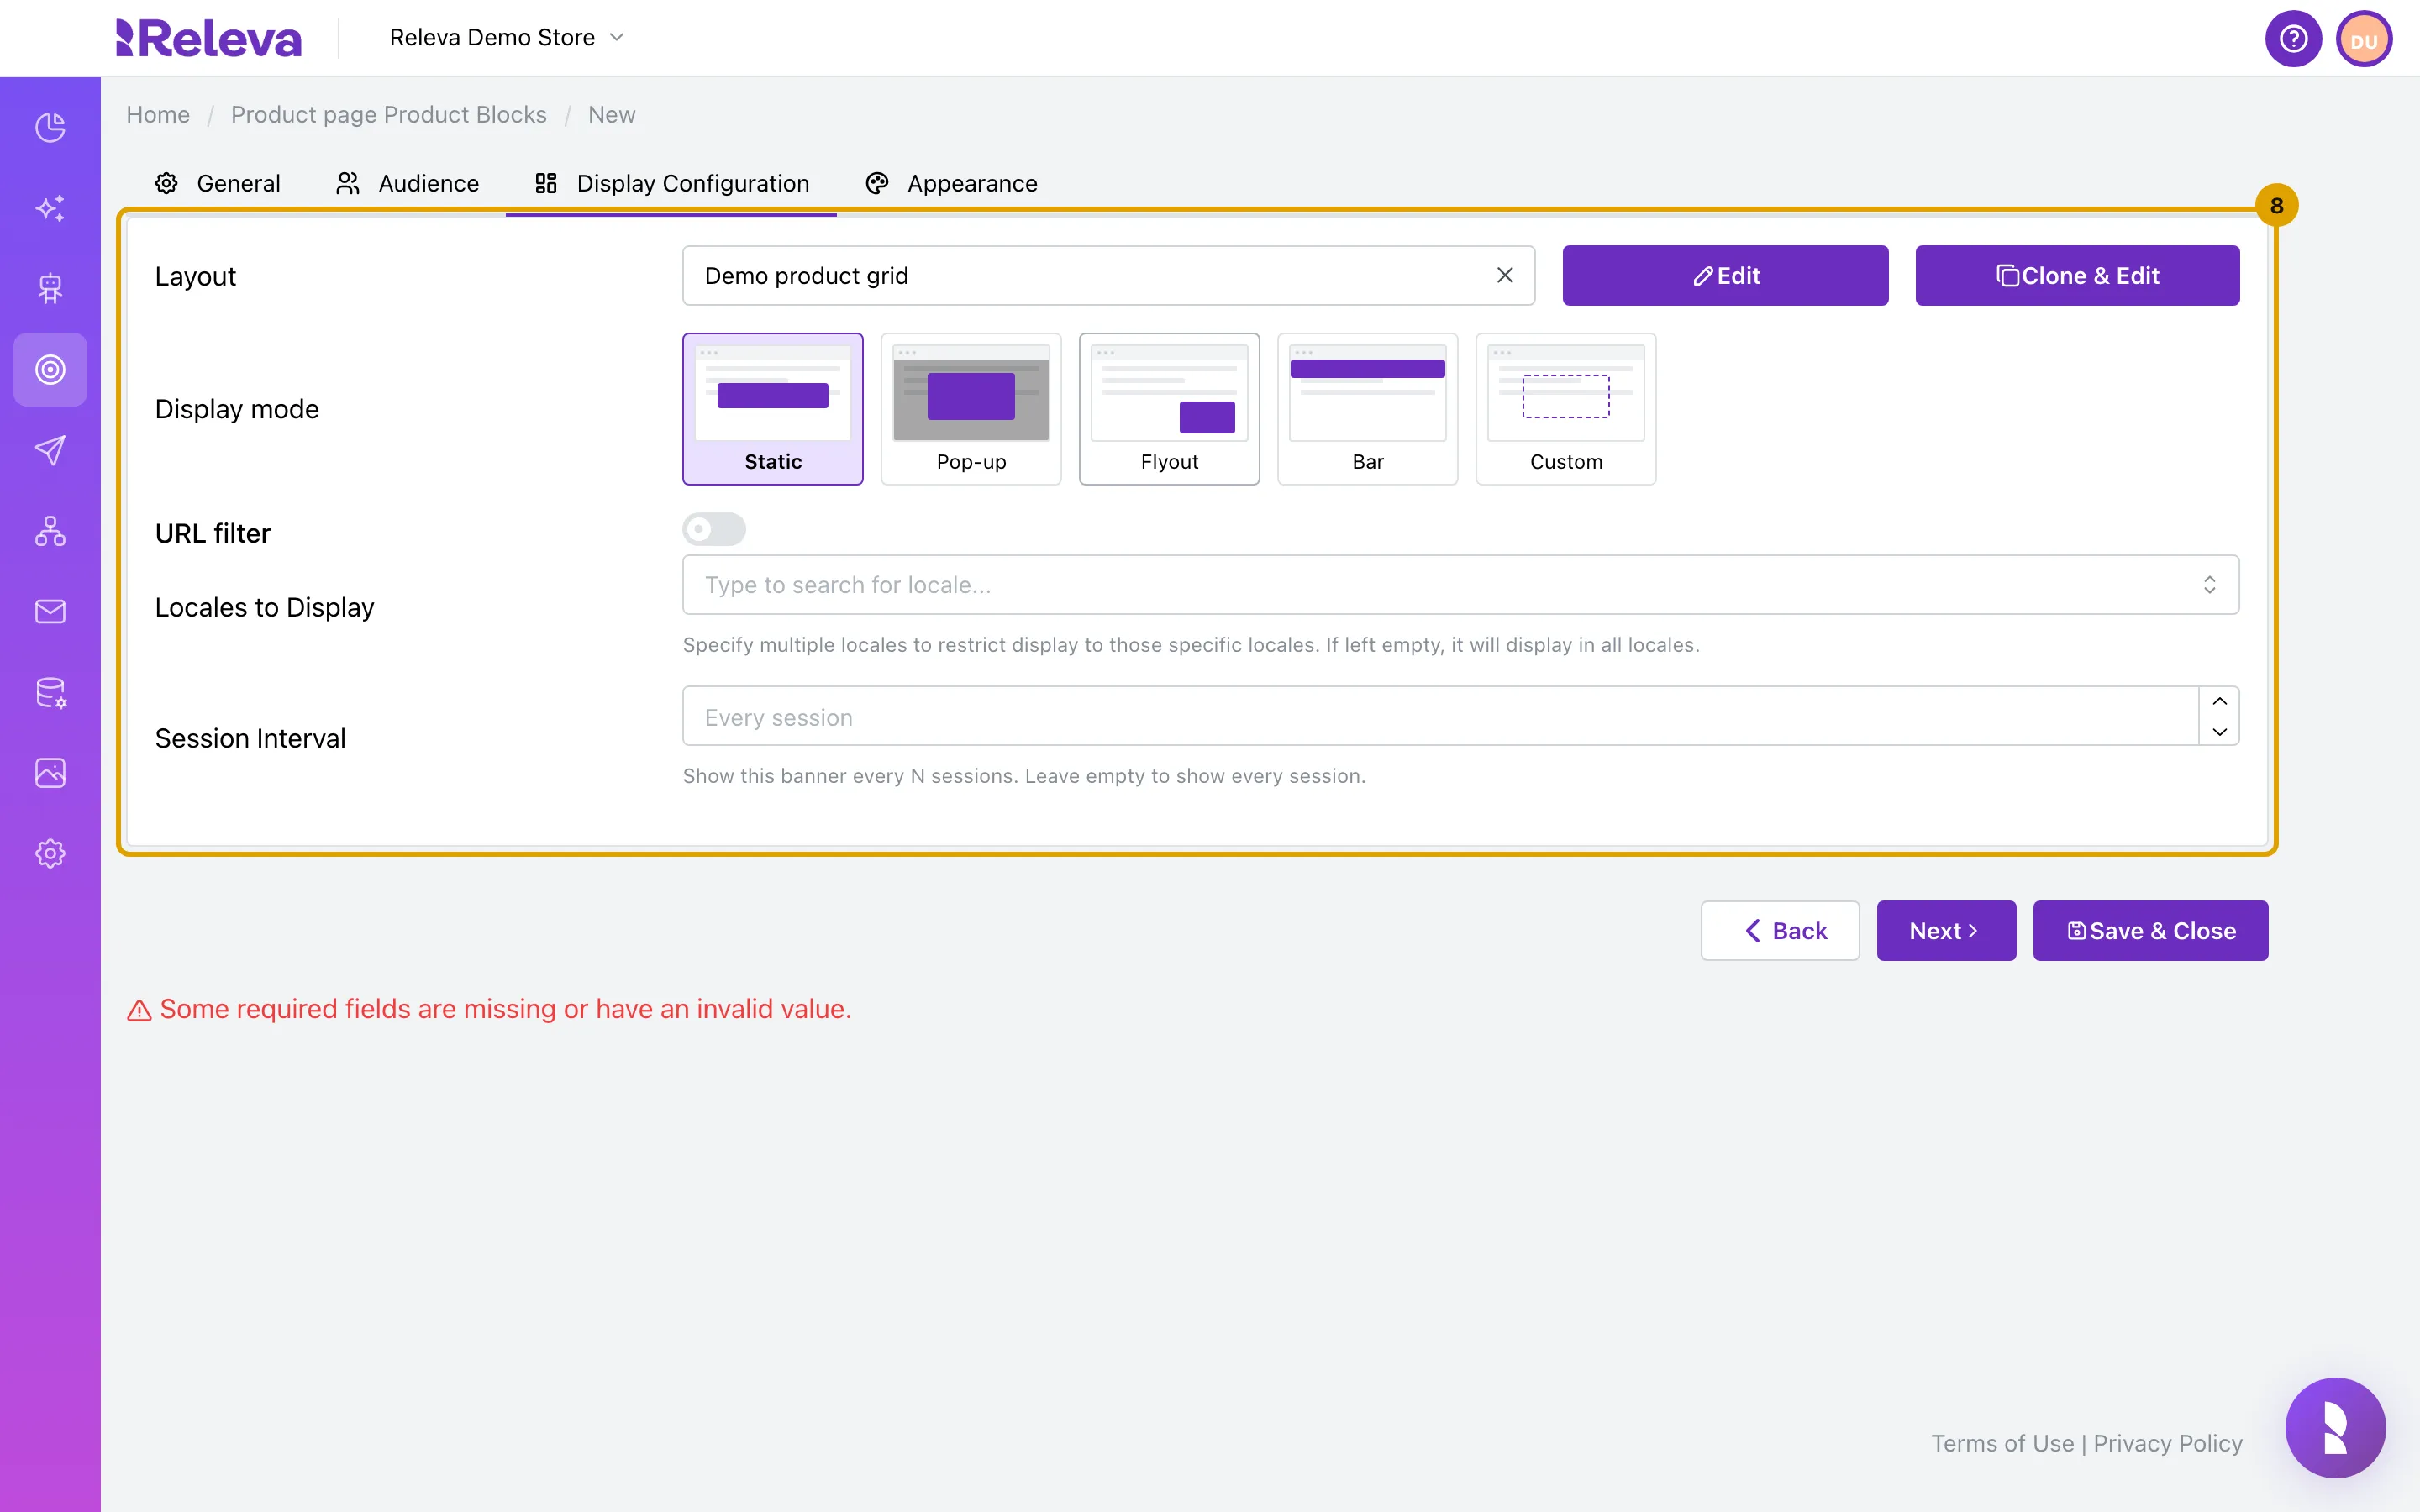
On Display Configuration, under Layout, select the layout that draws the block, for example Demo product grid. Keep Display mode on Static to place the block inside the page
(none) under Layout means your own code renders the products from the SDK callback; Edit and Clone & Edit open the chosen layout. Pop-up, Flyout and Bar show the block over the page and add a Trigger. URL filter limits the block to URLs that contain or do not contain a text; Locales to Display limits it to some of your shop’s languages (empty means all). As soon as a layout is chosen, the form shows “Some required fields are missing or have an invalid value.” in red: a layout needs a CSS Selector, which you enter on the next tab.
-
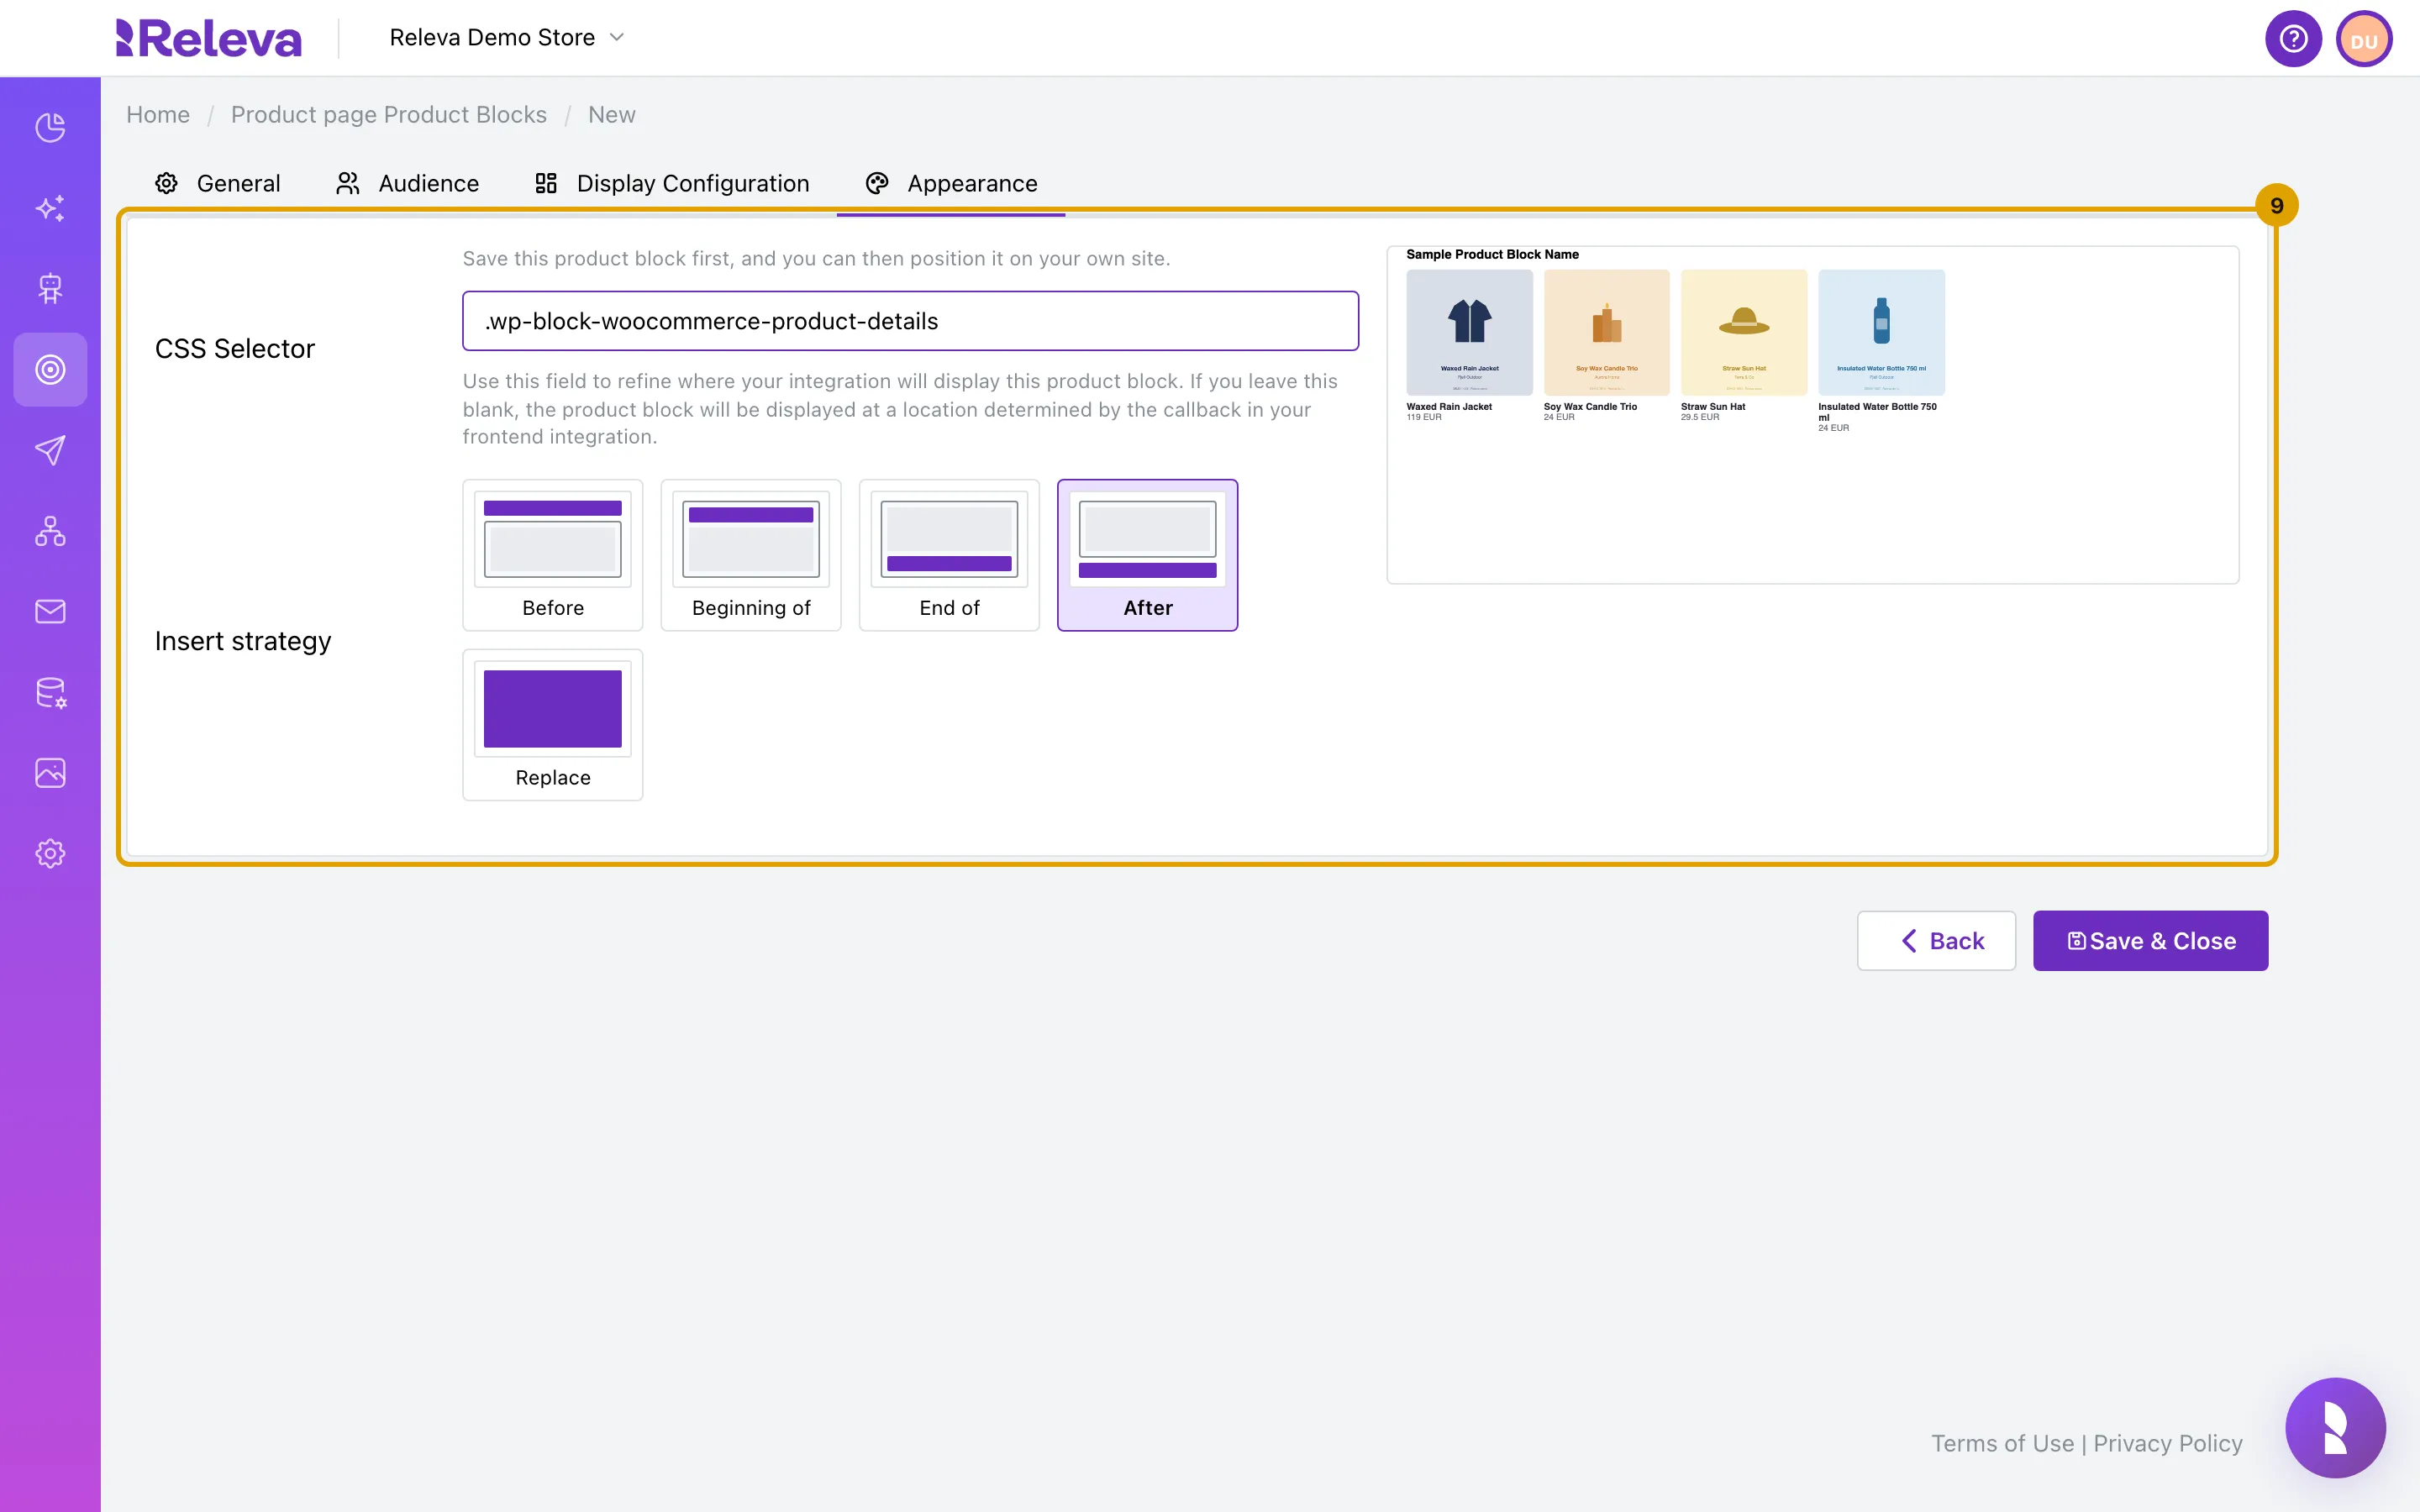
On Appearance, in CSS Selector, enter the element of your page the block attaches to, for example
.wp-block-woocommerce-product-details. Under Insert strategy, choose where the block goes relative to that element, here AfterThe other strategies are Before, Beginning of, End of and Replace. With a layout chosen, the preview on the right draws the block with sample products under the heading “Sample Product Block Name”, so you can check the layout before anything reaches your shop. The note “Save this product block first, and you can then position it on your own site.” means Position on my site appears once the block is saved; if you do not know the selector yet, enter any element of the page and pick the real place on your shop in the next section.
-
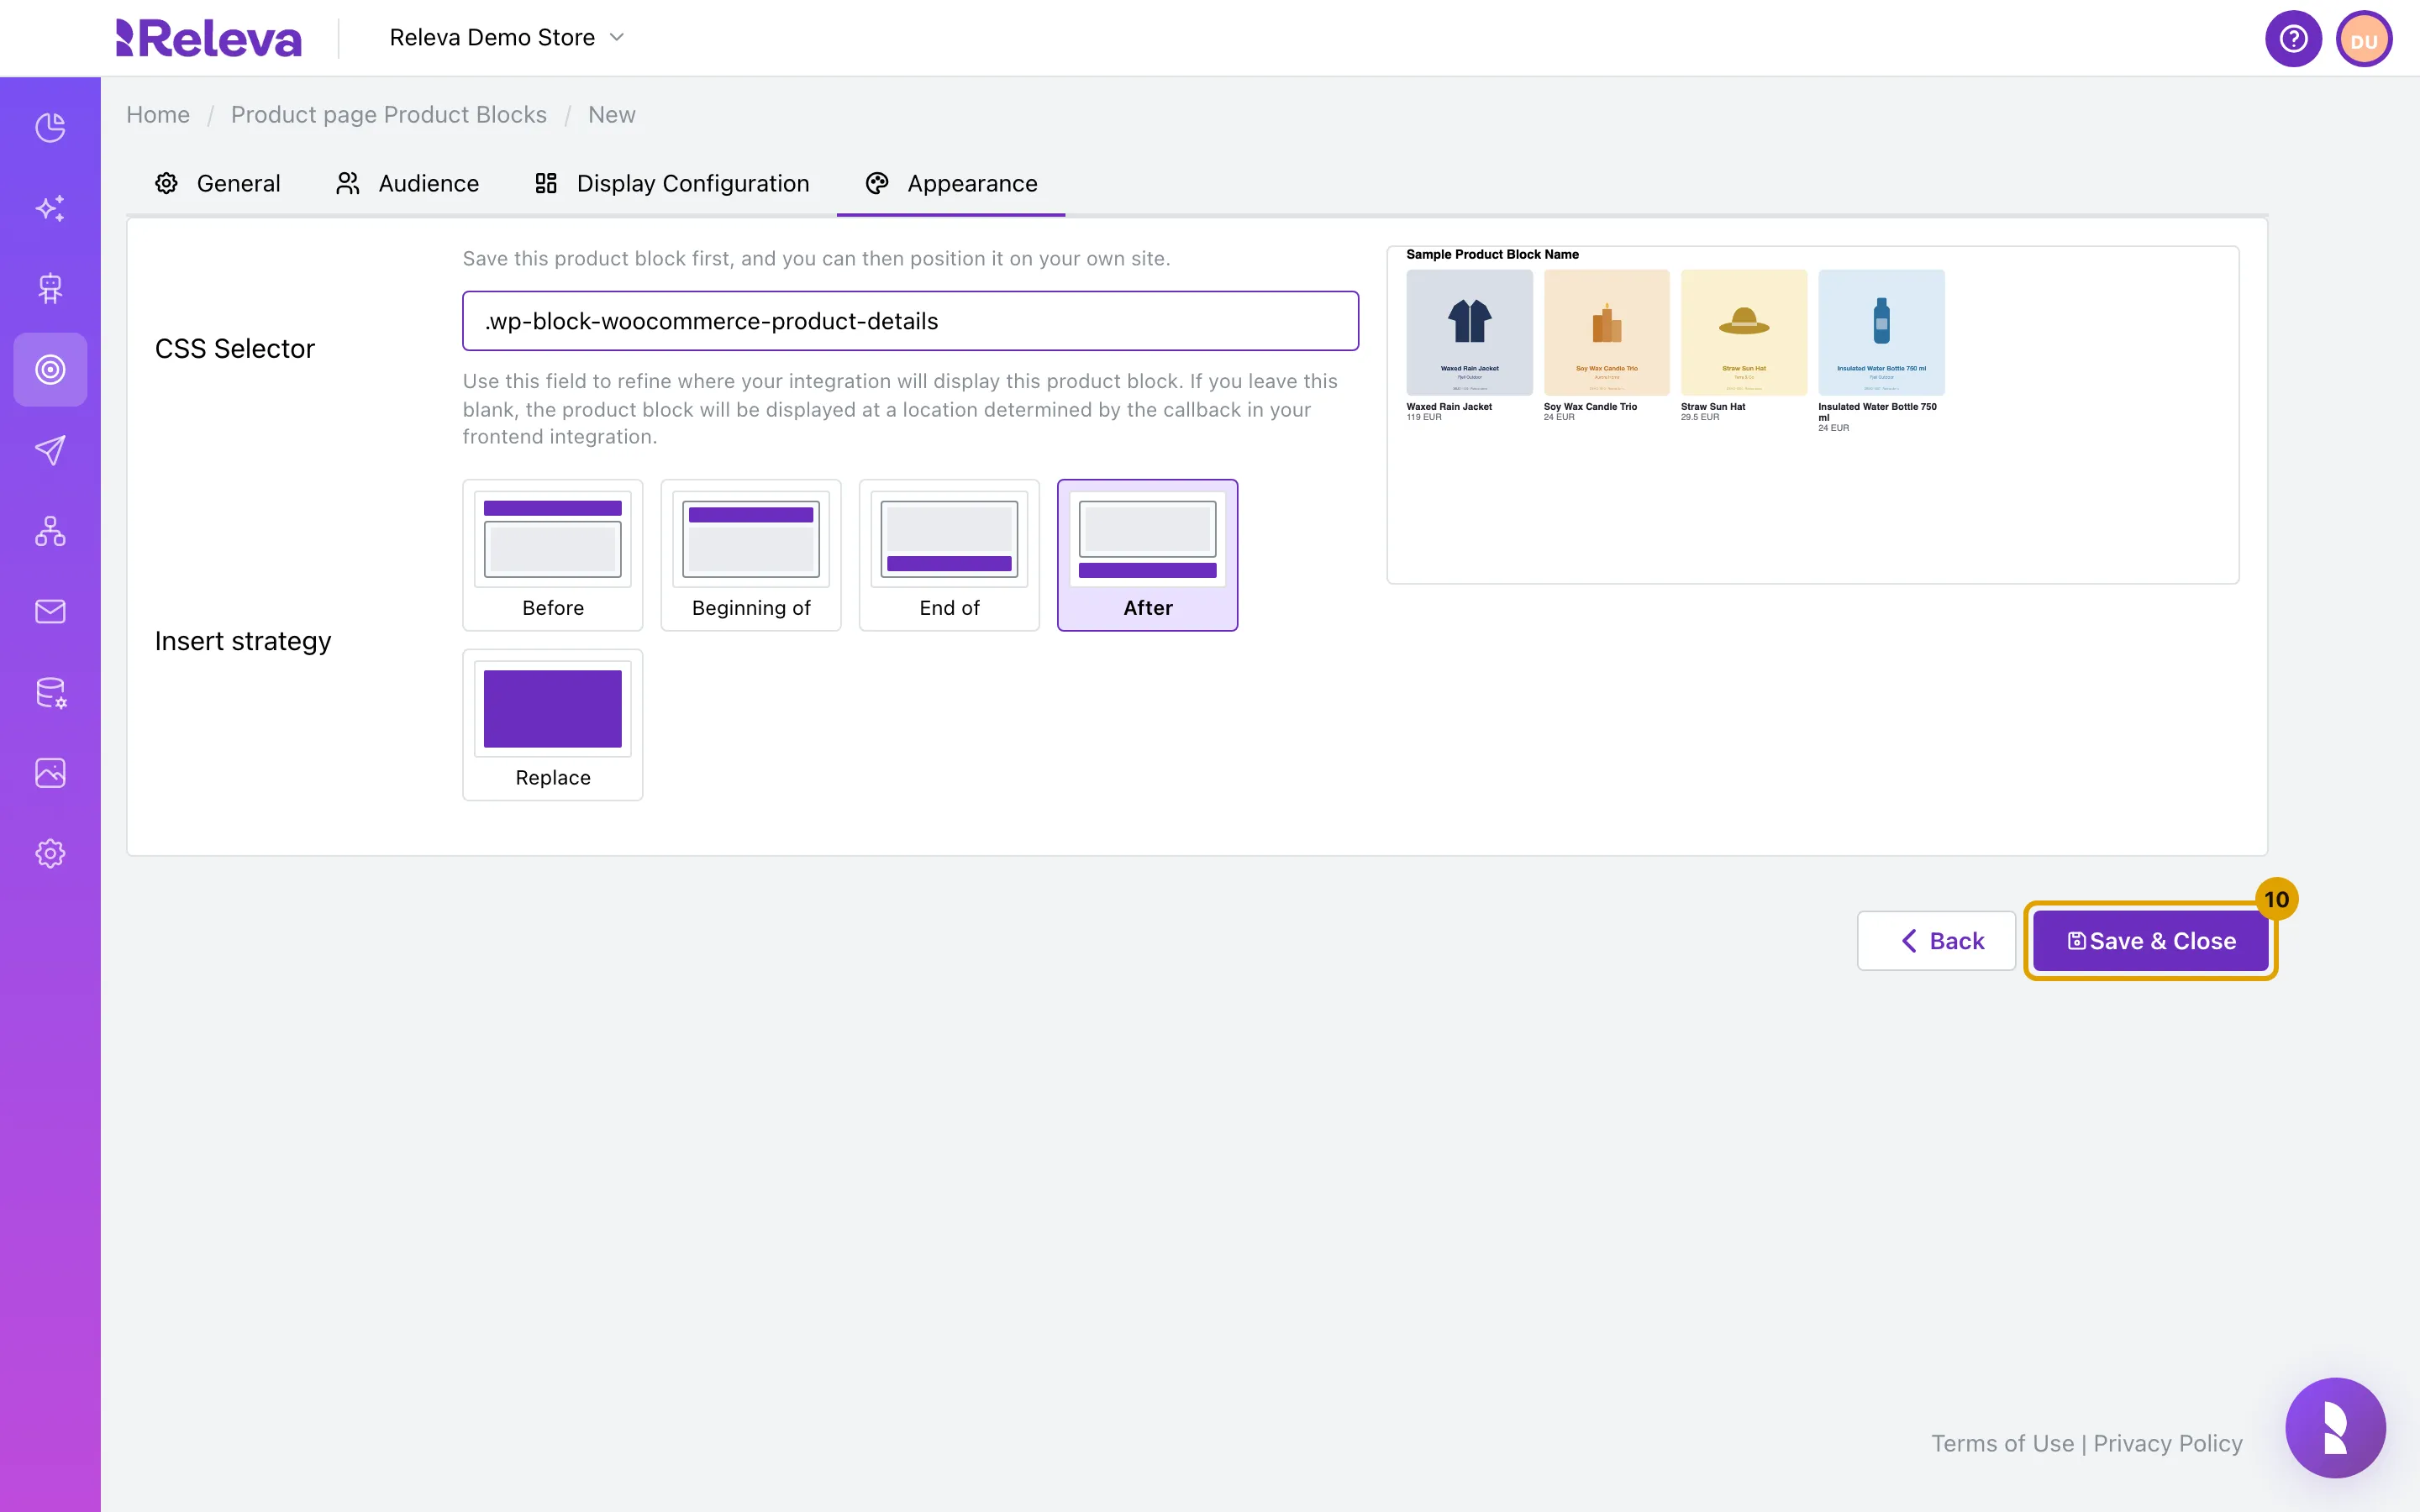
Select Save & Close
-
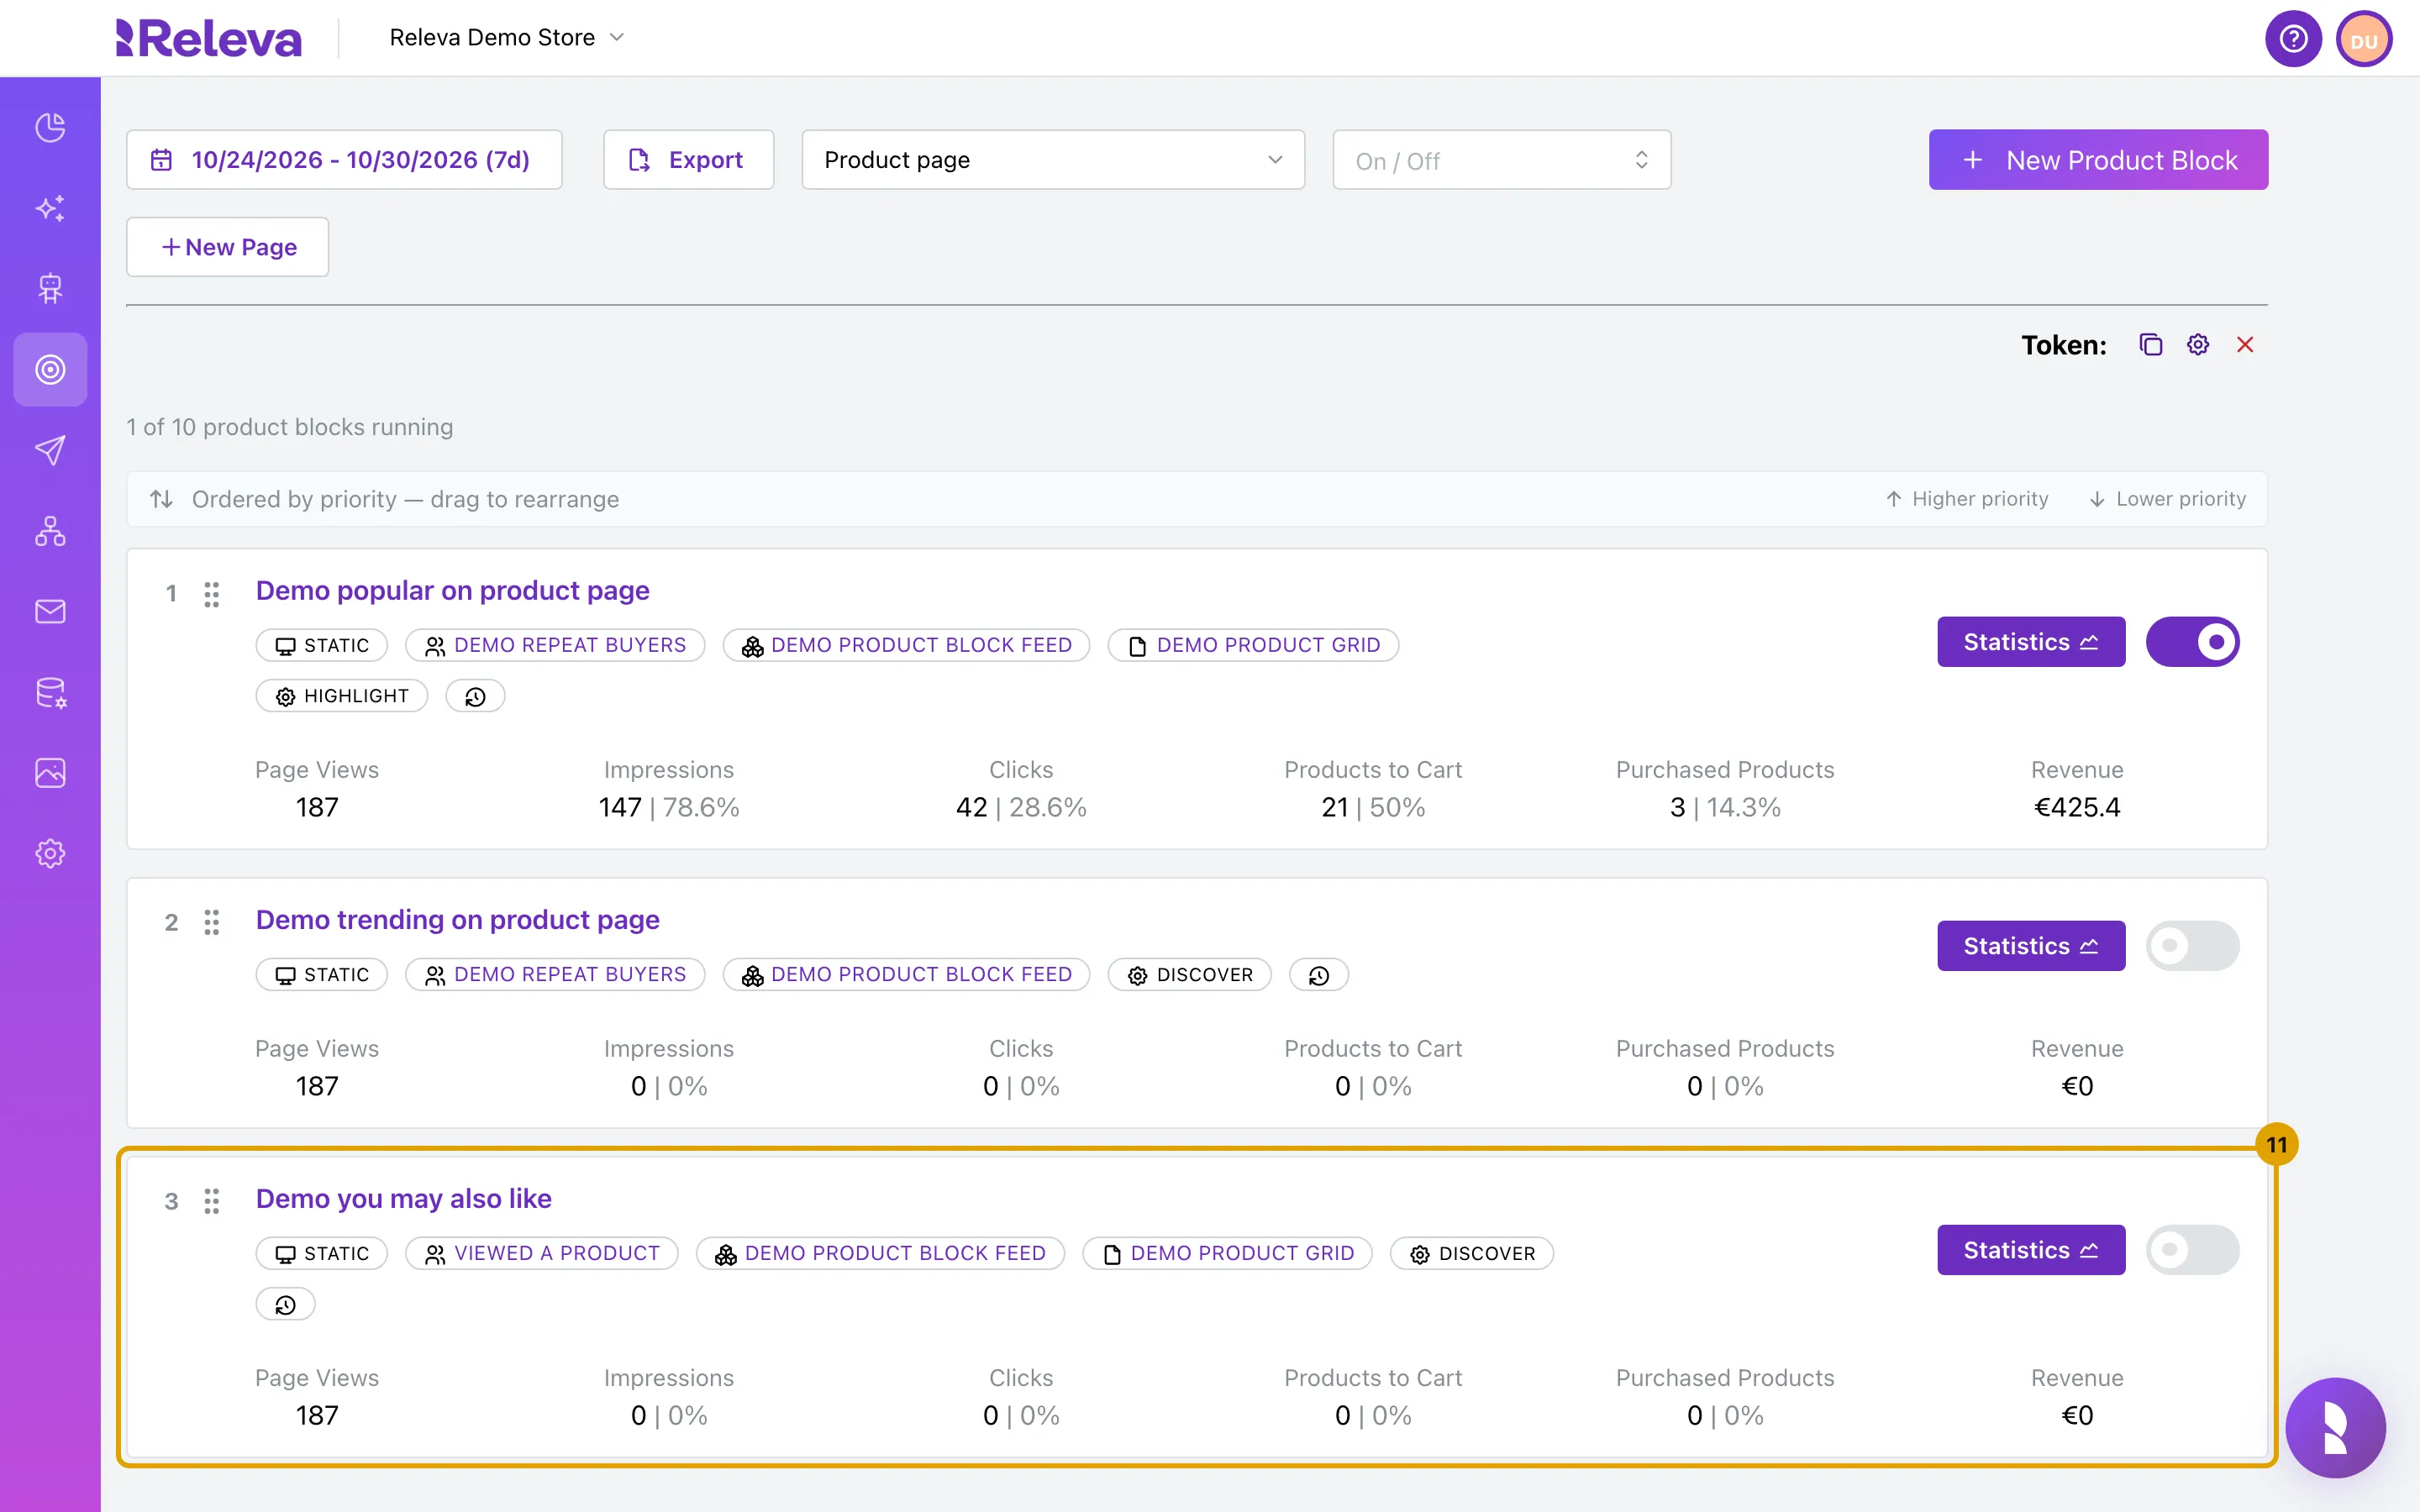
The new block appears at the bottom of the page’s list, switched off. Its number is its priority
The badges repeat what you chose: display mode (STATIC), segment, feed, layout and mode (DISCOVER).
Position the block on your shop
Section titled “Position the block on your shop”Instead of typing a CSS selector, you can click the spot on your shop. This works for saved Static blocks.
-
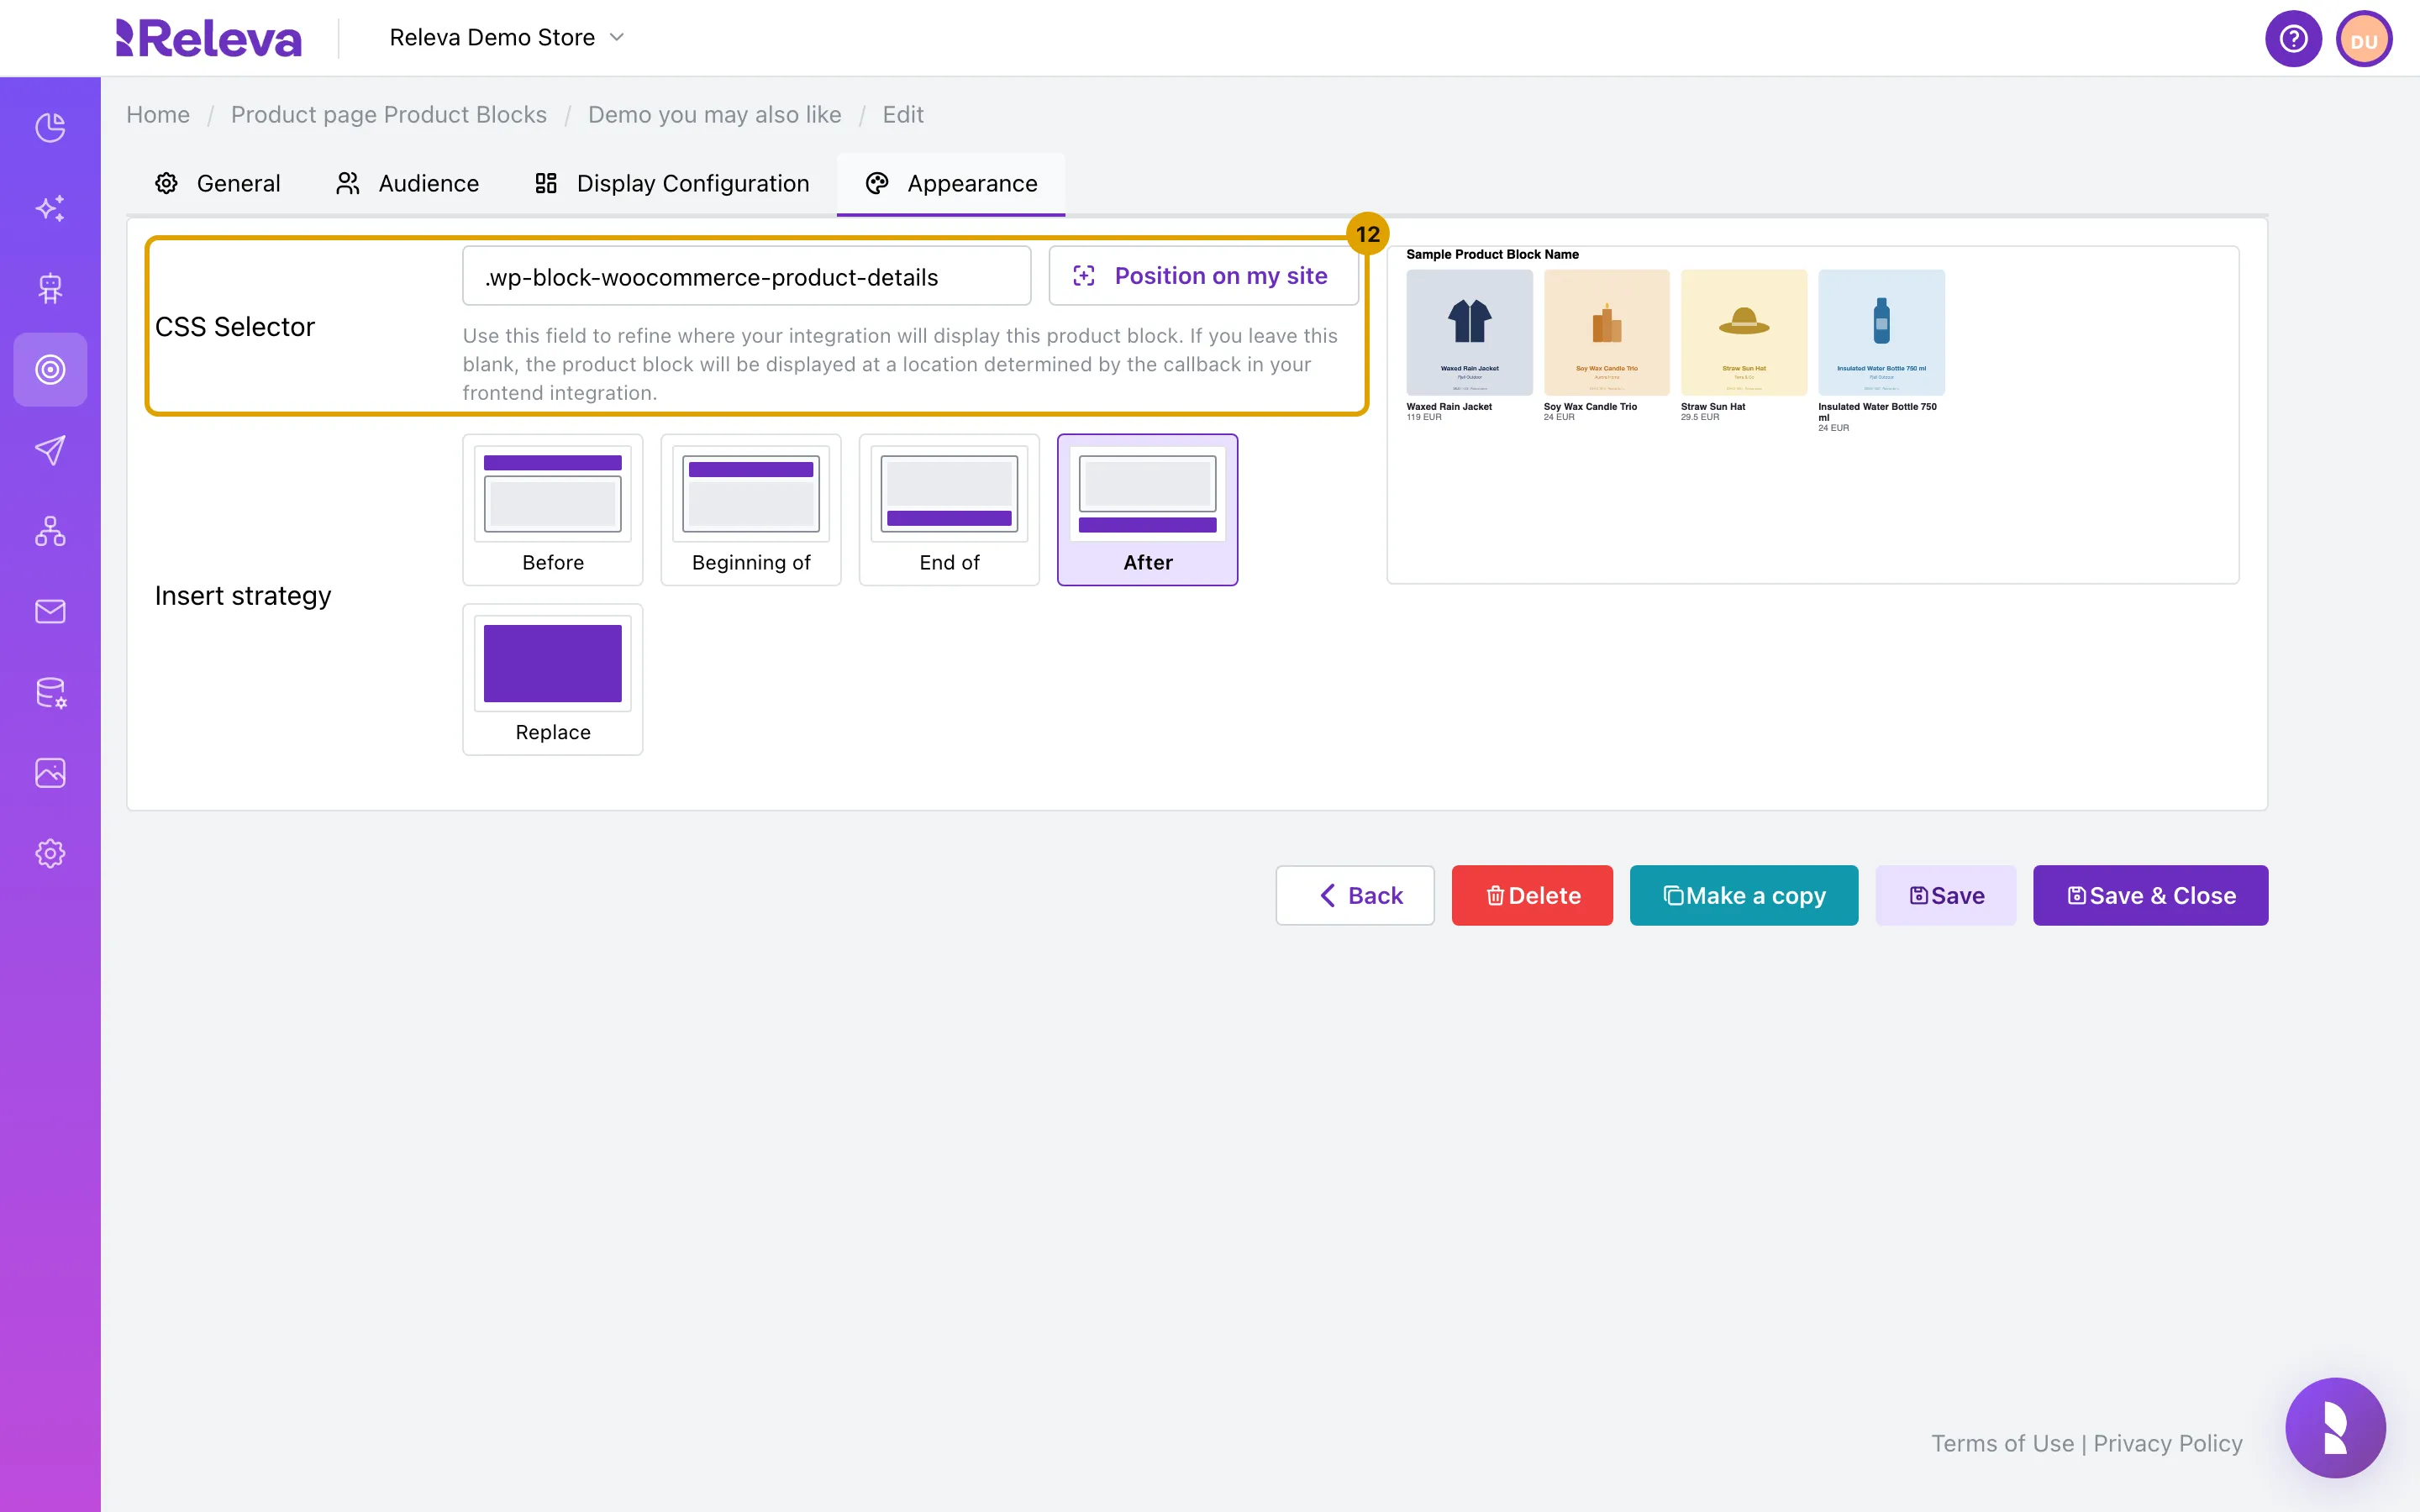
Open the block from the list, go to Appearance and select Position on my site
Your shop opens in the same browser tab, on the page your visitors last opened for this page type (for a product page, a recent product). The block does not need to be switched on.
-
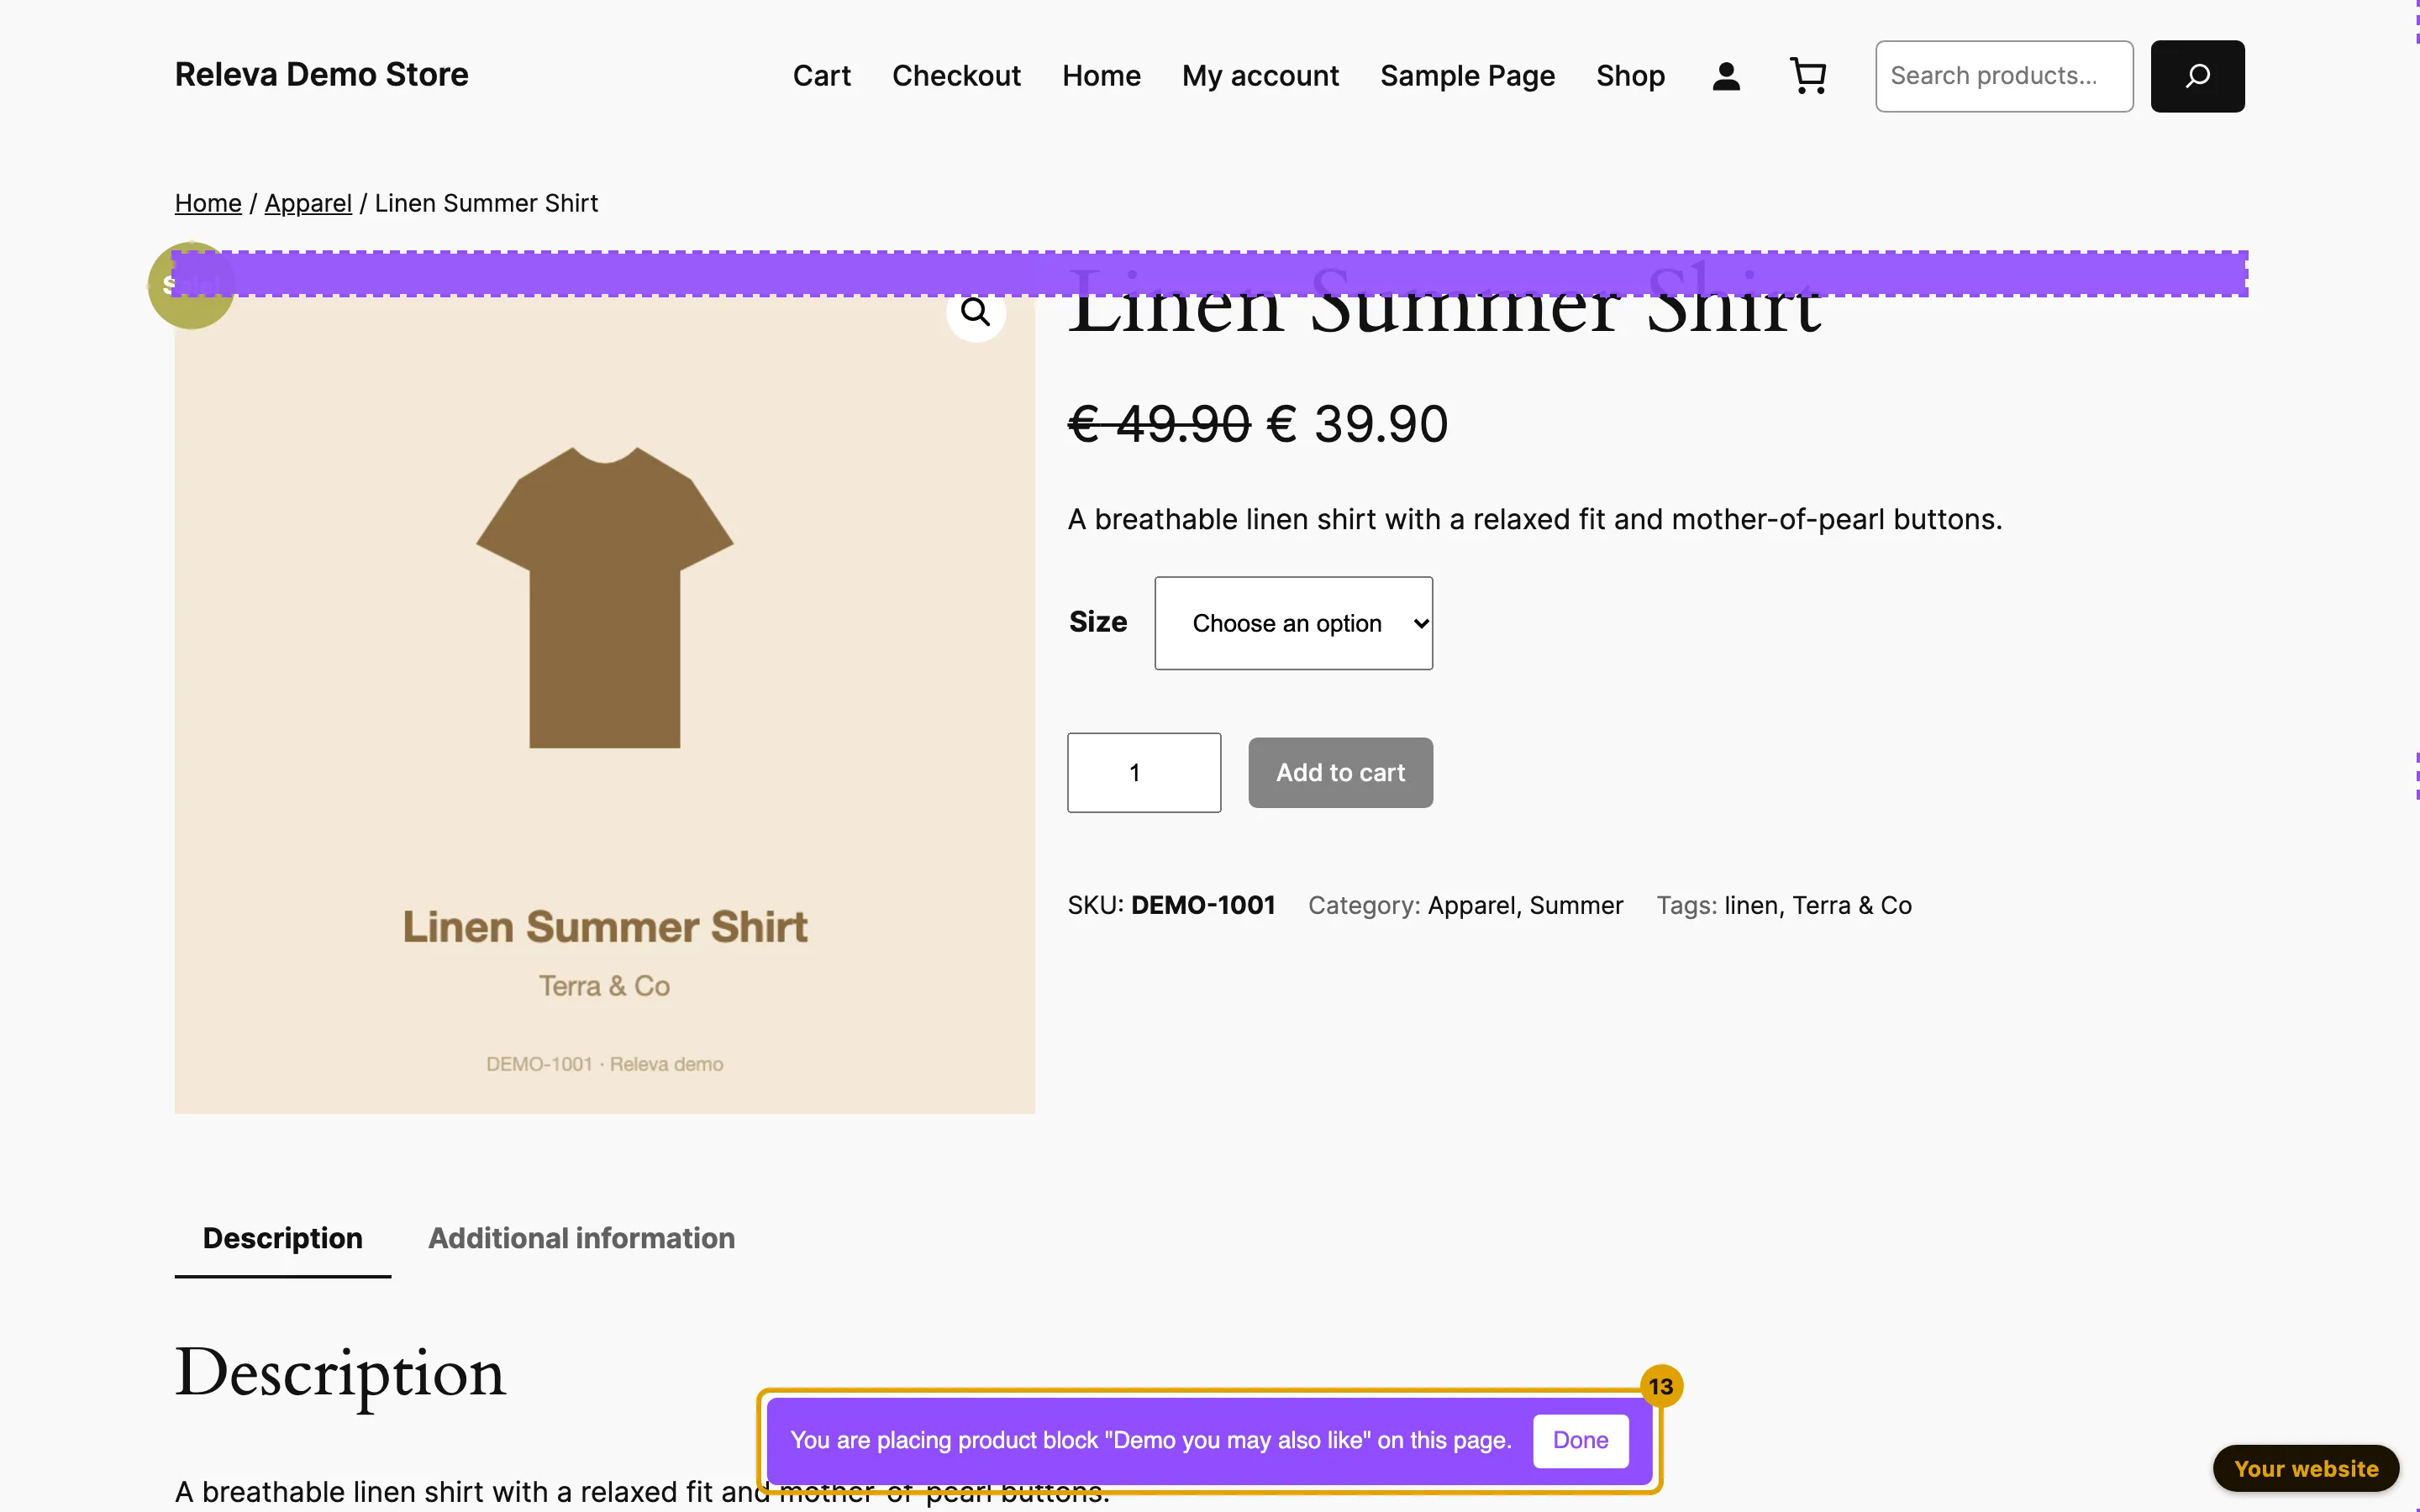
A bar at the bottom of your shop page reads “You are placing product block “Demo you may also like” on this page.” Move the pointer over the page
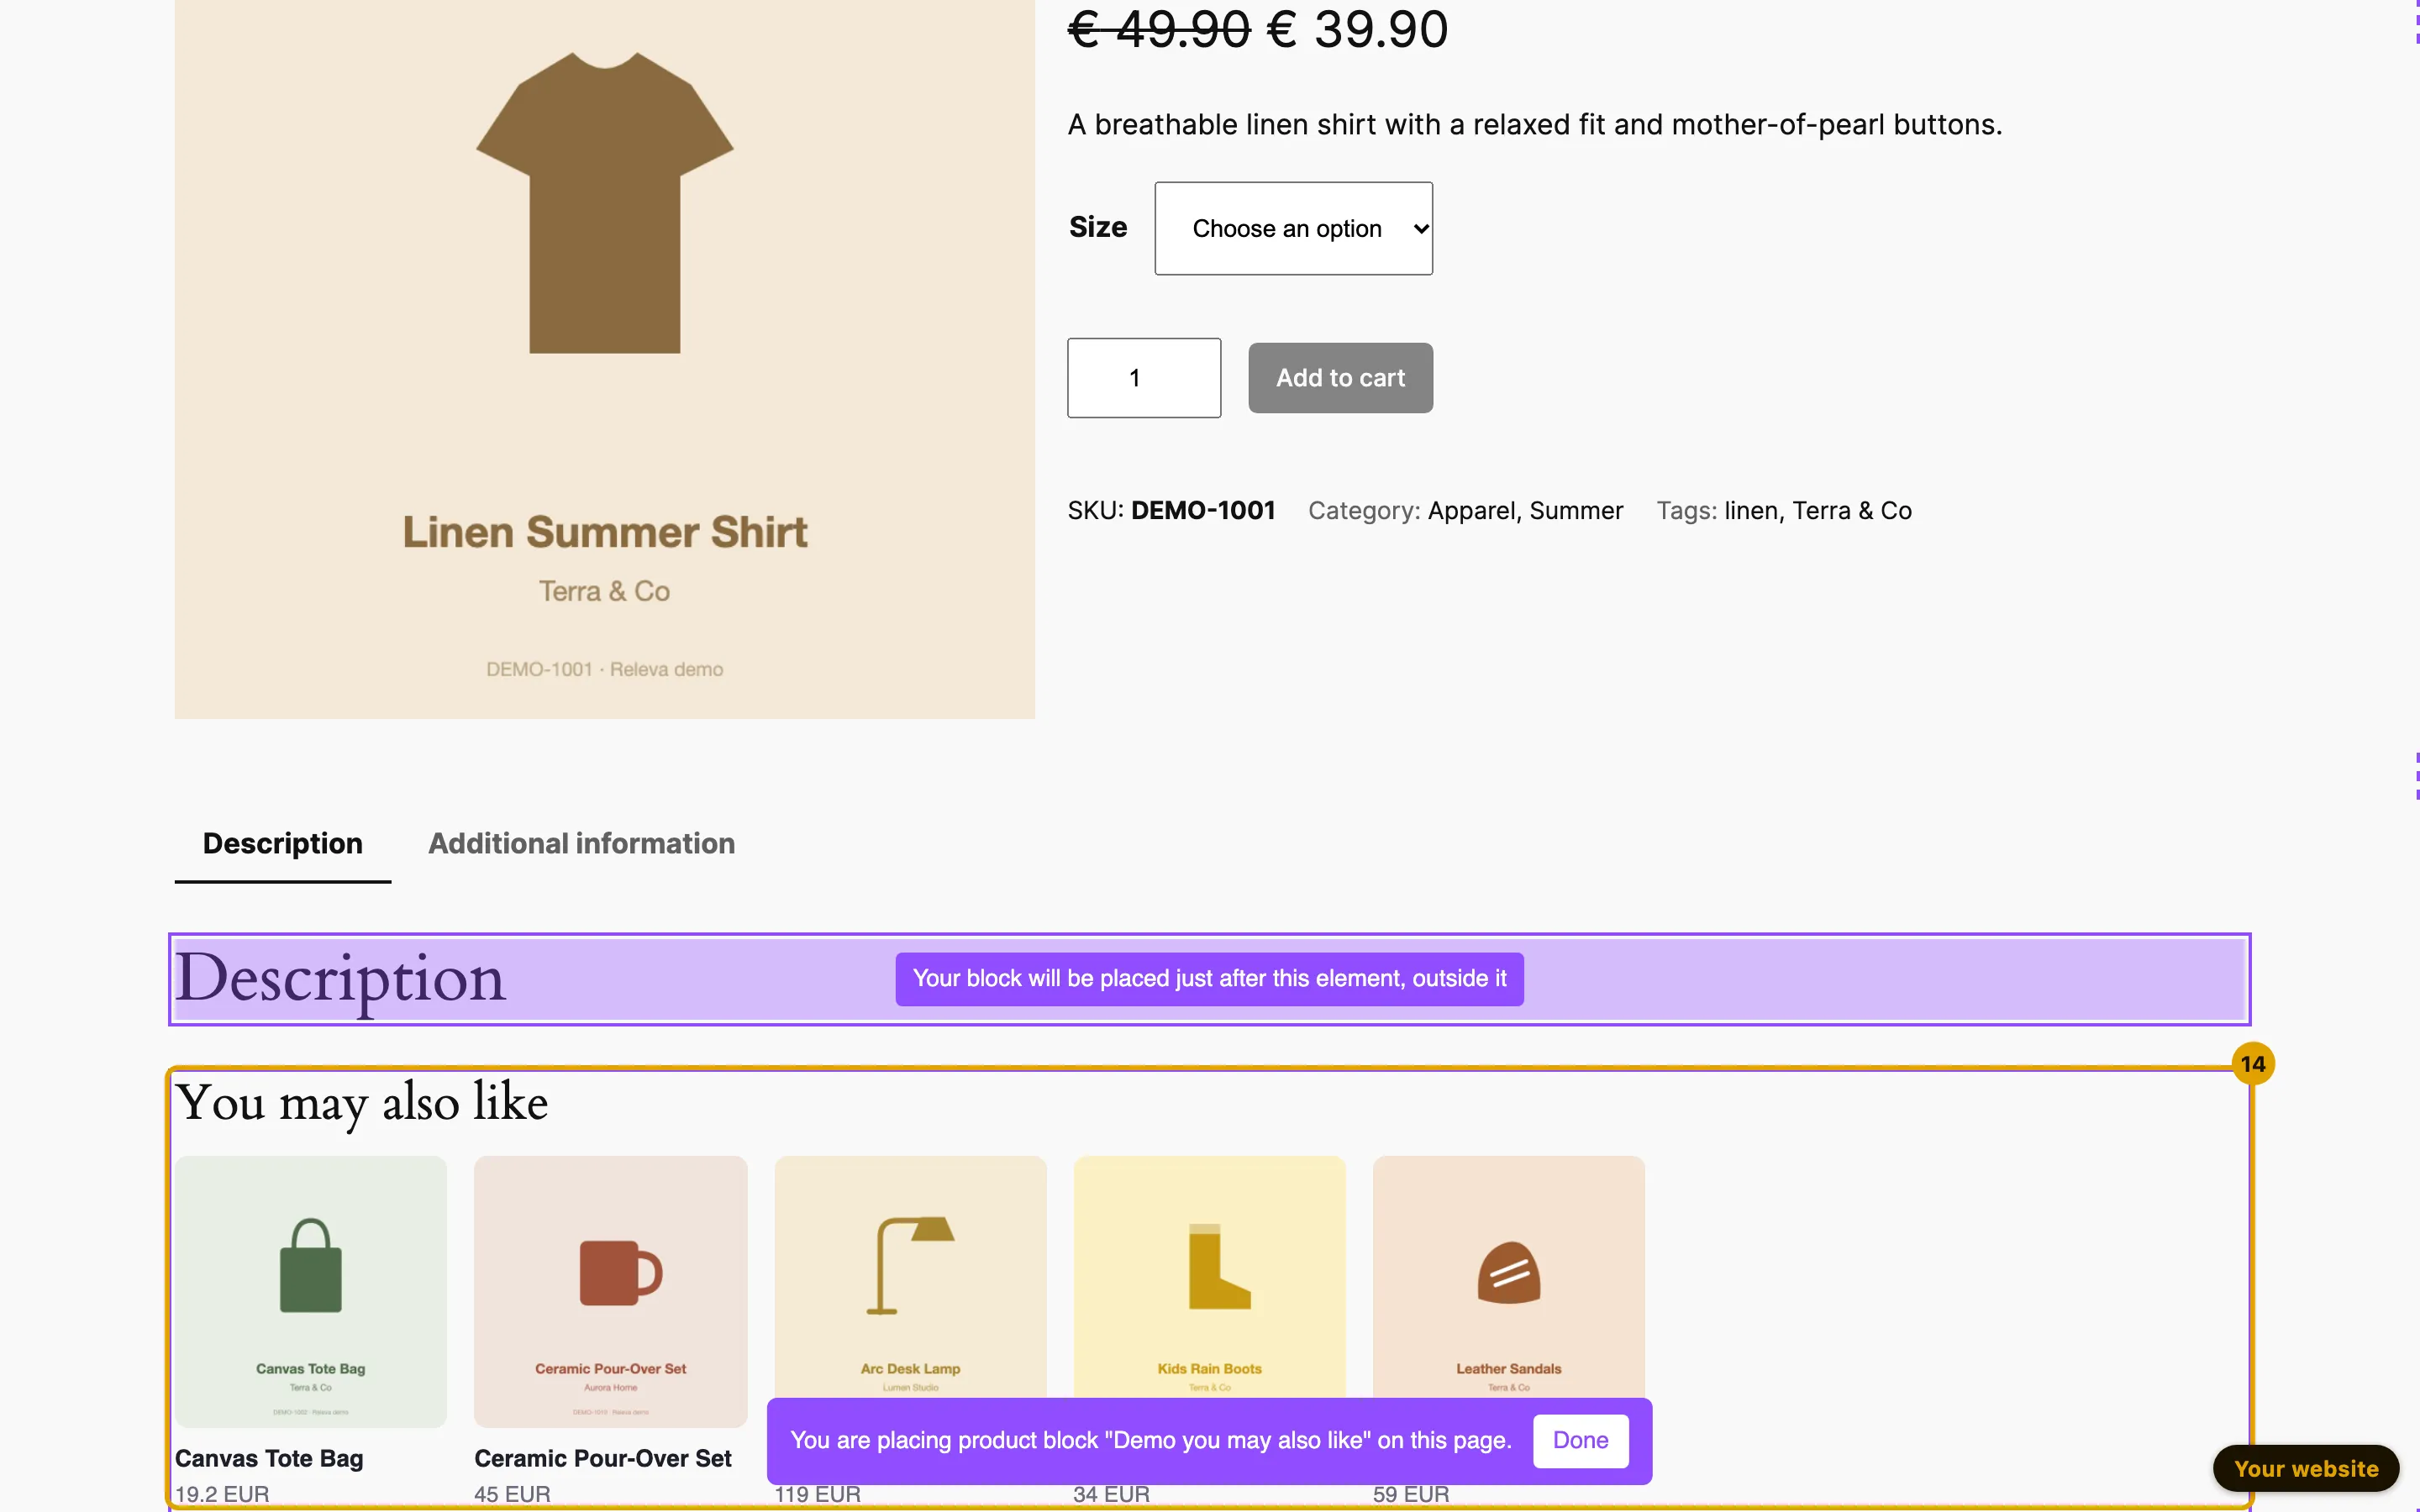
The element under the pointer is marked, and a label tells you where the block will go, for example “Your block will be placed just after this element, outside it”. The wording follows the insert strategy you chose. Other Releva blocks on the page get a grey ring; dashed purple bands mark empty containers you can also click (in the screenshot, the band across the top of the product details is one).
-
Click the element the block should follow. The block appears there with the products from its feed. Select Done
Releva opens the form again with the notice “Restored your unsaved changes and applied the new position — press Save to keep it.” The CSS Selector and Insert strategy now describe the spot you clicked. Select Save or Save & Close; until you do, the position is not stored.
Check it worked
Section titled “Check it worked”-
The new block is the last card on the page’s list with its switch off, and badges for the display mode (STATIC), the segment, the feed, the layout and the mode (DISCOVER).
-
Open a page of that type on your shop with
?rlv_mode=debugat the end of the address, for example a product page. Debug mode shows blocks that are switched off and draws a purple ring around every product block, so you can see the block with its products at the position you chose. It also ignores the audience, the schedule, the URL filter and Locales to Display, so it does not tell you who will see the block. Debug mode lasts for that browser tab; close the tab to leave it. Your debug visits are tracked like any other visit, so keep them short when you check the block’s numbers (Check Releva on your site with debug mode).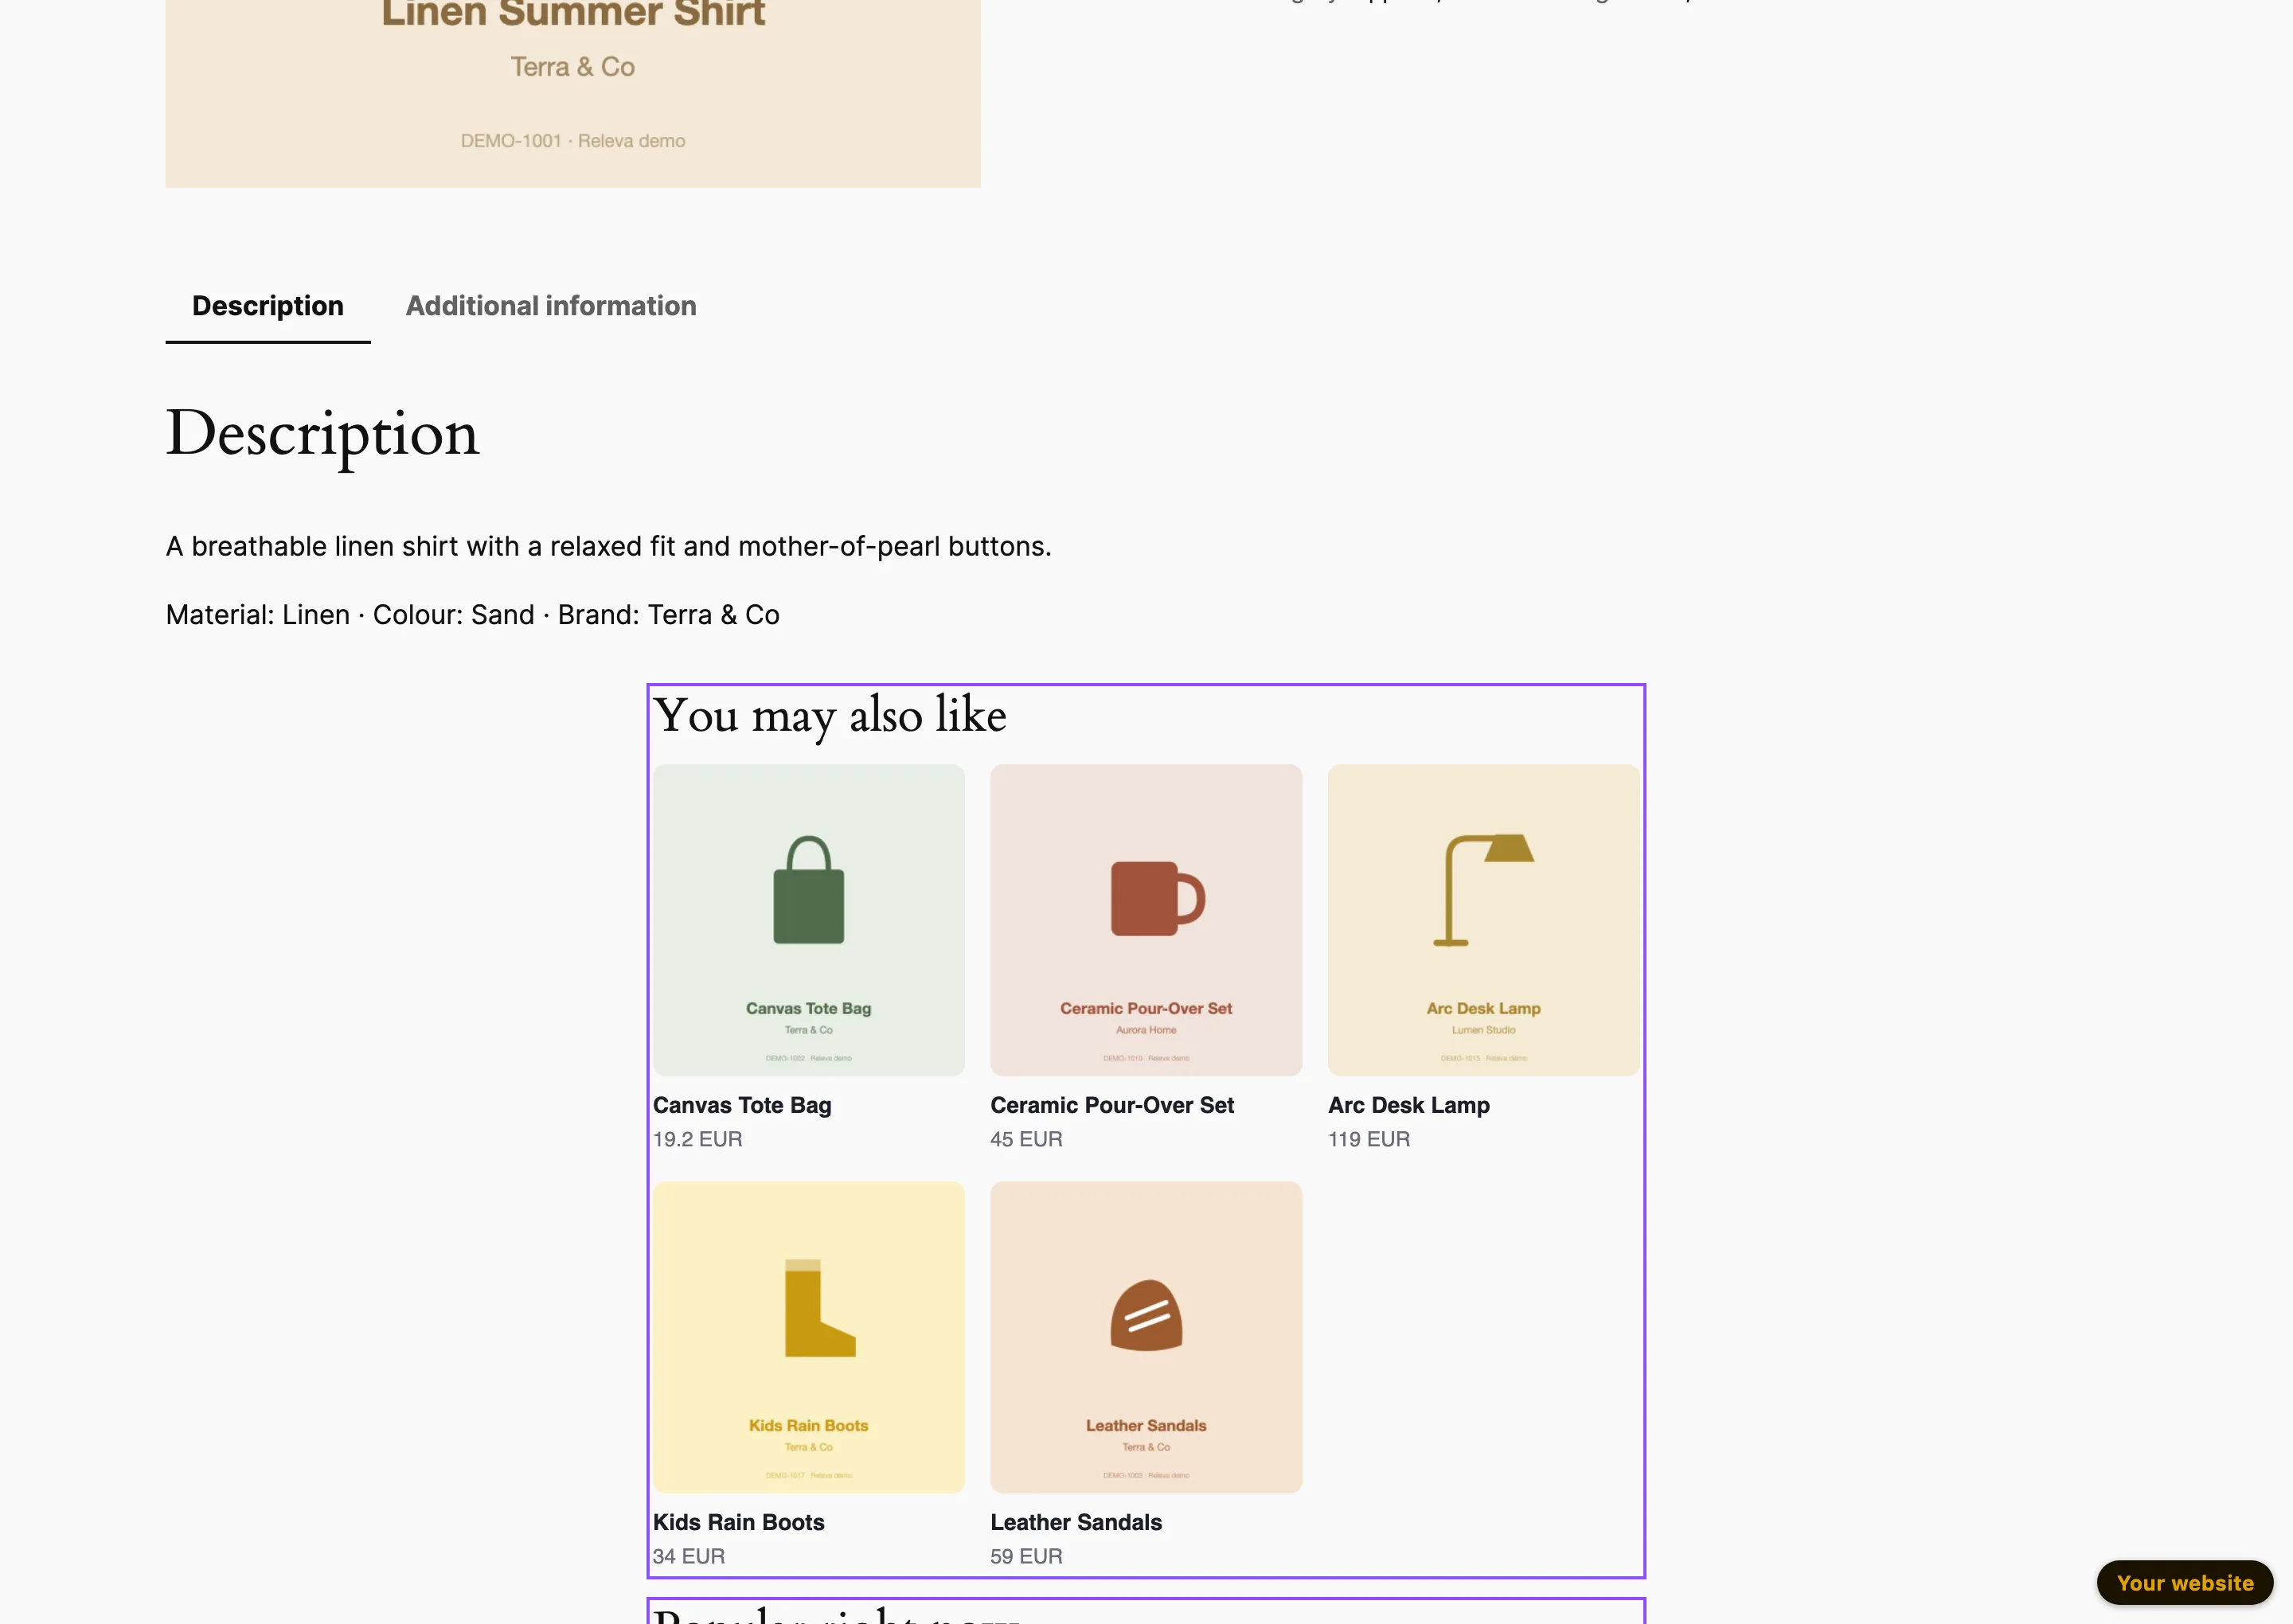
-
For developers: in debug mode, each product block in the SDK’s response also carries the search query and filter that produced its products, which helps when a feed returns fewer products than expected.
-
When it looks right, turn it on: Turn on a product block and check its results.
Troubleshooting
Section titled “Troubleshooting”Some required fields are missing or have an invalid value. A required field is empty: Name, Product Feed (“Product feed is required”) or Behavioral Segment (“Segment is required”), or CSS Selector when a layout is set on a Static block (“CSS selector is required when using a template.”). The tab with the error shows the field in red. “Product feed is required” also shows while the feed list is open; it goes away once you pick a feed.
The feed I want is not in the list. Only product feeds appear here; a feed made for a marketing channel still works, but a block on a web page normally uses a web feed. Create one under Data Platform › Product Feeds.
Product block limit reached. The page already runs as many blocks as its limit allows. Turn off a product block, or ask a super admin to raise the limit in the domain settings.
Position on my site is missing. The button appears only on a saved block, and only for the Static display mode. Save the block first, then open it again.
There is no web address we can open for this page. Releva knows no address for this page type: nobody has opened such a page on your shop in the last 30 days, and the page has no URL Path. Open one page of that type on your shop (with the Releva snippet installed) and try again, or set the page’s URL Path in its settings.
That positioning session could not be read. The positioning session expired or the request failed. Reload the form and select Position on my site again.
Restored your unsaved changes. No position was picked on your site, so it is unchanged. You selected Done without clicking an element. The selector you had before stays; run Position on my site again if you want to change it.
The block does not show in debug mode. The CSS Selector matches no element on that page (check it in your browser’s developer tools), or the page sends the token of a different Personalization page than the one the block belongs to. In debug mode the block shows even when switched off, so the switch, audience and schedule are not the cause.
The block is on but my site does not show it. The block needs a layout and a CSS selector that matches an element on the page, or your own rendering code. Check the schedule under Show when, the URL filter and Locales to Display, and read the checklist in How product blocks work.
I was logged out when opening a block link. The link points at a page that does not belong to this shop. Open Product Blocks from the menu and pick the page again.