

Create your shop
A shop in Releva is one website: its catalog, profiles, campaigns and settings. An account can hold several shops. Usually Releva’s team creates your first shop and sends you access, or installing the Shopify app creates it. Use this guide to add another shop from the admin. If your store runs on Shopify, you do not use this form: installing the Releva app from the Shopify App Store creates the shop. See Connect your Shopify store.
Right after you create the shop, Releva opens it on Brand Identity: it reads your website and proposes how your emails, pop-ups and assistant look and sound. You confirm it or skip it, and then the How-To Guide takes you through the rest.
Before you start
Section titled “Before you start”- You are signed in to Releva and can open Account from the avatar menu in the top-right corner. In a Shopify shop the New Shop tab is hidden; switch to a non-Shopify shop of the account first, or install the Shopify app.
- You know your store’s address, platform, main language and currency, and the email address your campaigns will be sent from.
- You know whether your store keeps its own record of who is subscribed. This decides Subscription Management.
- Your website is online and public, so that Releva can read your logo, colors and the way you talk to customers. If it is not live yet, you can fill in your brand by hand or skip that step.
-
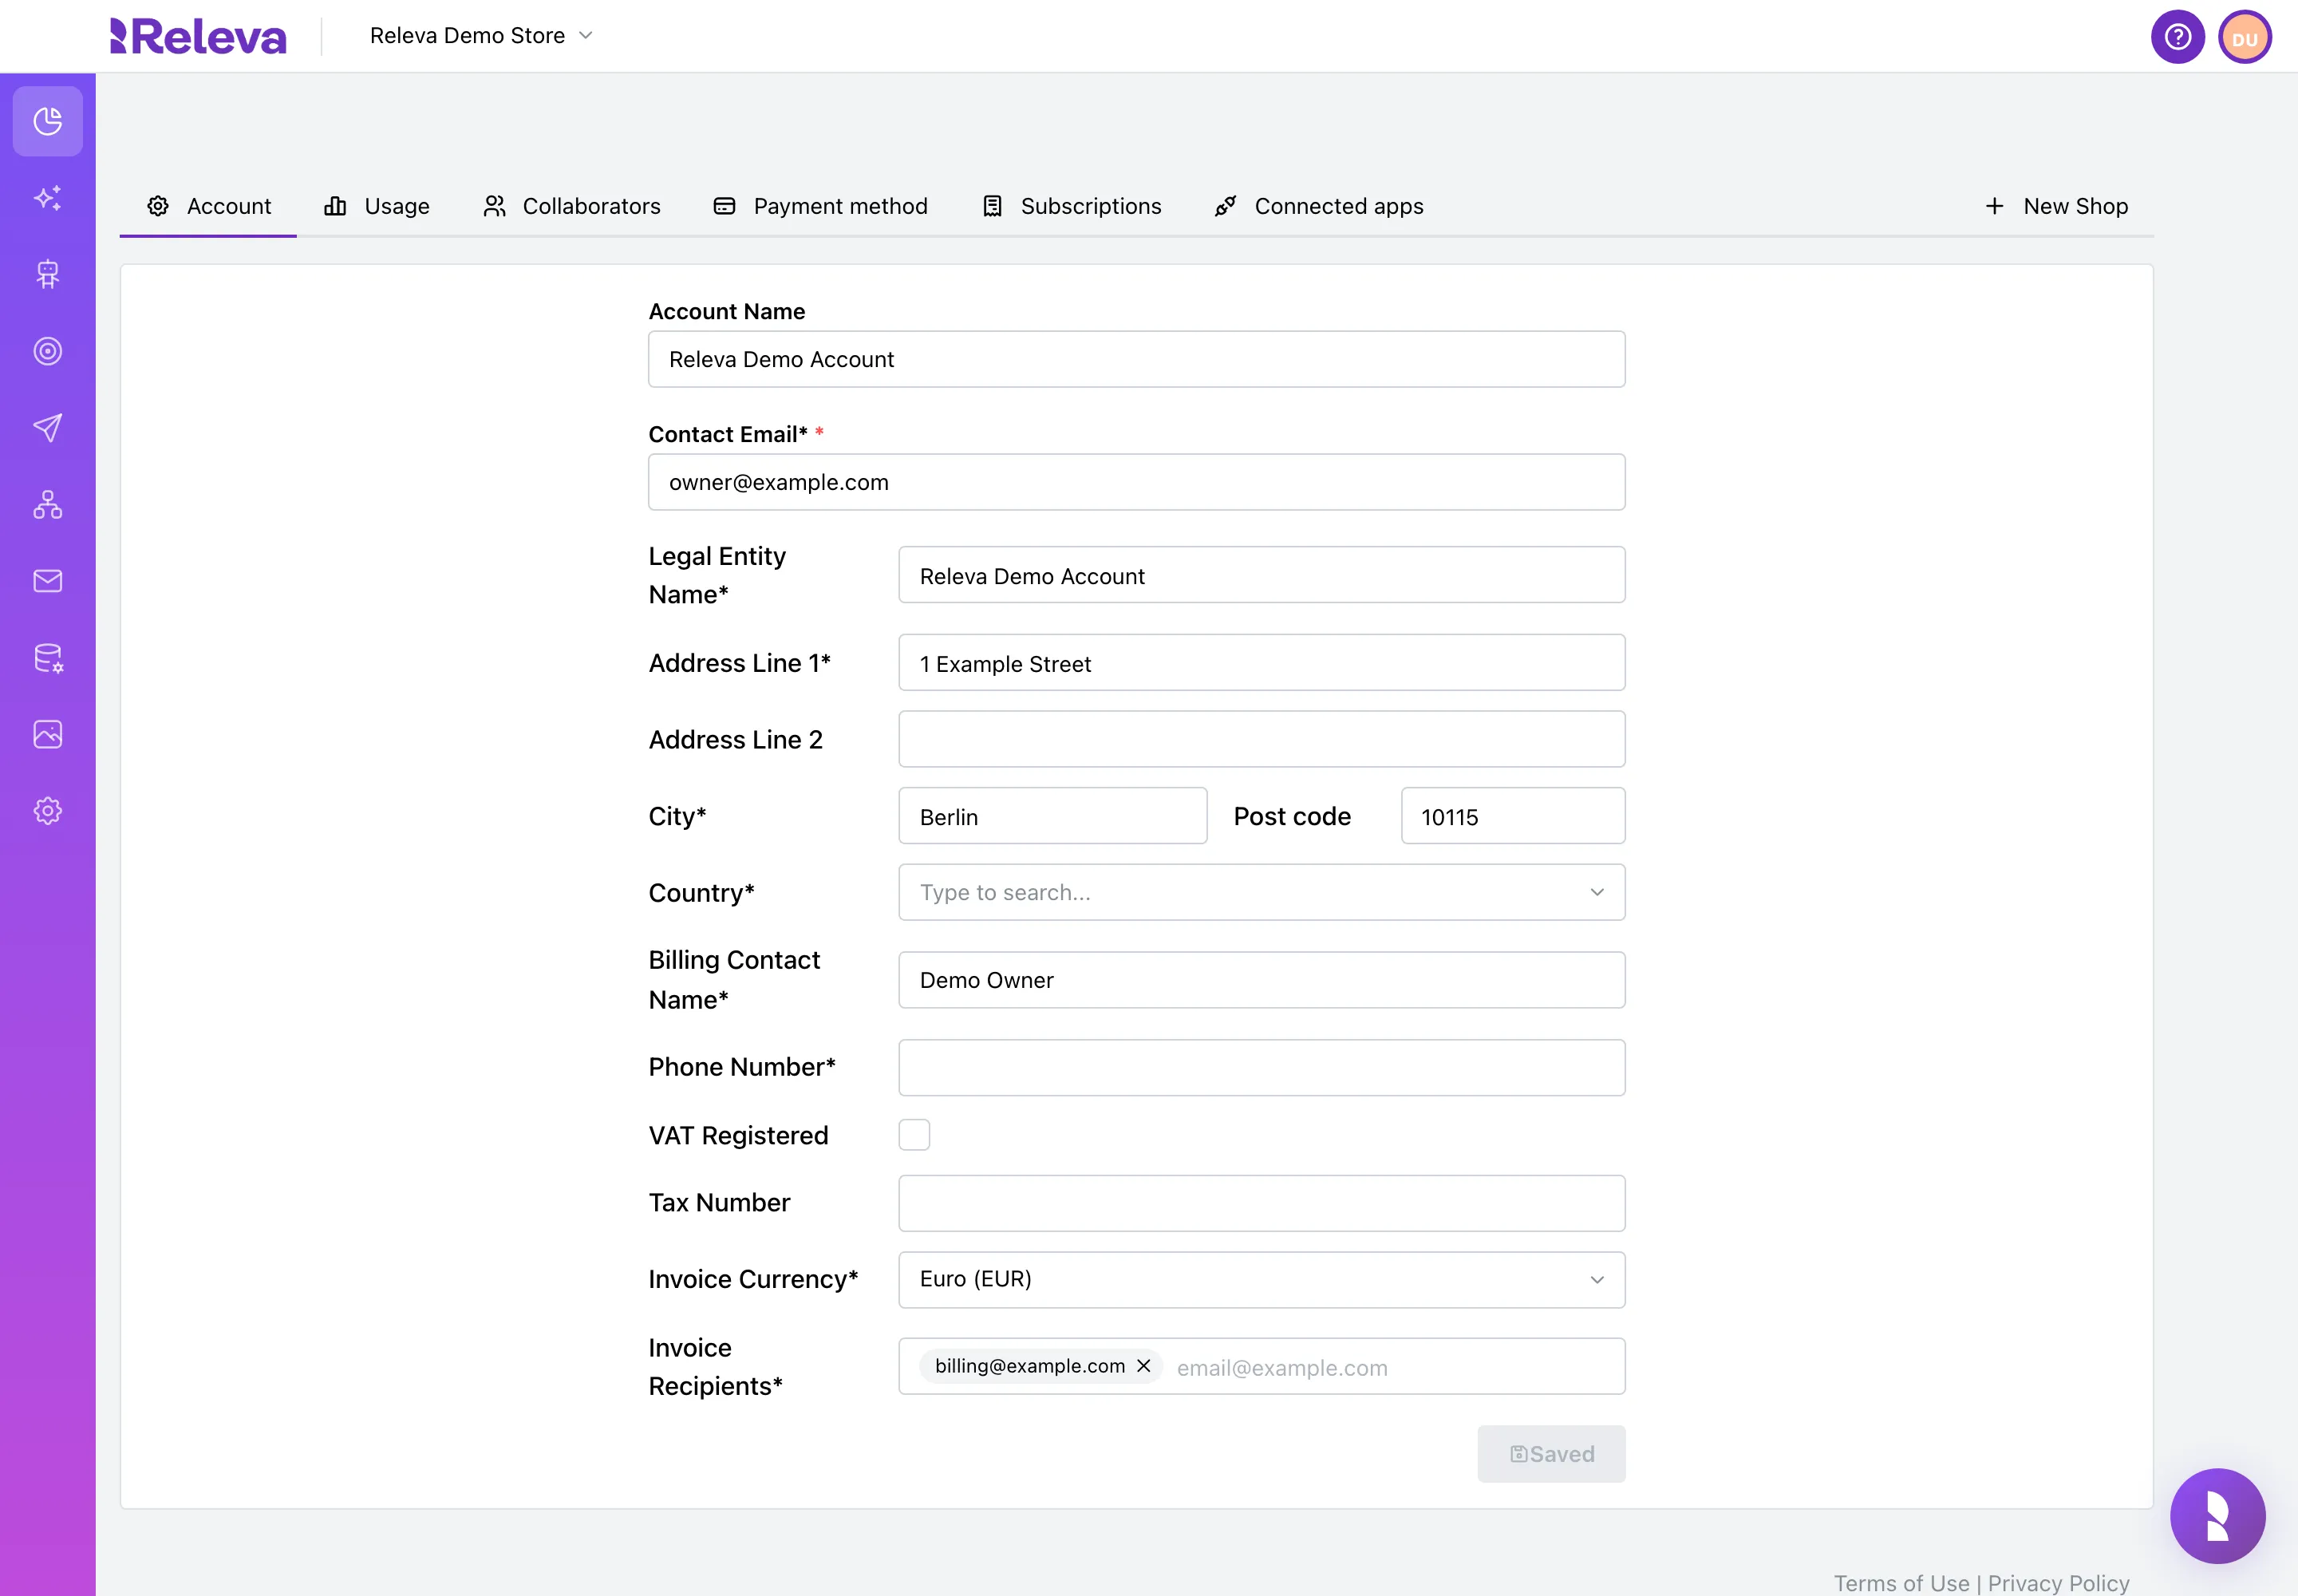
Select your avatar in the top-right corner, then Account.
-
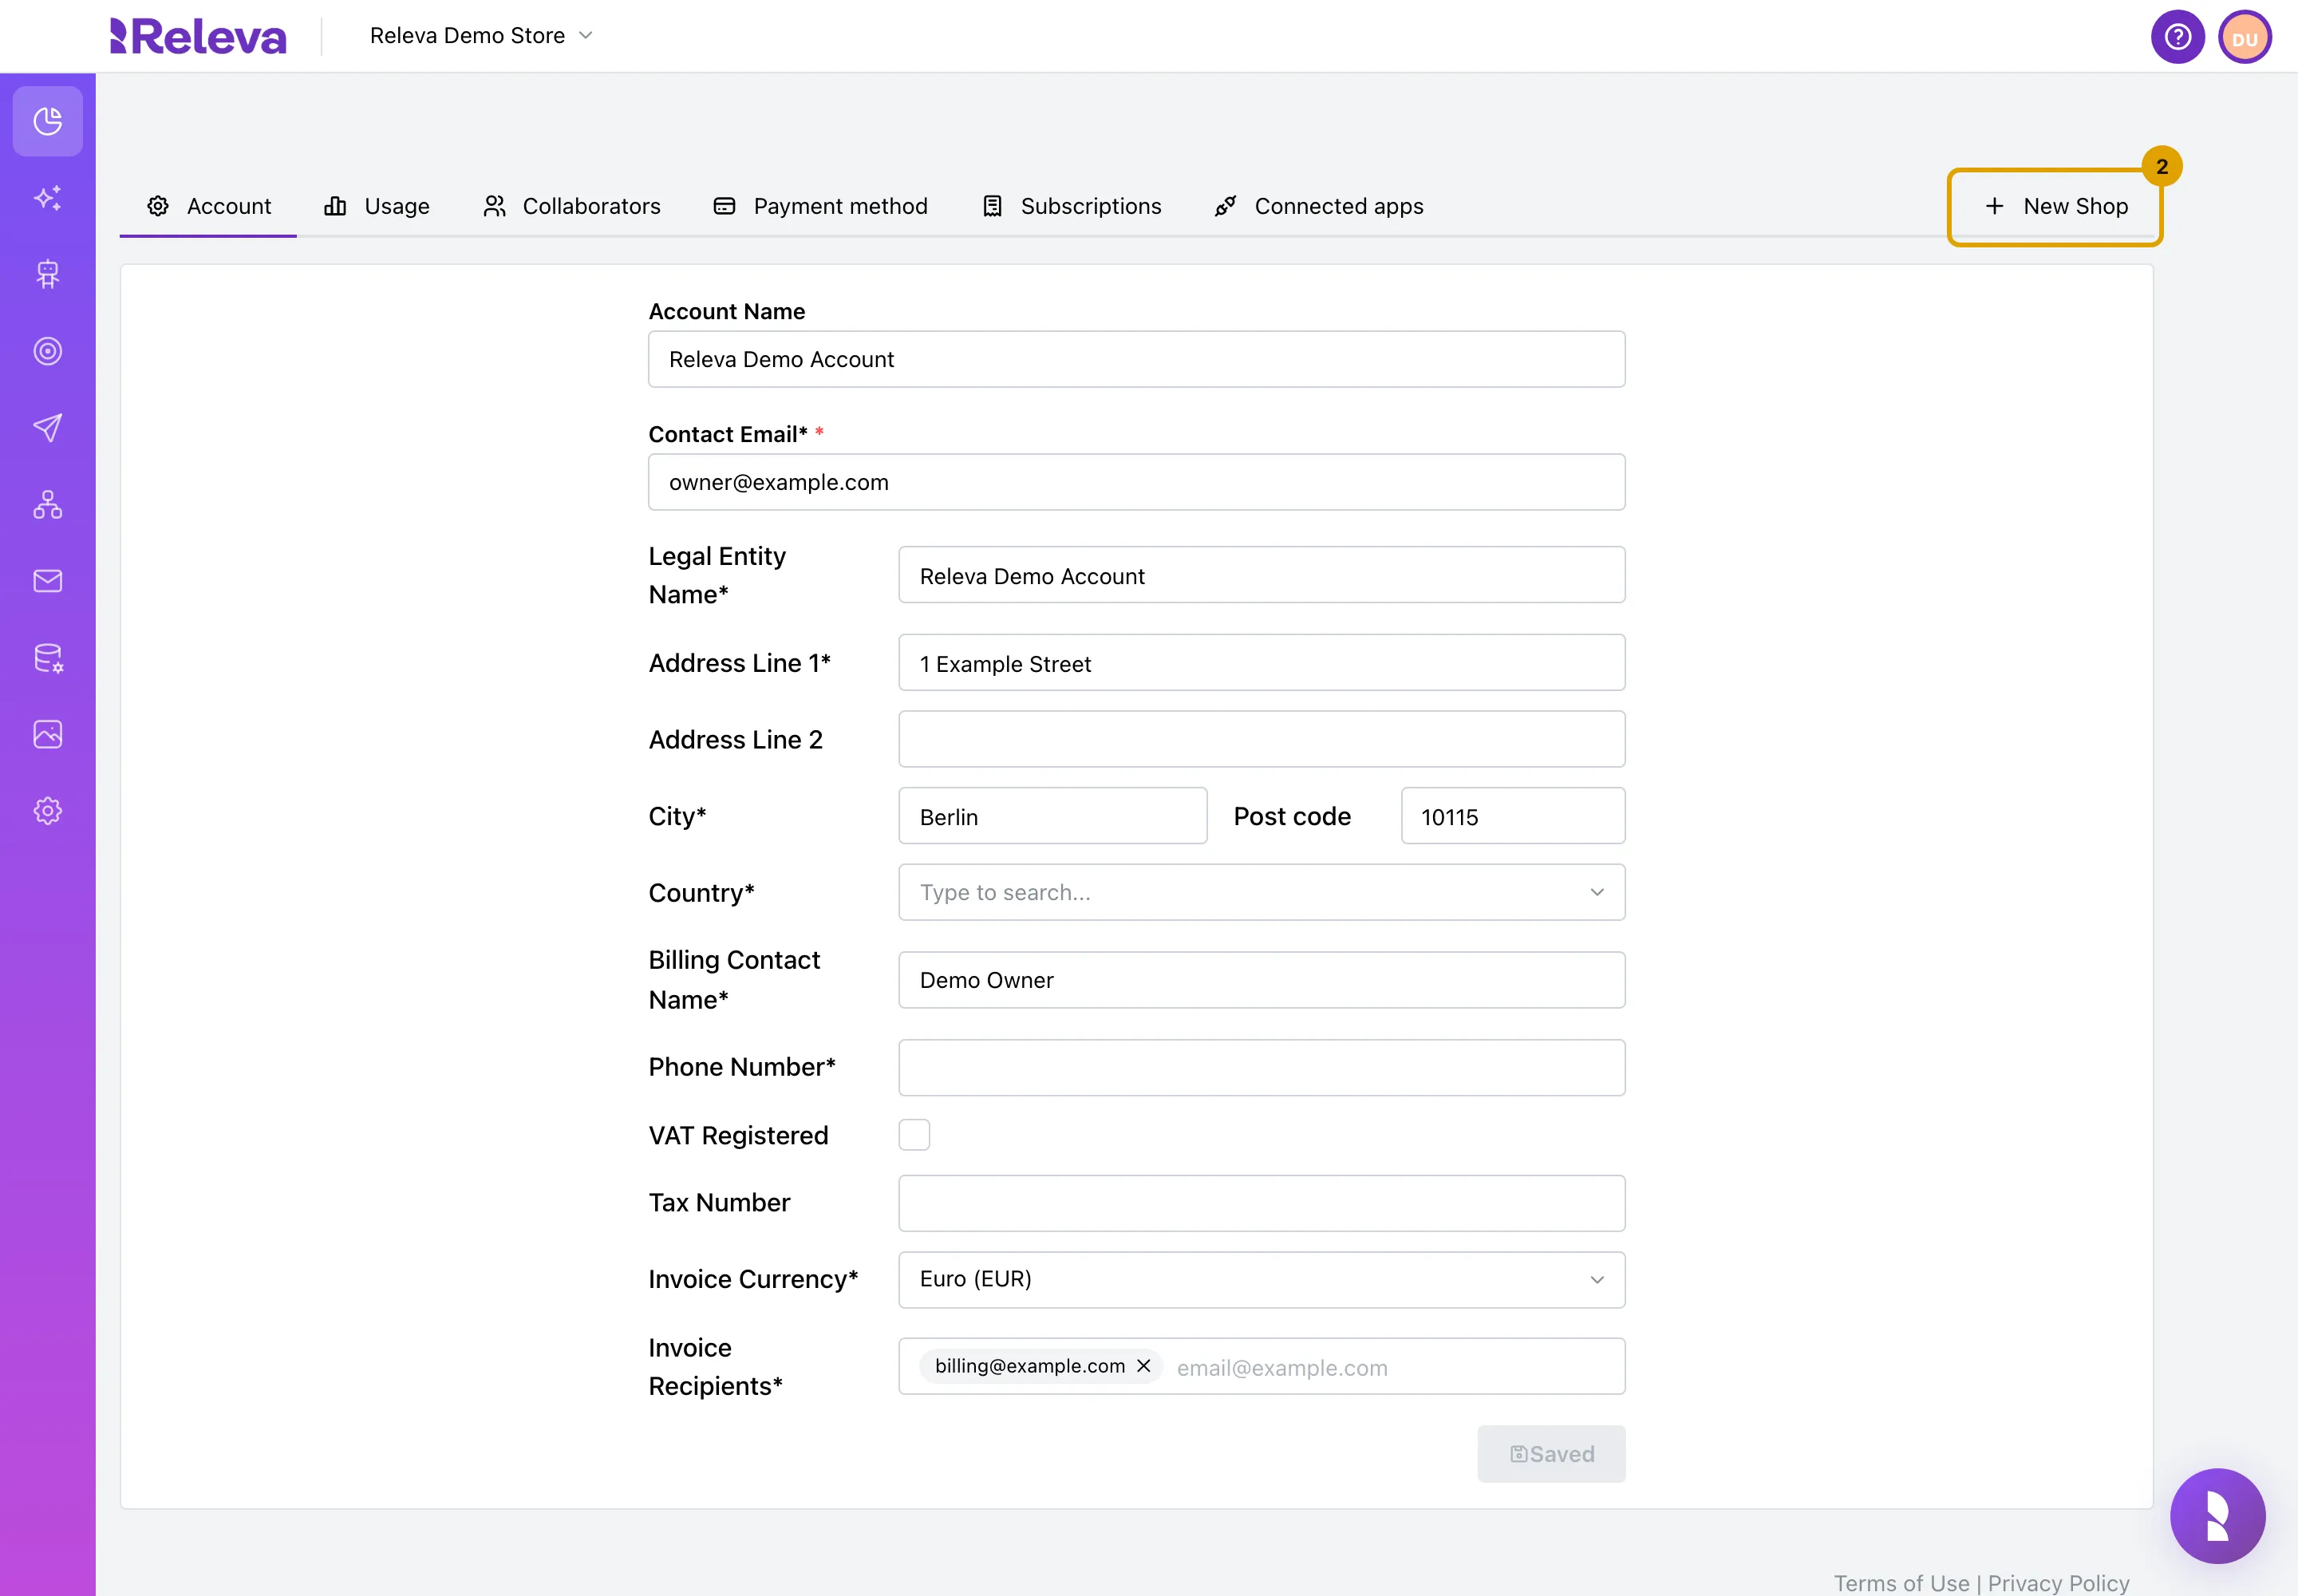
Select New Shop.
Create Shop opens.
-
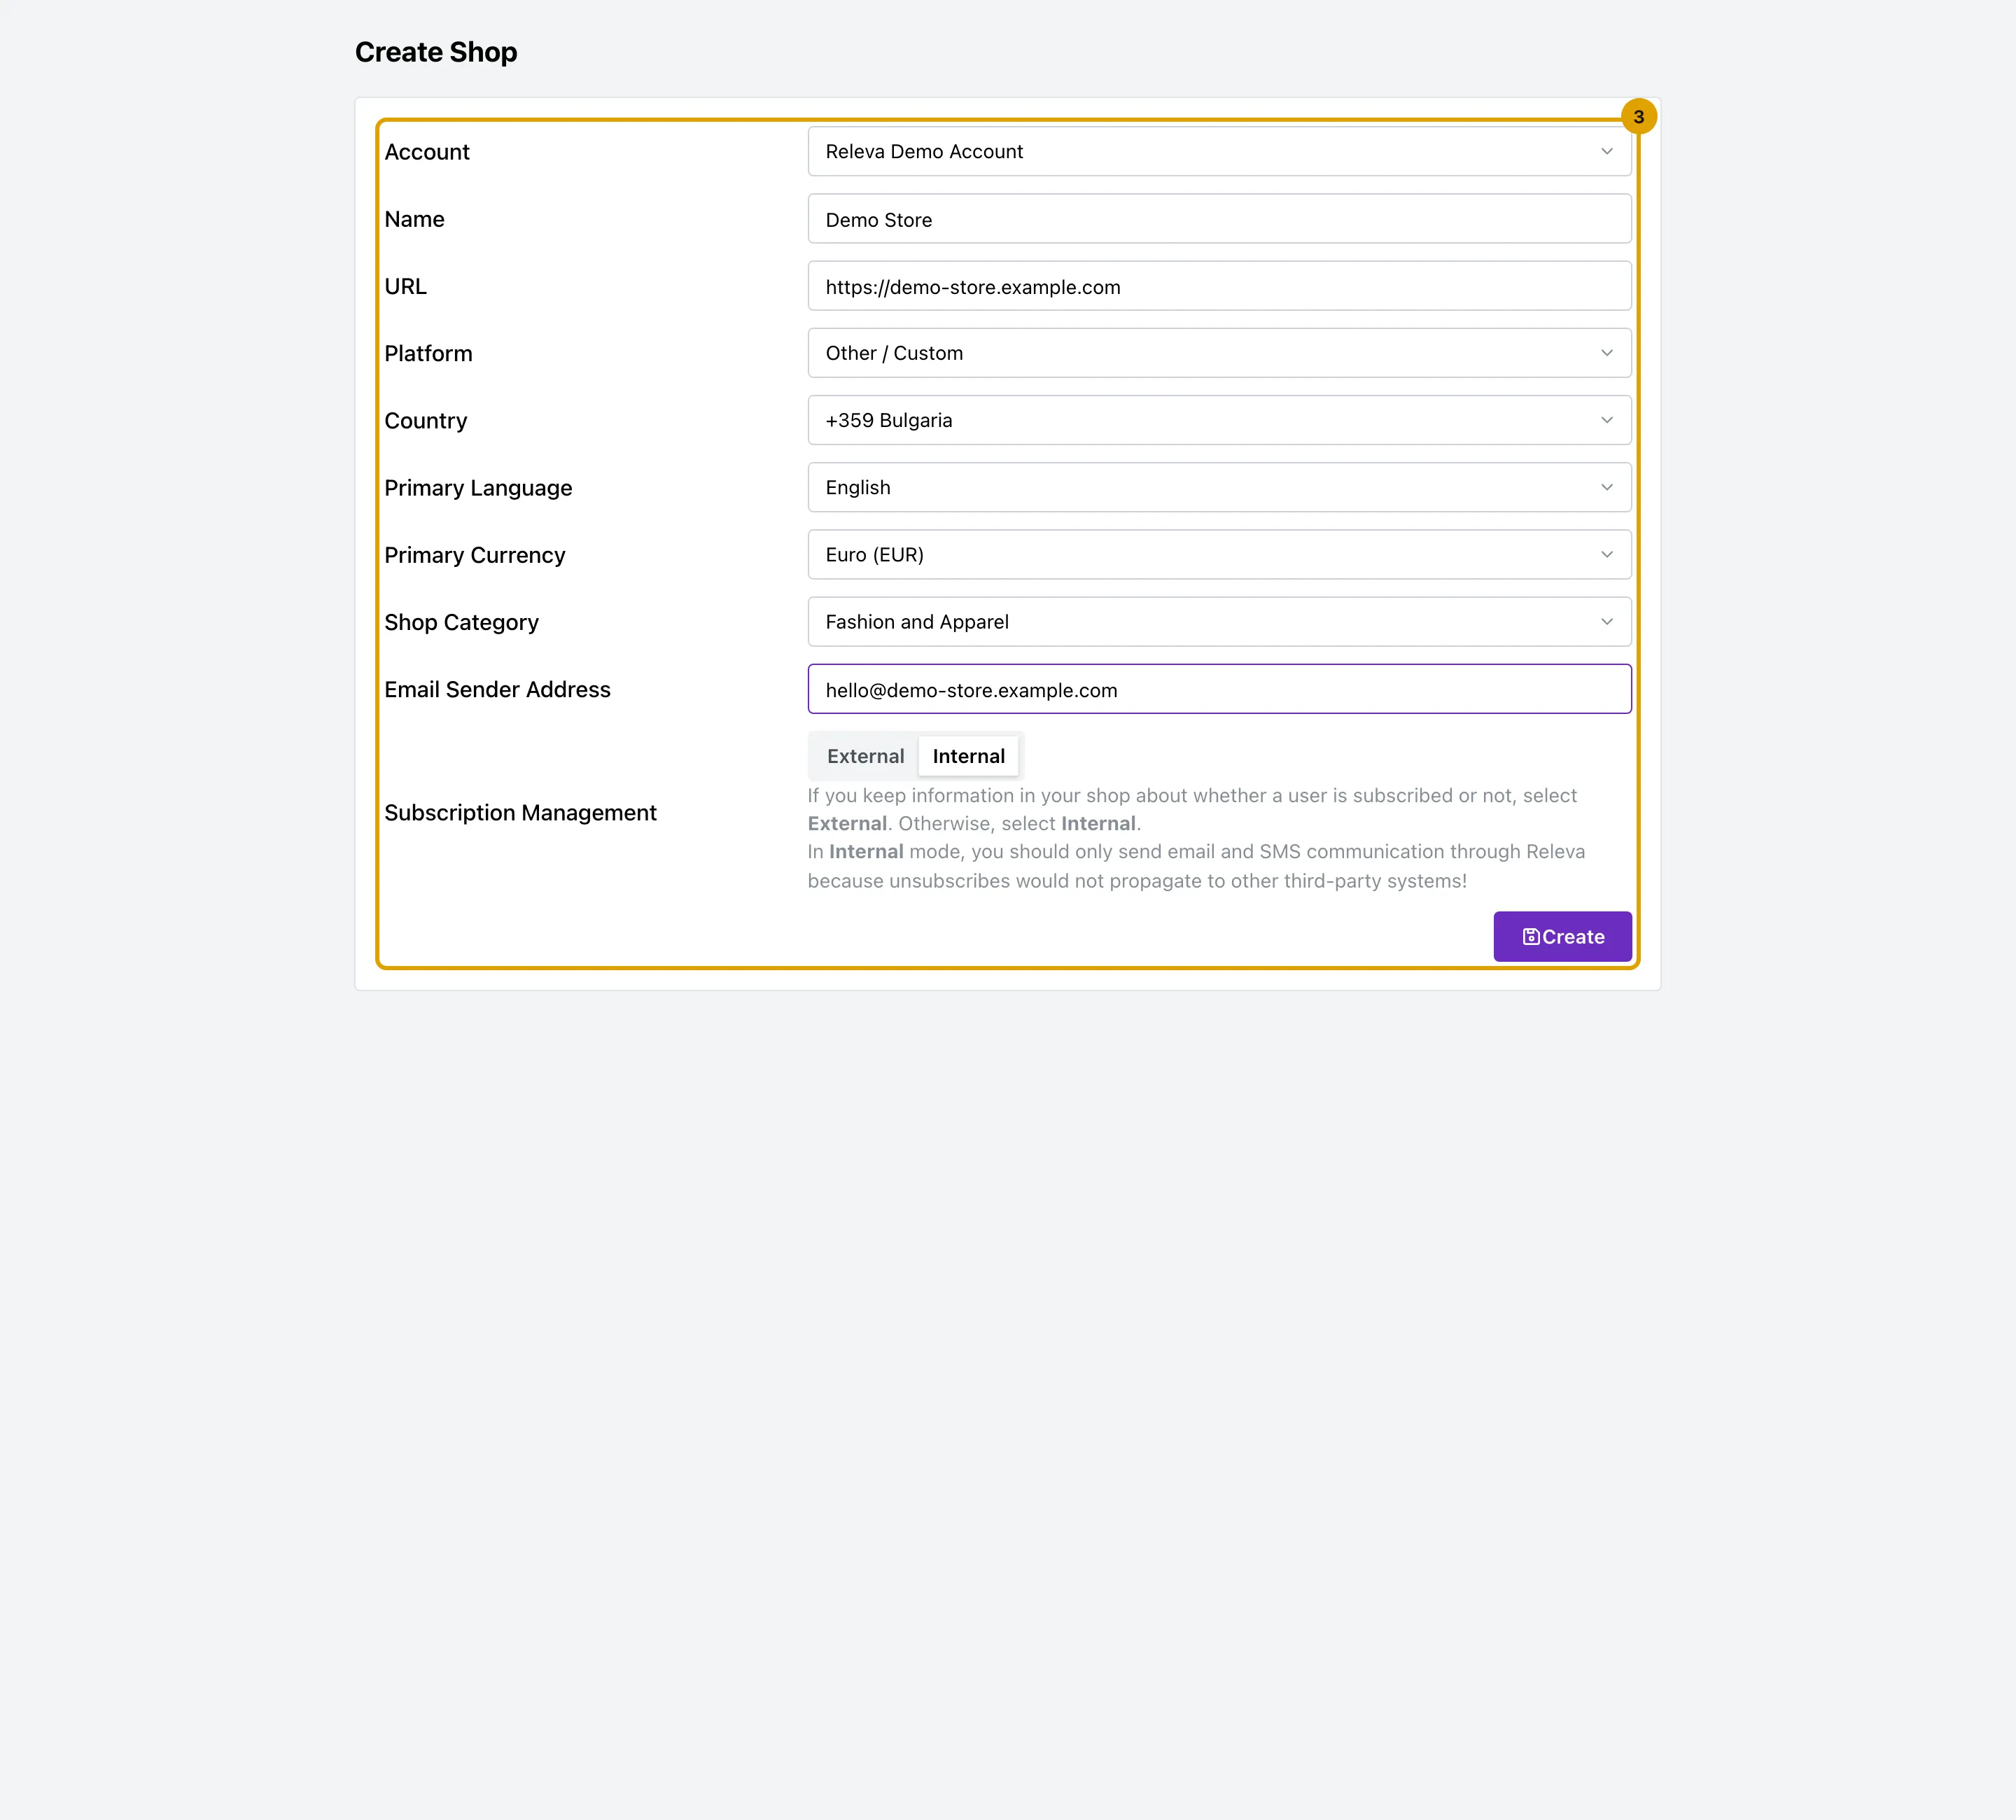
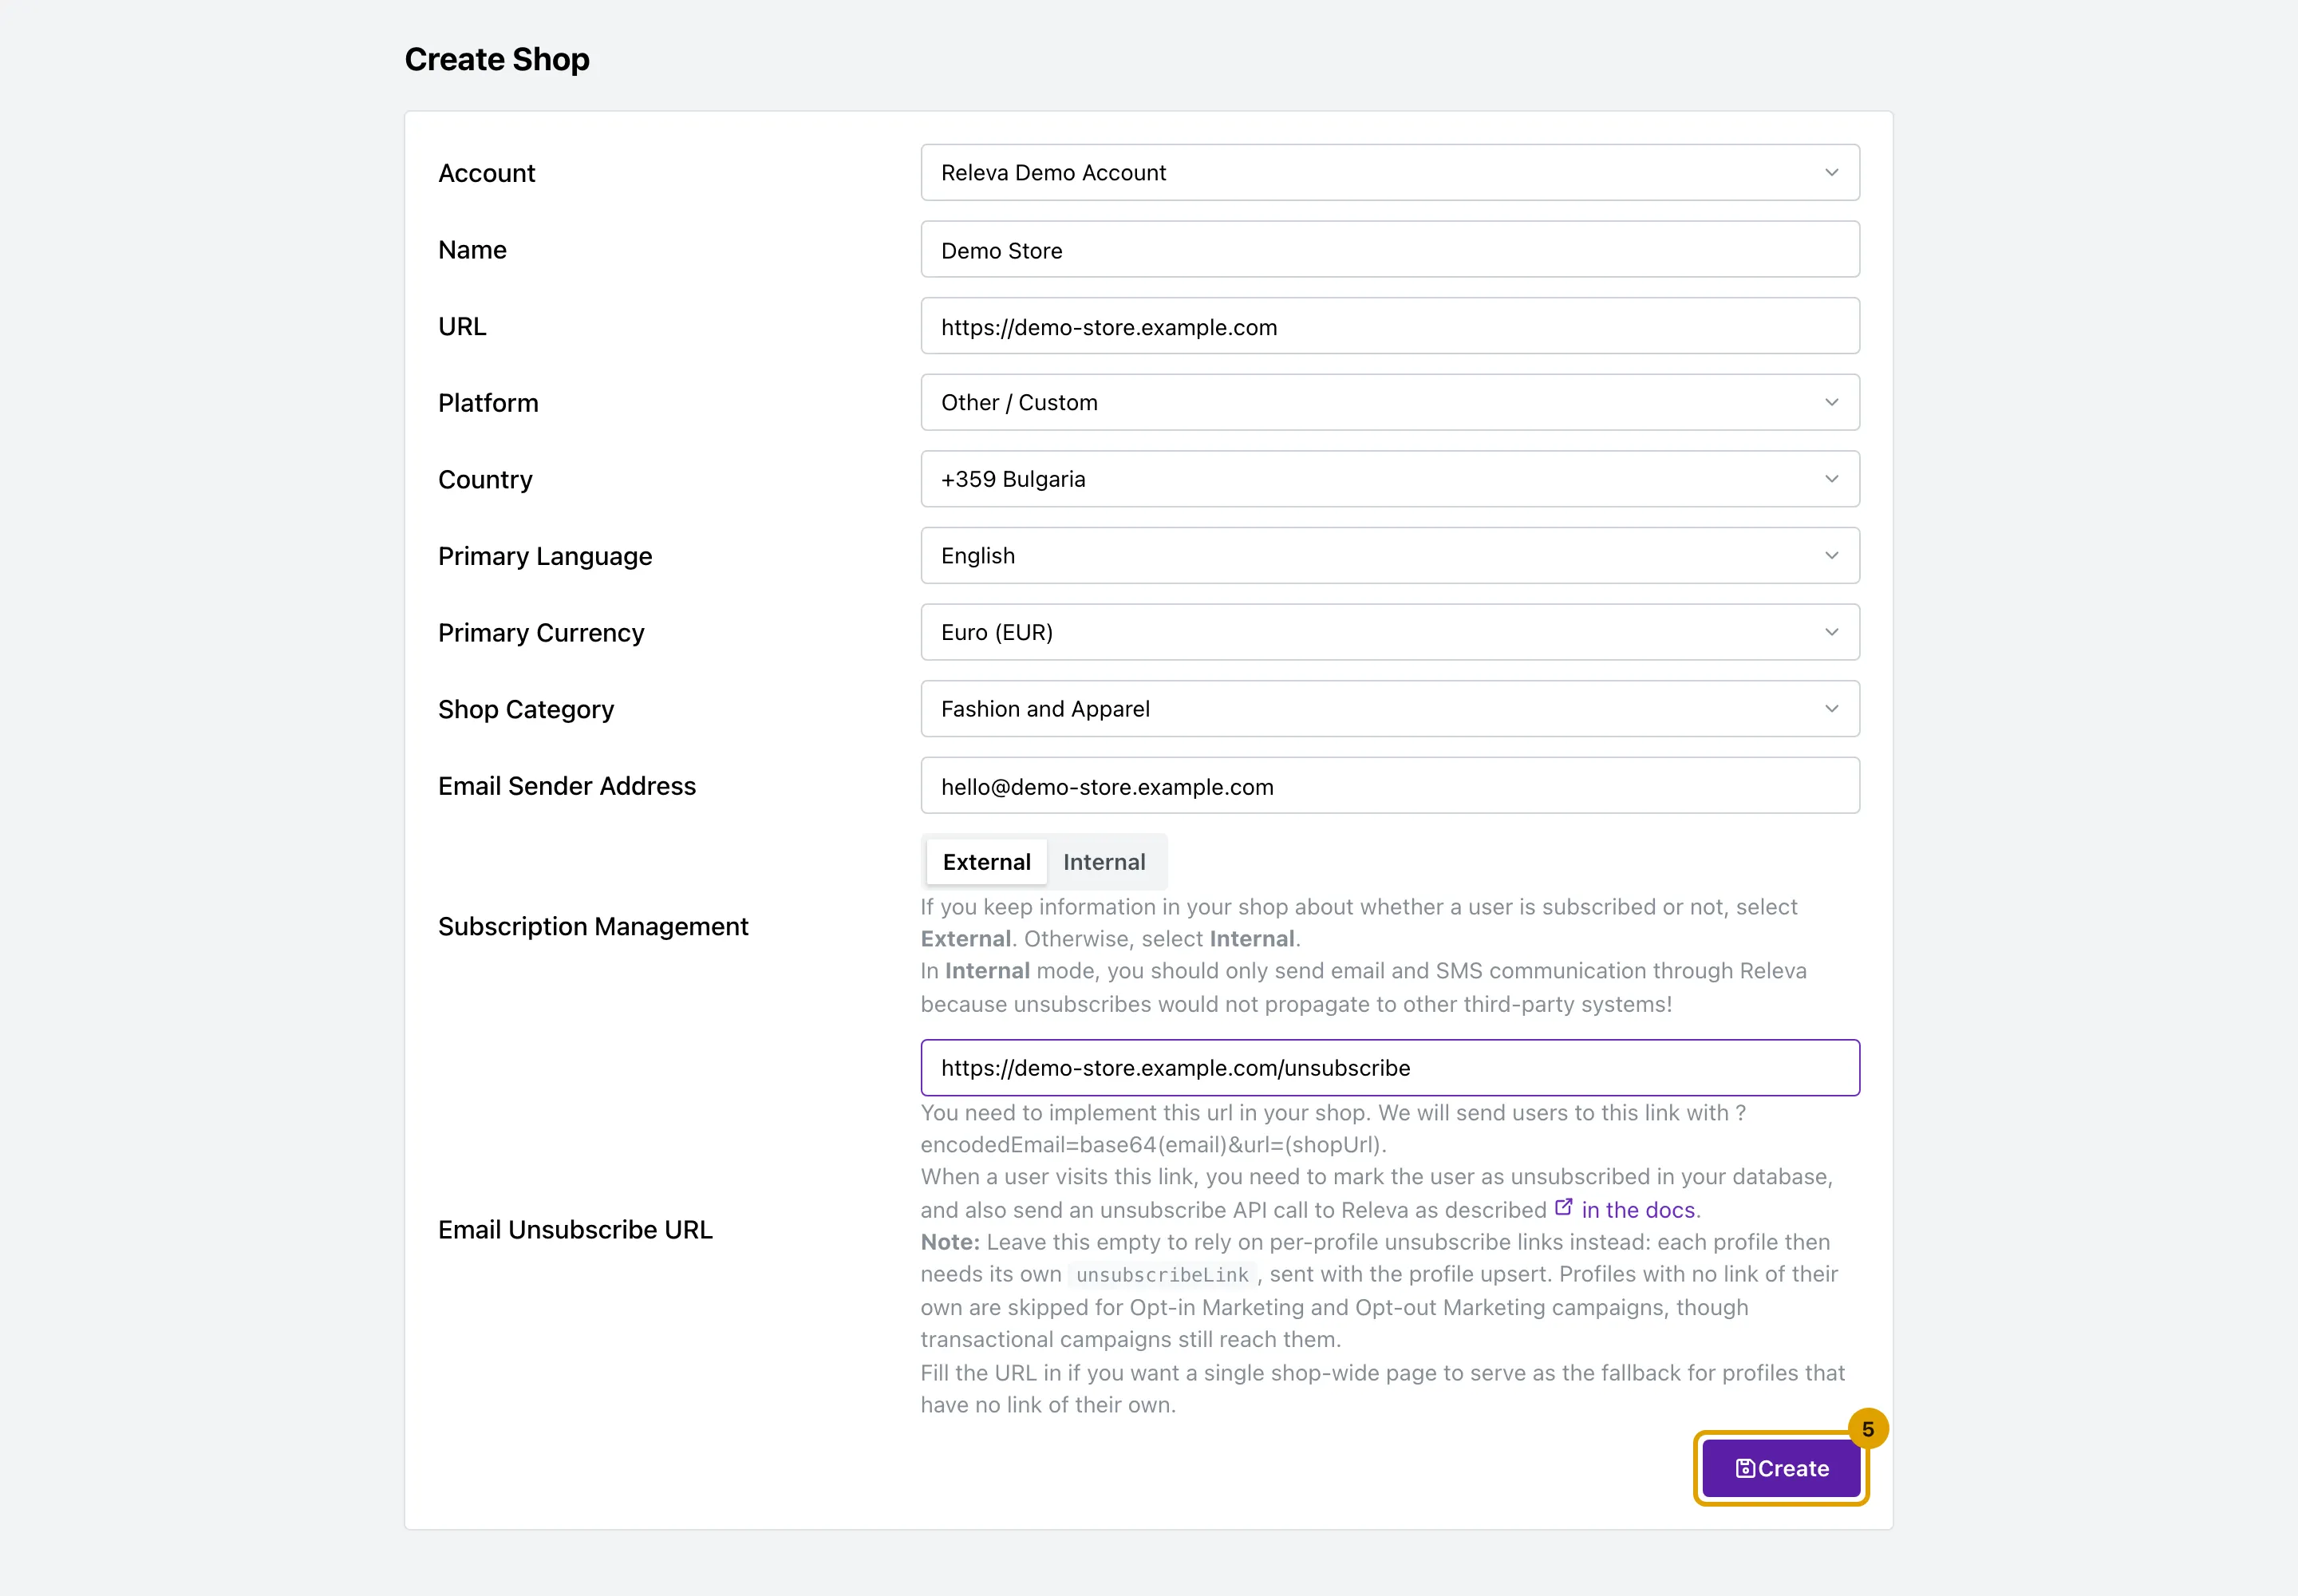
Fill in the form from top to bottom.
- Account: the account the shop belongs to.
- Name: how the shop is shown in Releva, for example Demo Store.
- URL: your store’s address with
https://orhttp://, for examplehttps://demo-store.example.com. - Platform: Cloudcart, Magento 1.x, Magento 2.x, OpenCart, Shopify, WordPress / WooCommerce, CS-Cart, MerchantPro, GombaShop, Shopiko, PrestaShop, Valival, Gomag, XXSale or Other / Custom. With Shopify, Create stays disabled.
- Country, Primary Language, Primary Currency and Shop Category.
- Email Sender Address: the address your emails are sent from, for example
hello@demo-store.example.com. Replies go to the same address until you change it.
Name, URL, Platform, Primary Currency and Email Sender Address are required. Choose a Primary Language too: Releva cannot create the shop without one.
-
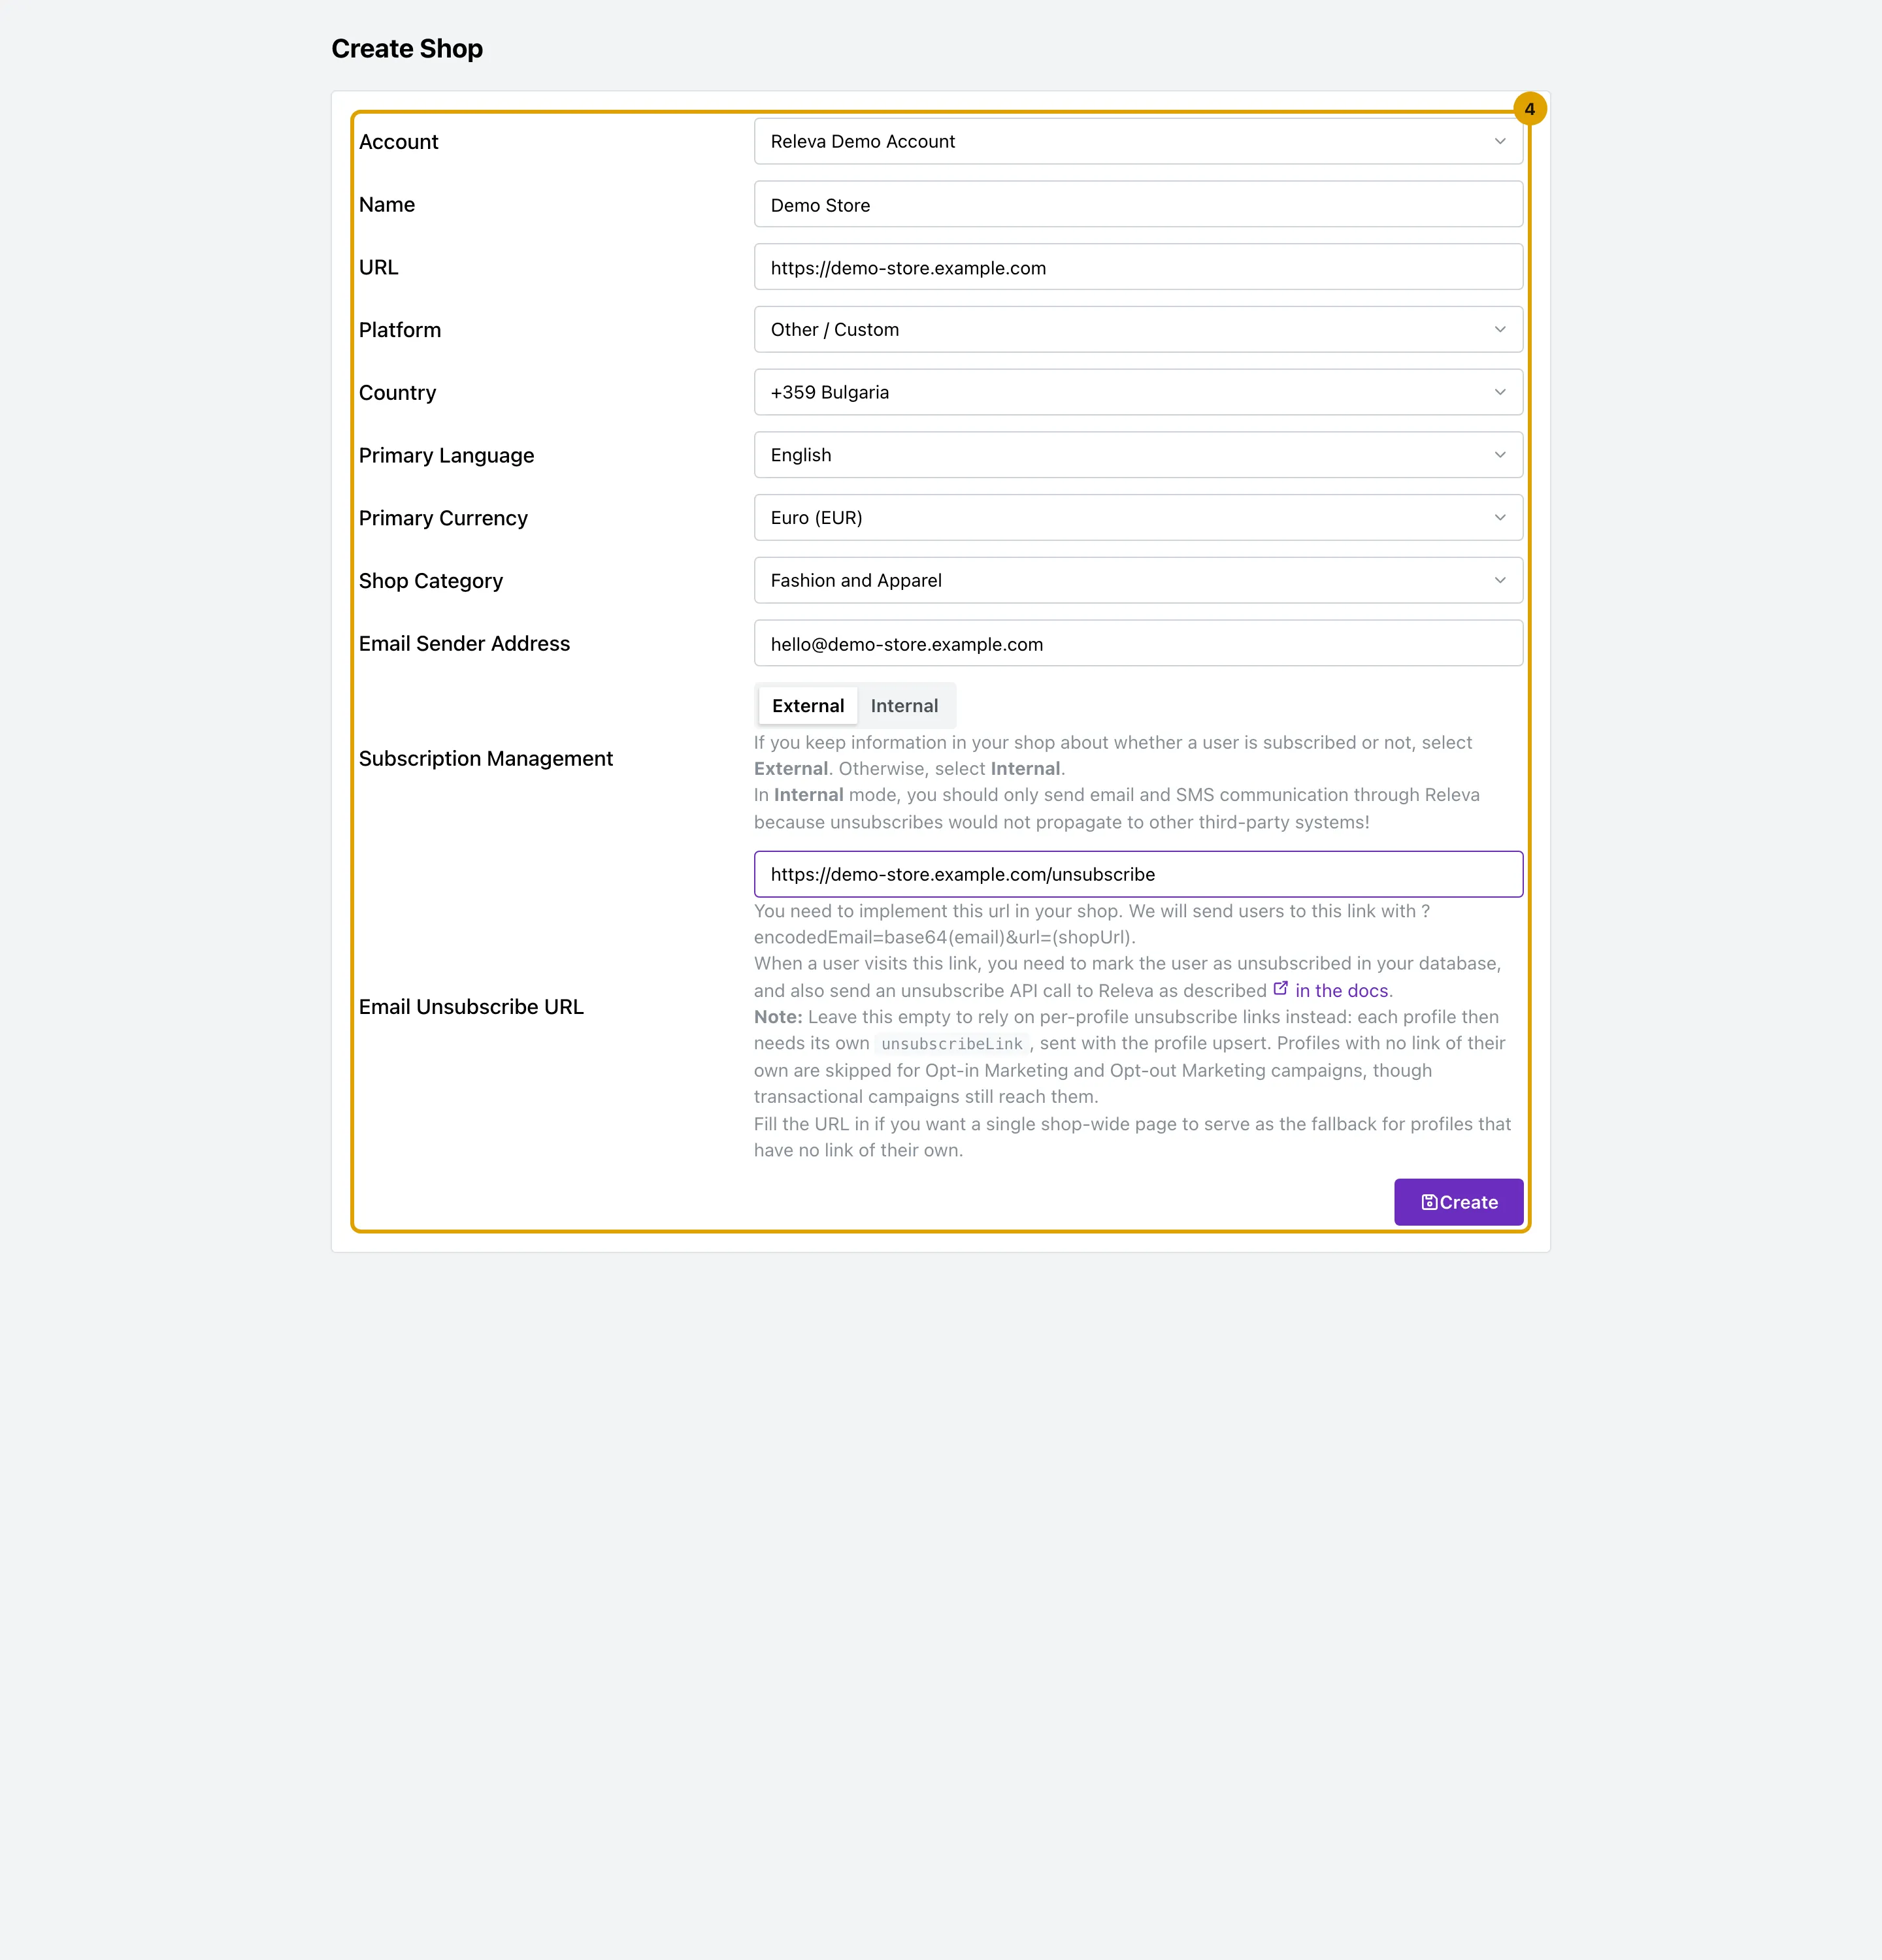
Under Subscription Management, choose who keeps the subscription status.
- Internal (the default): Releva keeps it. Send your email and SMS through Releva only, because unsubscribes in Releva do not reach other systems.
- External: your store keeps it. Email Unsubscribe URL appears. Enter the page of your store that unsubscribes a customer, for example
https://demo-store.example.com/unsubscribe. Releva sends customers there with?encodedEmail=(the email address, base64-encoded) and&url=(your shop address). That page must mark the customer as unsubscribed in your store and tell Releva. For developers: Unsubscribe a customer with the API.
With External, you can leave Email Unsubscribe URL empty if each profile carries its own unsubscribe link. Profiles without a link then receive no Opt-in Marketing or Opt-out Marketing messages; transactional messages still reach them.
-
Select Create.
Create stays disabled until the required fields are filled in. Releva creates the shop and opens it on Brand Identity.
-
If Welcome to Releva appears, select I accept Releva’s Terms of Use and I accept Releva’s Pricing Policy, then select Save.
Every new shop asks for this once. The window covers the page until you accept.
-
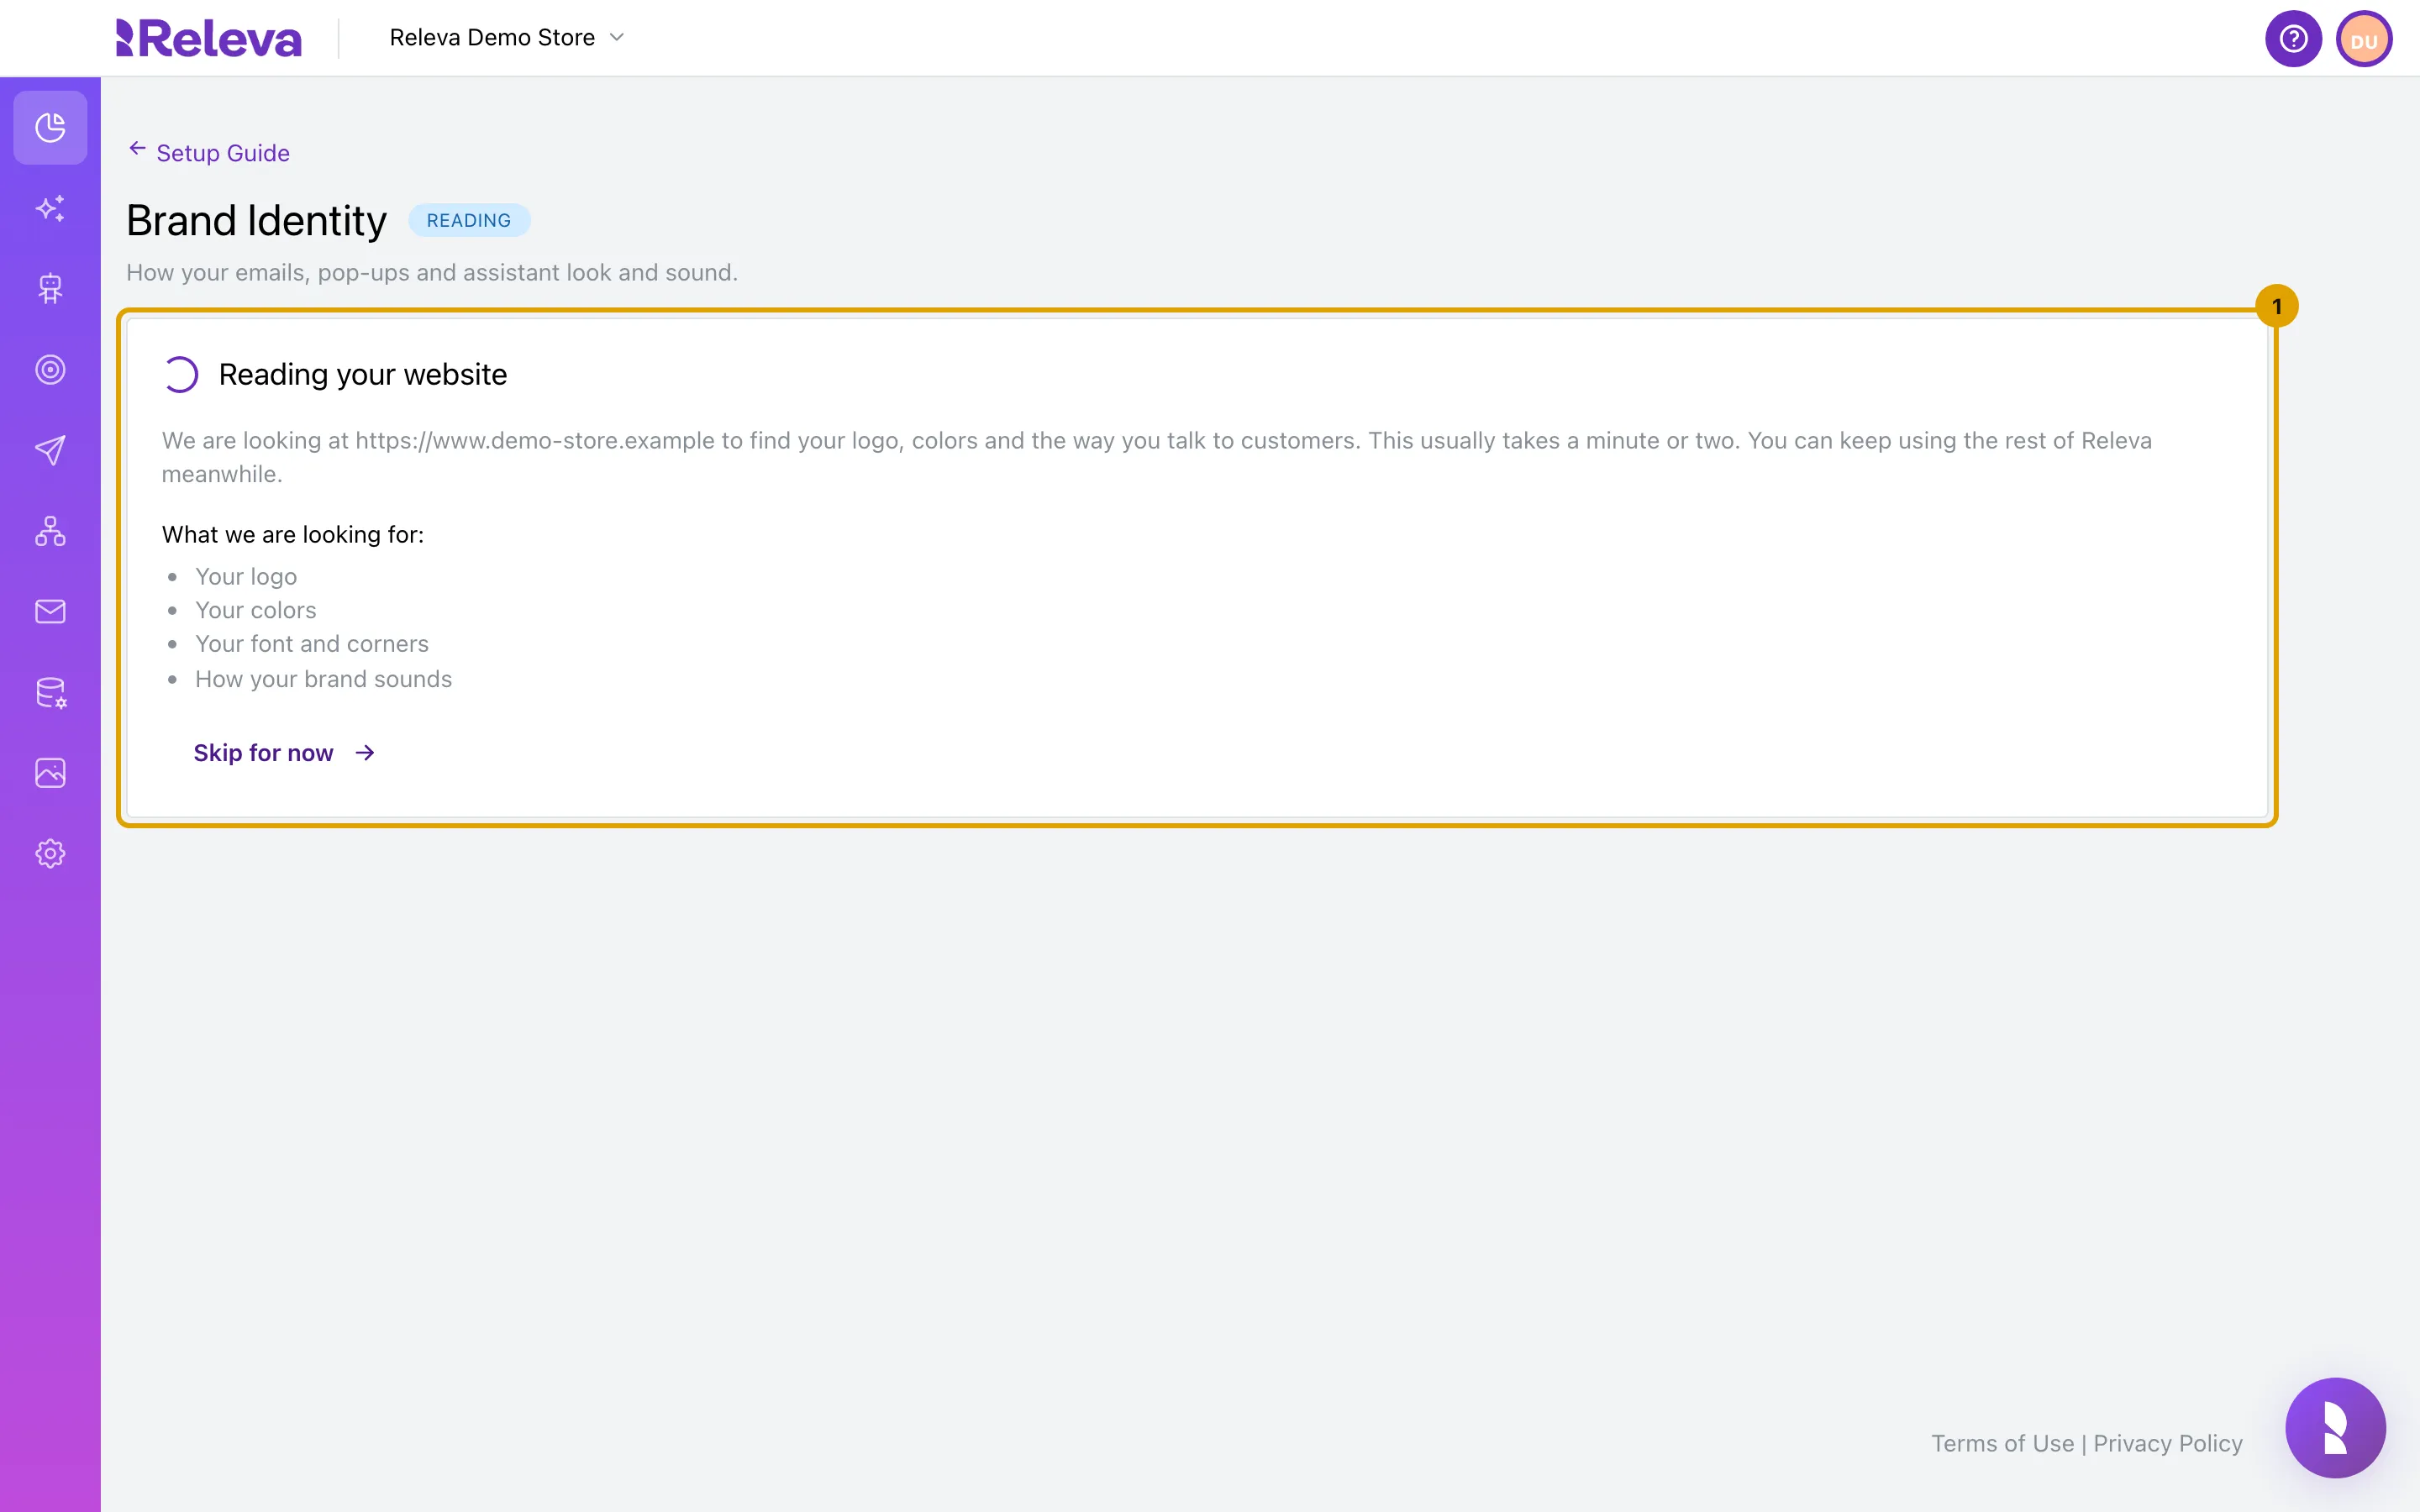
Wait while Reading your website is shown.
Releva looks at your website for your logo, your colors, your font and corners, and how your brand sounds. This usually takes a minute or two. The badge next to the title shows Reading. To do this later, select Skip for now.
-
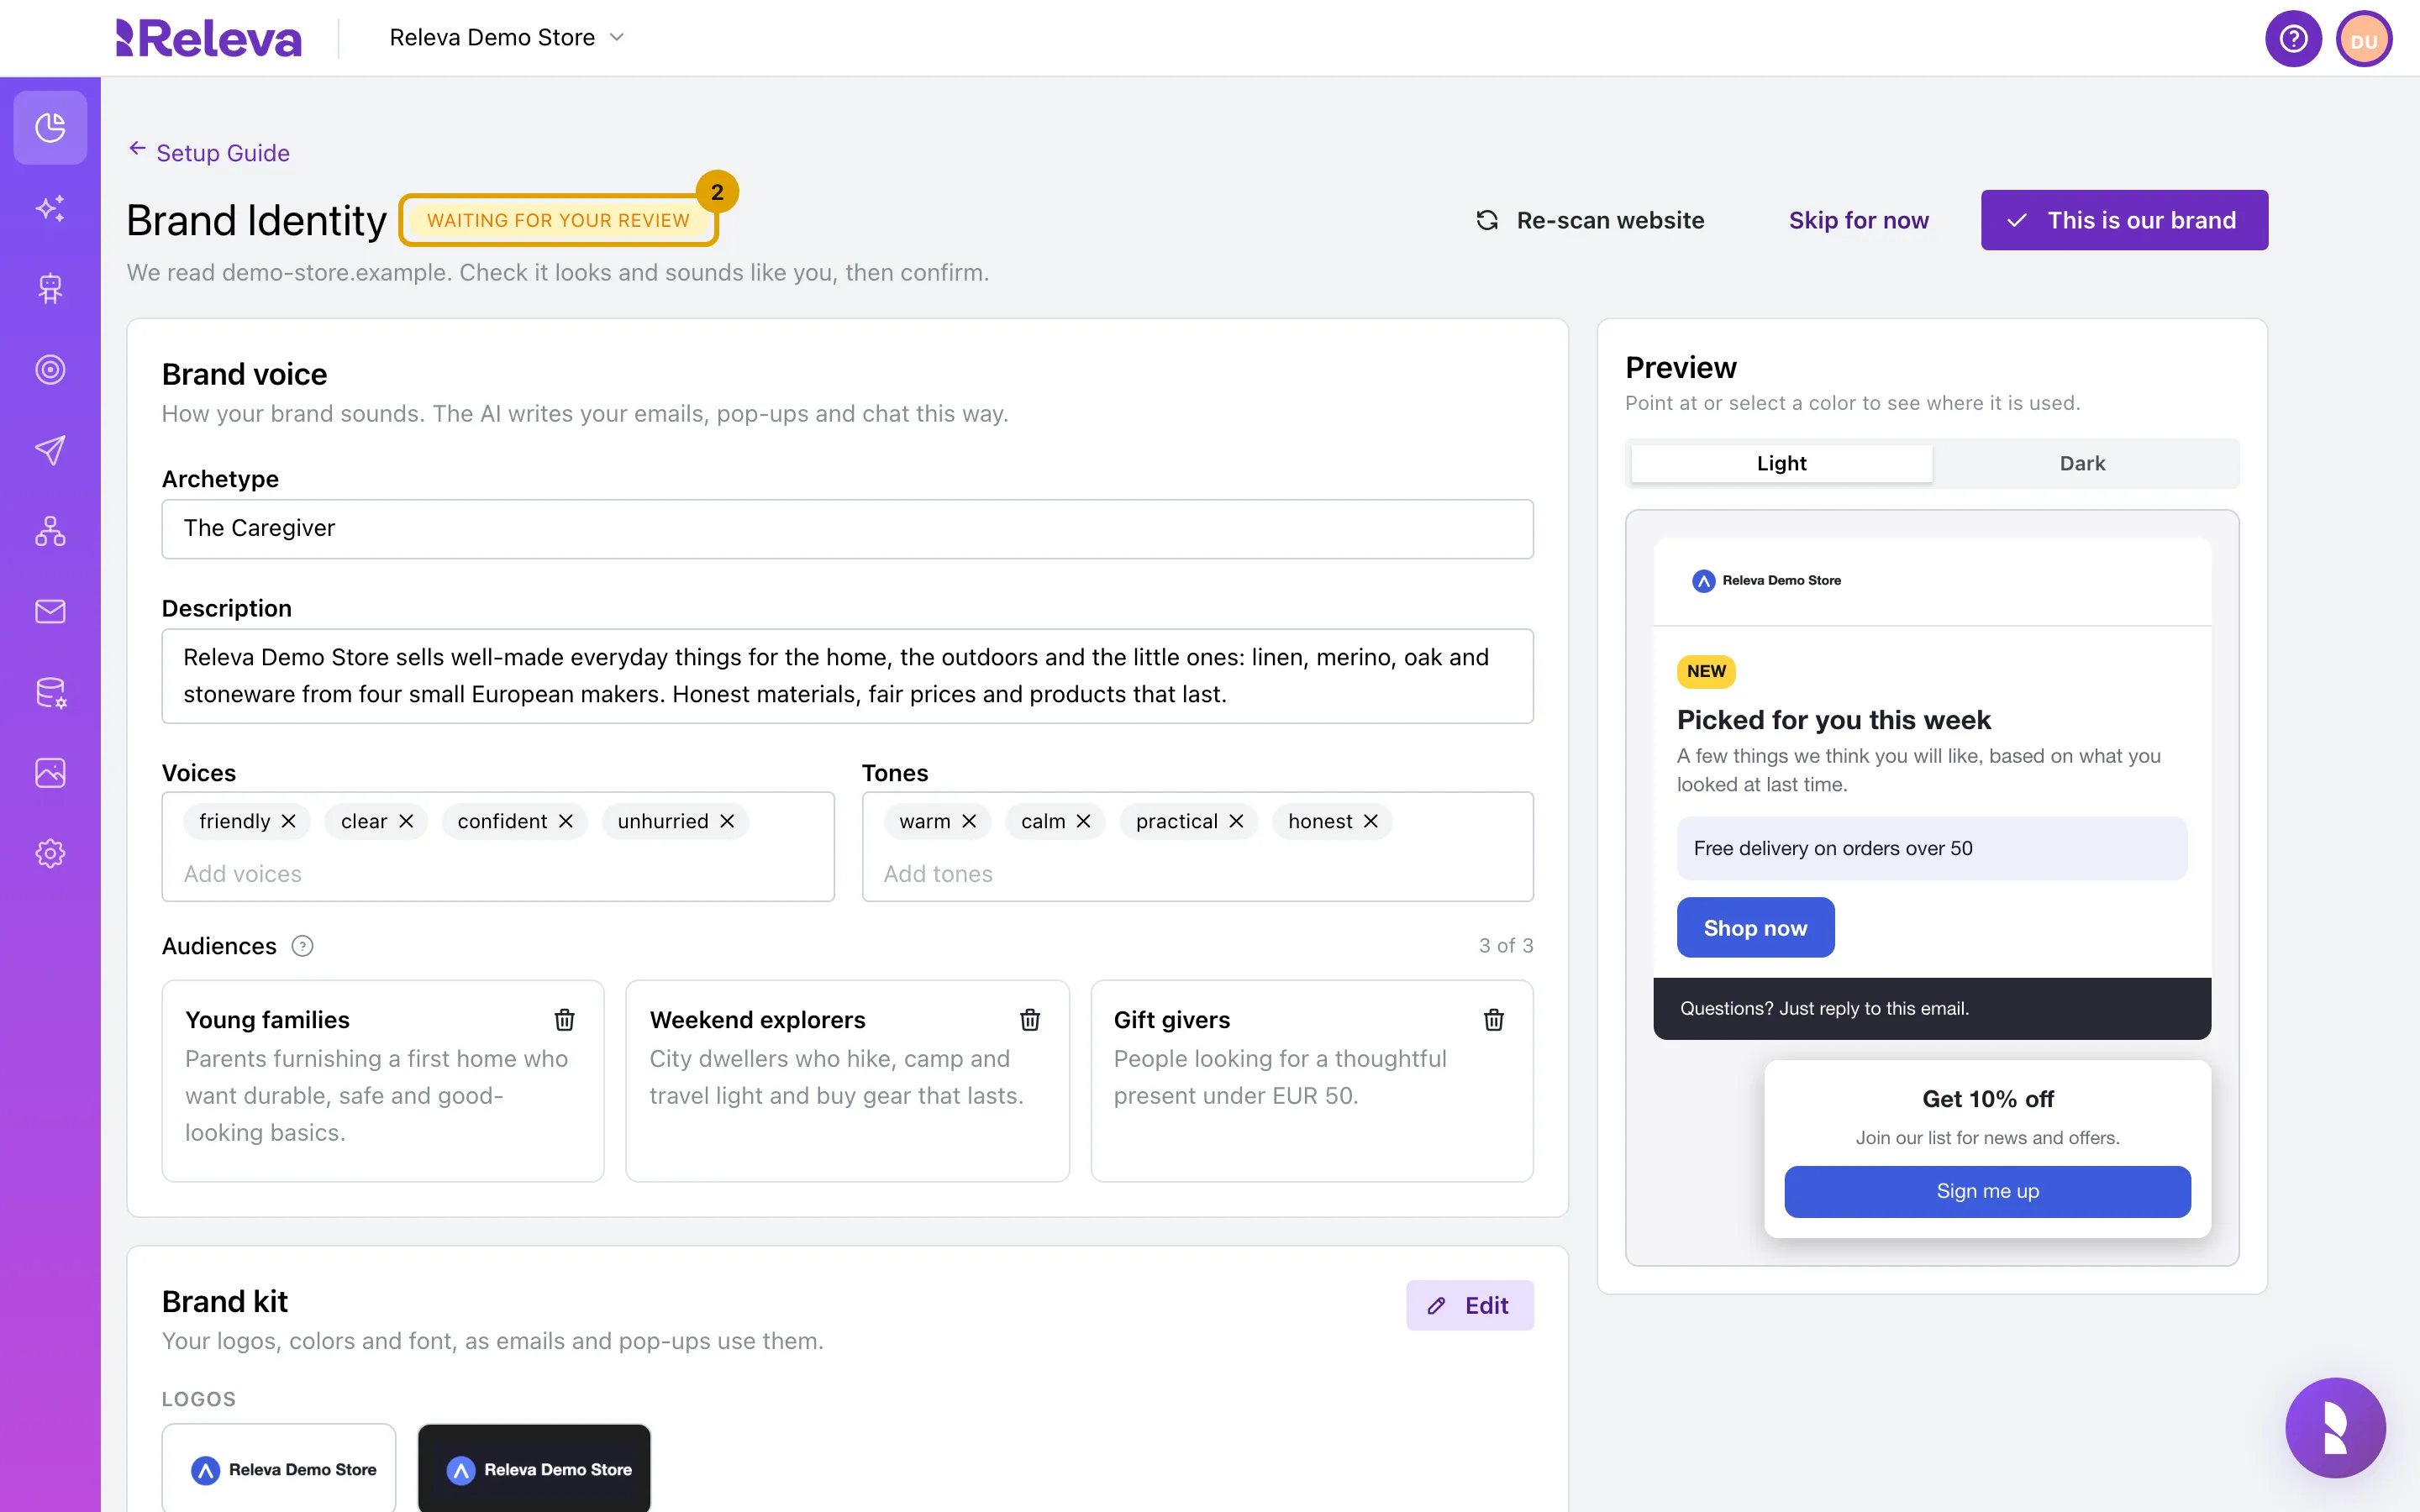
Check what Releva found.
When the reading is done, the badge shows Waiting for your review and the page fills in. Under Brand voice, check the Archetype, Description, Voices, Tones and Audiences. Under Brand kit, check the logos, colors, font and corners; select Edit to change them. Preview shows a sample email and sign-up pop-up in your brand. For every field, see Set up your Brand Identity.
-
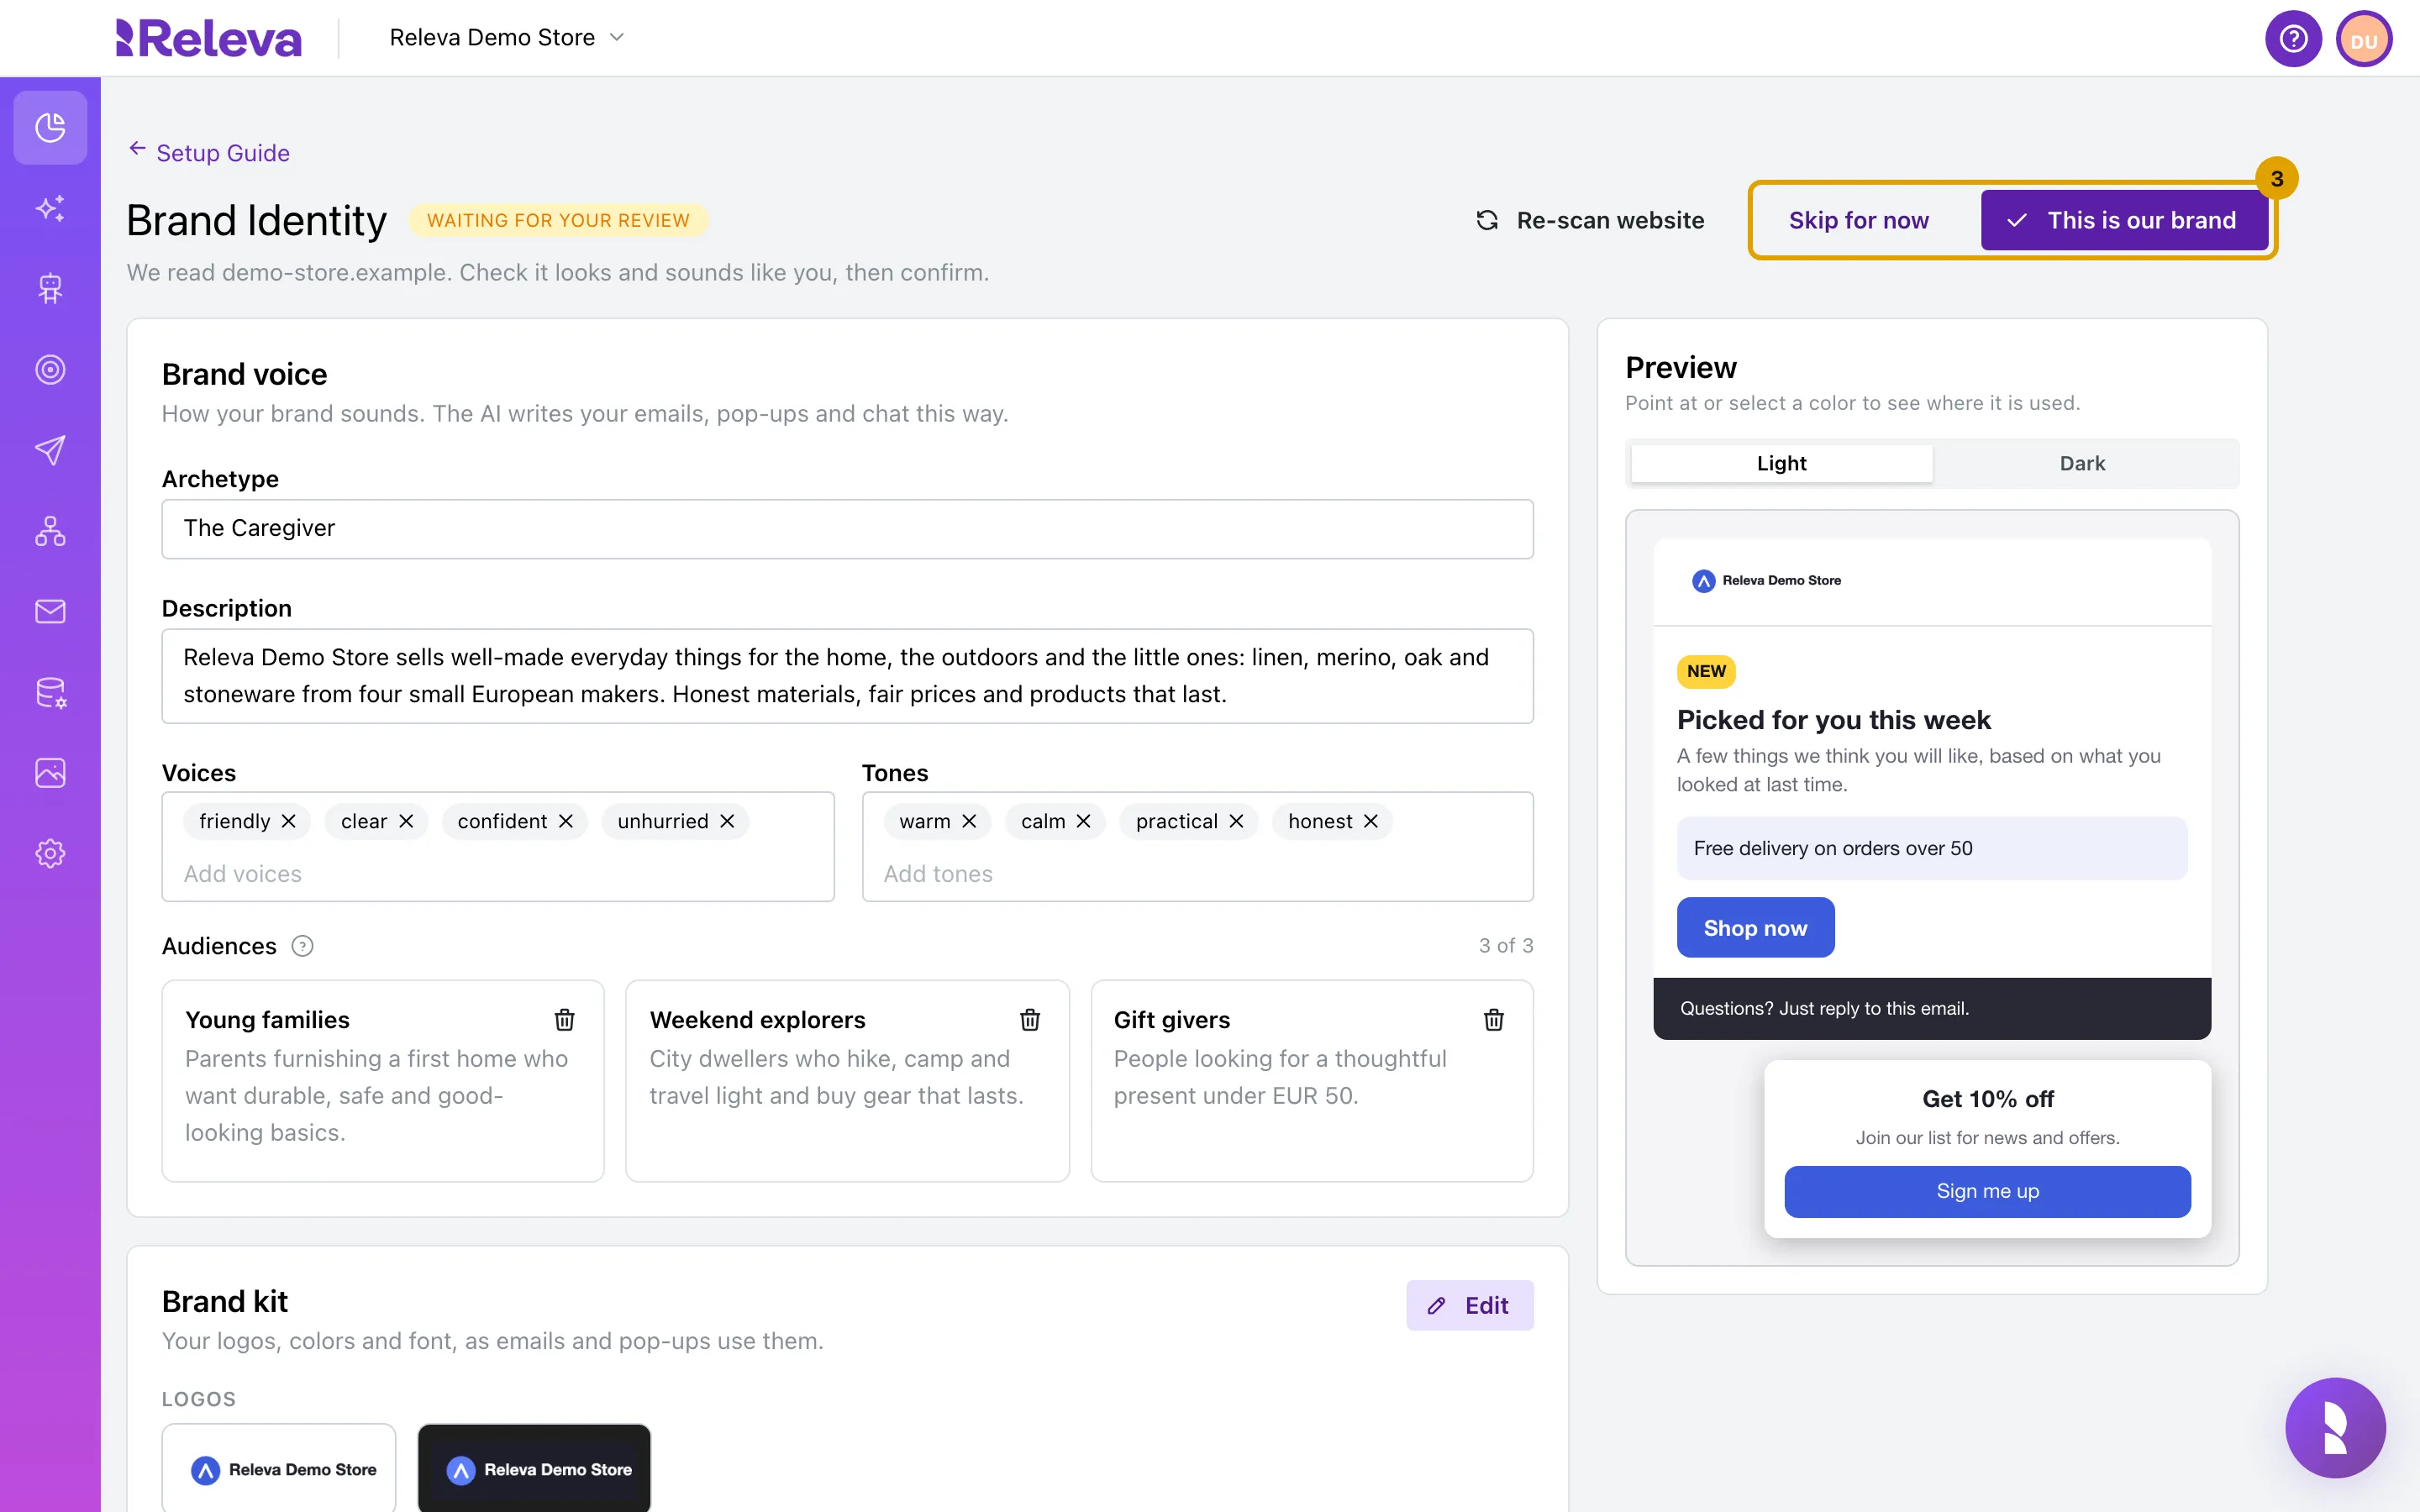
Select This is our brand to confirm, or Skip for now to do it later.
This is our brand saves your changes and confirms the brand: from then on your emails, pop-ups and assistant use it. Skip for now keeps nothing you changed on this page and leaves the brand unconfirmed.
-
Continue in the How-To Guide.
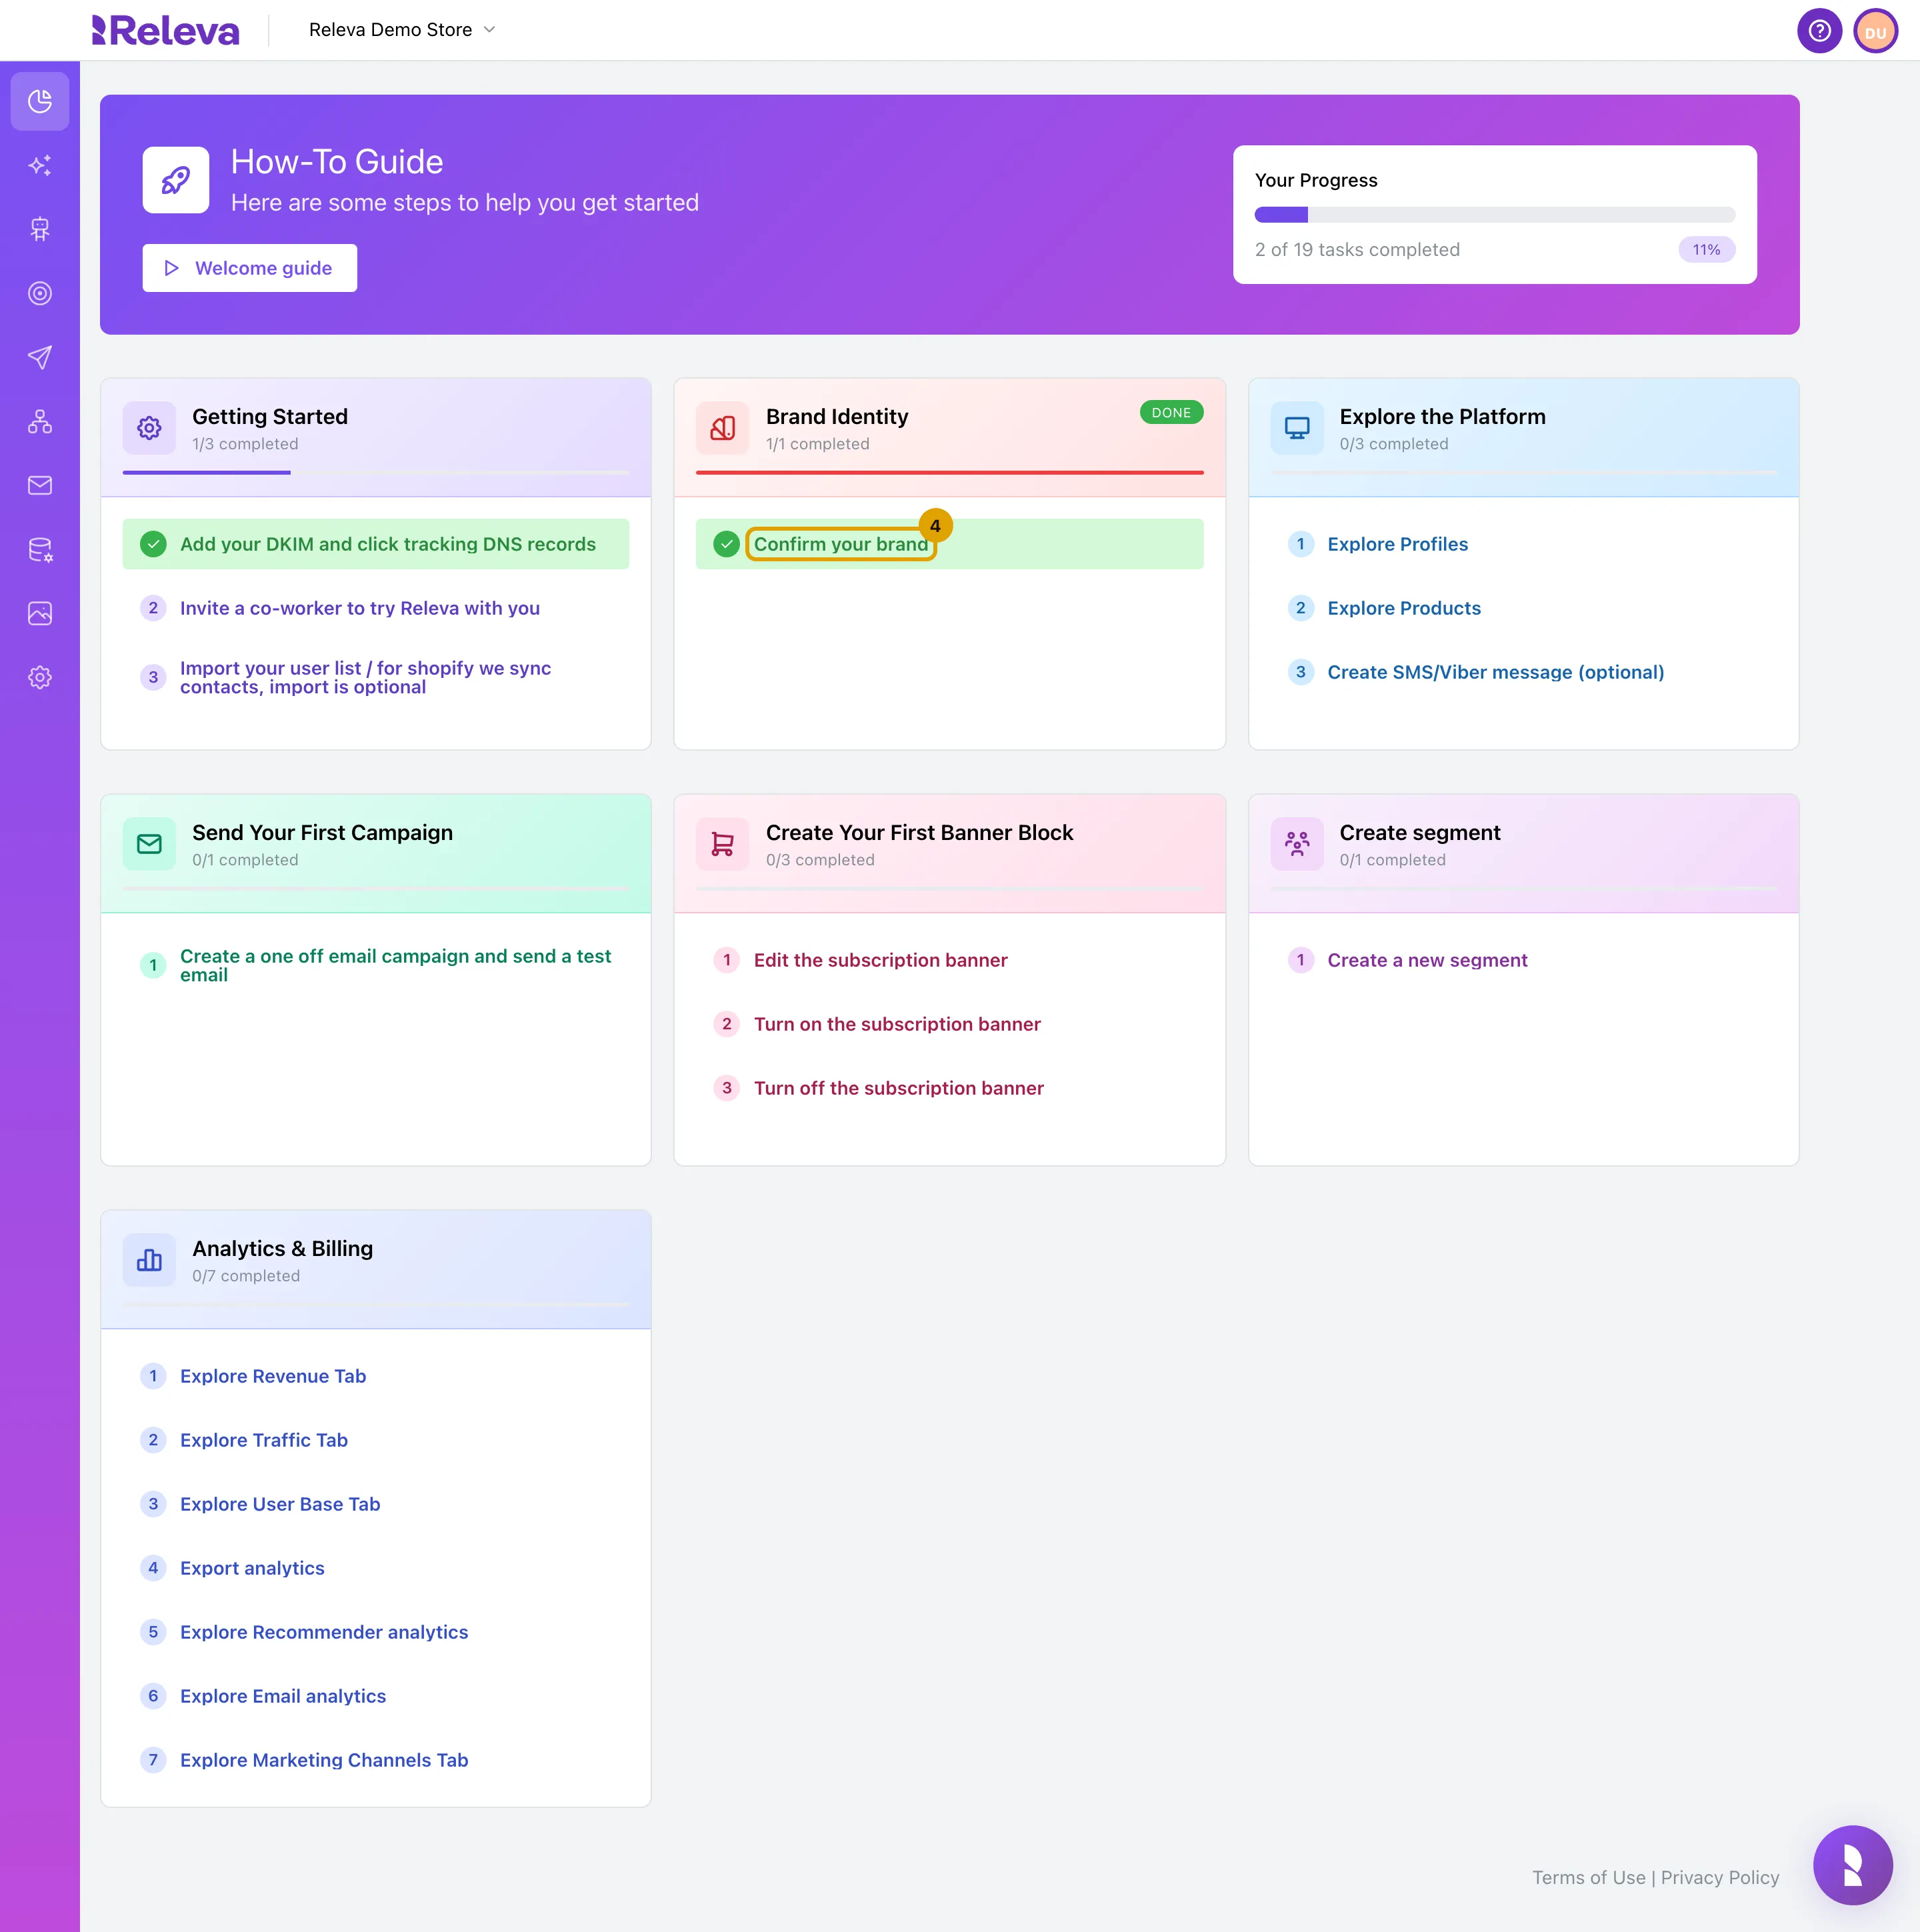
Either button opens the How-To Guide. After This is our brand, Confirm your brand in the Brand Identity card is ticked. Work through the other cards from there; see Get started with Releva.
Check it worked
Section titled “Check it worked”- The new shop appears in the shop switcher at the top of the admin.
- Under Settings › Shop & Integration, the shop’s URL, platform, currency and sender address are the ones you entered.
- In the How-To Guide, the Brand Identity card shows Done if you confirmed your brand.
Troubleshooting
Section titled “Troubleshooting”Create stays disabled. A required field is empty, the URL does not start with https:// or http://, or Platform is Shopify. Shopify shops are created by installing the Releva app.
“The URL field is required. Please provide a URL with a valid protocol.” Add https:// in front of your store’s address.
“sender email is required”. Enter an Email Sender Address.
A red alert says “We couldn’t read your website: …”. Releva could not read the site, for example because it sits behind a login, blocks bots, or is not online yet; a site Releva cannot reach is reported as it blocked our bot. The page shows empty fields. Fill in your brand by hand and select This is our brand, or select Skip for now and use Re-scan website later, once the site is public. See Set up your Brand Identity.
A yellow alert says “This is taking longer than usual”. The page stops waiting after three minutes. Select Check again; the reading may still be running.
I skipped Brand Identity and want to do it now. In the How-To Guide, select Confirm your brand in the Brand Identity card, or open AI Hub › Brand Identity in the sidebar. The page says You skipped this step.
I cannot see the New Shop tab. The shop you are in is a Shopify shop. Switch to another shop of the account, or install the Releva app for your new Shopify store.