

Connect your Meta account to Releva
Facebook ads, Facebook product sets, Facebook audiences and WhatsApp messages all use one Meta connection per shop. This guide connects Facebook to Releva, picks the Meta business, ad account, page and pixel Releva works with, and sends your catalog to Meta for the first time. For how the pieces fit together, read How Facebook ads work.
Before you start
Section titled “Before you start”- You can log in to Facebook as a user with admin access to your Meta business, its ad account, the Facebook page your ads run from and your Meta pixel.
- In Meta Business Manager, accept the Custom Audience and the Value Based Custom Audience terms of service for the ad account. Releva cannot create Facebook audiences from your segments until you do.
- Releva switches on the Facebook integration for your shop. Until then, the settings save but no catalog or audience sync runs, even when you select Sync Now. Ask your Releva contact to switch it on.
Log in with Facebook
Section titled “Log in with Facebook”These screens belong to Meta, so their labels can change.
-
Go to Settings › Facebook & Whatsapp. The Facebook tab opens with a Connection card
-
Select Connect Facebook to Releva
-
In the Facebook window, log in and allow every permission Facebook asks for: your businesses, pages, ad accounts, catalogs and WhatsApp accounts
When the window closes, the Facebook tab shows the connected Facebook user. If the window does not open, refresh the page and try again.
-
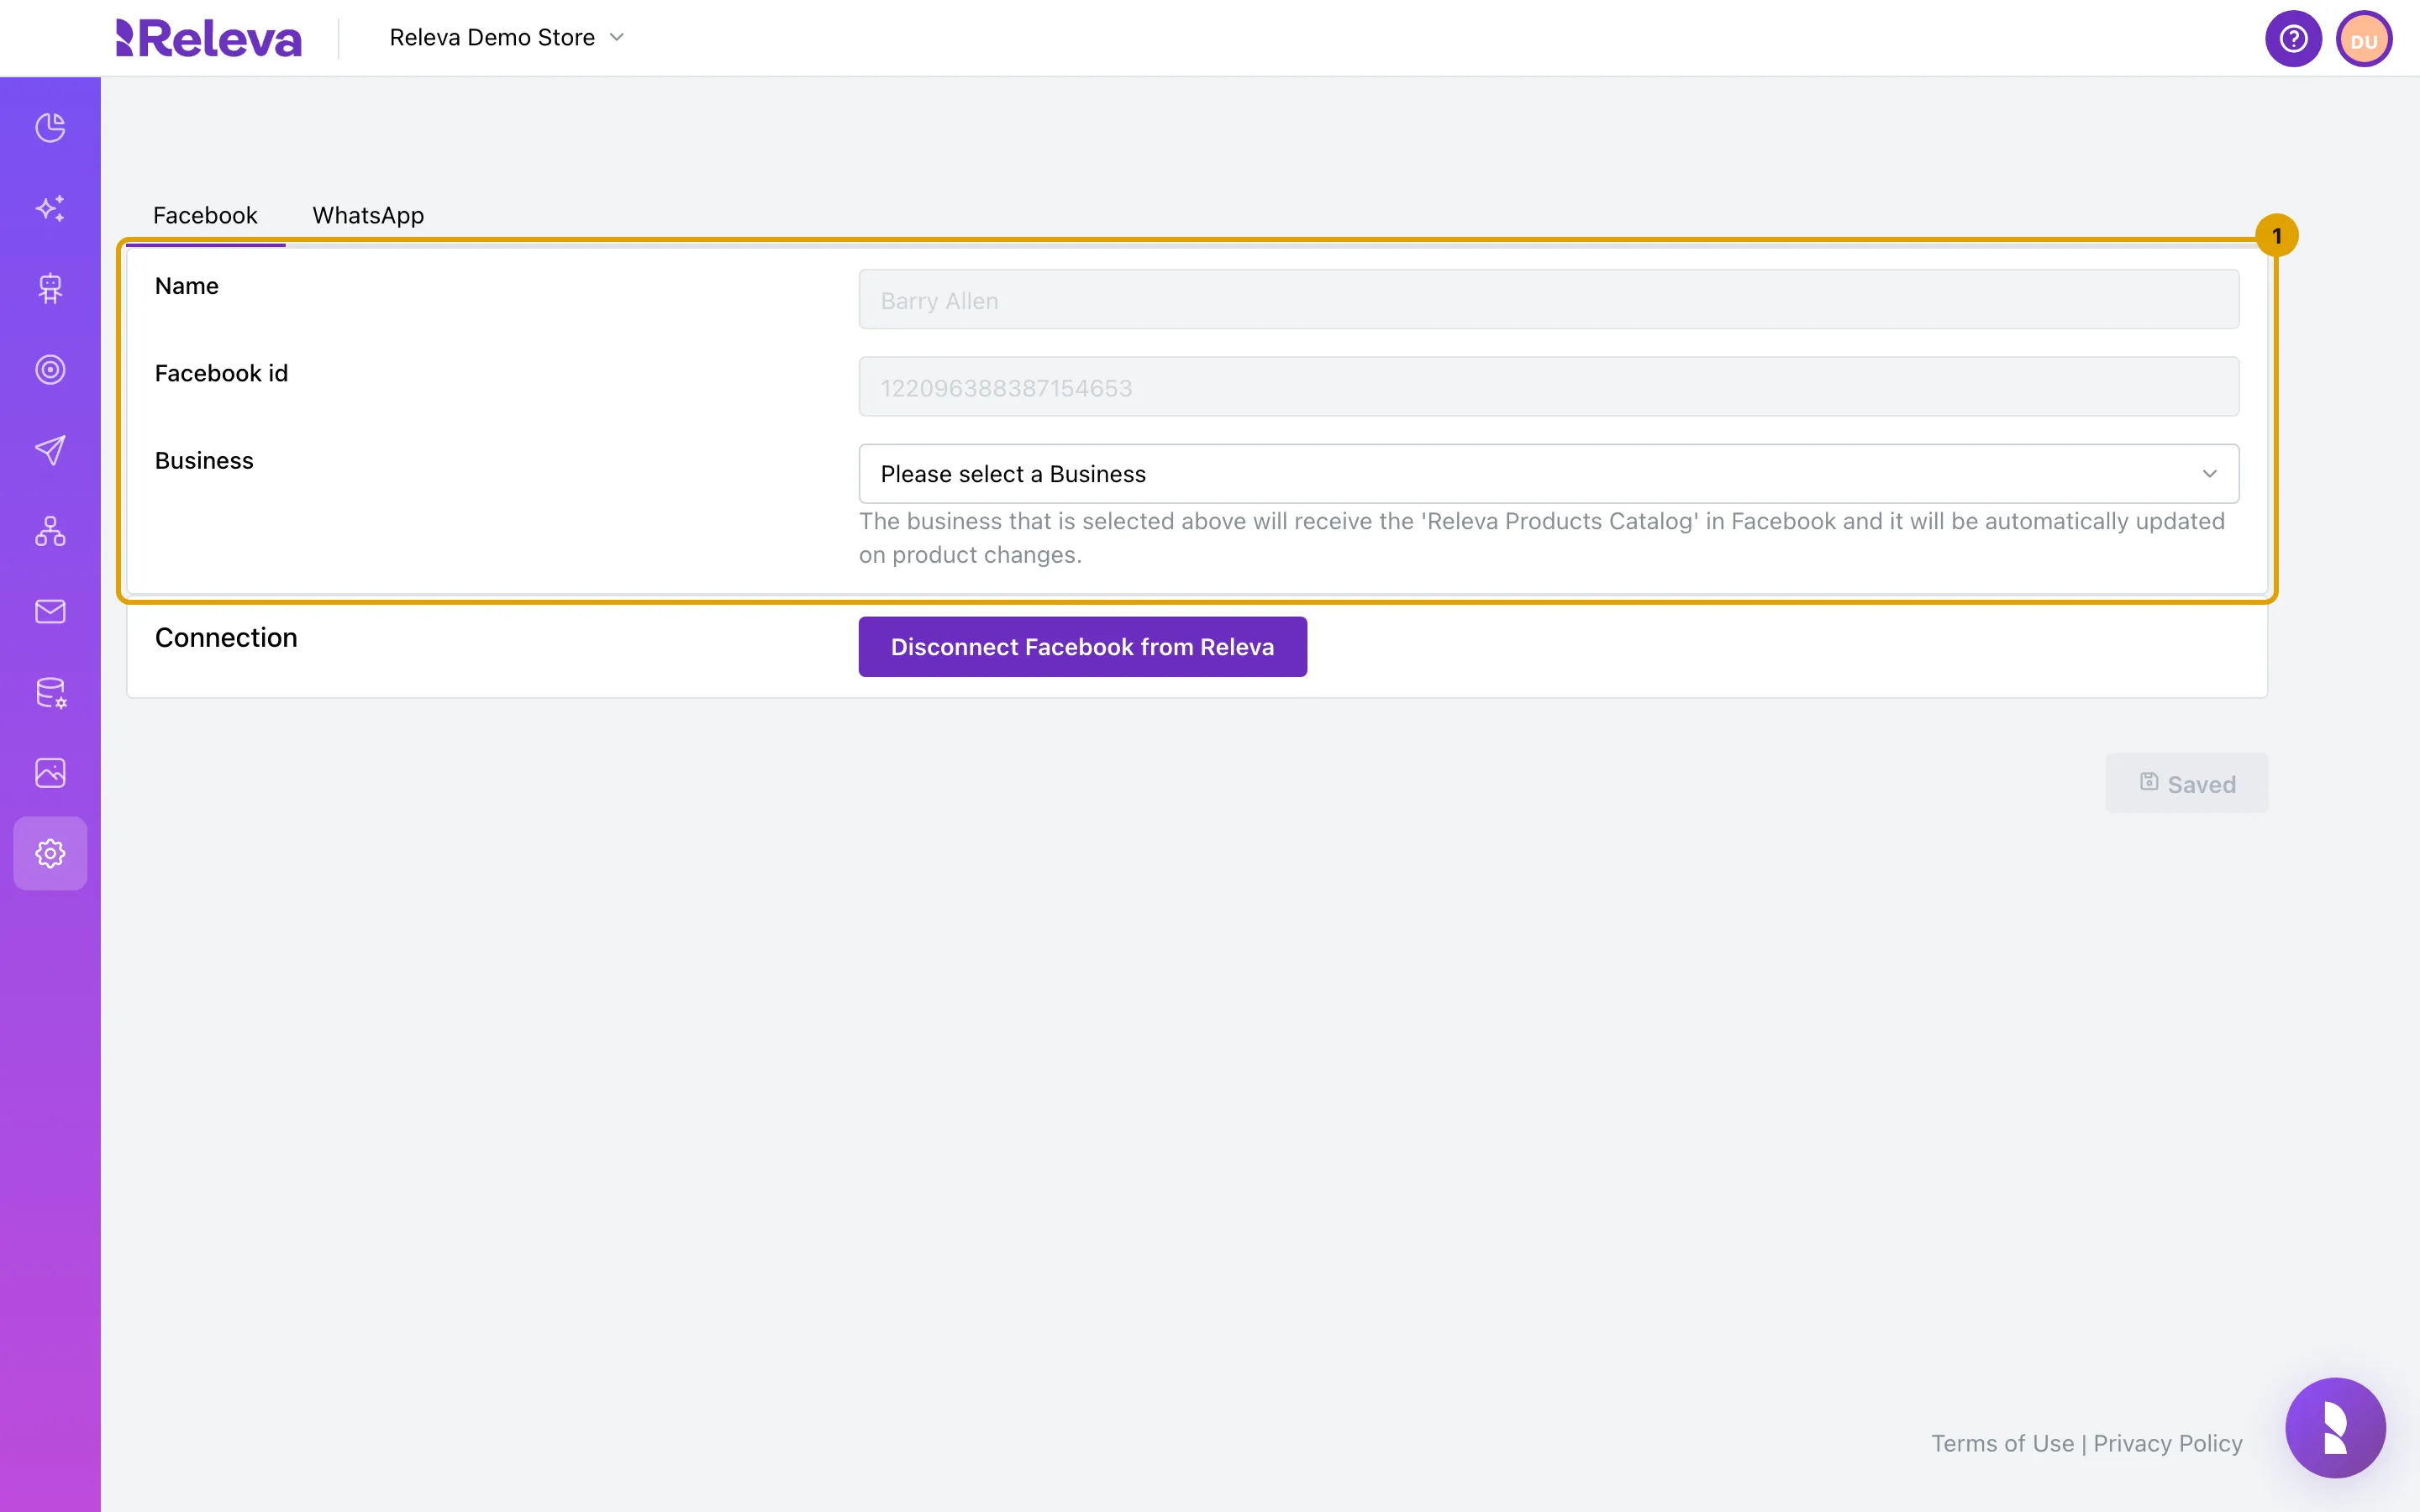
On the Facebook tab, check that Name and Facebook id show the Facebook user you logged in with
Only Business is shown at first. The other settings appear once you pick a business.
-
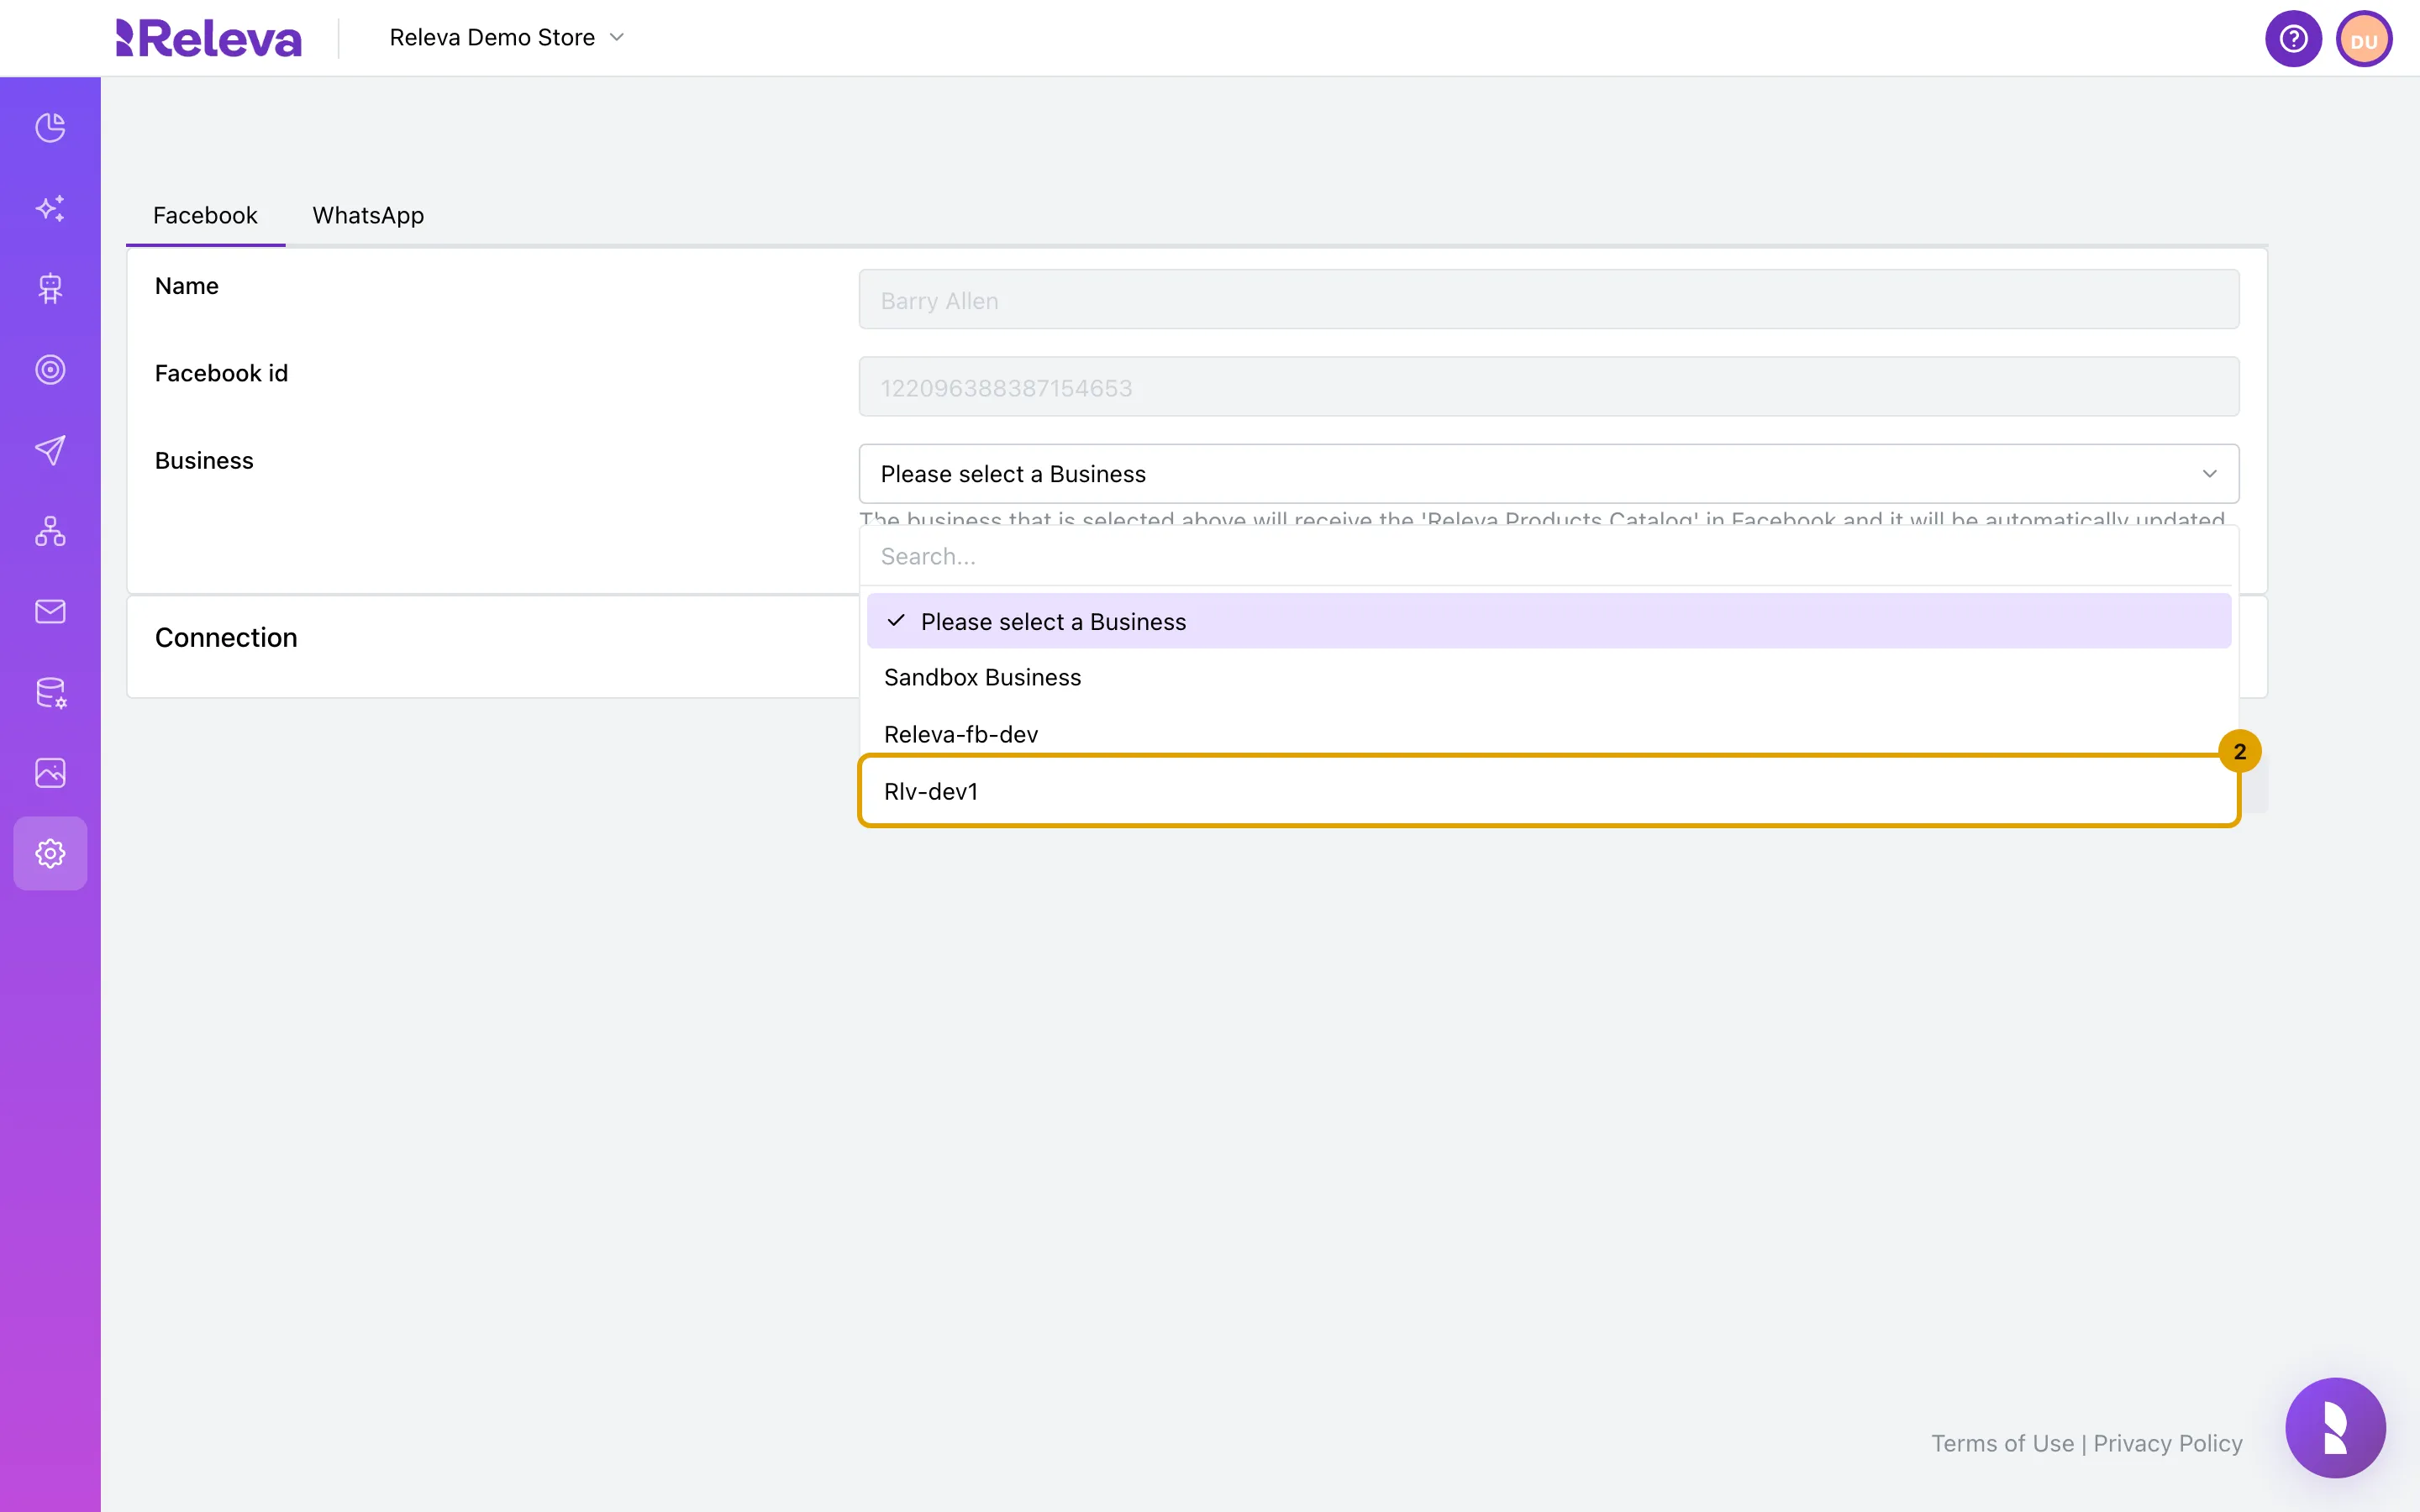
In Business, select the Meta business that owns your ad account
Releva creates its product catalog in this business and keeps it up to date when your products change.
-
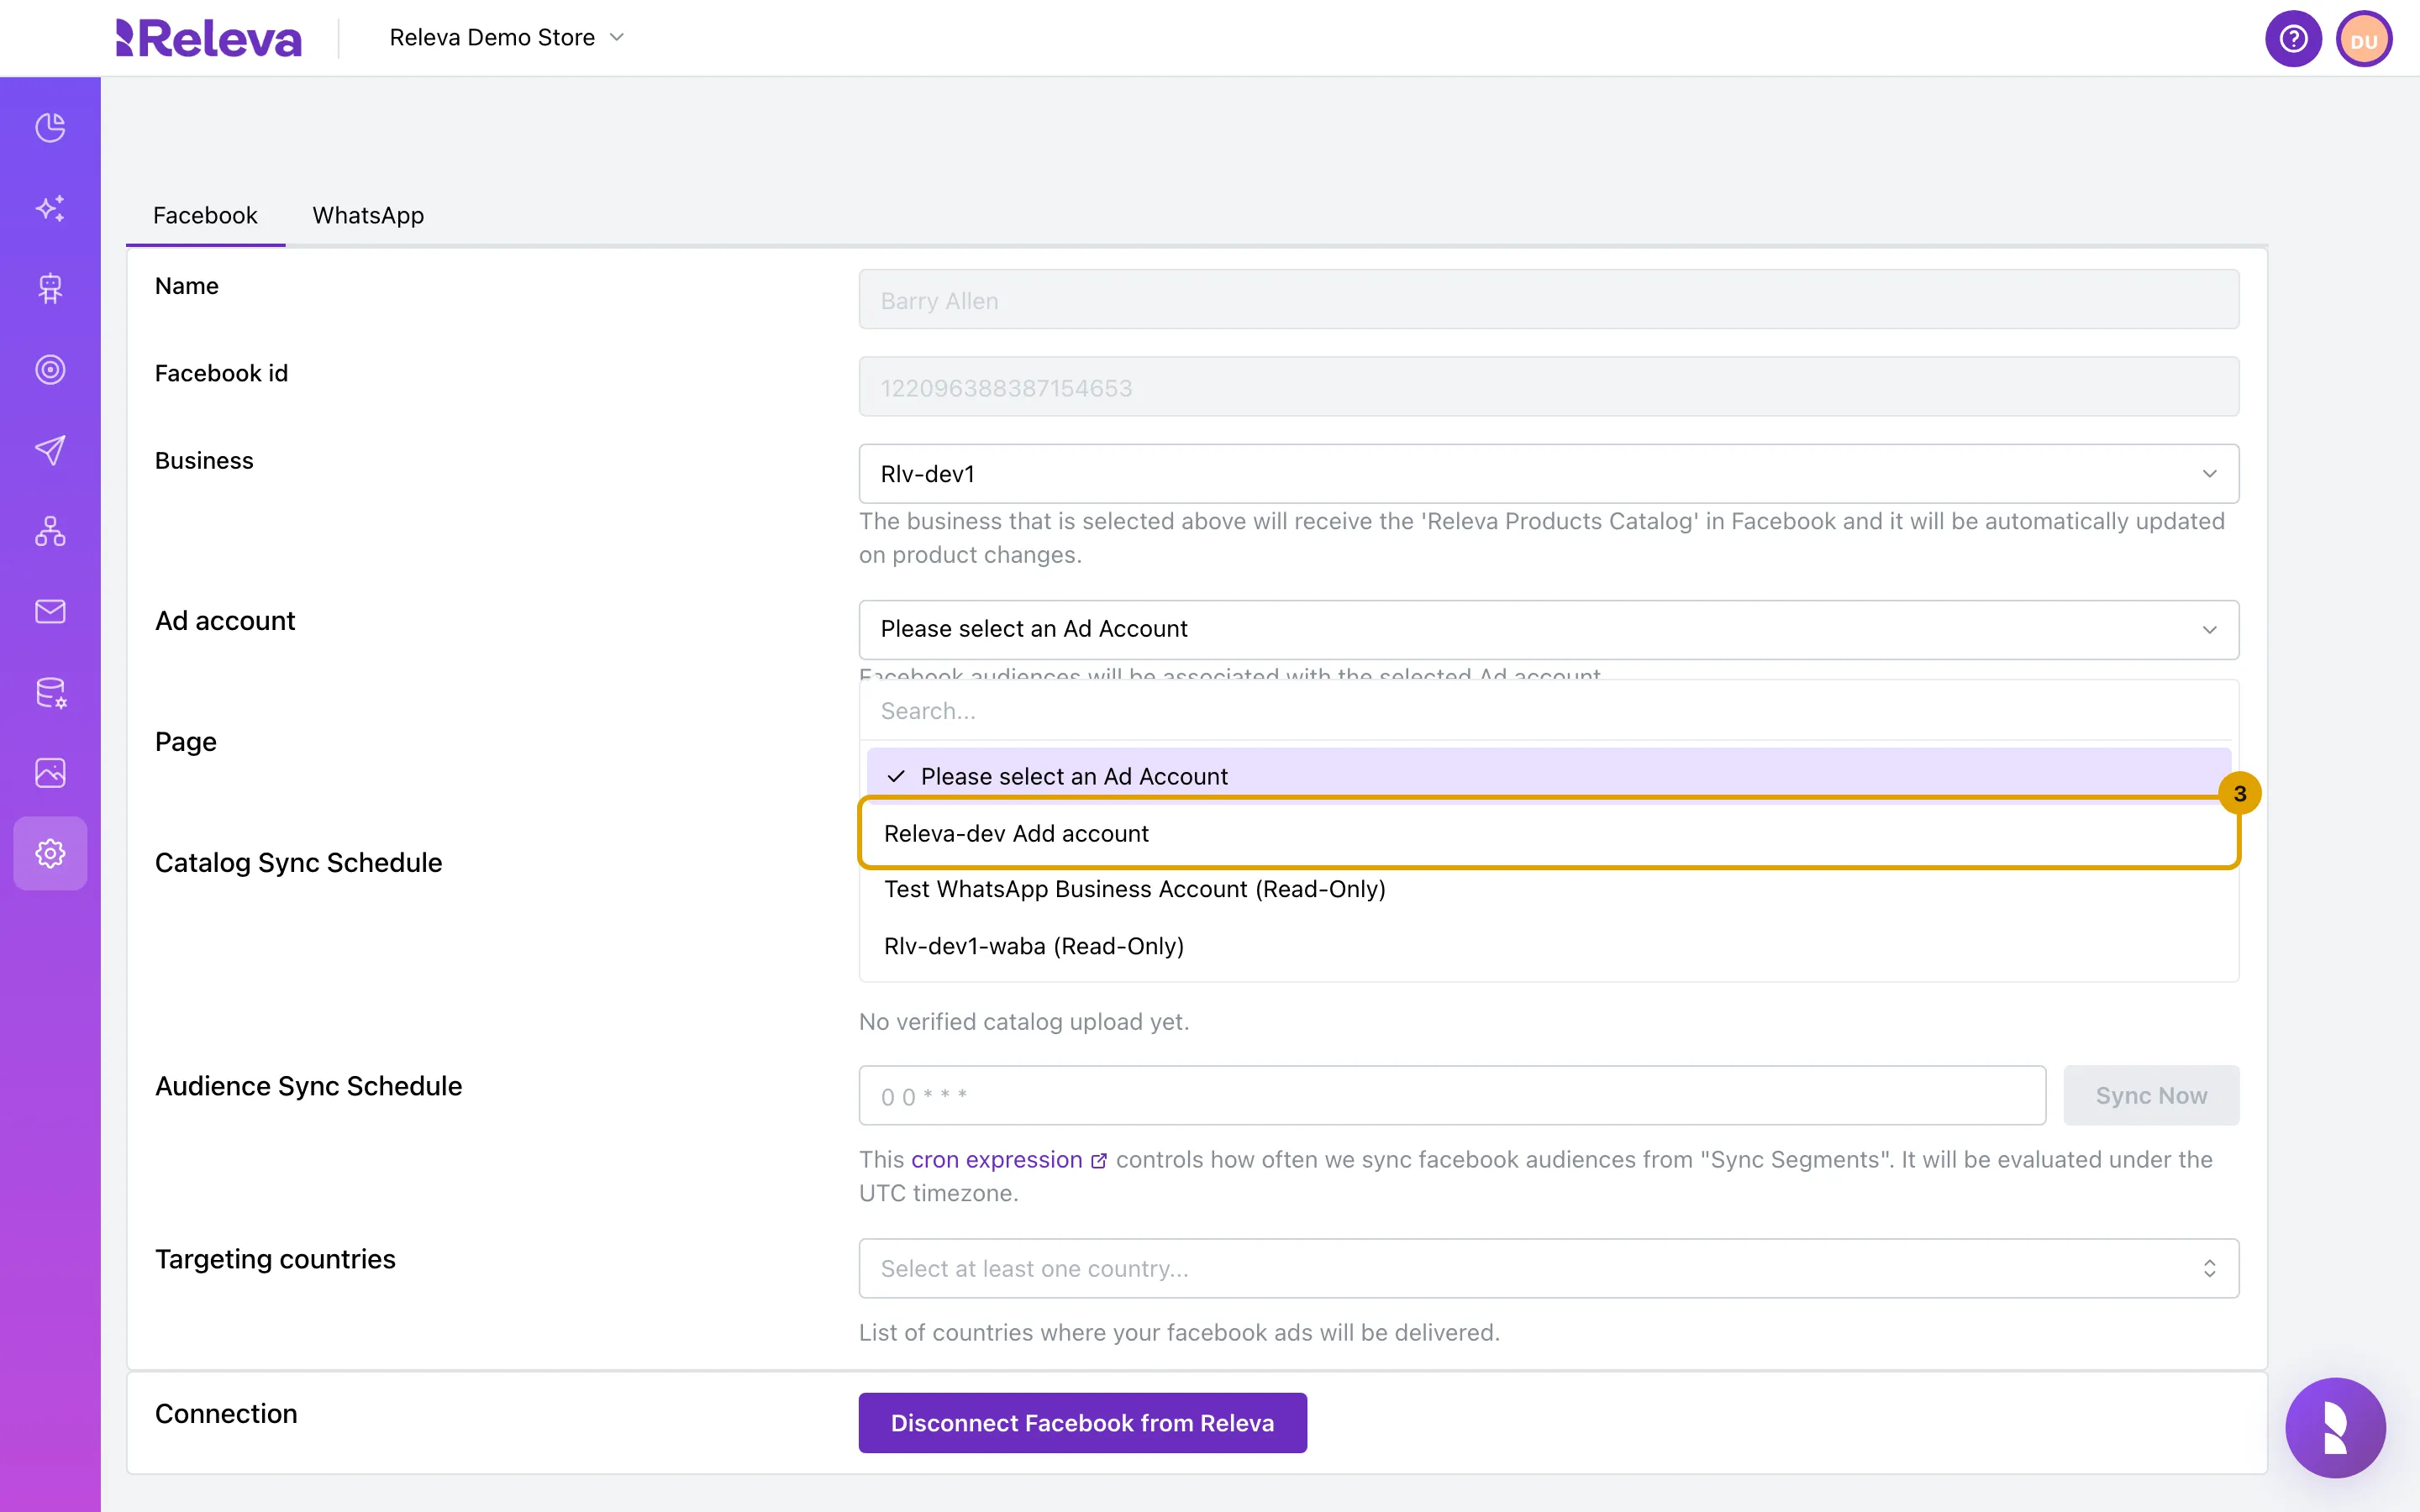
In Ad account, select the ad account that runs your ads
The list shows the ad accounts of the business you picked. Releva creates campaigns in this ad account and links your Facebook audiences to it.
-
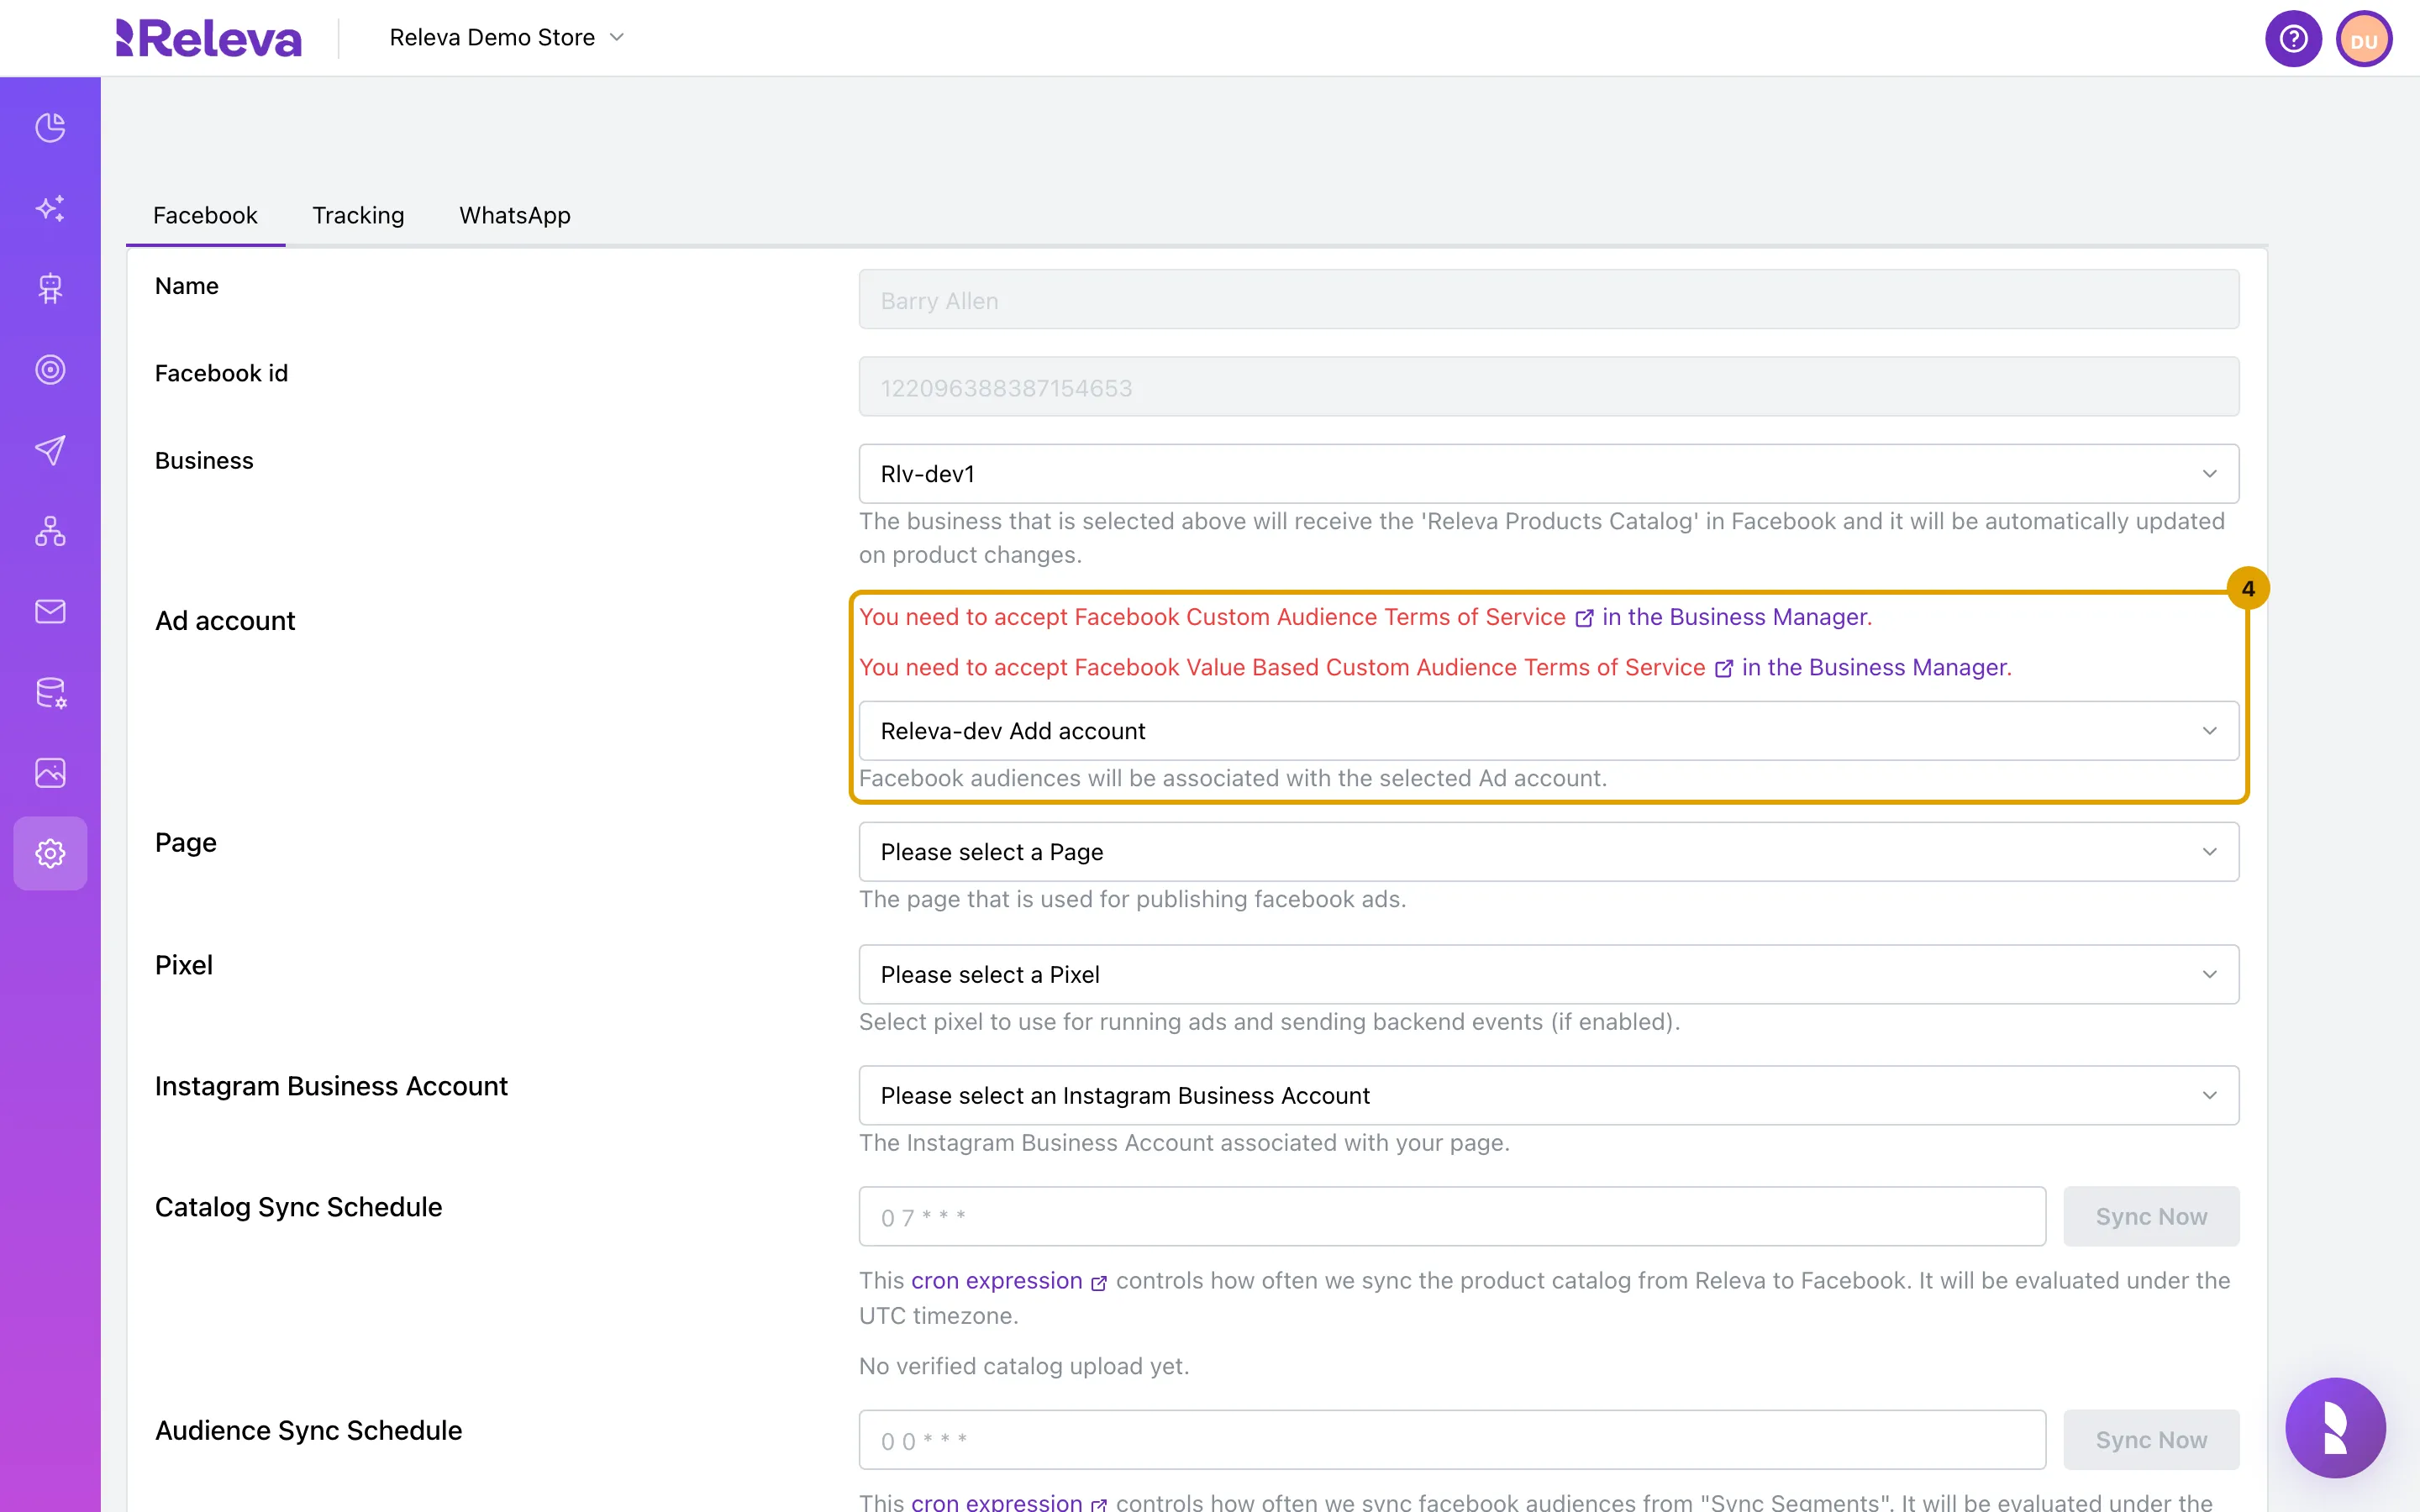
If red notes appear above the ad account, select in the Business Manager next to each note and accept the terms in Meta
The notes read You need to accept Facebook Custom Audience Terms of Service in the Business Manager. and the same for the Value Based Custom Audience terms. They do not stop you from saving, but segment syncs to Facebook fail until you accept both. Choosing an ad account also adds the Tracking tab and the Pixel and Instagram Business Account settings.
-
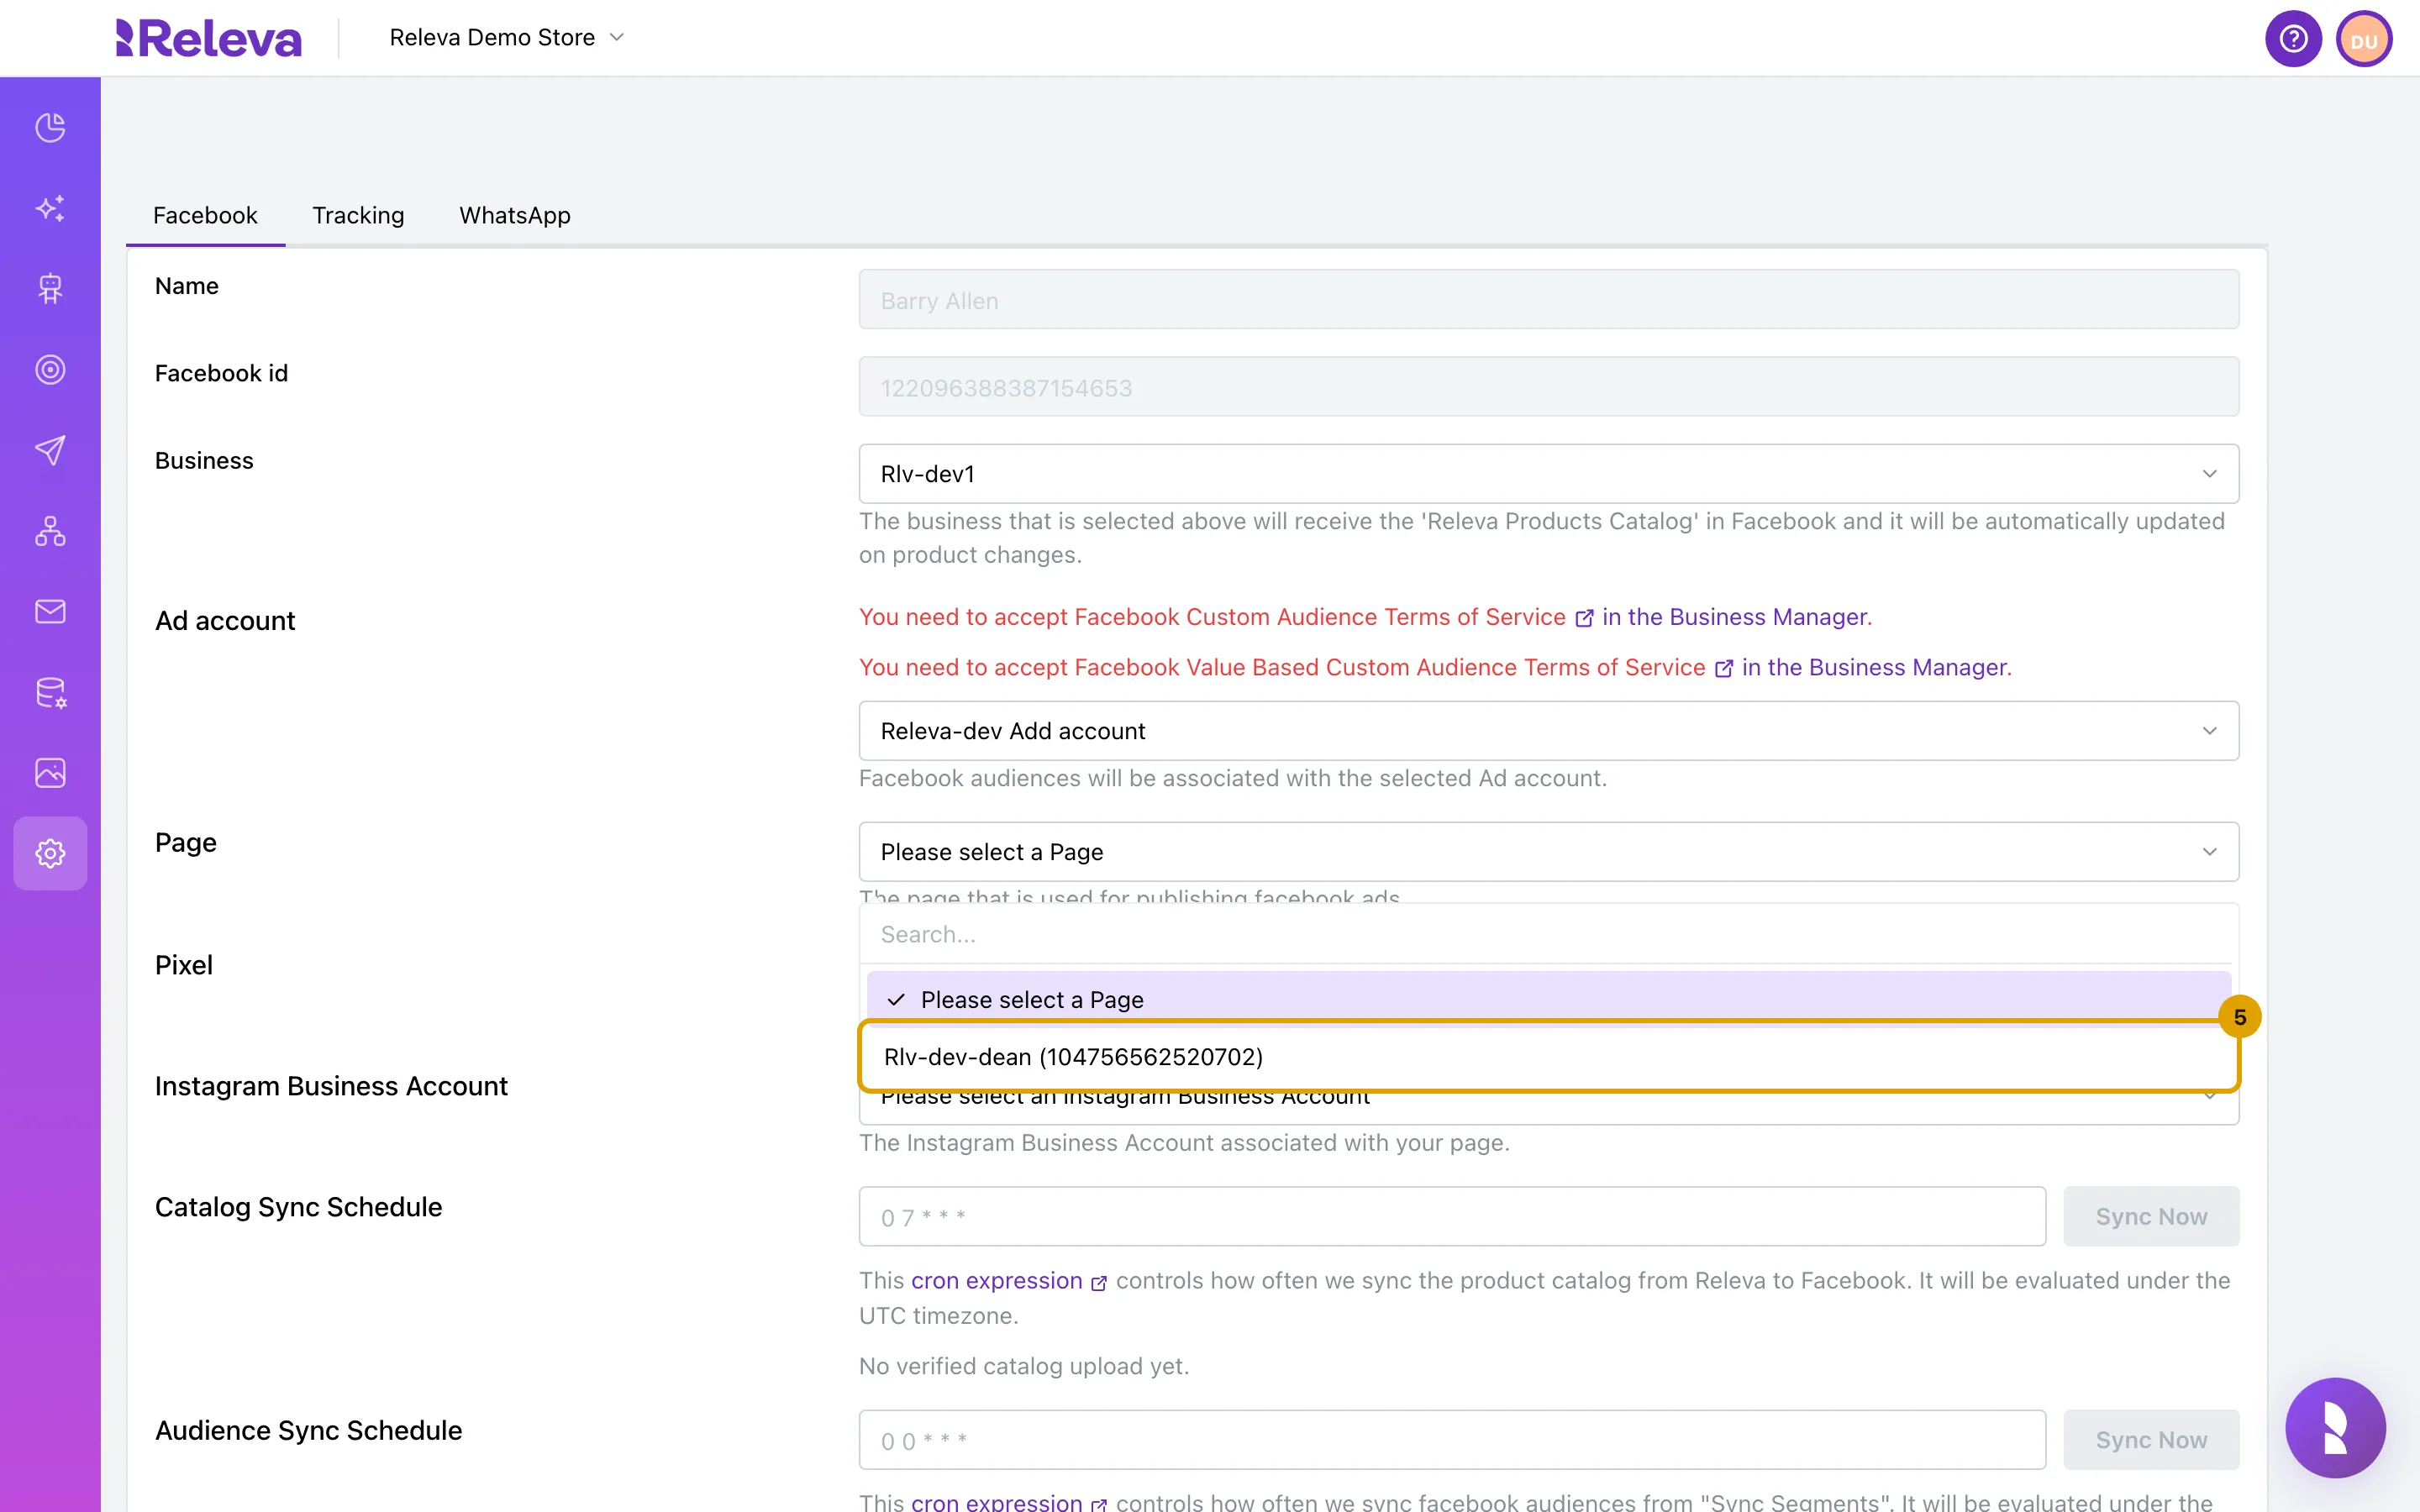
In Page, select the Facebook page your ads are published from
Each page is listed with its id in brackets.
-
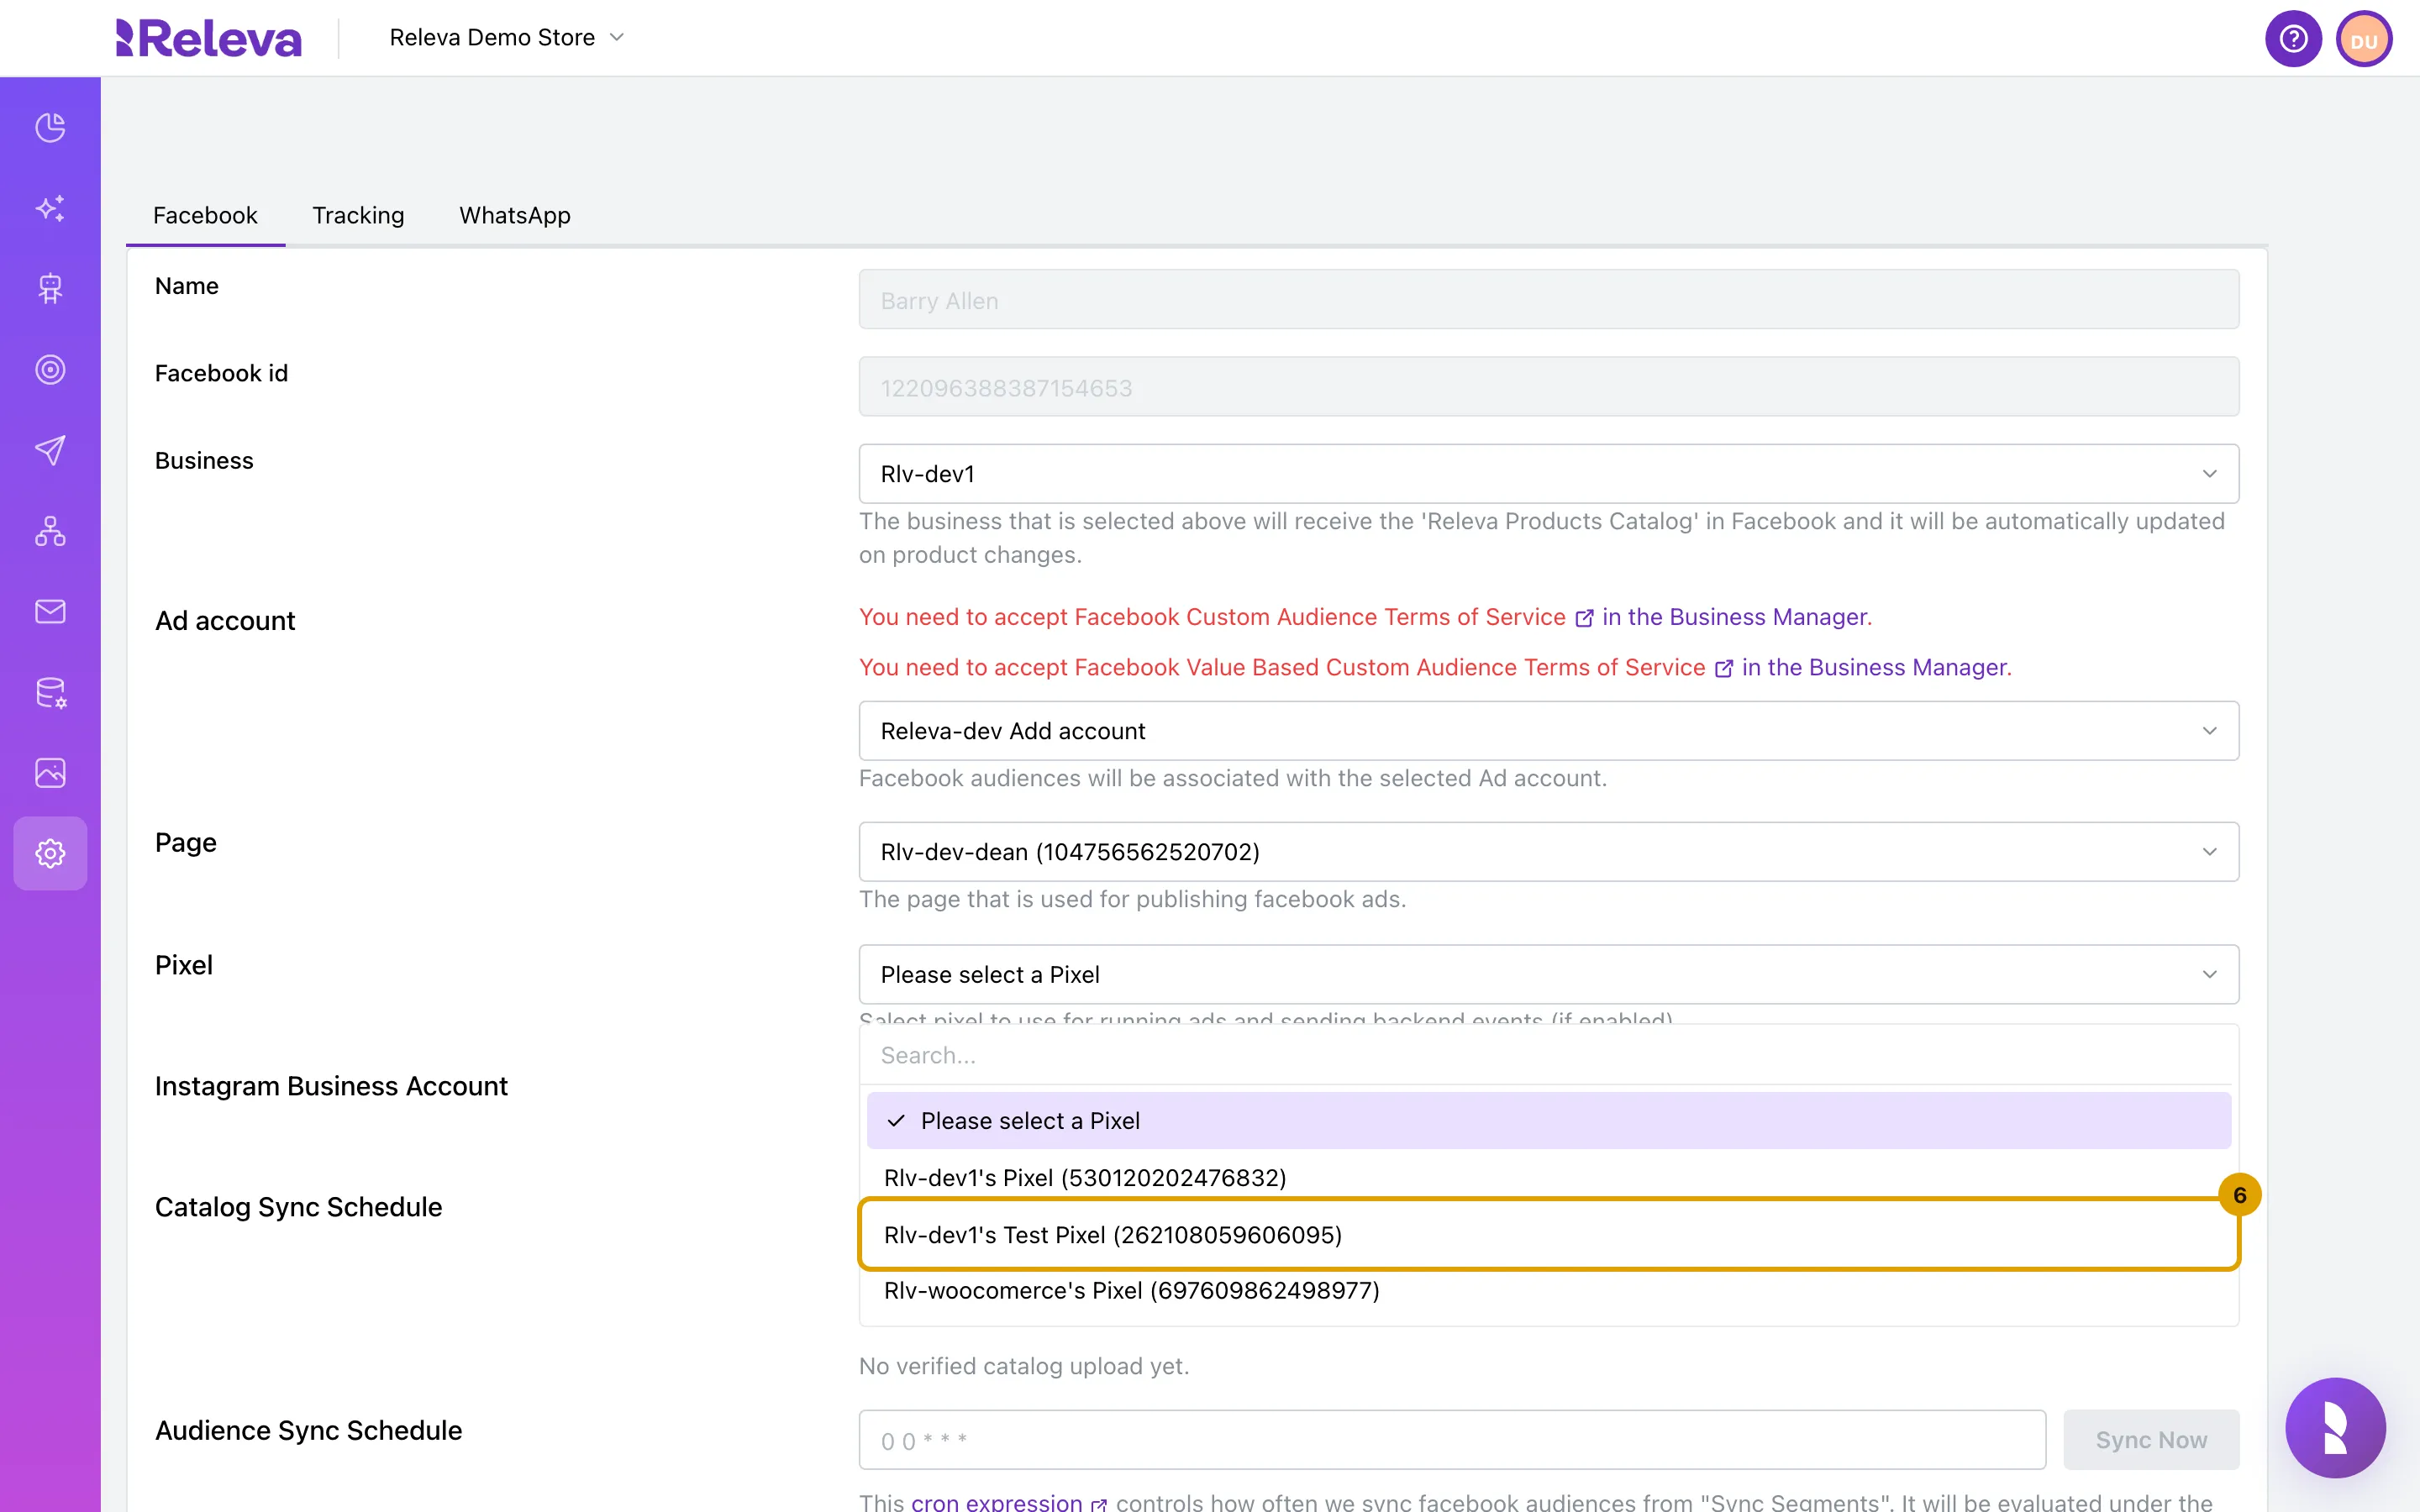
In Pixel, select the Meta pixel of your shop
Releva uses this pixel for your ads and, if enabled, for sending events from its servers. It also links the pixel to the Releva catalog.
-
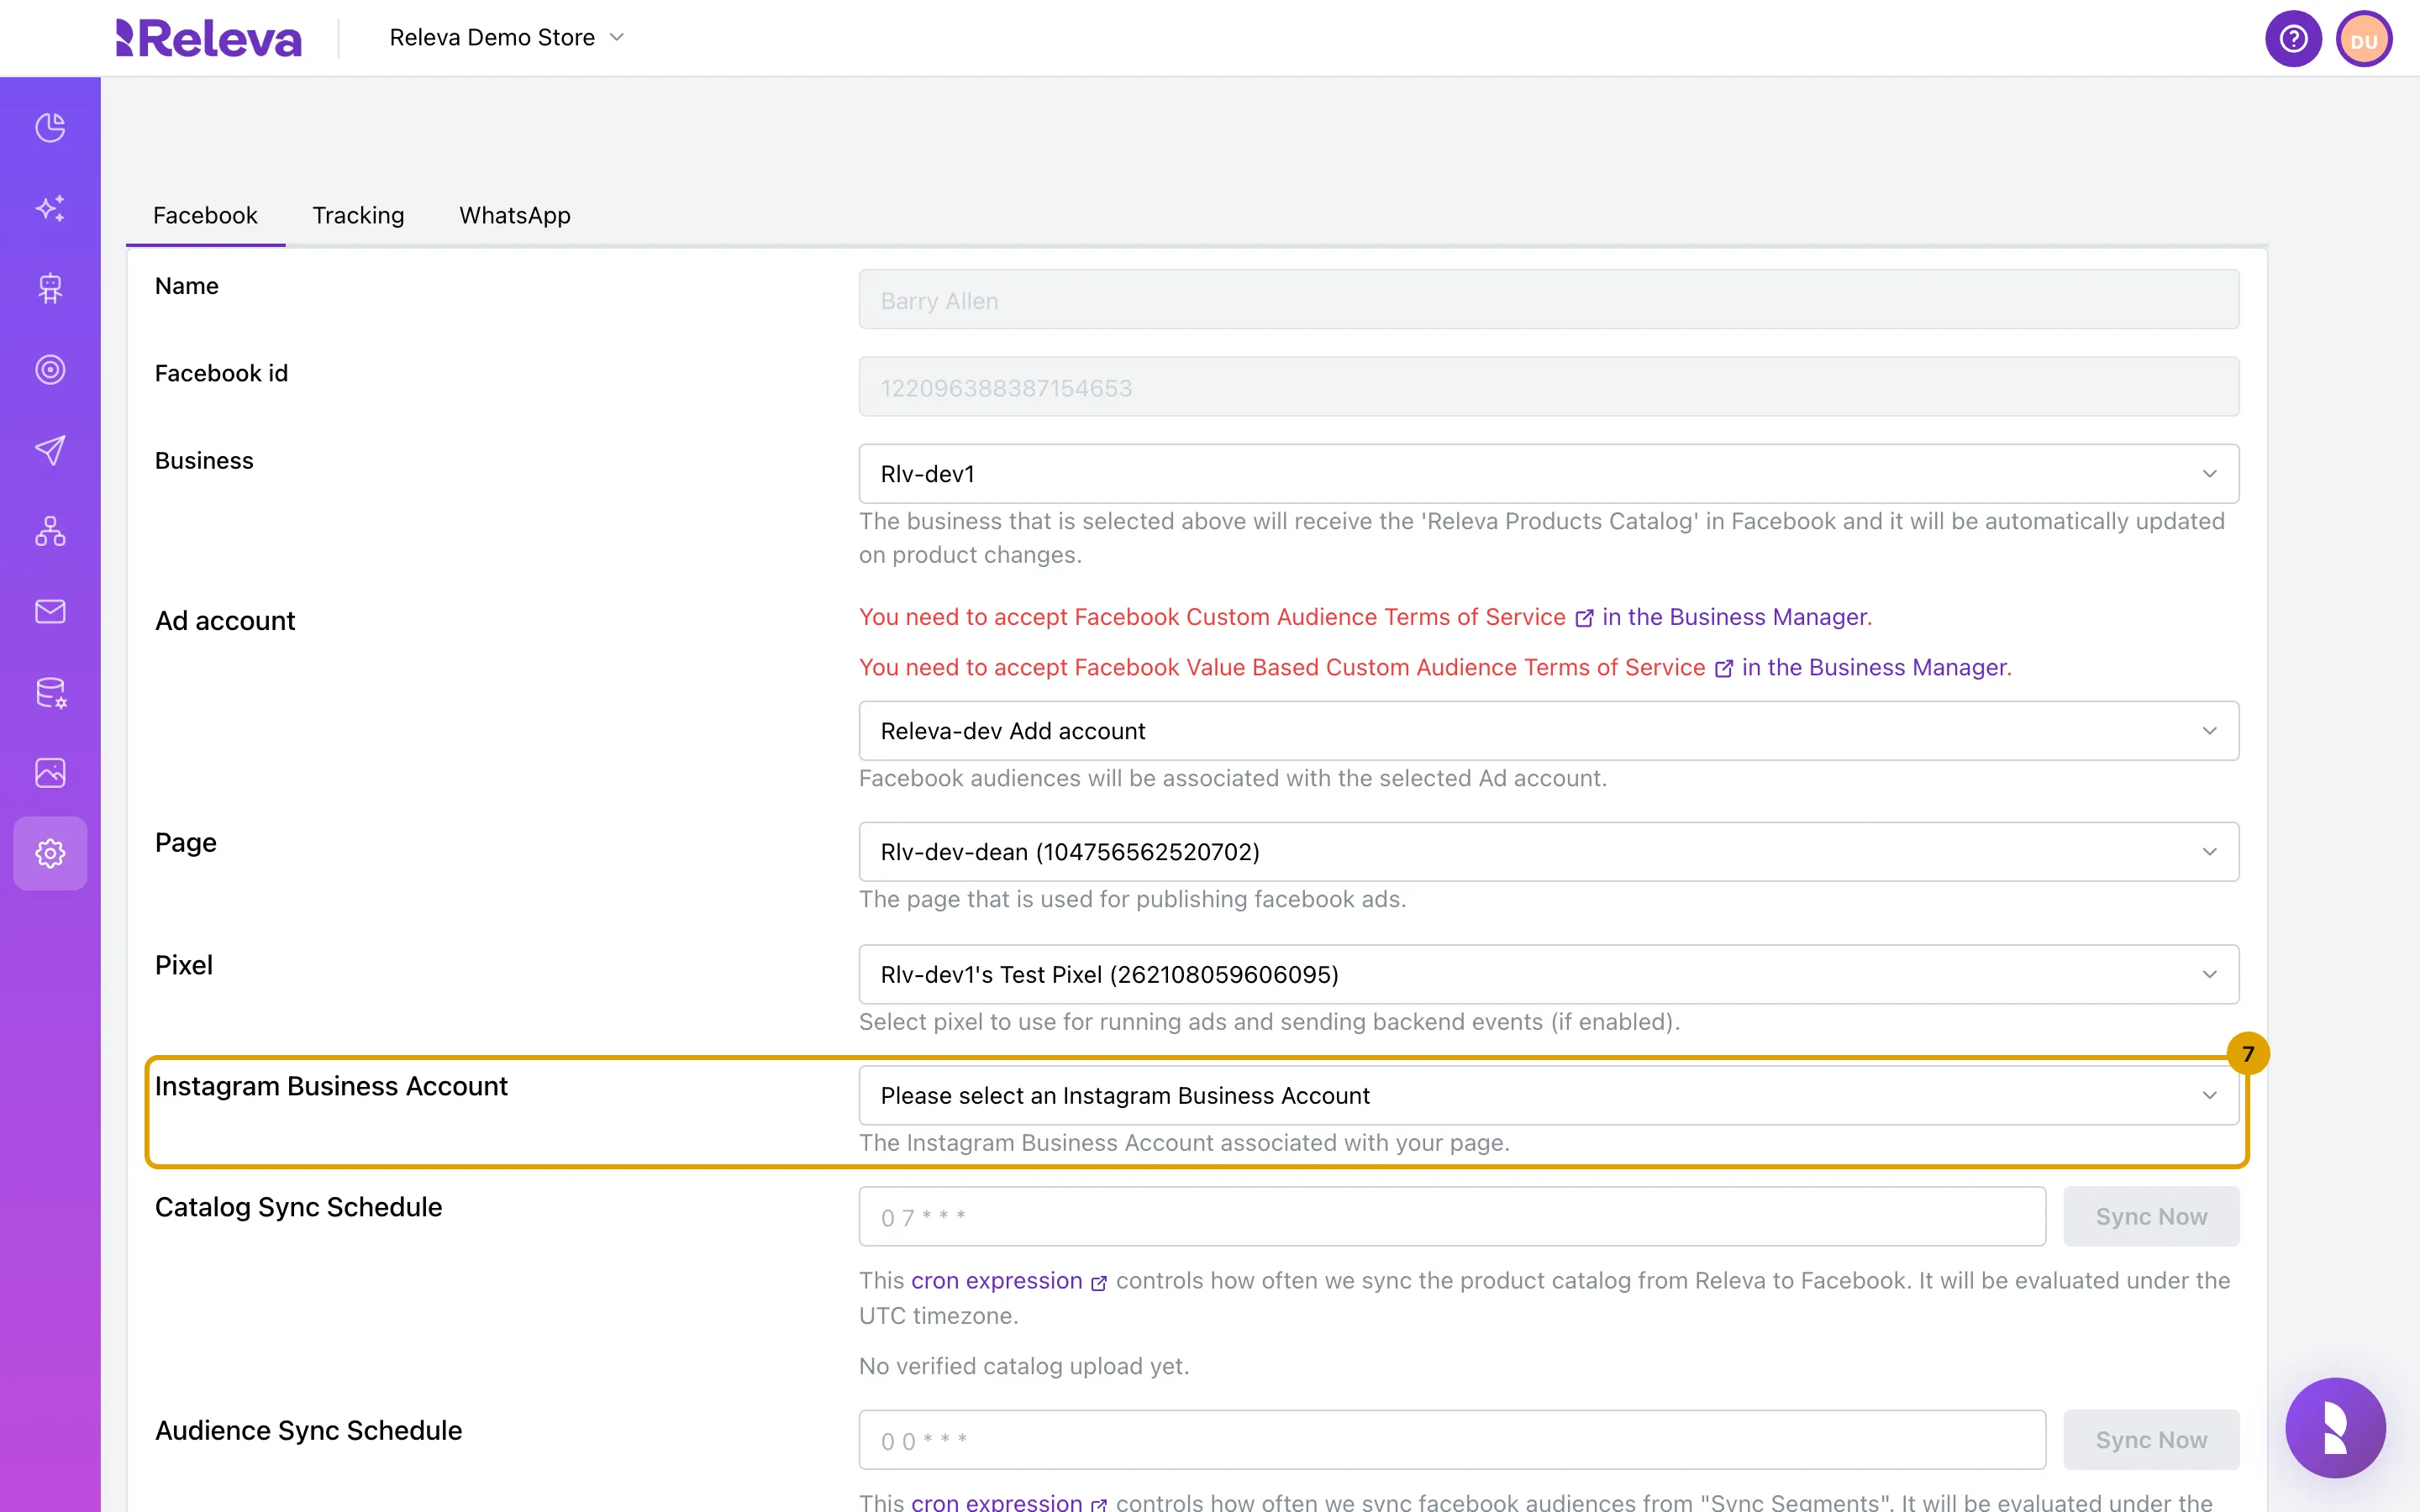
Optional: in Instagram Business Account, select the Instagram account linked to your page
You can leave it on Please select an Instagram Business Account.
-
In Catalog Sync Schedule, enter how often Releva sends your products to Meta, for example
0 7 * * *The value is a cron expression evaluated in UTC:
0 7 * * *means every day at 07:00 UTC. Next sync shows the next run in your local time.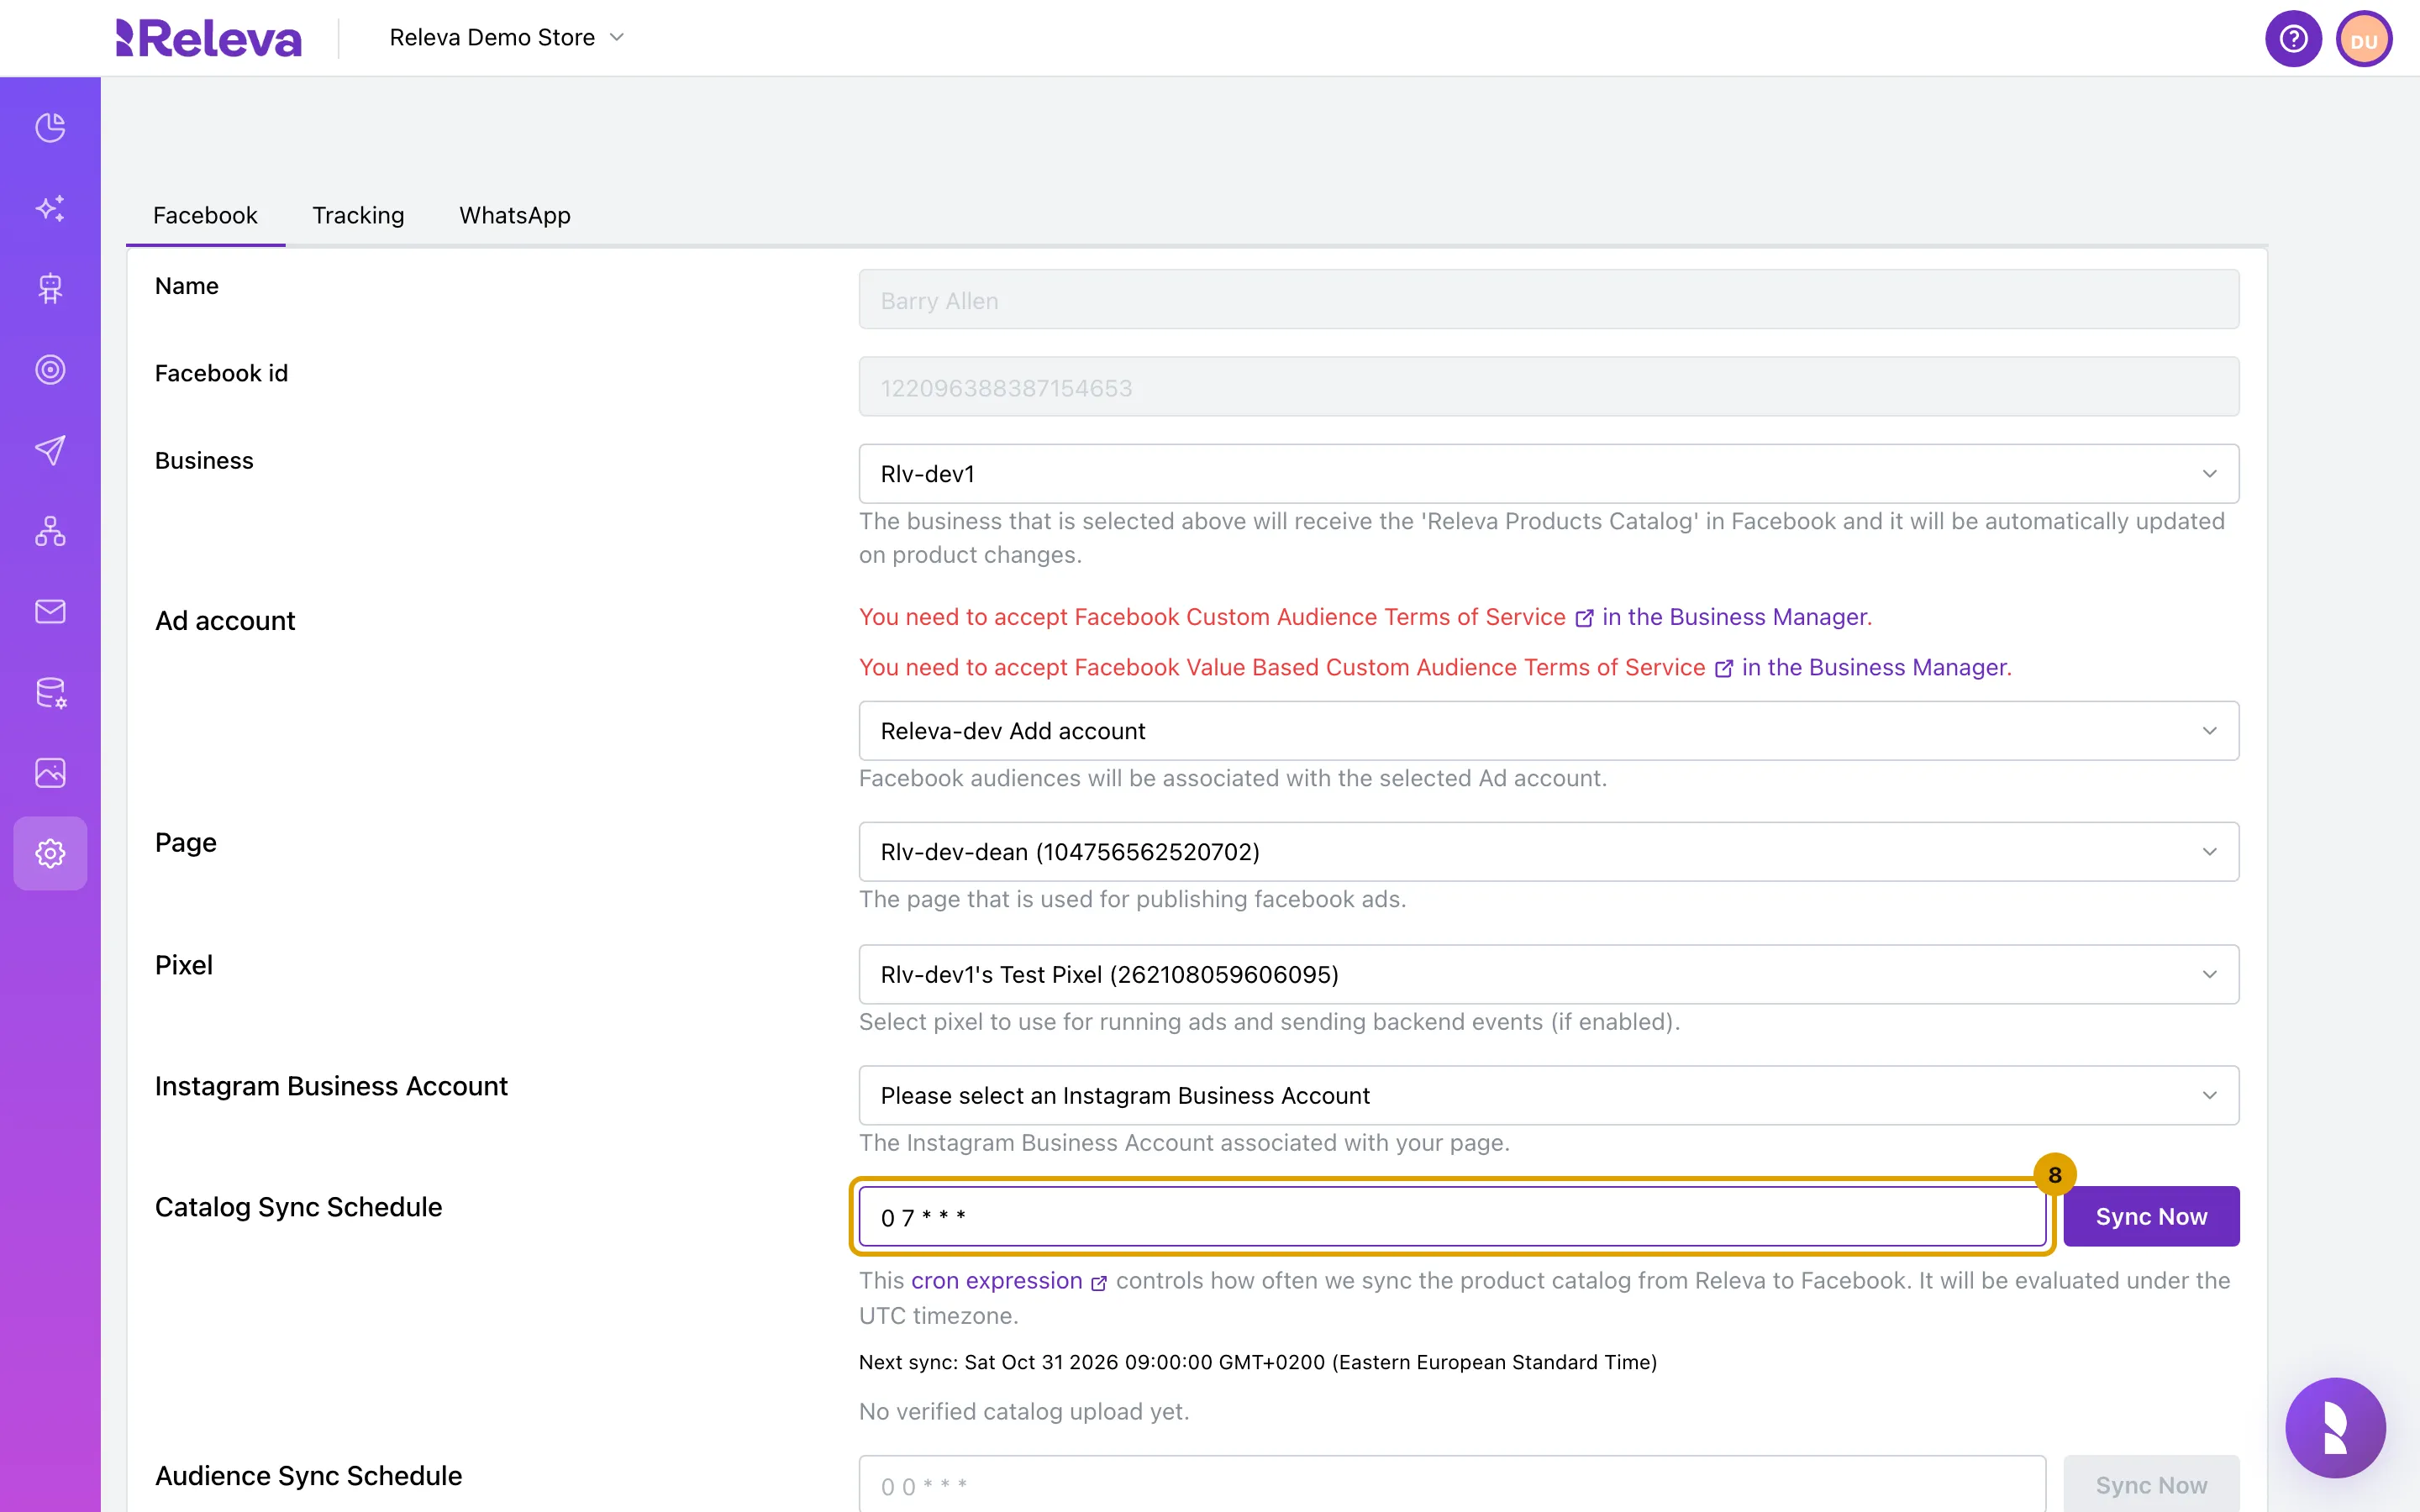
-
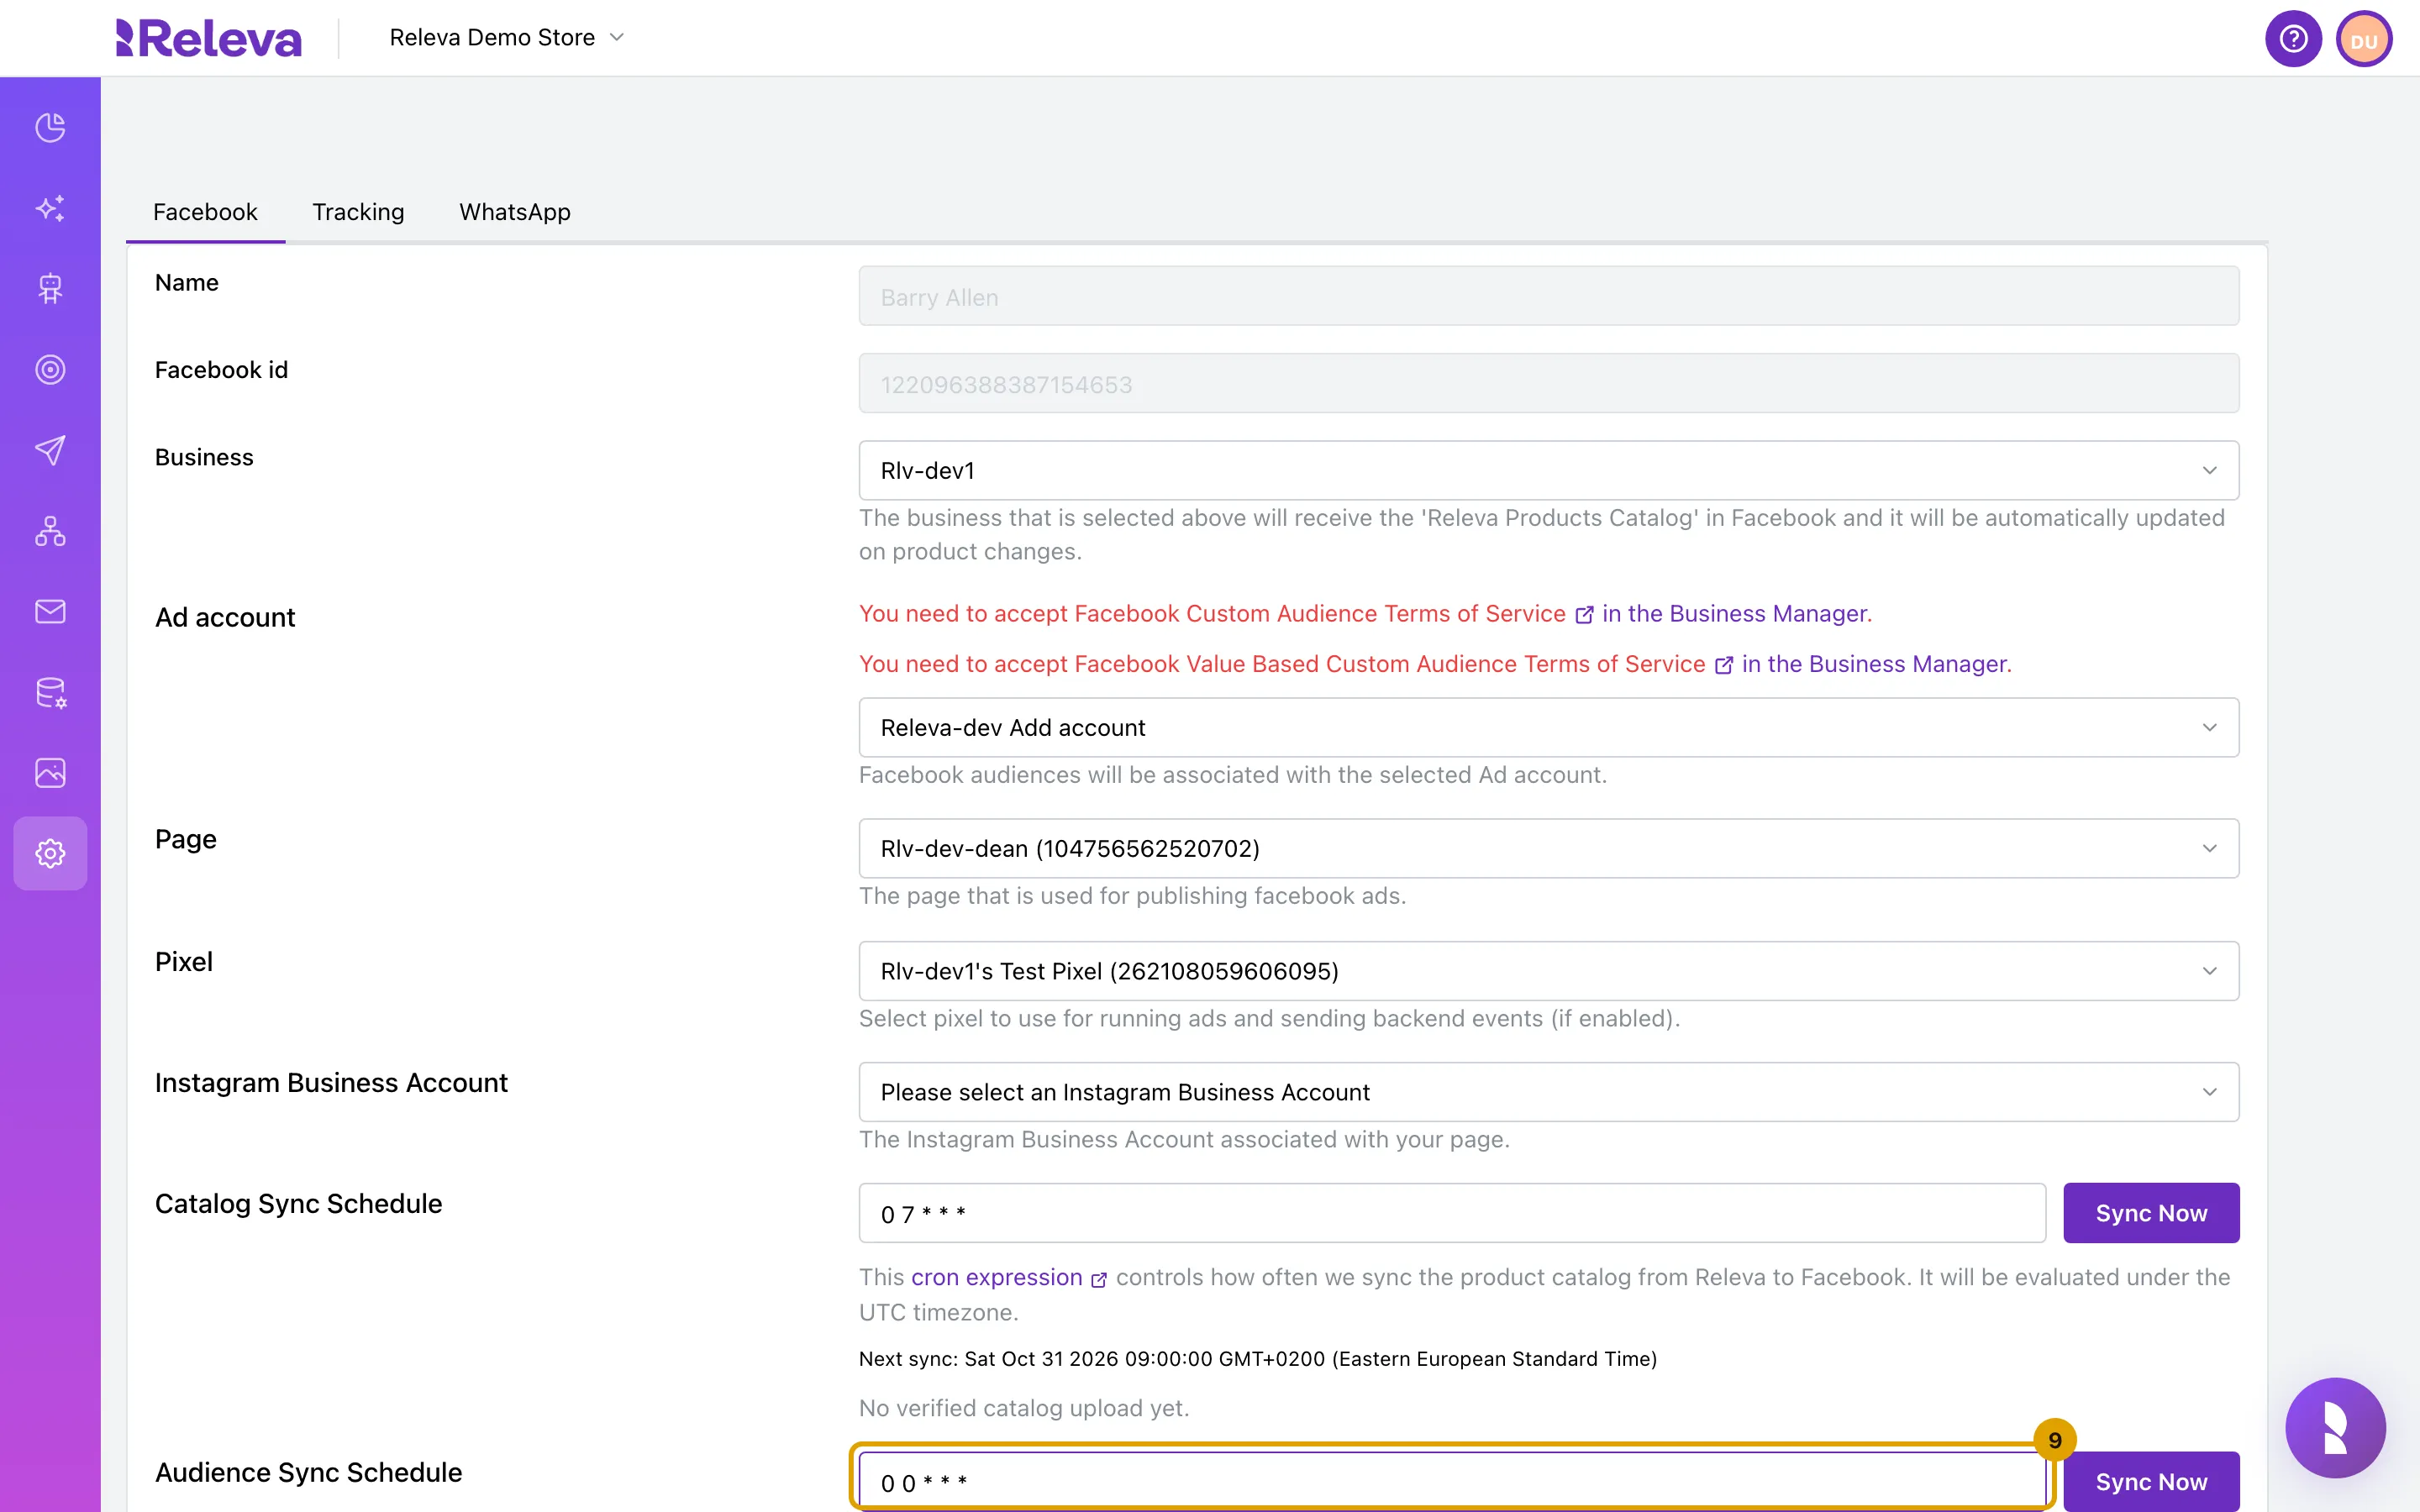
In Audience Sync Schedule, enter how often Releva updates the Facebook audiences of your synced segments, for example
0 0 * * *This schedule updates the audiences you create under Sync Segments. It is also a cron expression in UTC.
-
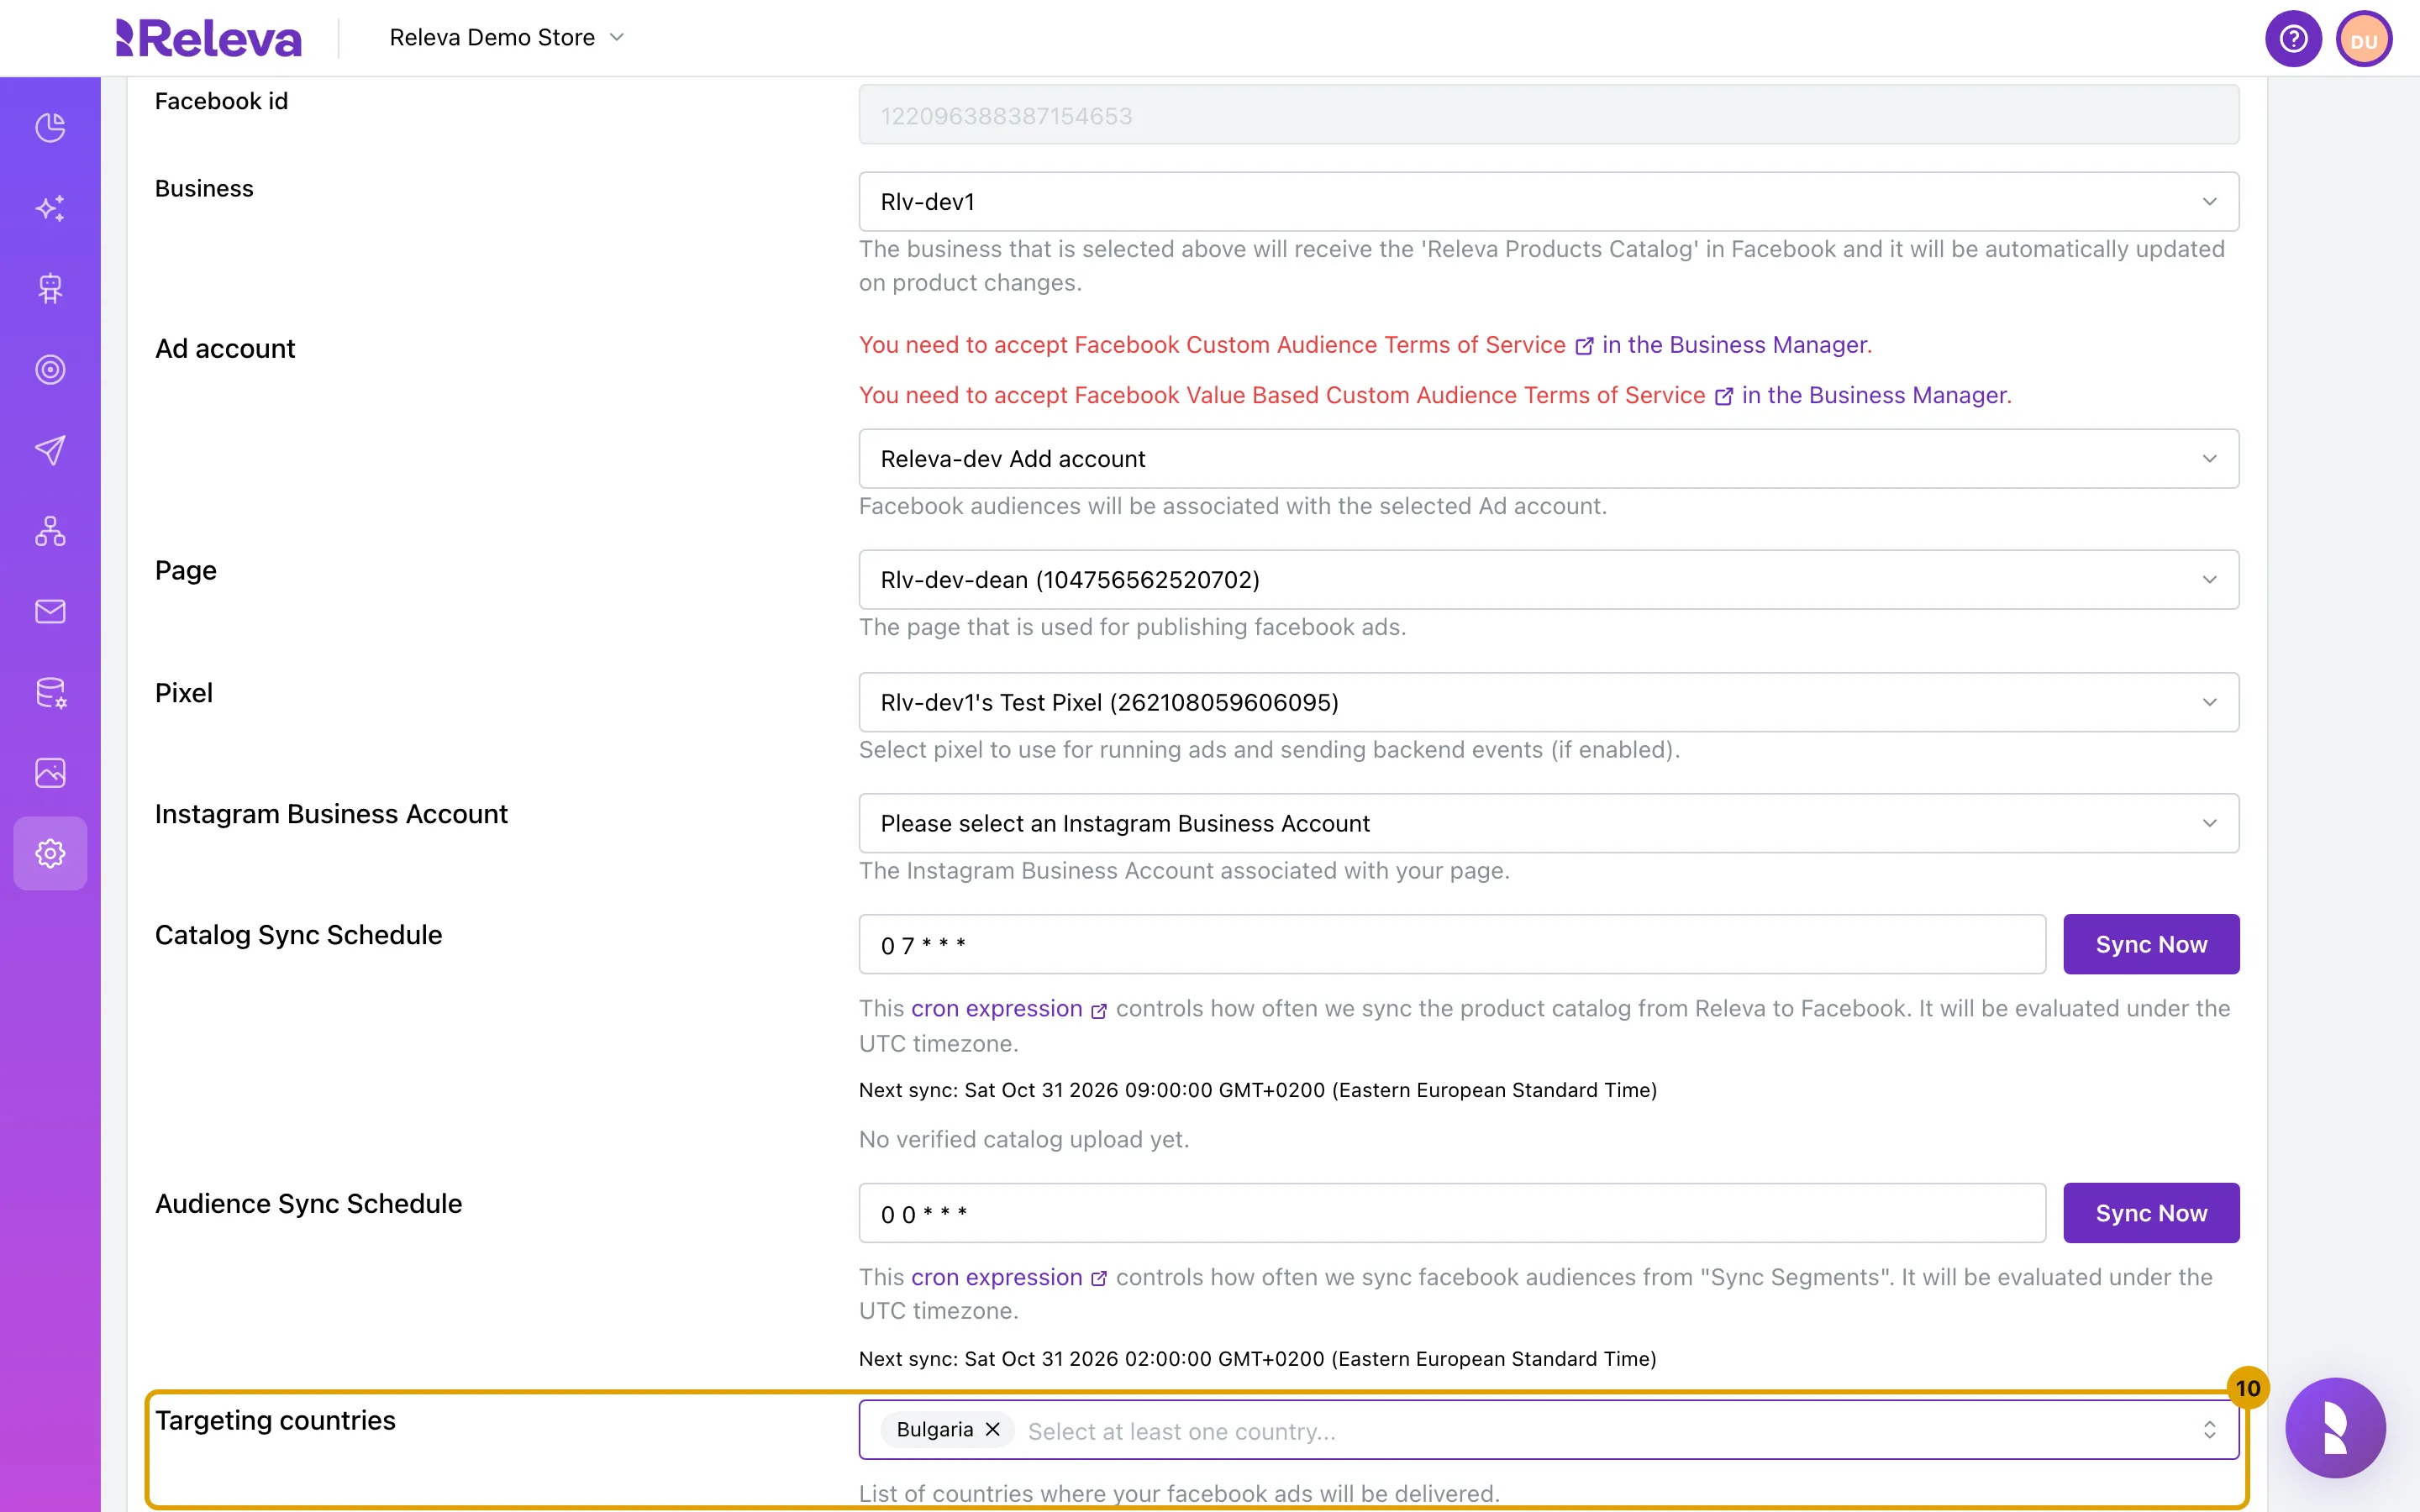
In Targeting countries, select every country where your Facebook ads should be shown
Pick at least one country. Every ad set Releva creates targets these countries.
-
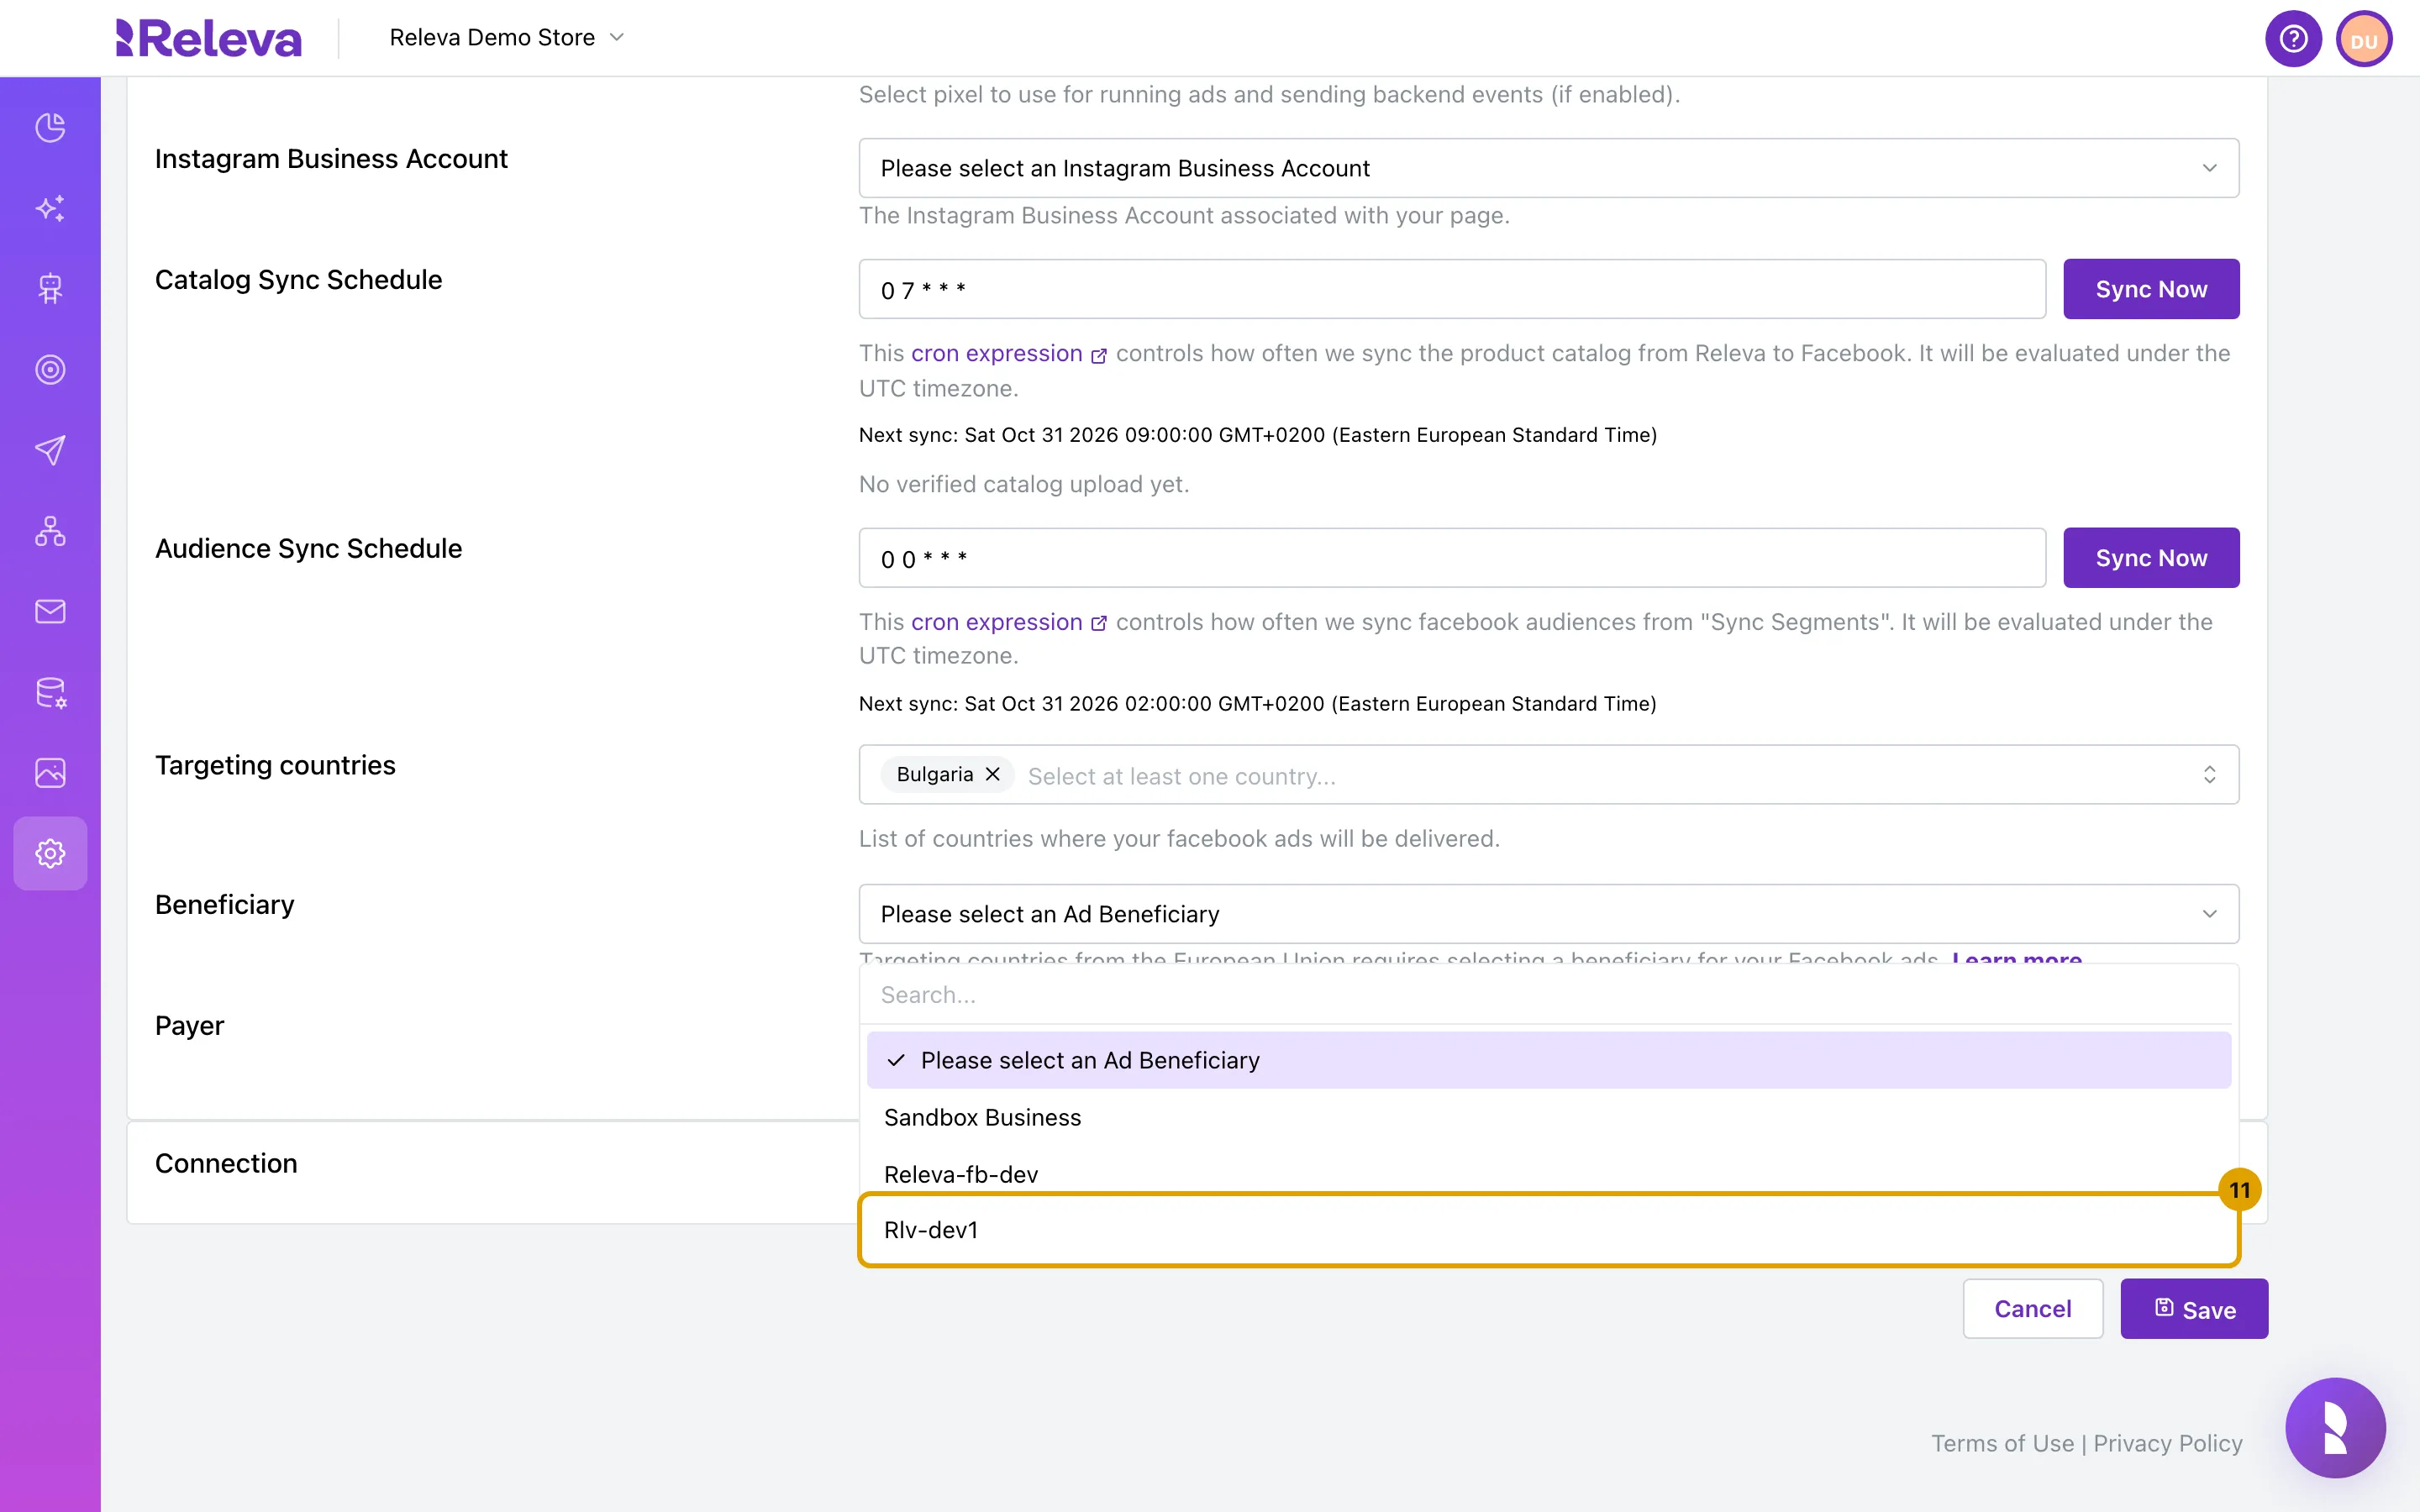
If you picked a country in the European Union, select the business that benefits from your ads in Beneficiary
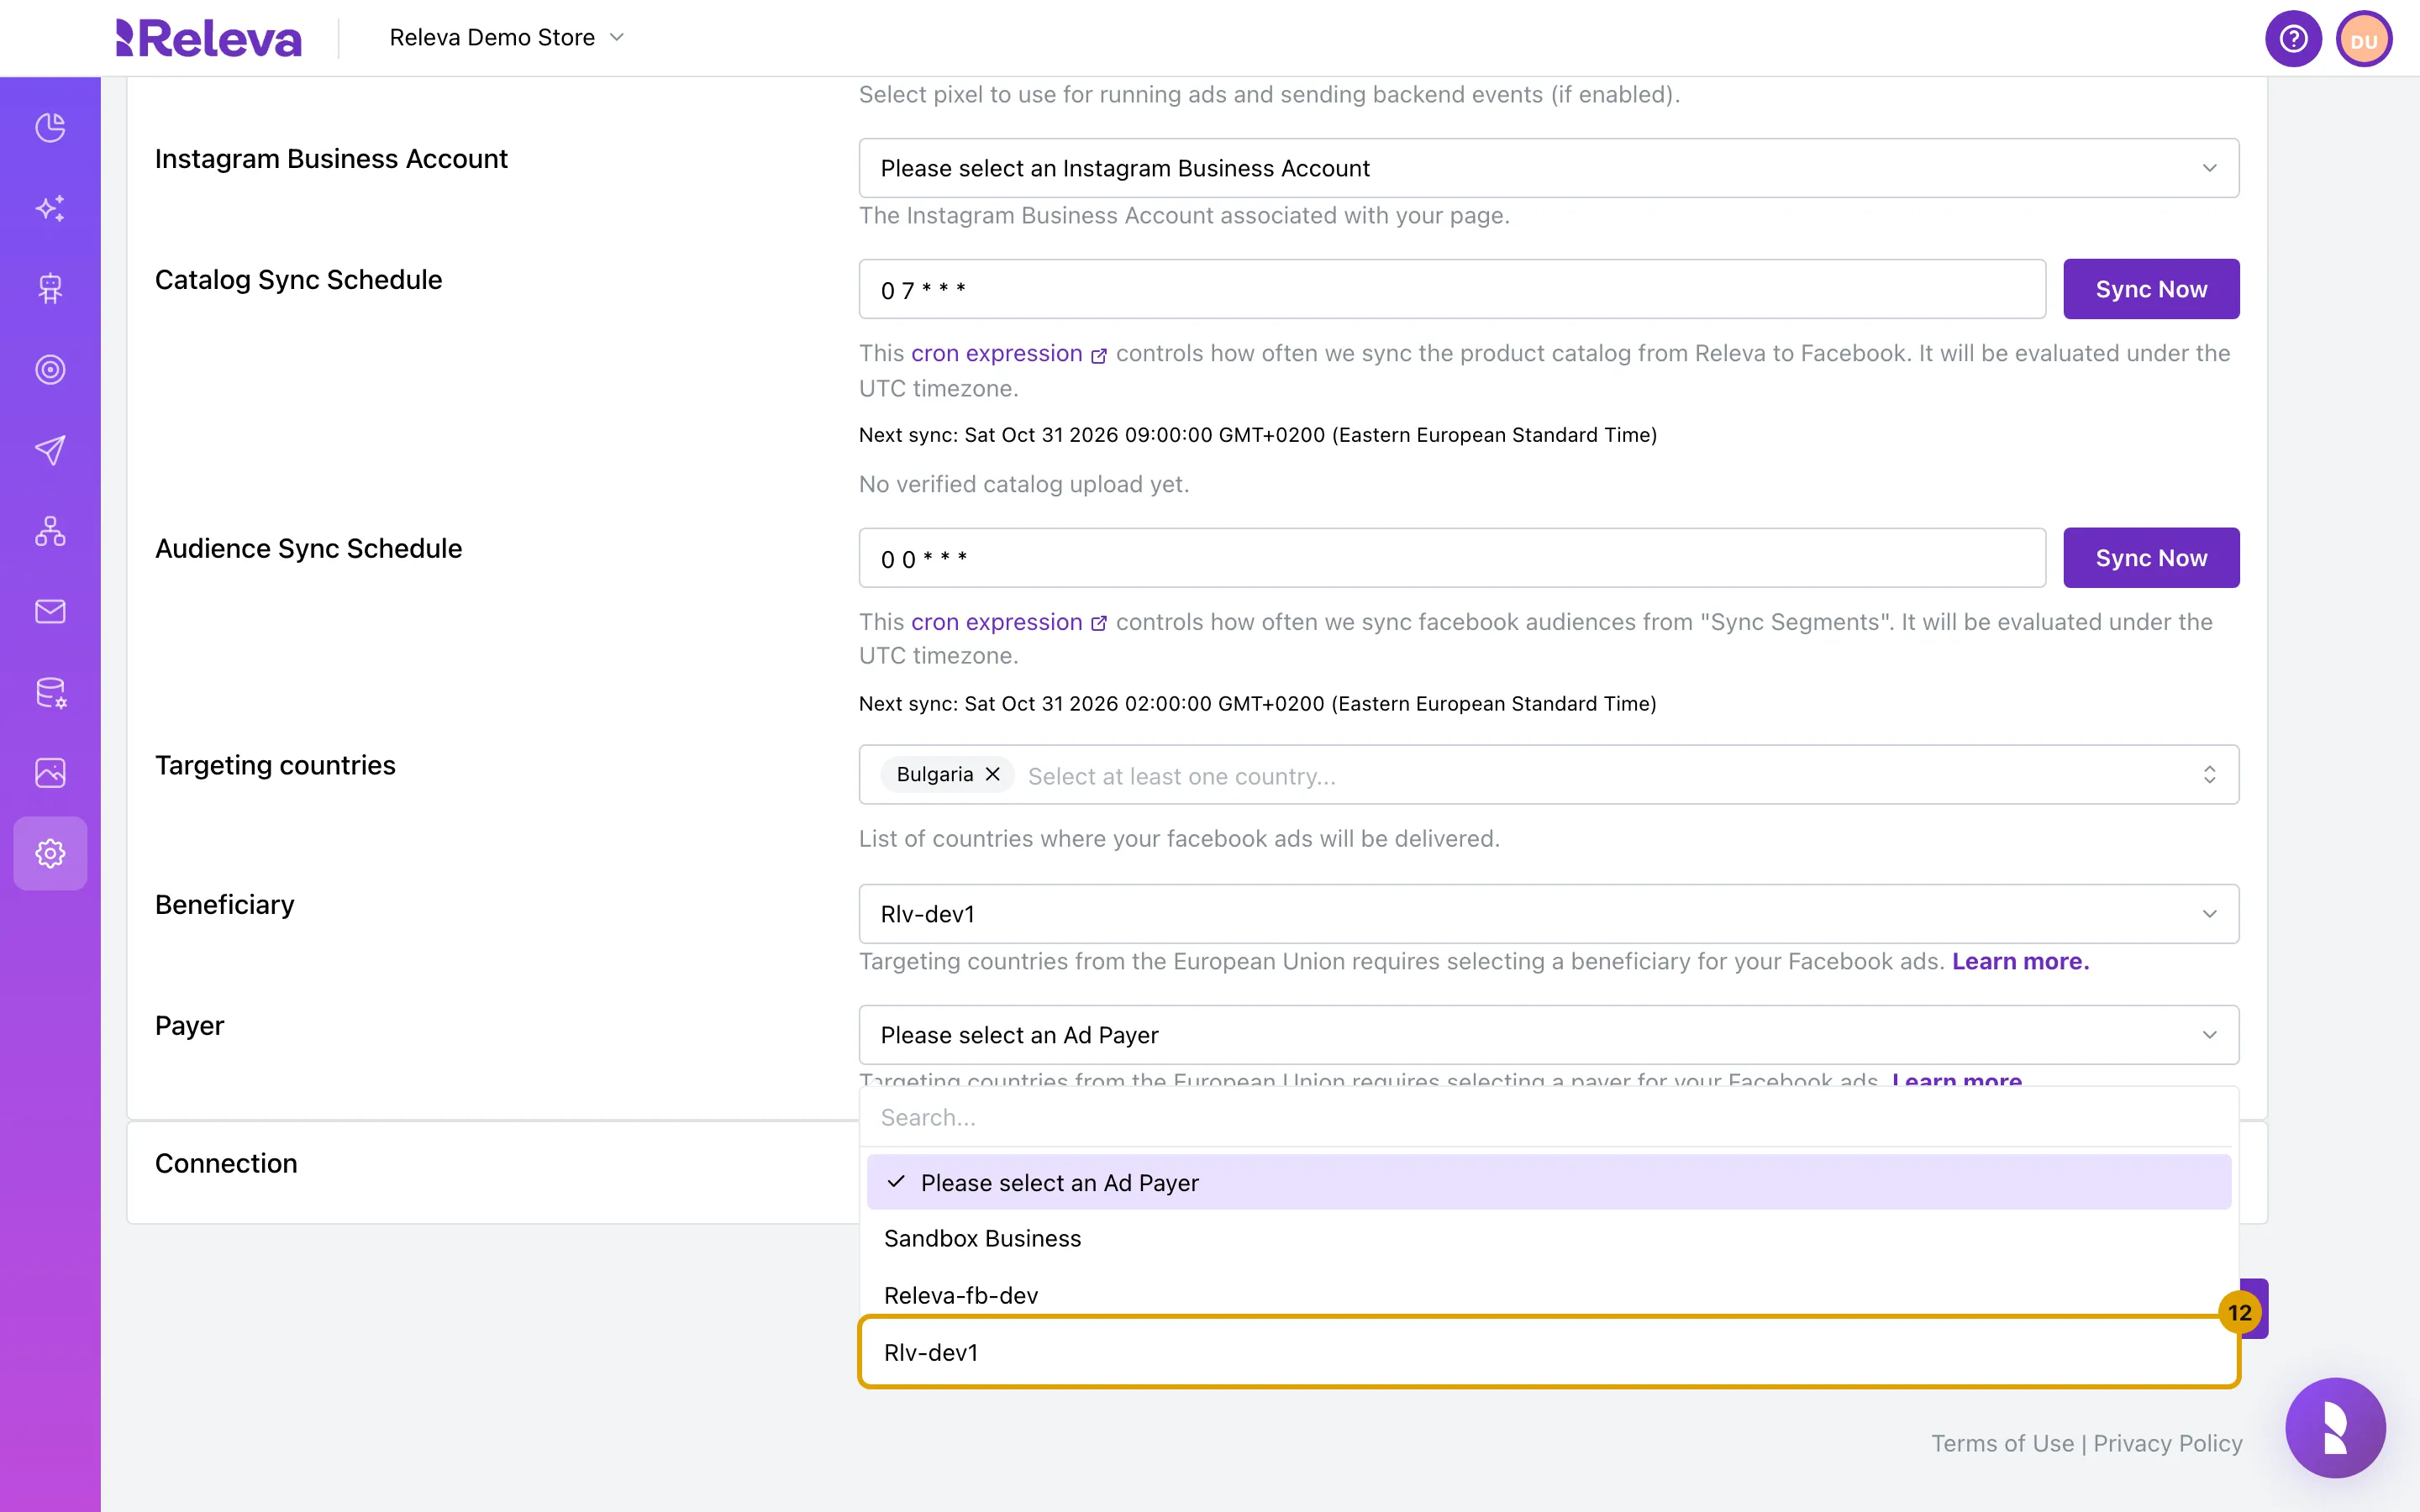
Beneficiary and Payer appear only when a targeting country is in the European Union. Meta requires both for ads shown there.
-
In Payer, select the business that pays for your ads
-
Select Save
Save stays disabled until Ad account, Page, Pixel, both sync schedules and at least one targeting country are set. Cancel discards your changes.
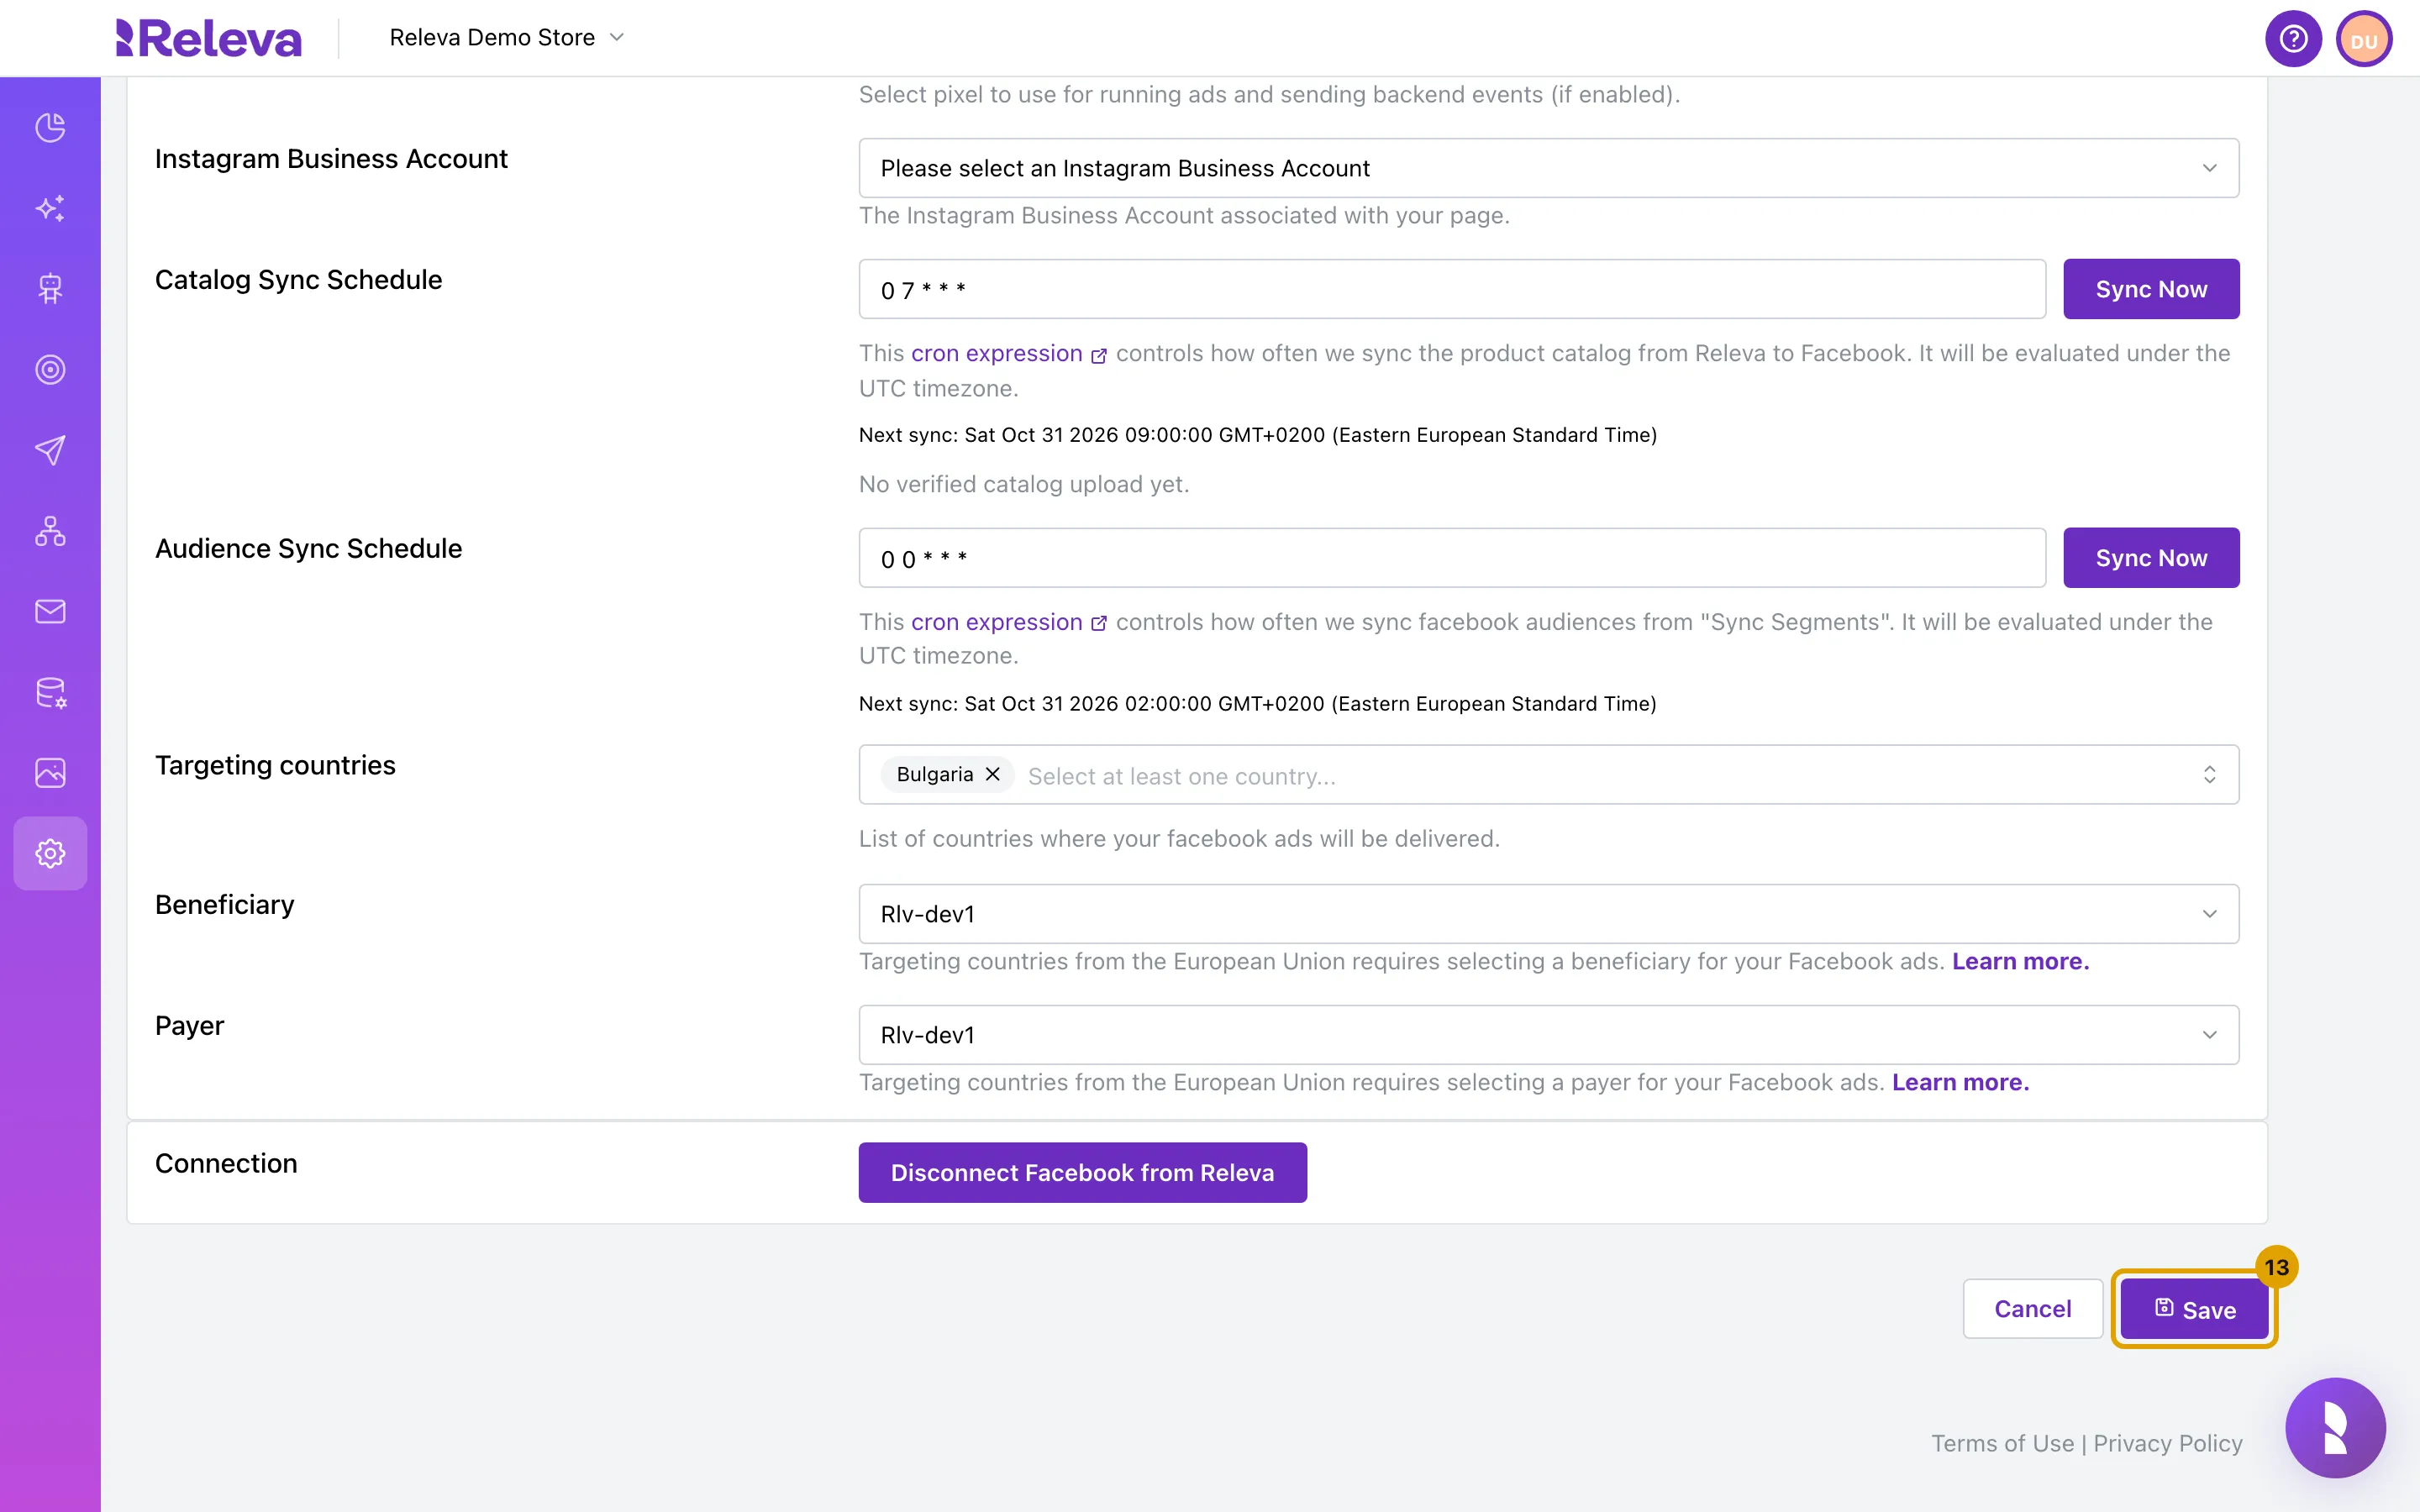
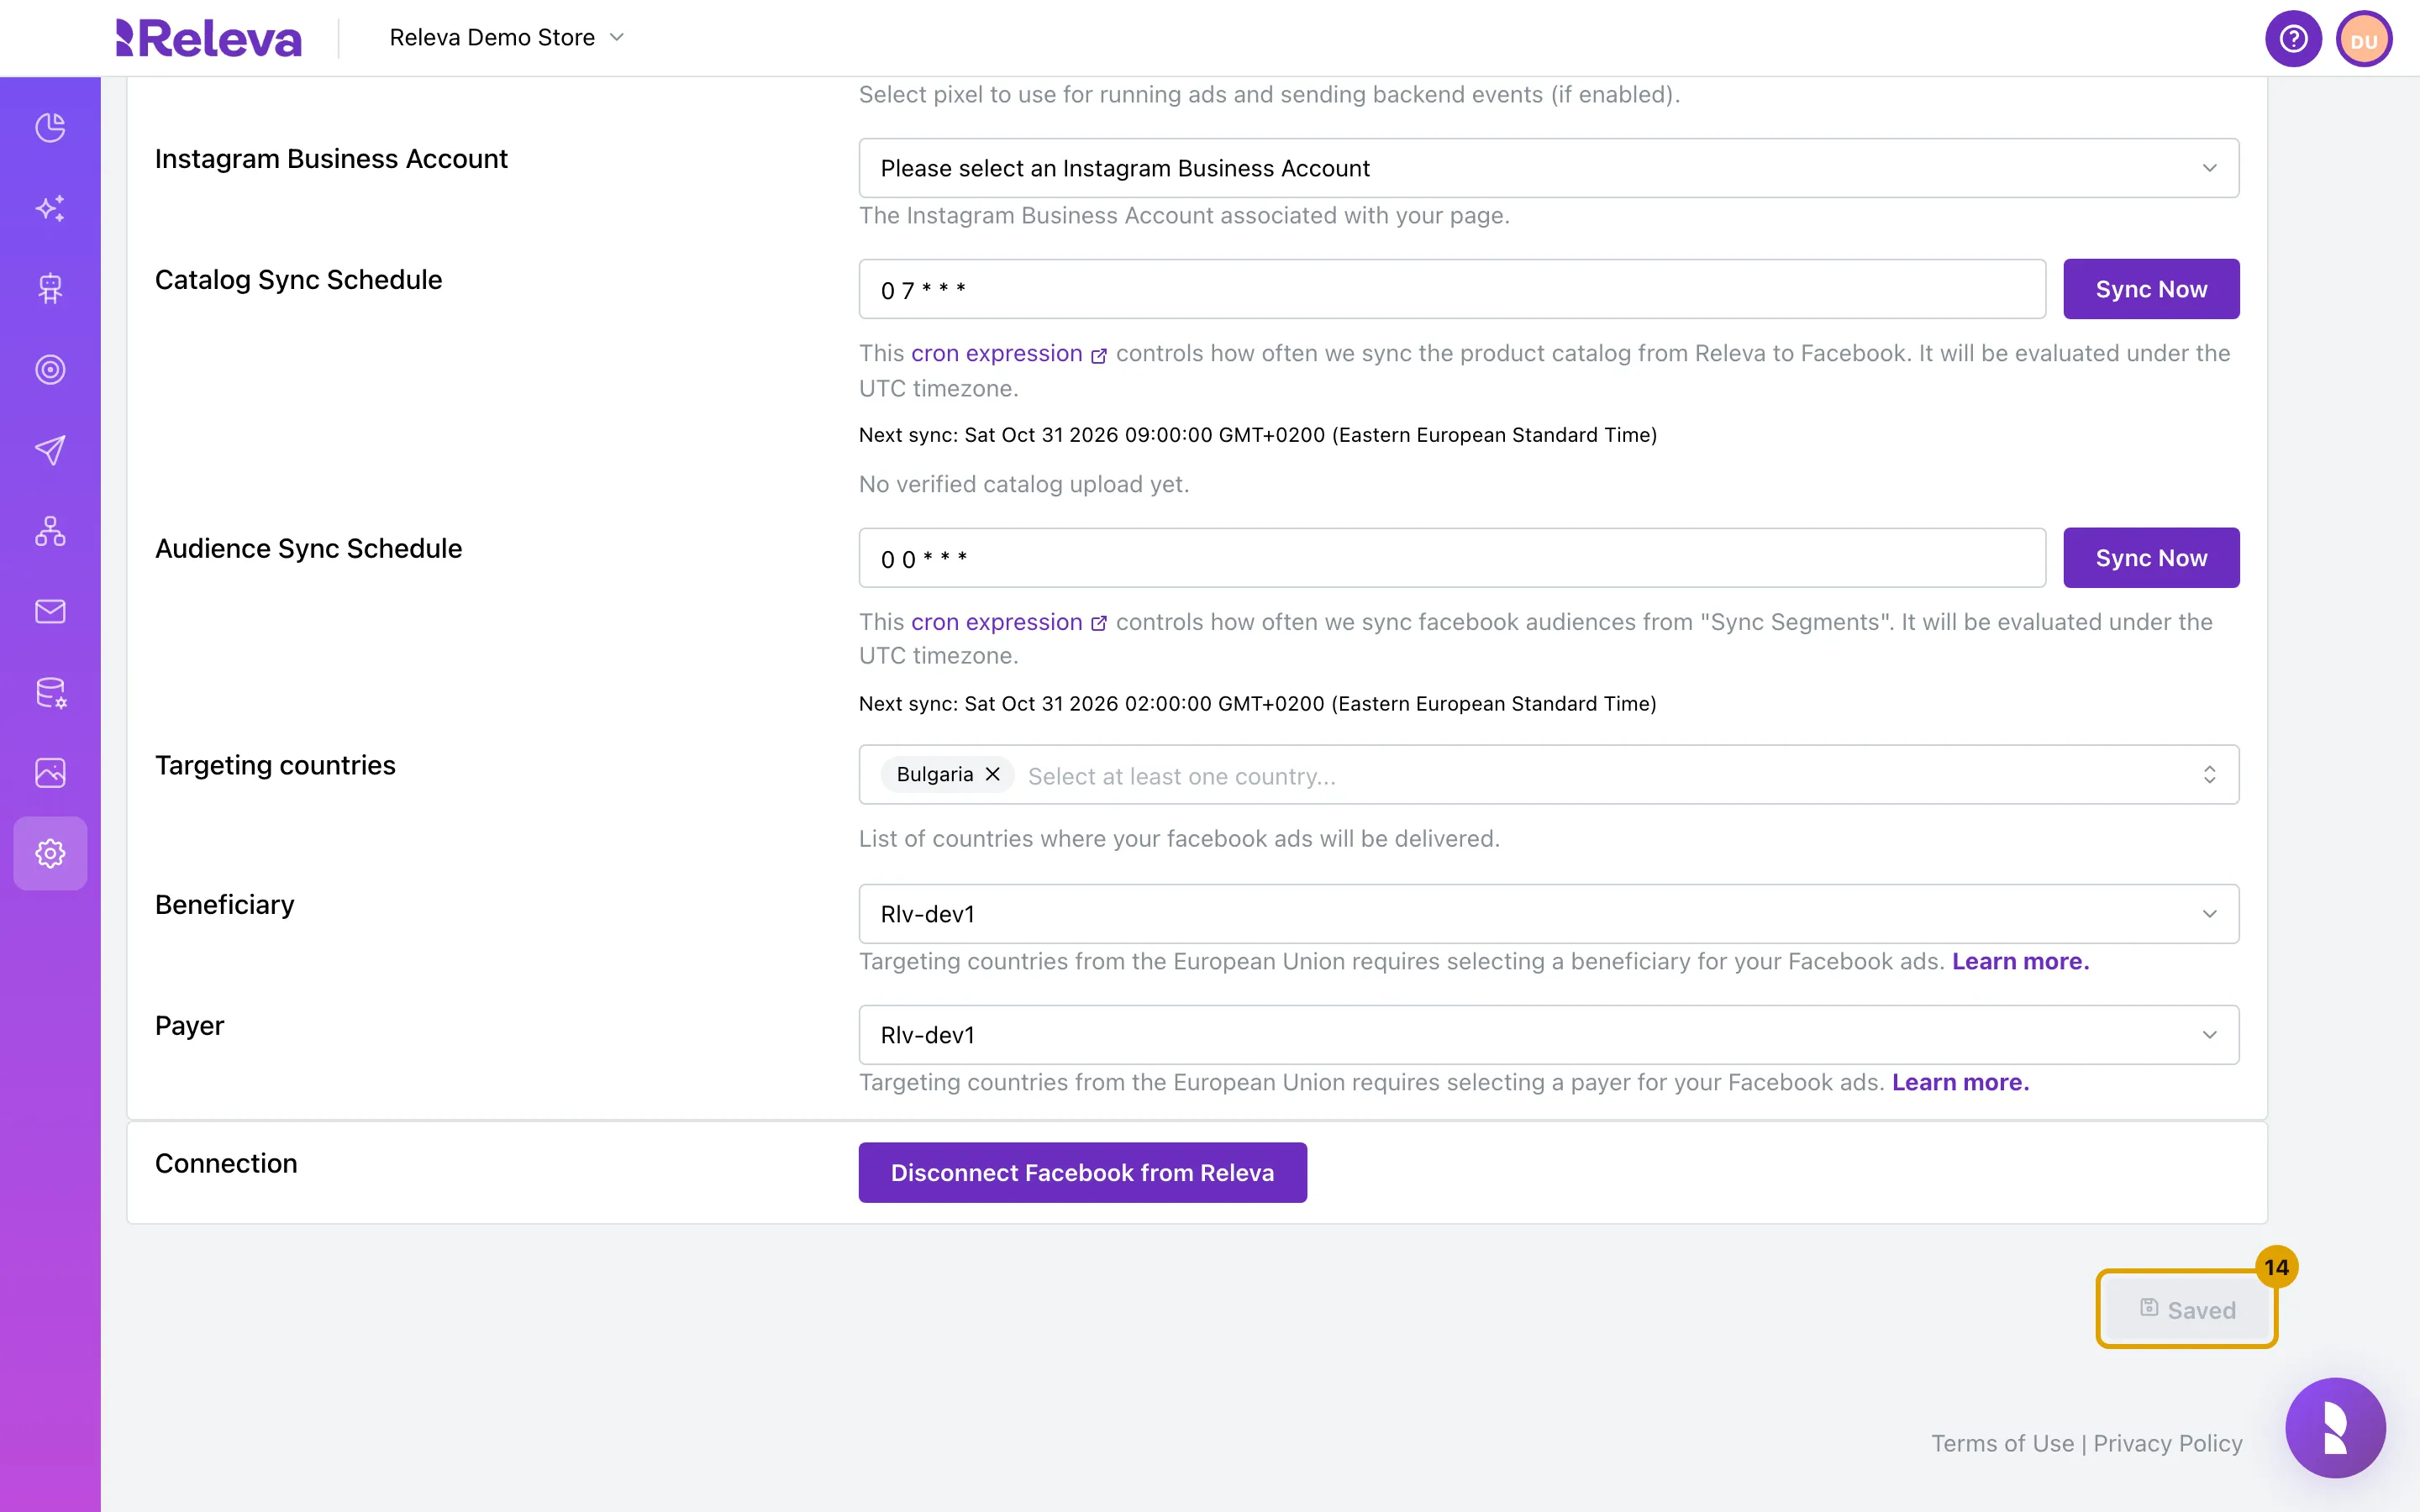
The button changes to Saved. On the first save, Releva creates a product catalog in your Meta business named after your page, <page name> (<page id>) Releva Products Catalog, gives your Facebook user access to it and links your pixel. You do not pick a catalog: Releva creates and owns it. If the business already has that catalog, Releva reuses it.
-
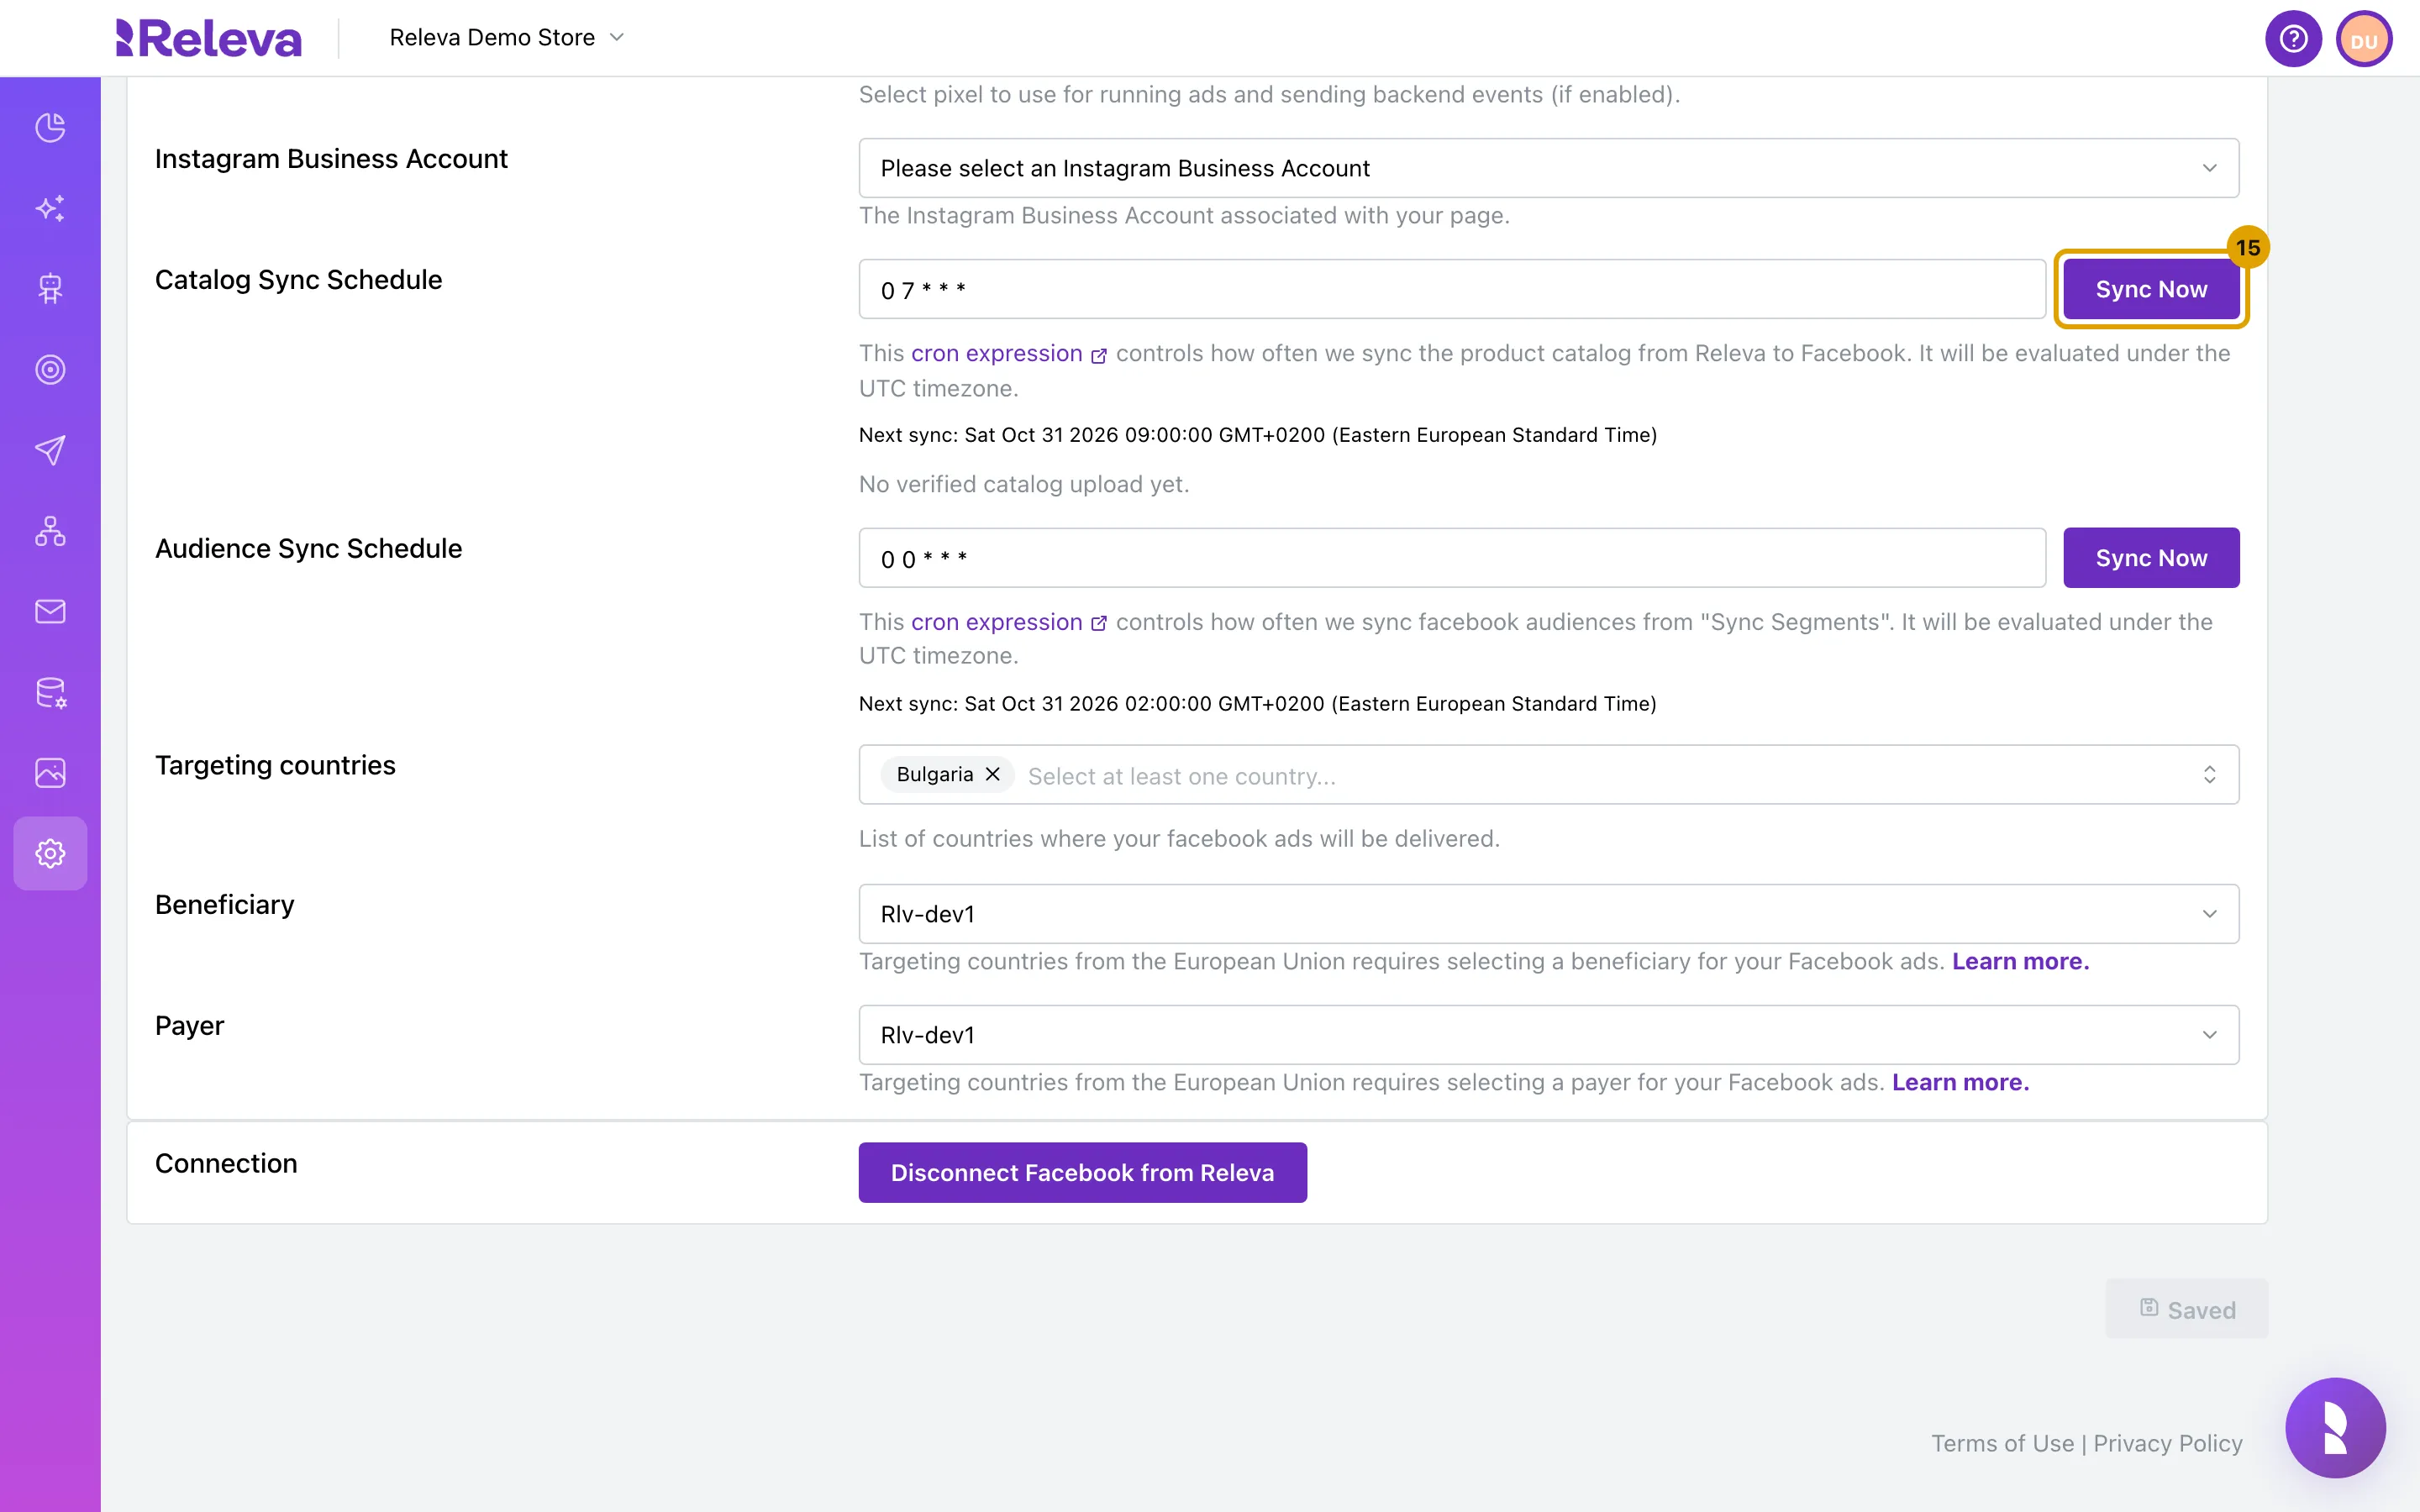
Next to Catalog Sync Schedule, select Sync Now to send your products to Meta right away
Without this, the first sync runs at the next scheduled time.
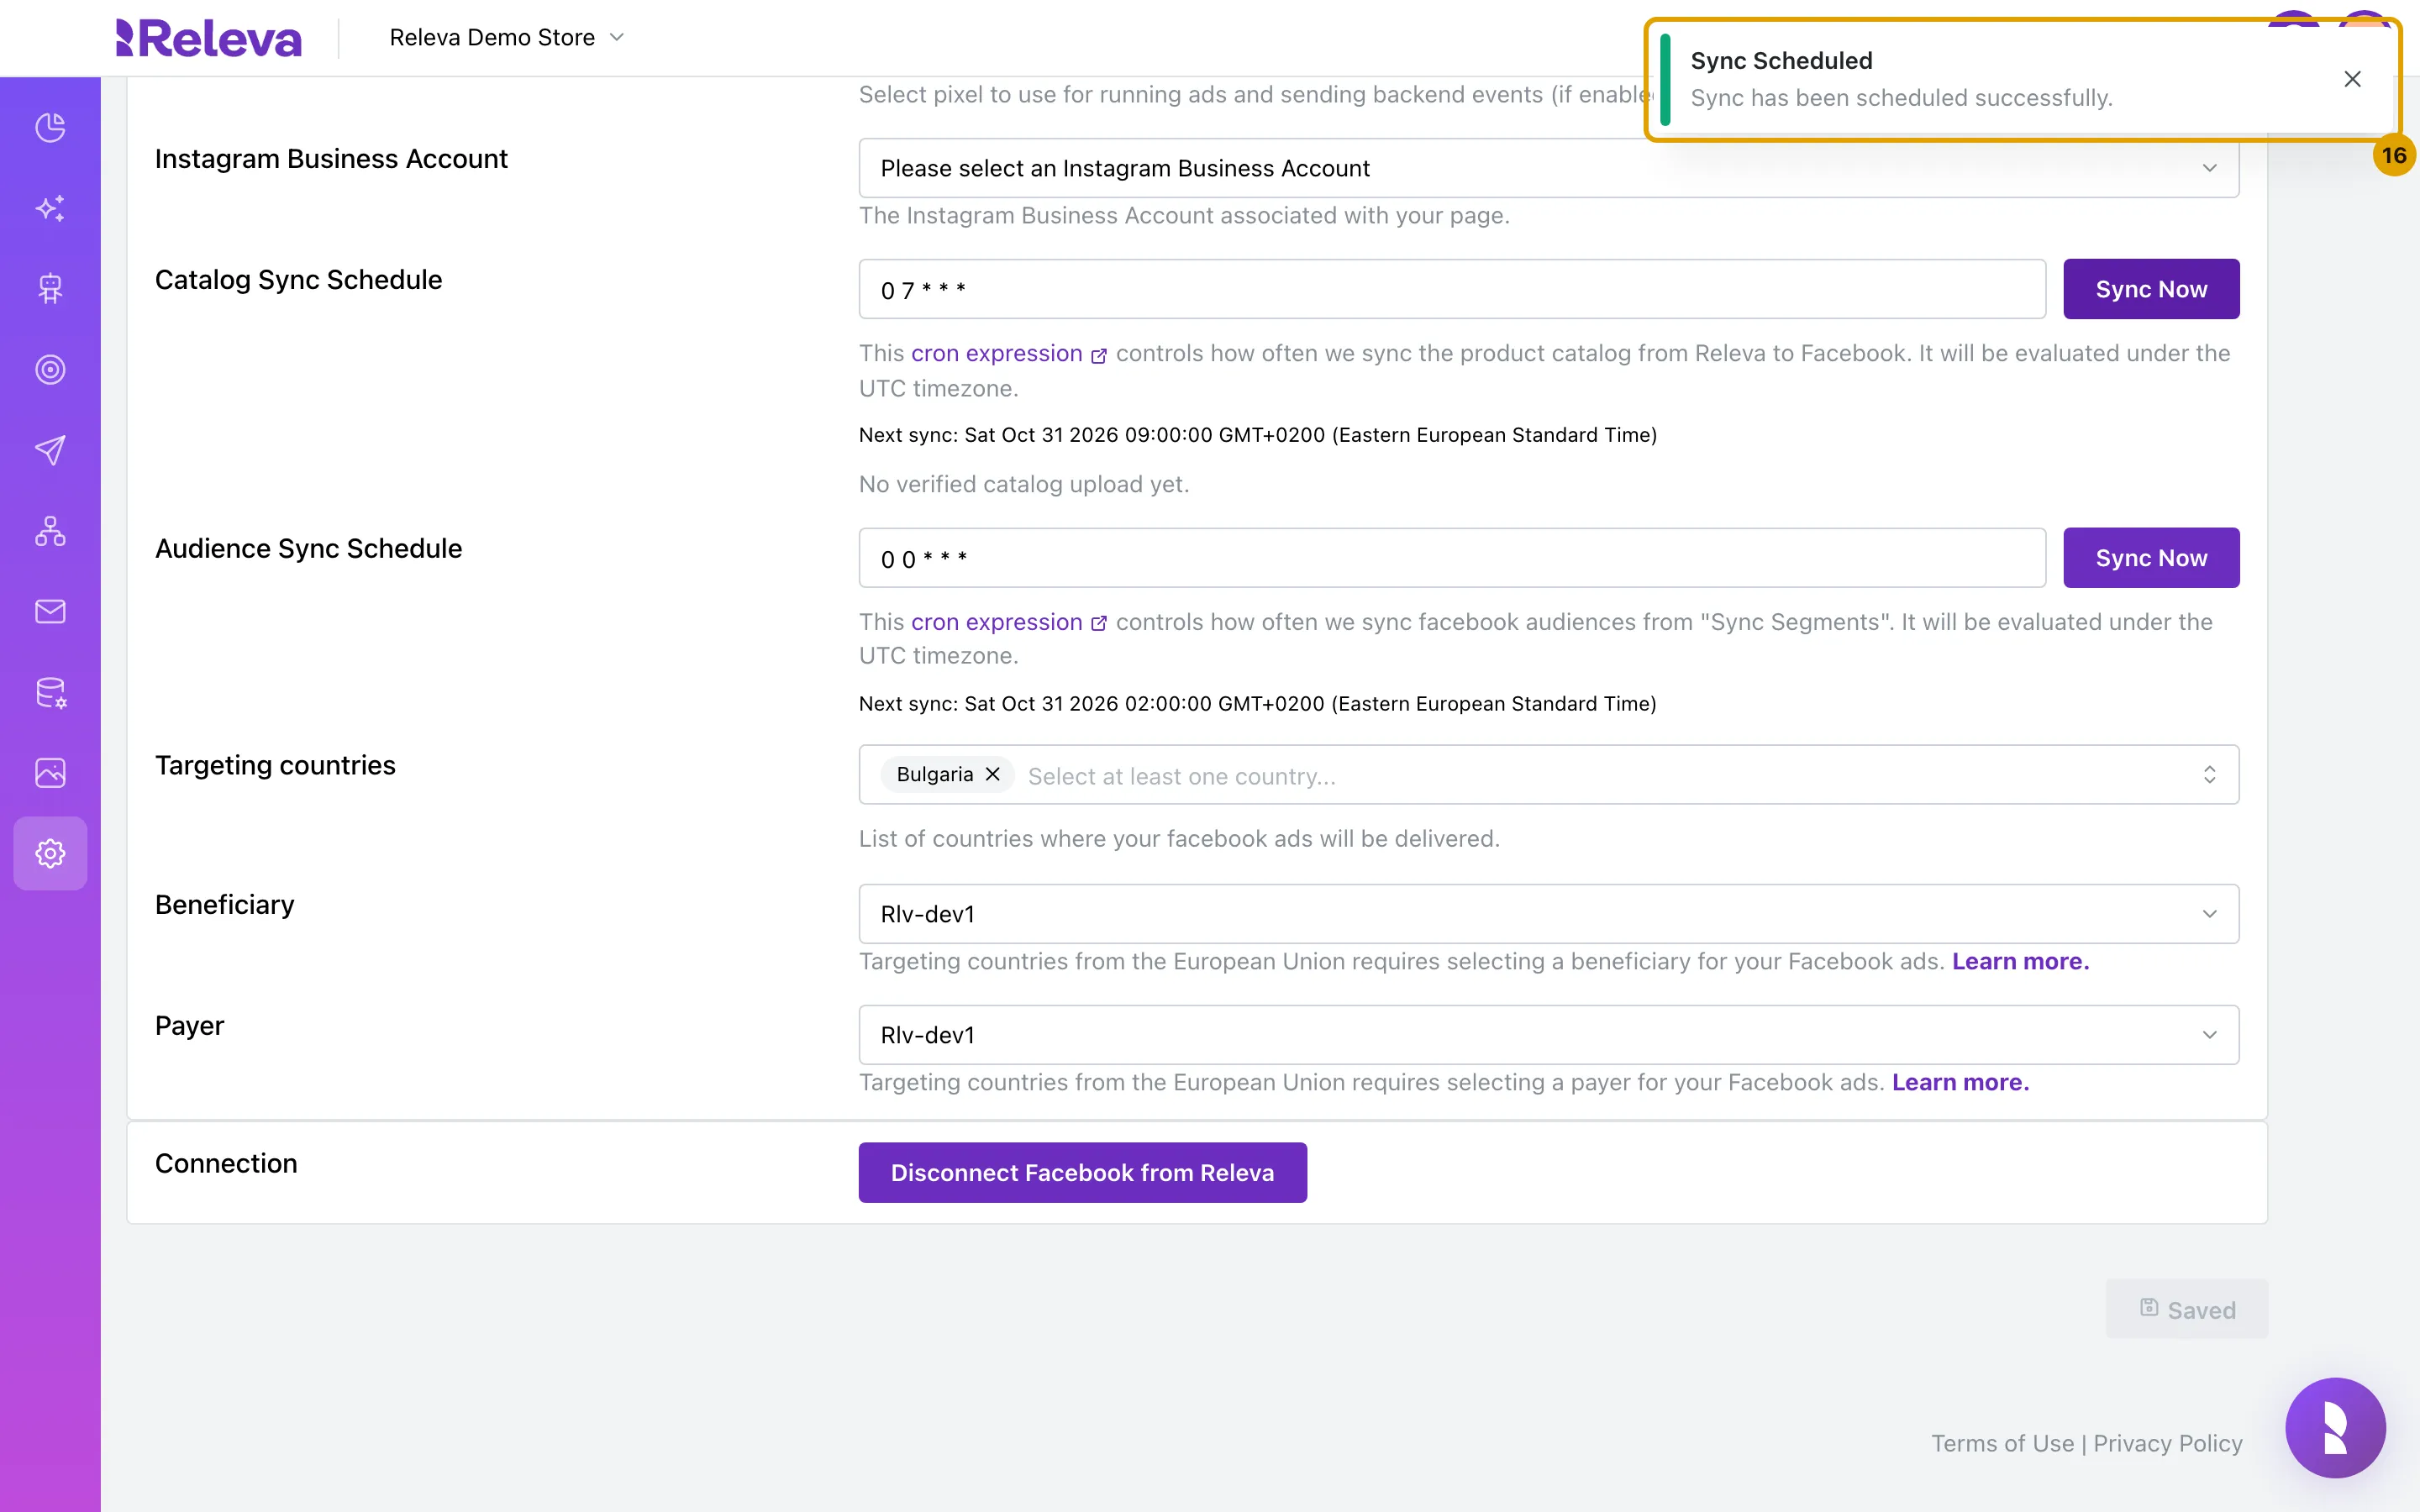
Releva confirms with Sync Scheduled – Sync has been scheduled successfully. The upload runs in the background and usually takes less than a minute.
Check it worked
Section titled “Check it worked”Reload the page after about a minute. Your selections are kept, and a Last catalog upload card appears under Catalog Sync Schedule:
- The badge reads OK, with the time of the upload.
- Products in main feed is the number of products Releva sent; Products in catalog is the number Meta holds.
- In the table, Applied should match Rows sent and Rejected should be 0.
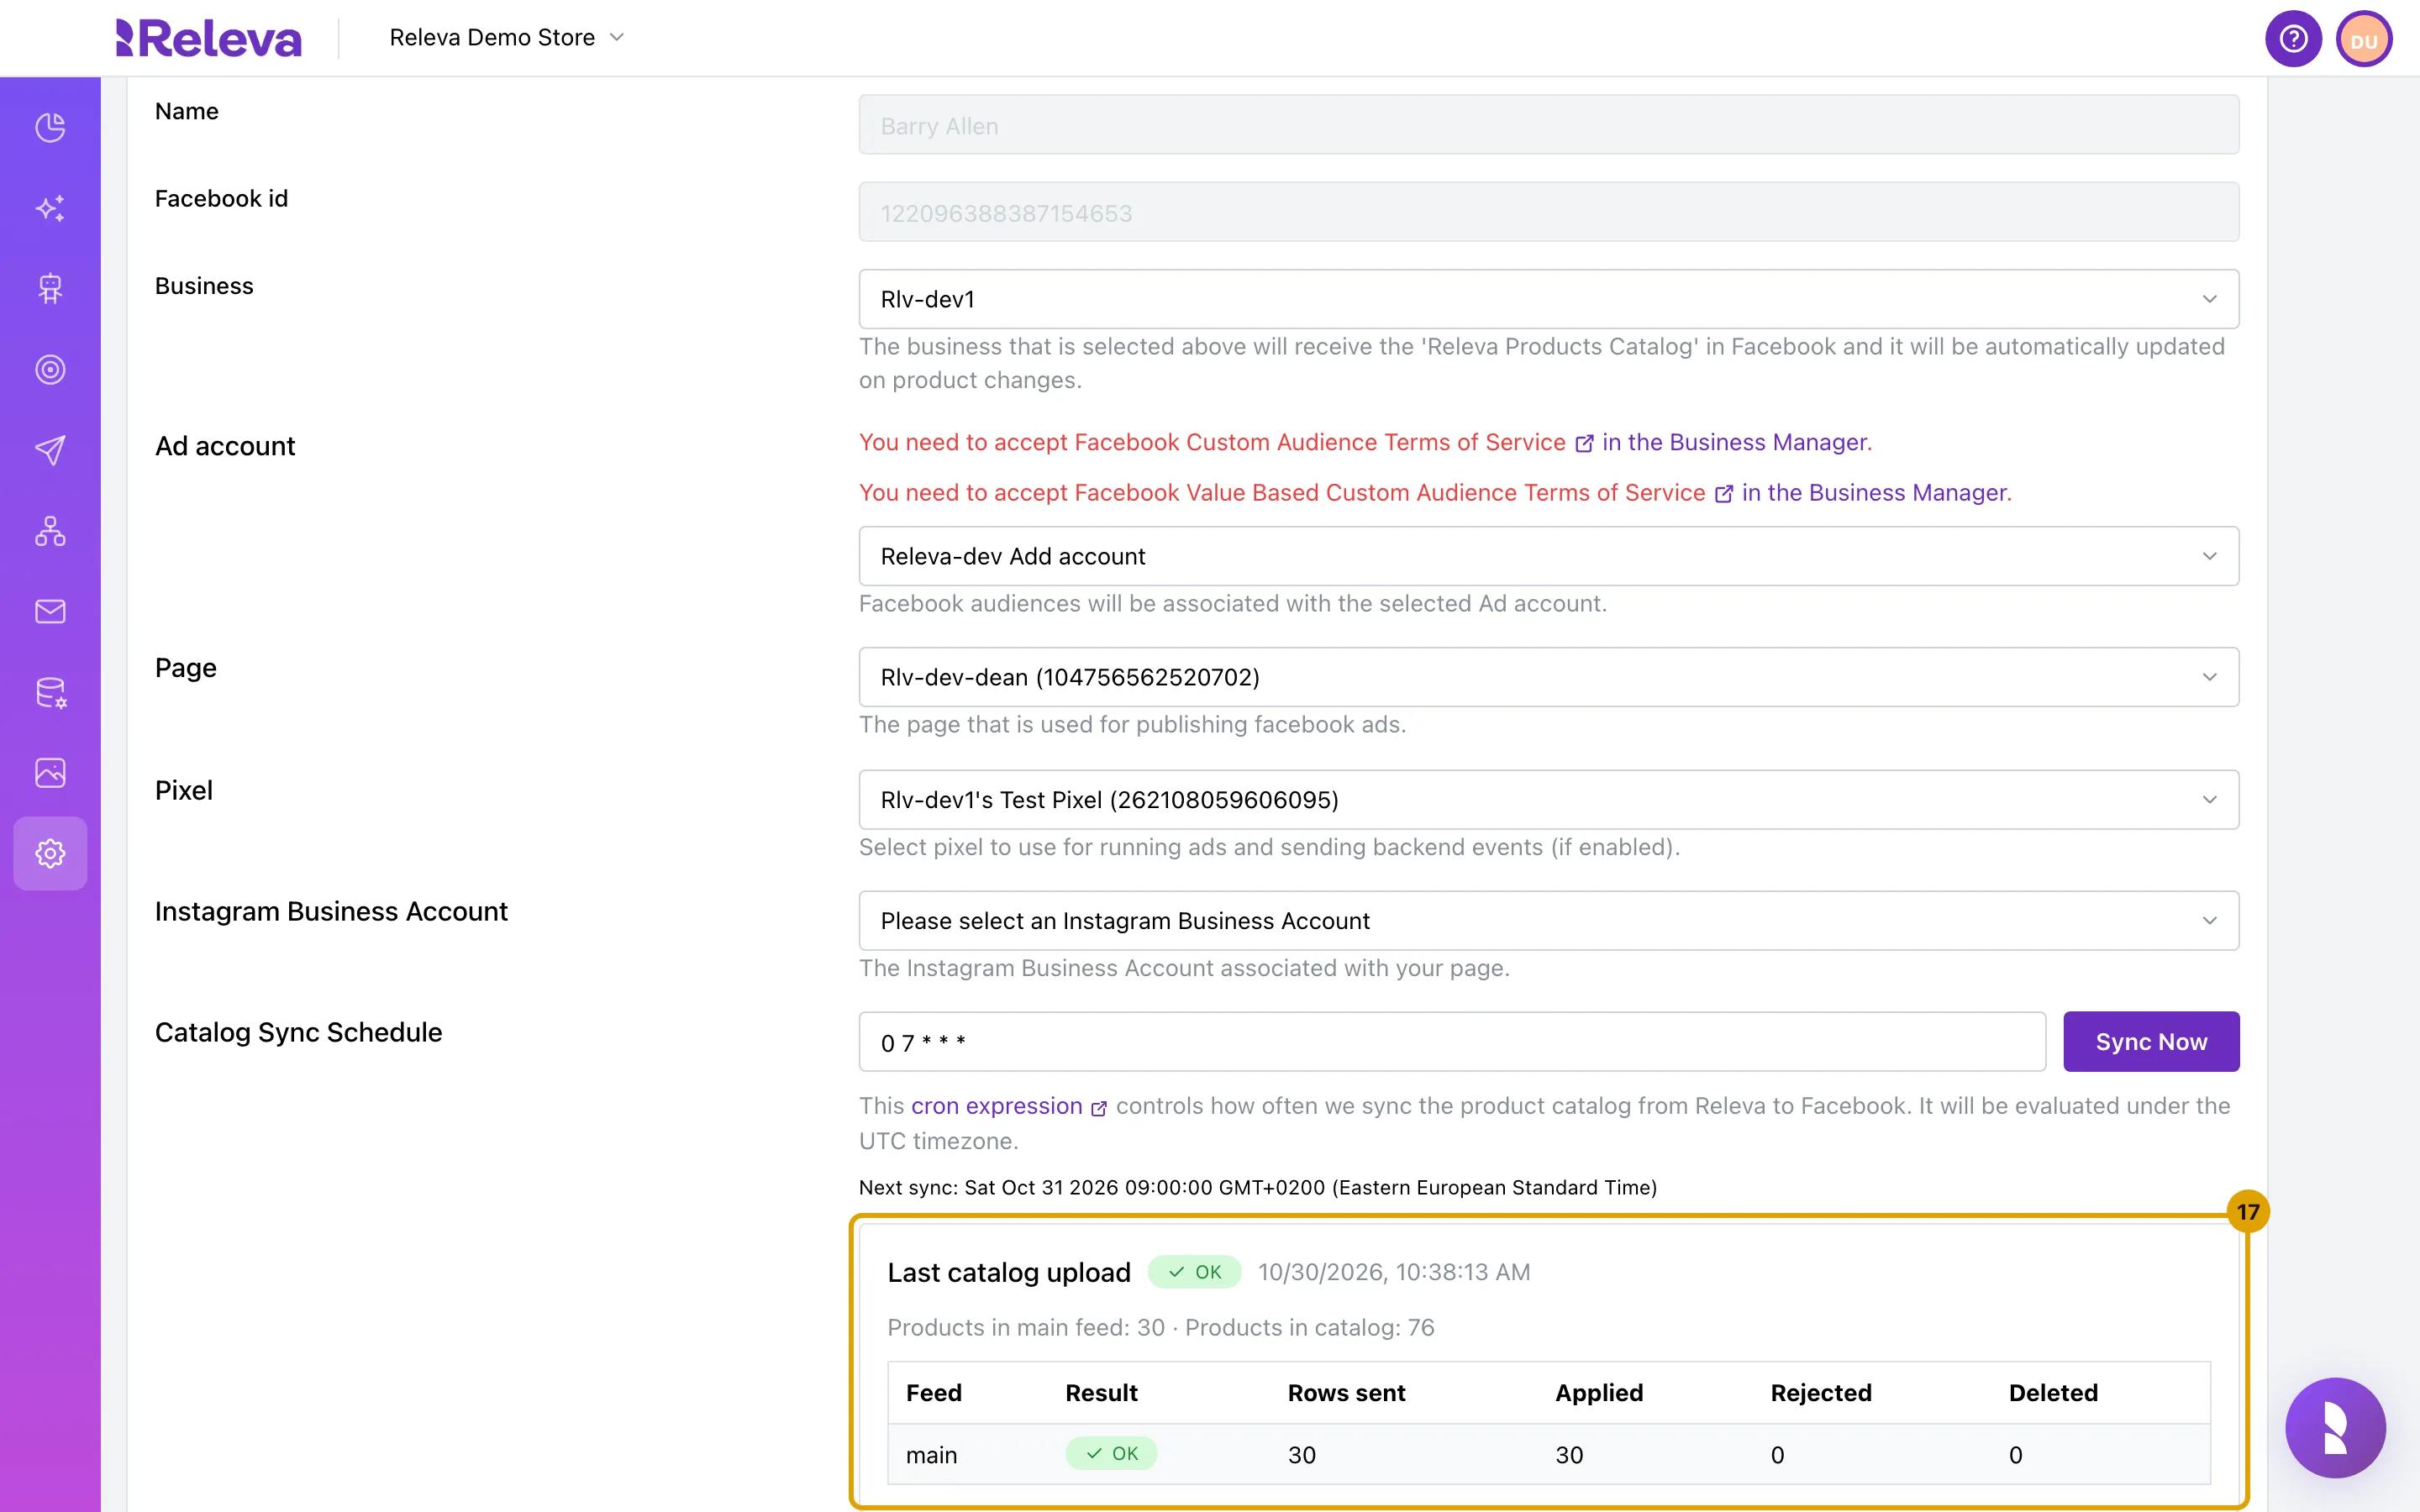
Until the first upload finishes, the card reads No verified catalog upload yet. The card refreshes only when you reload the page.
Troubleshooting
Section titled “Troubleshooting”Save stays disabled. One of the required settings is missing: Ad account, Page, Pixel, at least one Targeting countries entry, or a valid cron expression in both sync schedules. A schedule that is not a valid cron expression shows Invalid cron expression.
Red notes about the Custom Audience Terms of Service. The ad account has not accepted Meta’s Custom Audience terms. Select in the Business Manager next to each note, accept the terms in Meta, and reload the page.
Sync Now says Sync Scheduled, but Last catalog upload never appears. Releva may not have switched on the Facebook integration for your shop. Releva then skips every sync, but the confirmation still appears. Ask your Releva contact to switch it on. If Sync Now shows Catalog Sync Error, the request did not reach Releva: check your connection and try again. (The audience Sync Now also reports its errors as Catalog Sync Error.)
Save fails with Please assign <user> permissions to <catalog> catalog and try again. Releva could not give your Facebook user access to the Releva catalog. In Meta Business Manager, assign the user to the catalog with permission to manage it, then save again.
The upload card shows Failed, Partly applied or Meta did not finish. Meta rejected some or all products. The card lists the reasons under Problems in <feed>, with sample rows. Fix the products in your catalog and select Sync Now again. Meta did not finish means Meta was still processing; reload later.
You change the ad account later. Releva asks you to confirm: Please note that modifying your Facebook Ad Account will trigger the creation of new Facebook Ads reflecting the revised settings. After you save, Releva creates new campaigns for your Facebook ads and new audiences for your Facebook segment syncs in the new ad account.
The Facebook tab shows Connect Facebook to Releva again. Facebook ended Releva’s access, for example because the password changed or access was removed. Releva removes the connection and emails you a request to log in again. Select Connect Facebook to Releva, log in, and check your settings.
You want to disconnect. Under Connection, select Disconnect Facebook from Releva. If an ad account is set, Releva asks you to confirm: active campaigns are paused in Facebook Ads Manager and stopped in Releva, and WhatsApp message workflows stop.