

Get started with Releva
Thank you for choosing Releva. This page shows you how you get into your shop and what to turn on first, so that you see results soon. The list follows the same order as the How-To Guide inside Releva, and each item links to the guide with the full steps.
How your shop is set up
Section titled “How your shop is set up”- Releva’s team set up your shop. This is the usual case. Releva’s team creates the shop and sends you access. Sign in and start with step 1 below.
- You installed the Releva app from the Shopify or MerchantPro App Store. Installing the app creates your shop. See Connect your Shopify store or Install the Releva app on MerchantPro.
- You created the shop yourself. Releva opens Brand Identity right after you select Create. See Create your shop.
Releva’s team helps you with the setup. In the top bar, select Book Onboarding Session to pick a time, or write to support@releva.ai.
Before you start
Section titled “Before you start”- Your shop is set up in Releva and you can sign in.
- Your shop’s website is public, so that Releva can read your brand from it.
-
Confirm your brand.
Releva reads your website and proposes your logos, colors, font and voice. In the top bar, select the Get Help icon (the question mark), then How-to Guide. In the Brand Identity card, select Confirm your brand. See Set up your Brand Identity.
-
Install Releva on your site.
Releva needs your catalog, your orders and what visitors do on your site. On Shopify, install the Releva app: see Connect your Shopify store. On another platform, follow your platform’s guide in Integrations. For a custom website, your developer follows Developers › Get started › Build your integration. Then check that your store data arrives.
-
Set up your email sender and DNS records.
Until both DNS records for your sender domain are verified, Releva does not send your email campaigns. See Set up your email sender and DNS records.
-
Turn on the abandoned cart and abandoned browsing workflows.
Review the emails before you turn the workflows on. They go to your customers as they are. Under Marketing Channels › Emails, open [Automated] Cart abandonment and [Automated] Browse abandonment and adapt them to your shop. Then, under Workflows › Continuous, turn on the switch of Cart abandonment and of Browse abandonment. Your shop has these workflows when the How-To Guide shows the Activate Workflows card. If Workflows › Continuous also lists a weekly promotion workflow, review its email and turn it on the same way. See Build an email in the visual editor and Change the steps of a workflow.
-
Turn on the subscription banner to grow your list of subscribers.
Under Personalization › Banner Blocks, open the banner block Subscription form, adapt it, and turn on its switch. To build your own sign-up banner, see Create a banner and Show a banner on your site.
-
Show product recommendations on your site.
Under Personalization › Product Blocks, turn on the product block Recommended for You on your Homepage page. See Turn on a product block and check its results.
-
Send an email to new subscribers.
Create a triggered workflow on the Subscribed event that sends a welcome email, for example with a discount code. See Create a triggered workflow.
-
Send a welcome series to customers who register.
Create a triggered workflow on the Registered event with a short series of emails about the benefits of shopping with you. Put a Wait step between two emails; waits are set in hours. See Create a triggered workflow.
-
Reach shoppers on Facebook.
Connect your Meta account and create Facebook ads for your Releva segments. See Connect your Meta account to Releva and Create a Facebook ad.
The steps at the top of this page take you through the first of these one page at a time: your brand, your sender, your first campaign, your first segment and your results.
Follow the How-To Guide in Releva
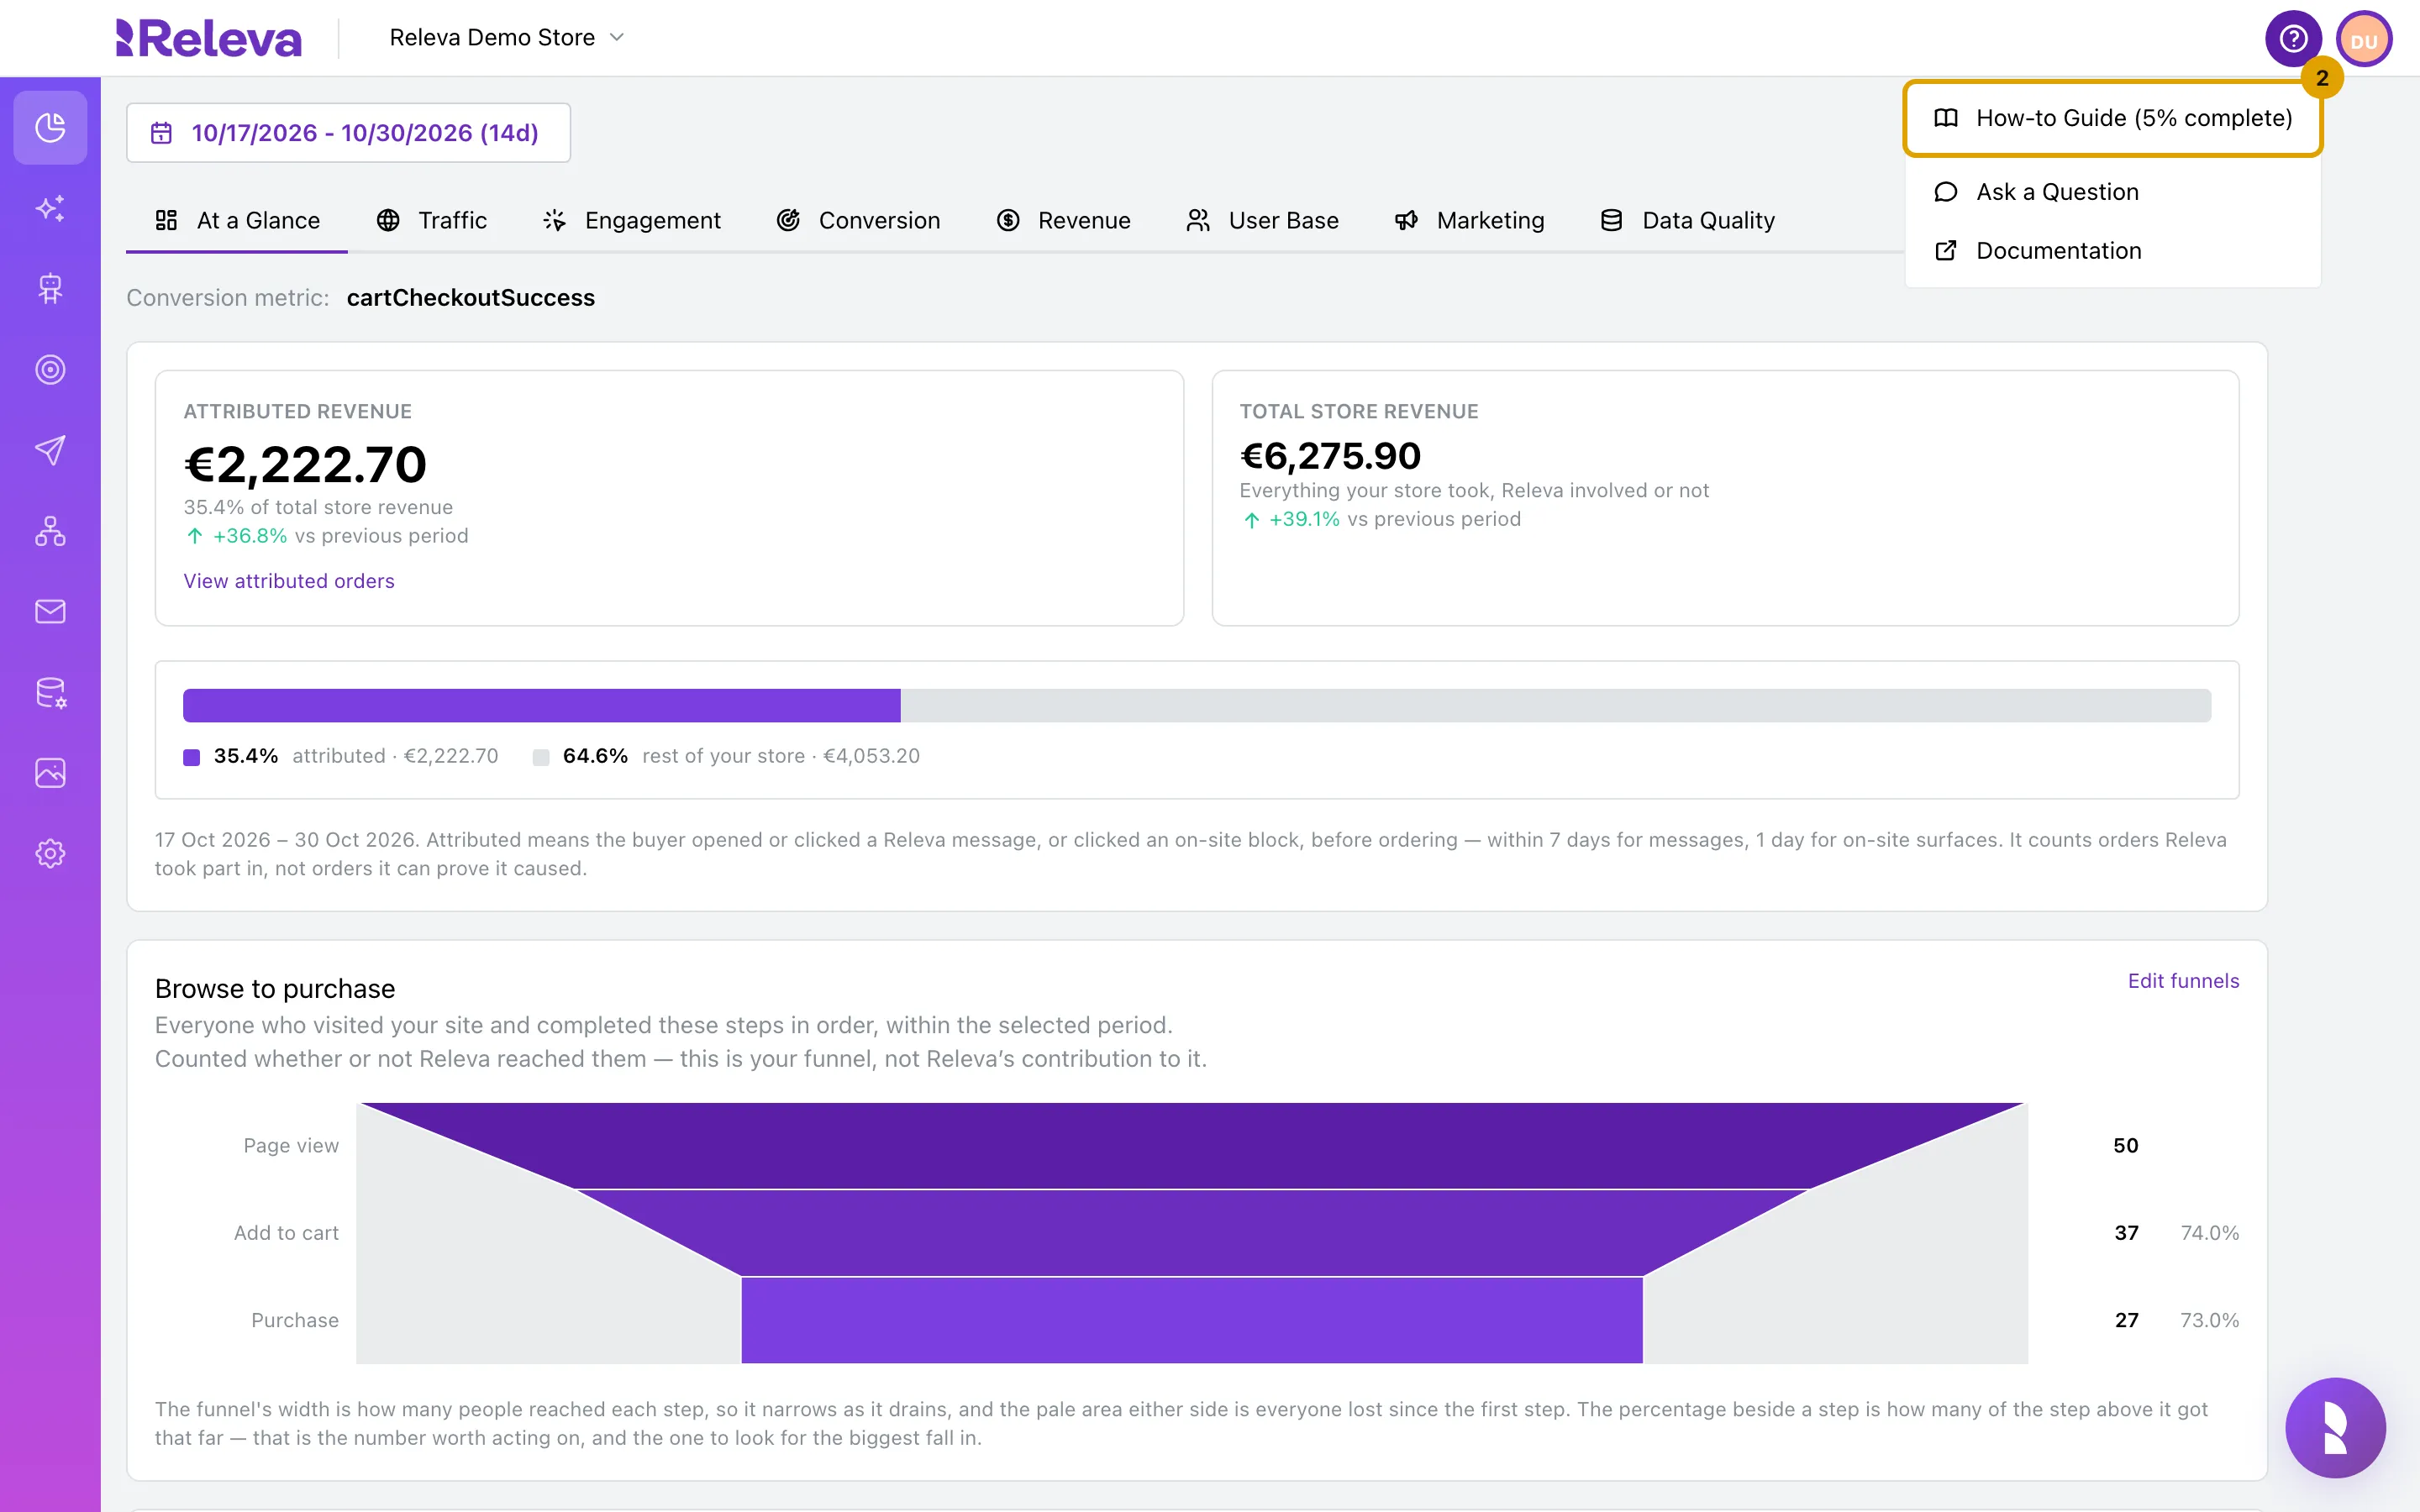
Section titled “Follow the How-To Guide in Releva”Releva’s How-To Guide tracks these tasks for you. In the top bar, select the Get Help icon (the question mark), then How-to Guide. The menu item shows how much you have completed, for example How-to Guide (5% complete).
Your Progress shows how many tasks you have completed, and each card shows its own count, such as 0/3 completed. Select a task to start its tour: the tour opens each page, points at what to select, and explains it. A task counts as done only when you select Next or Done on the tour’s last step.
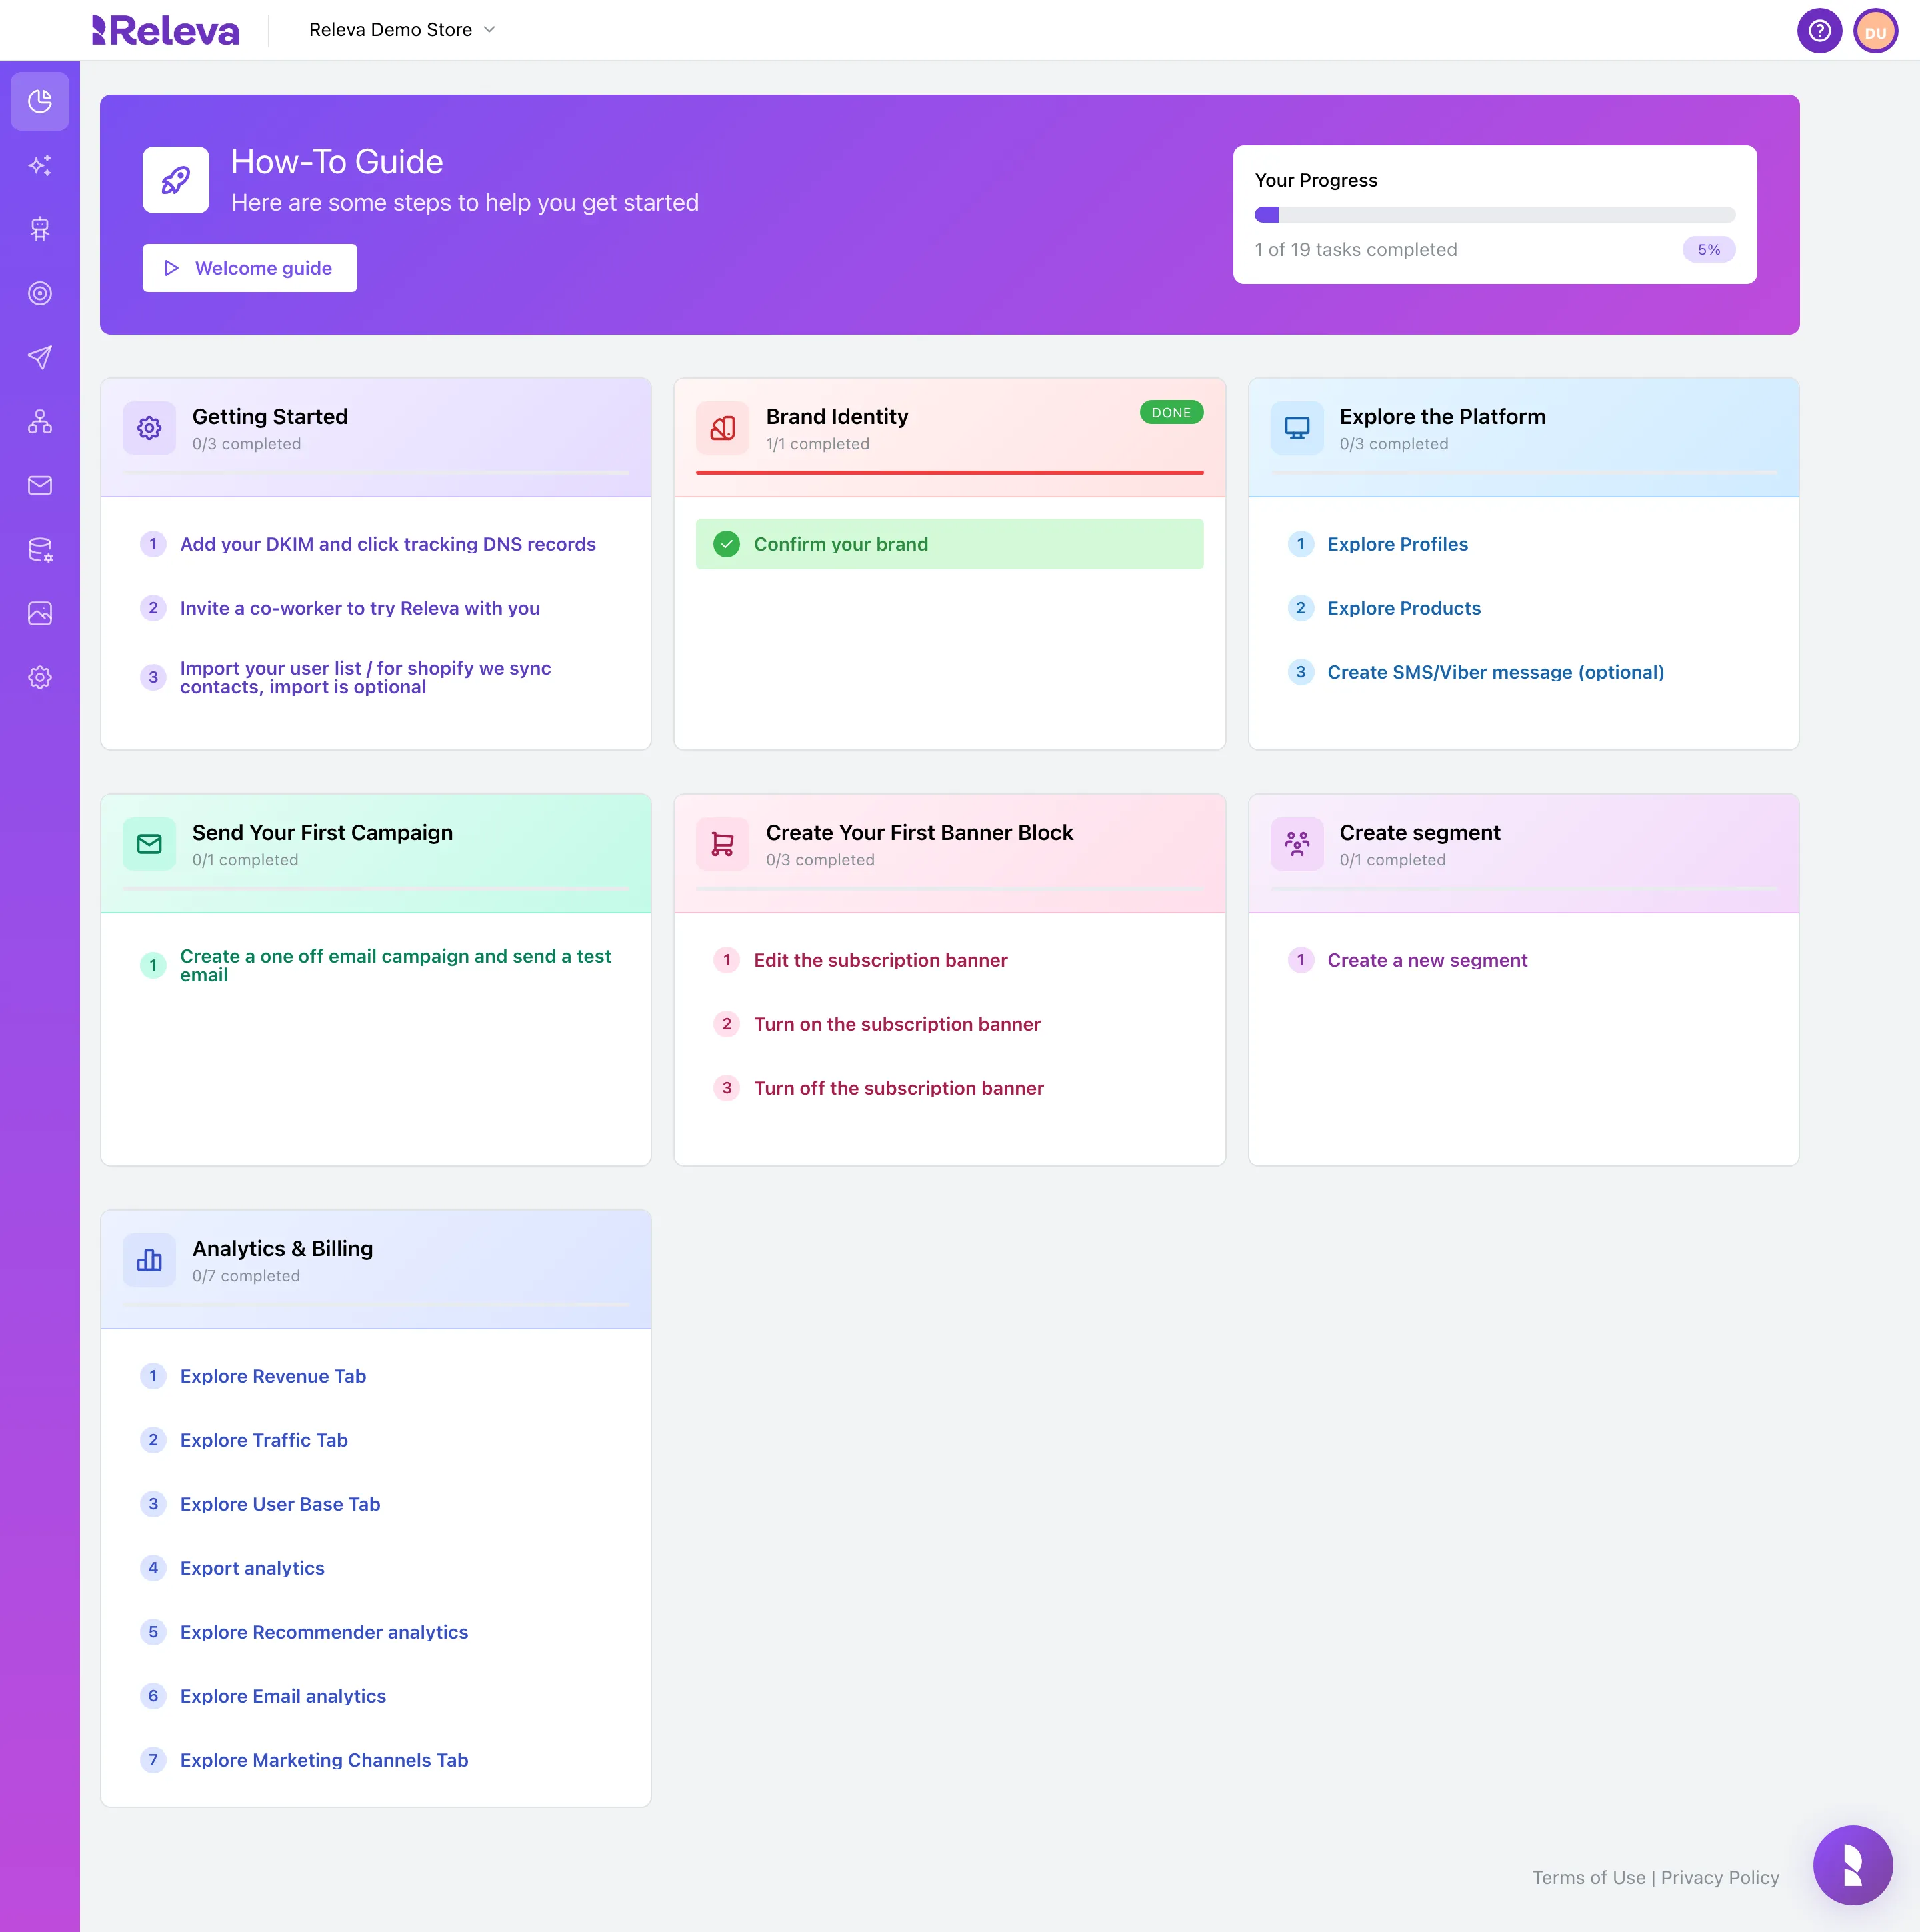
The cards, in order:
- Getting Started: add your DKIM and click tracking DNS records, invite a co-worker, and import your contacts. See Invite a collaborator and Import profiles from a CSV file.
- Brand Identity: Confirm your brand opens the Brand Identity page, the same page a new shop opens on after Create (step 1). See Set up your Brand Identity.
- Explore the Platform: tours of profiles, products, workflows, and SMS or Viber messages.
- Send Your First Campaign: a one-off email campaign from start to launch. See Create a one-off email campaign.
- Activate Workflows: the abandoned cart and abandoned browsing workflows (step 4).
- Create Your First Banner Block: edit, turn on or turn off the Subscription form banner block (step 5).
- Create Your First Product Block: create a recommender and turn on Recommended for You (step 6).
- Create segment: build a segment from rules. See Create a segment.
- Analytics & Billing: tours of the analytics tabs and exports. See Check how your store is doing.
Some cards and tasks appear only when your shop has the content they use. Activate Workflows needs the abandoned cart and browsing workflows, Create Your First Product Block needs the Recommended for You block on your homepage, and Send Your First Campaign needs at least one campaign.
Check it worked
Section titled “Check it worked”- In the How-To Guide, Your Progress shows more completed tasks, and the finished tasks are green with a check mark.
- Under Workflows › Continuous, the switches of Cart abandonment and Browse abandonment are on.
- Under Personalization, the switches of the banner block Subscription form and the product block Recommended for You are on.
Troubleshooting
Section titled “Troubleshooting”A card or task I expected is missing. The shop does not have the content the task uses, such as the abandoned cart workflow or the Recommended for You block. Write to support@releva.ai.
A task stays open after I went through it. A tour counts only when you select Next or Done on its last step; finish the tour again. The DNS, import, workflow, Confirm your brand and Turn on the recommender tasks check the real state of your shop instead, so complete the real action. Confirm your brand completes when the brand is confirmed.
The DNS task stays open after I added the records. Releva has not verified the records yet. Check the values in Set up your email sender and DNS records.
I need help with the setup. In the top bar, select Book Onboarding Session to pick a time with Releva’s team. After you book, the button reads Contact Support. You can also write to support@releva.ai.
The Subscribed or Registered event is not in the trigger list. The Event list of a triggered workflow shows only events your shop has already sent. Subscribe or register once on your site with a test address such as maria@example.com, then look again.