

Create a continuous workflow
A continuous workflow keeps running while it is switched on. Each profile that enters its segment goes through the steps on the canvas, for example an abandoned browsing reminder. This guide builds a workflow with one email step, saves it switched off, and shows how to switch it on. For the three workflow types, read How workflows work.
Before you start
Section titled “Before you start”- You have saved the messages the workflow sends, for example an email. The step panel only picks existing messages. See Build an email in the visual editor.
- You have a Behavior segment of the profiles that should enter. Only Behavior segments are offered. See Create a segment.
- Your plan includes continuous workflows. If New Workflow shows a lock, ask your account owner.
- To switch on a workflow that sends messages with links, your sender domain’s click-tracking DNS record must be verified. See Set up your email sender and DNS records.
-
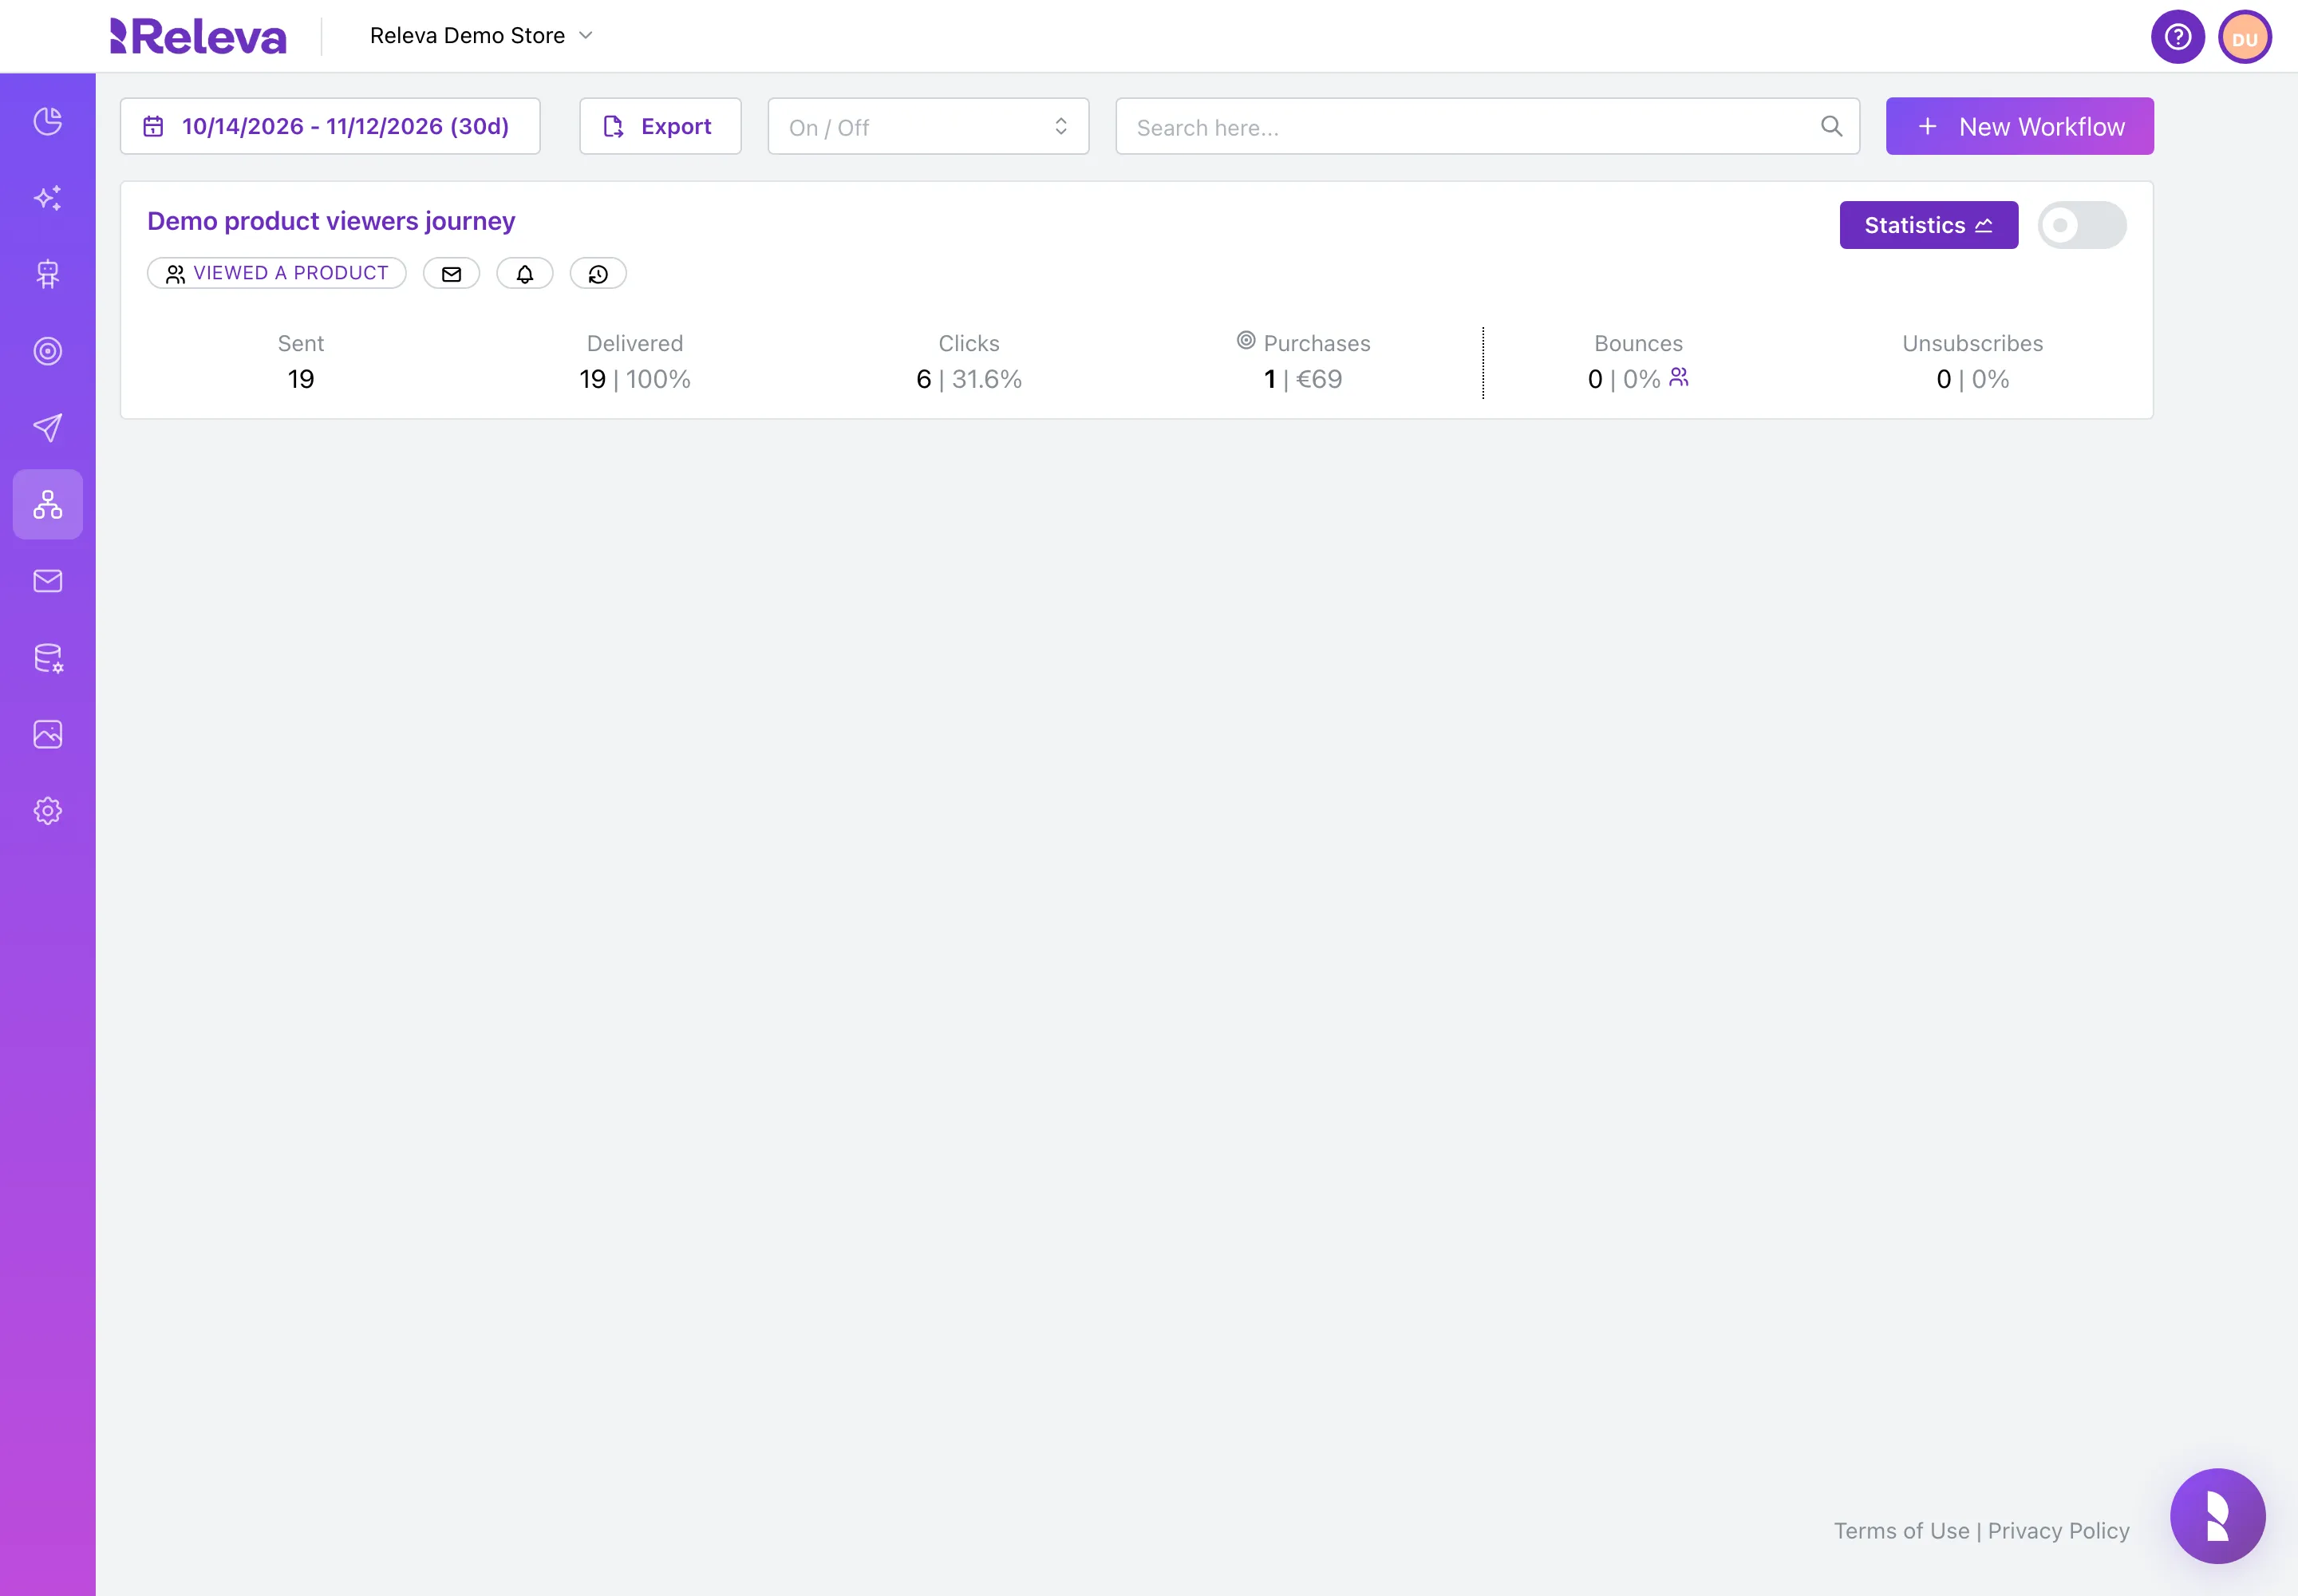
Go to Workflows › Continuous.
-
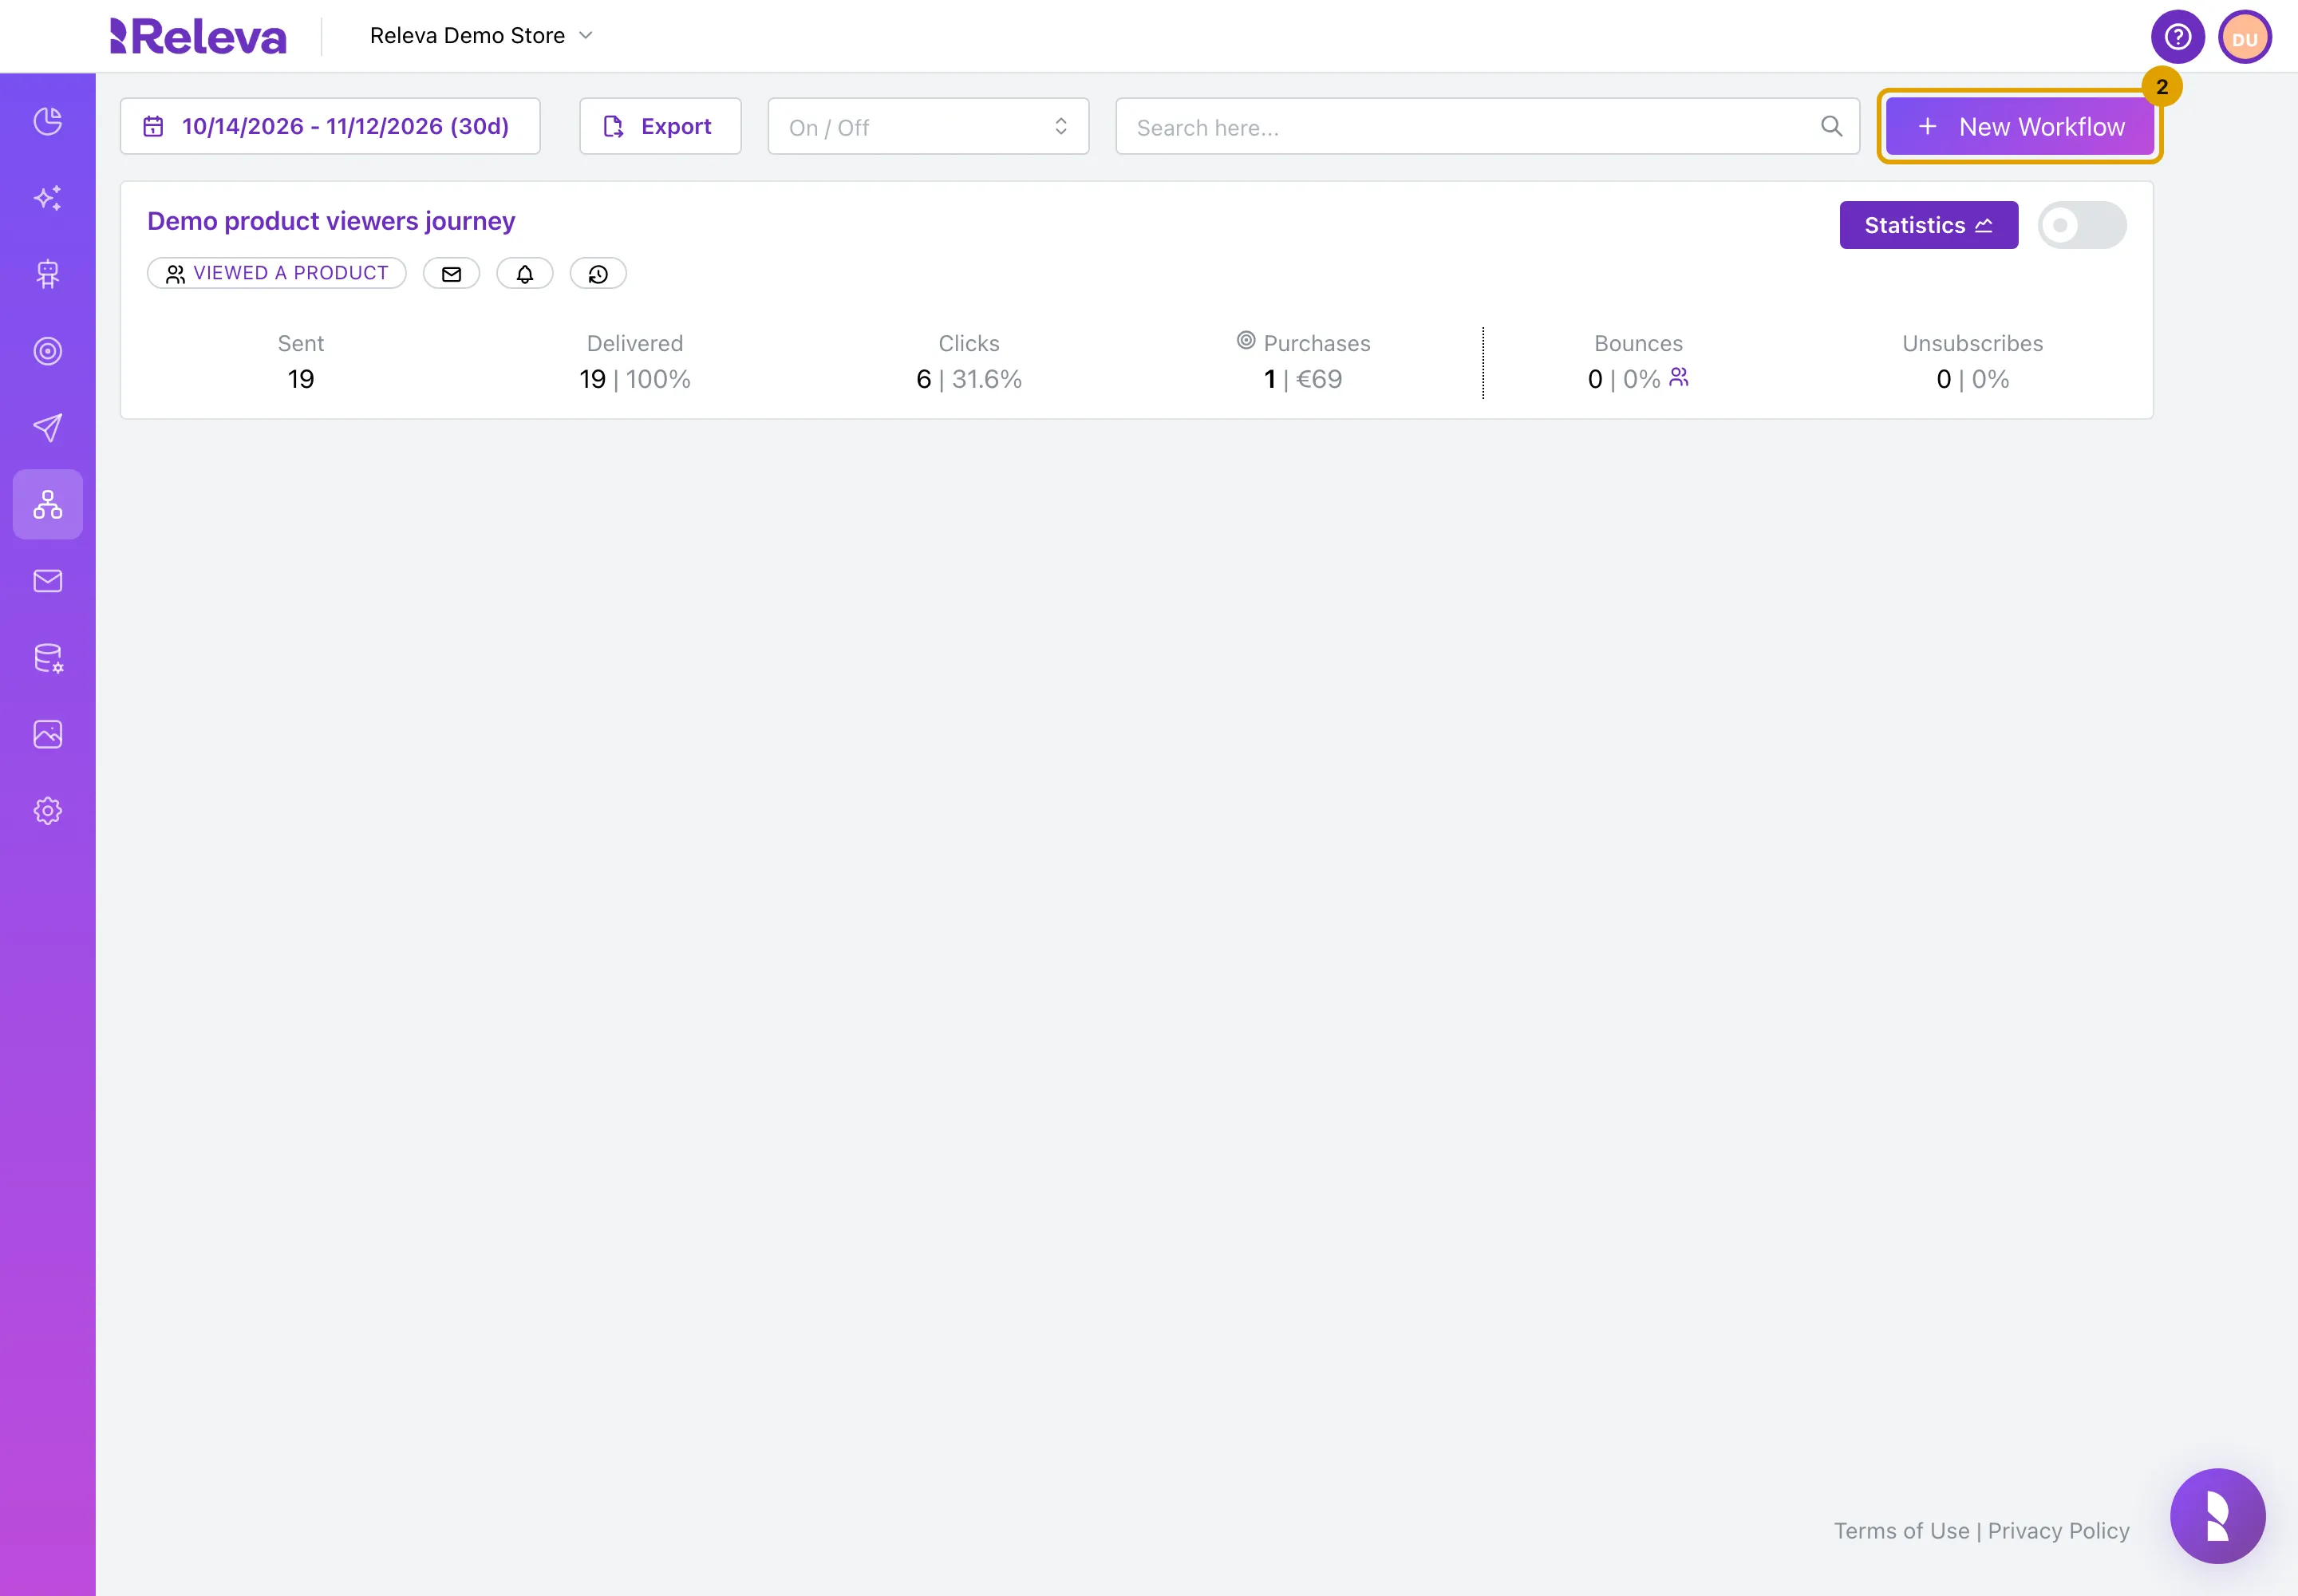
Select New Workflow.
-
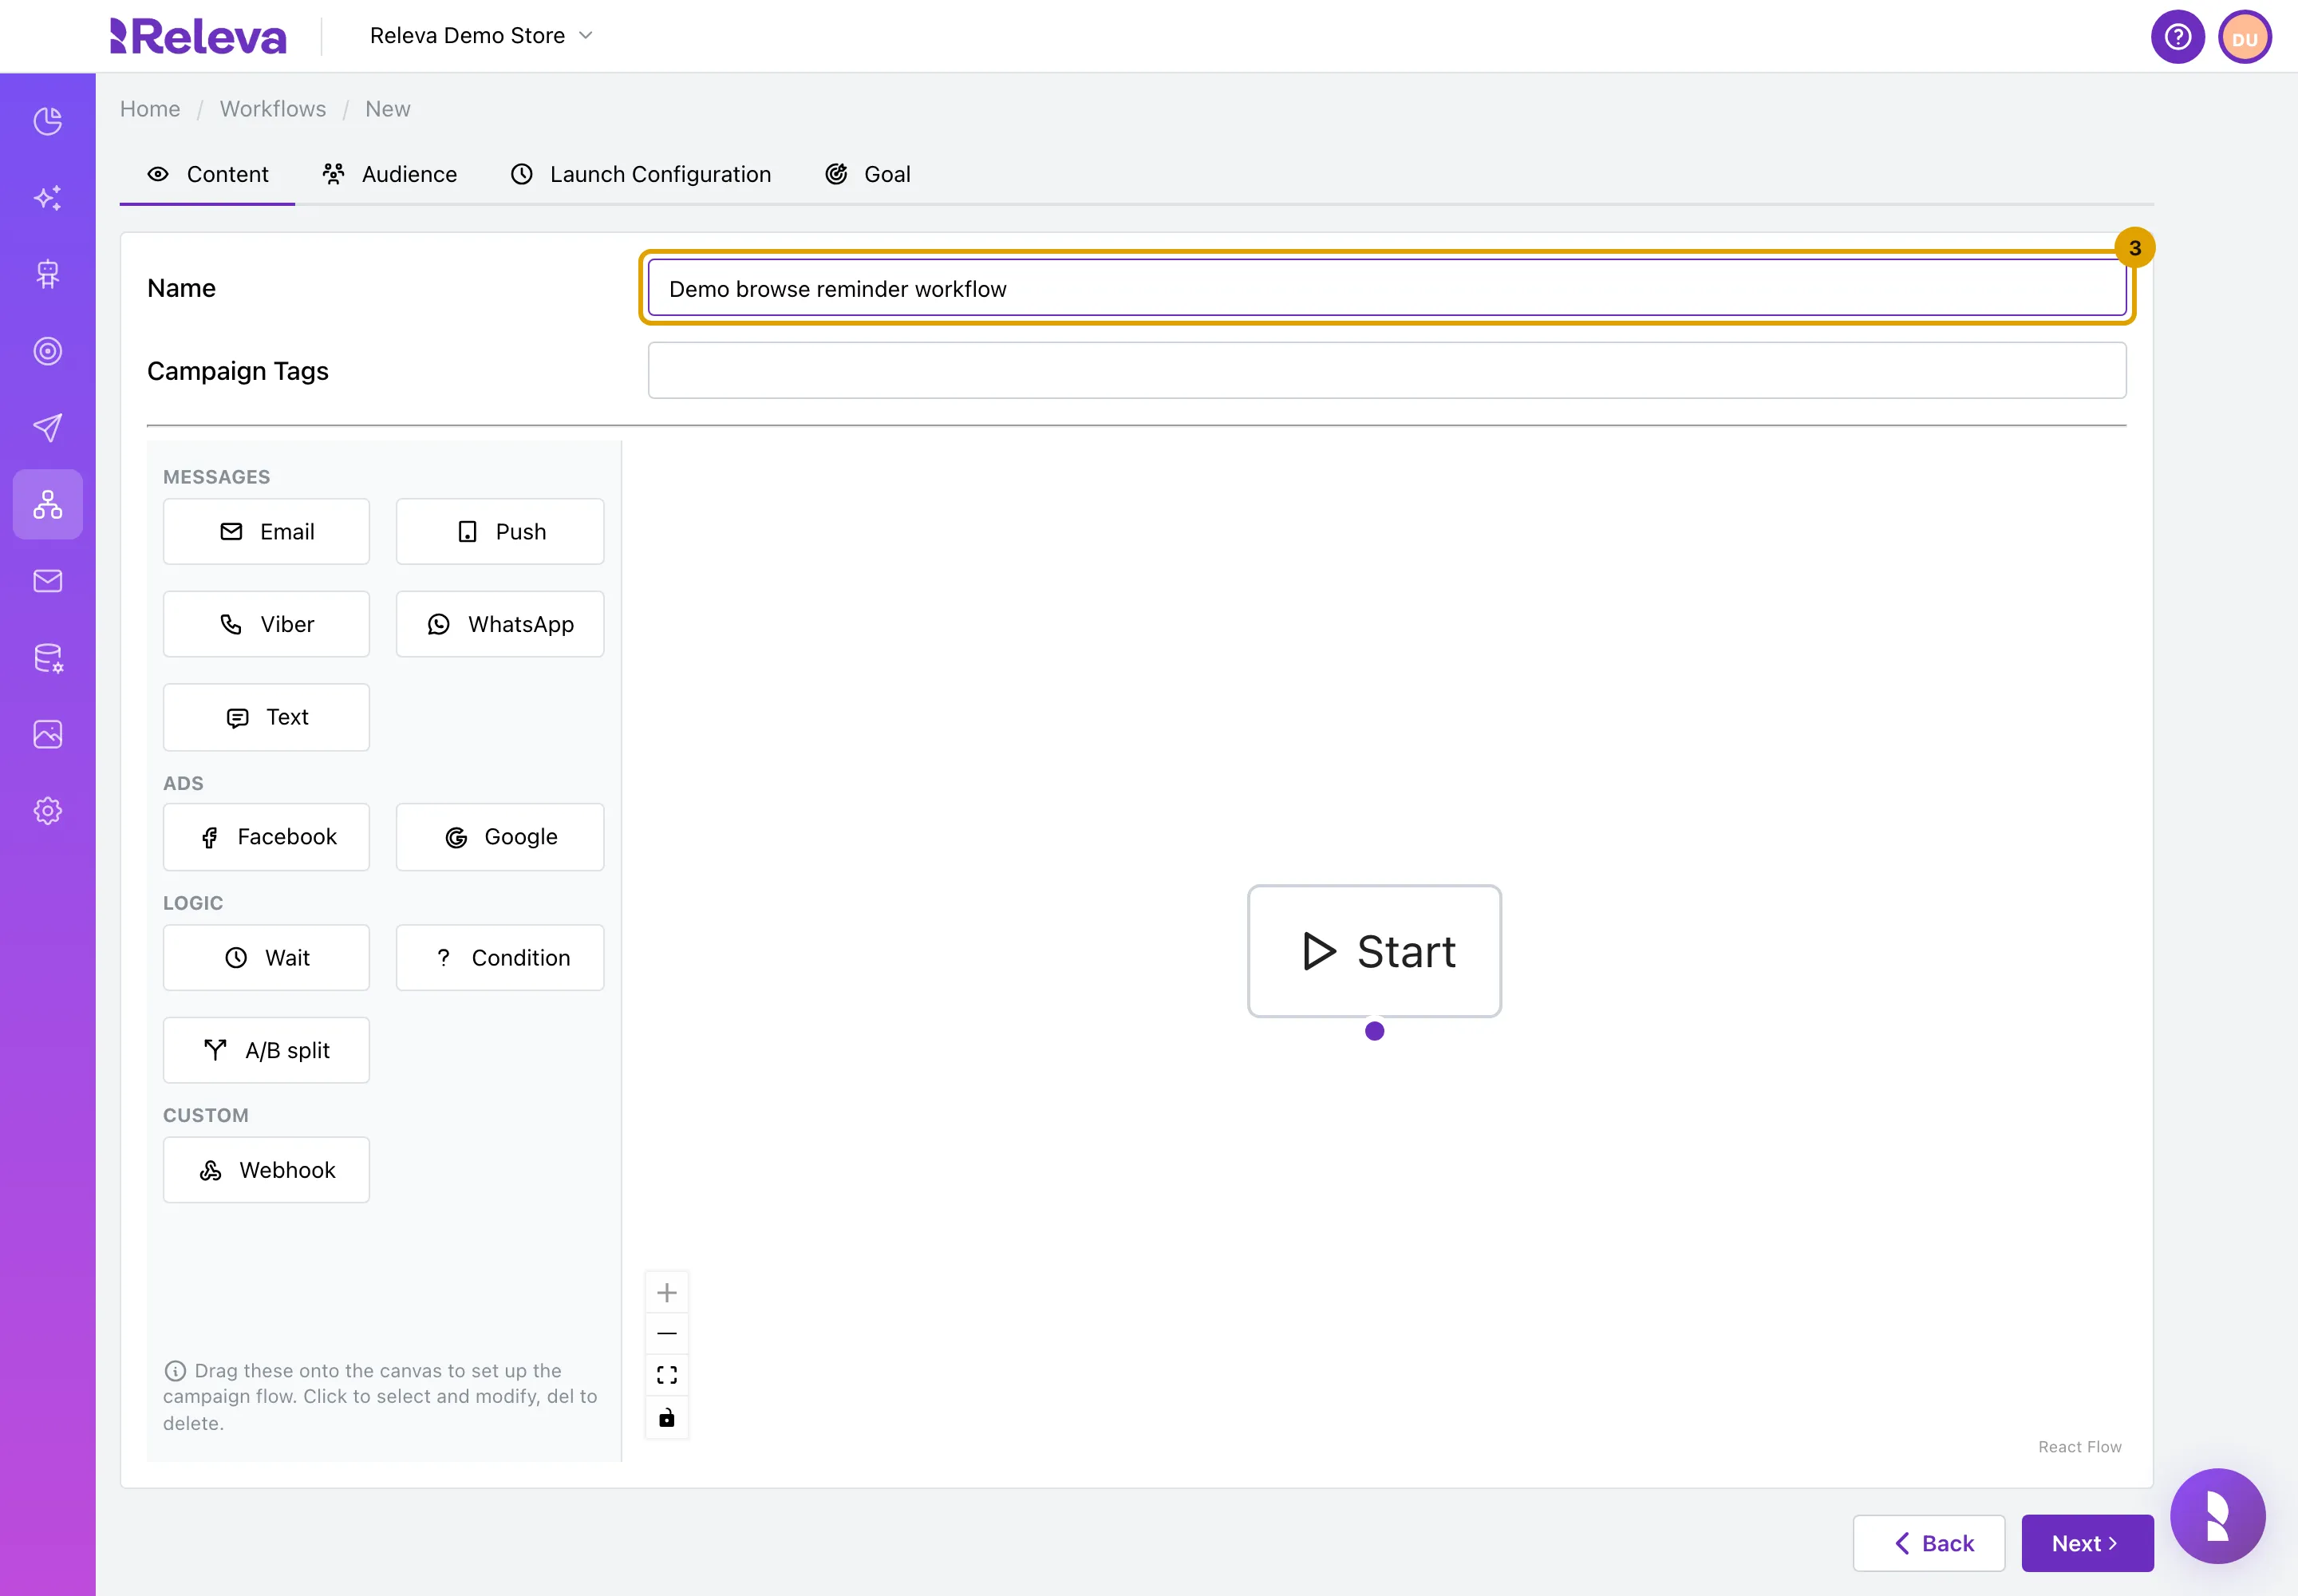
In Name, replace “New workflow” with a name your team will recognise, for example Demo browse reminder workflow.
Names must be unique in the shop. Campaign Tags are optional labels for your own reporting.
-
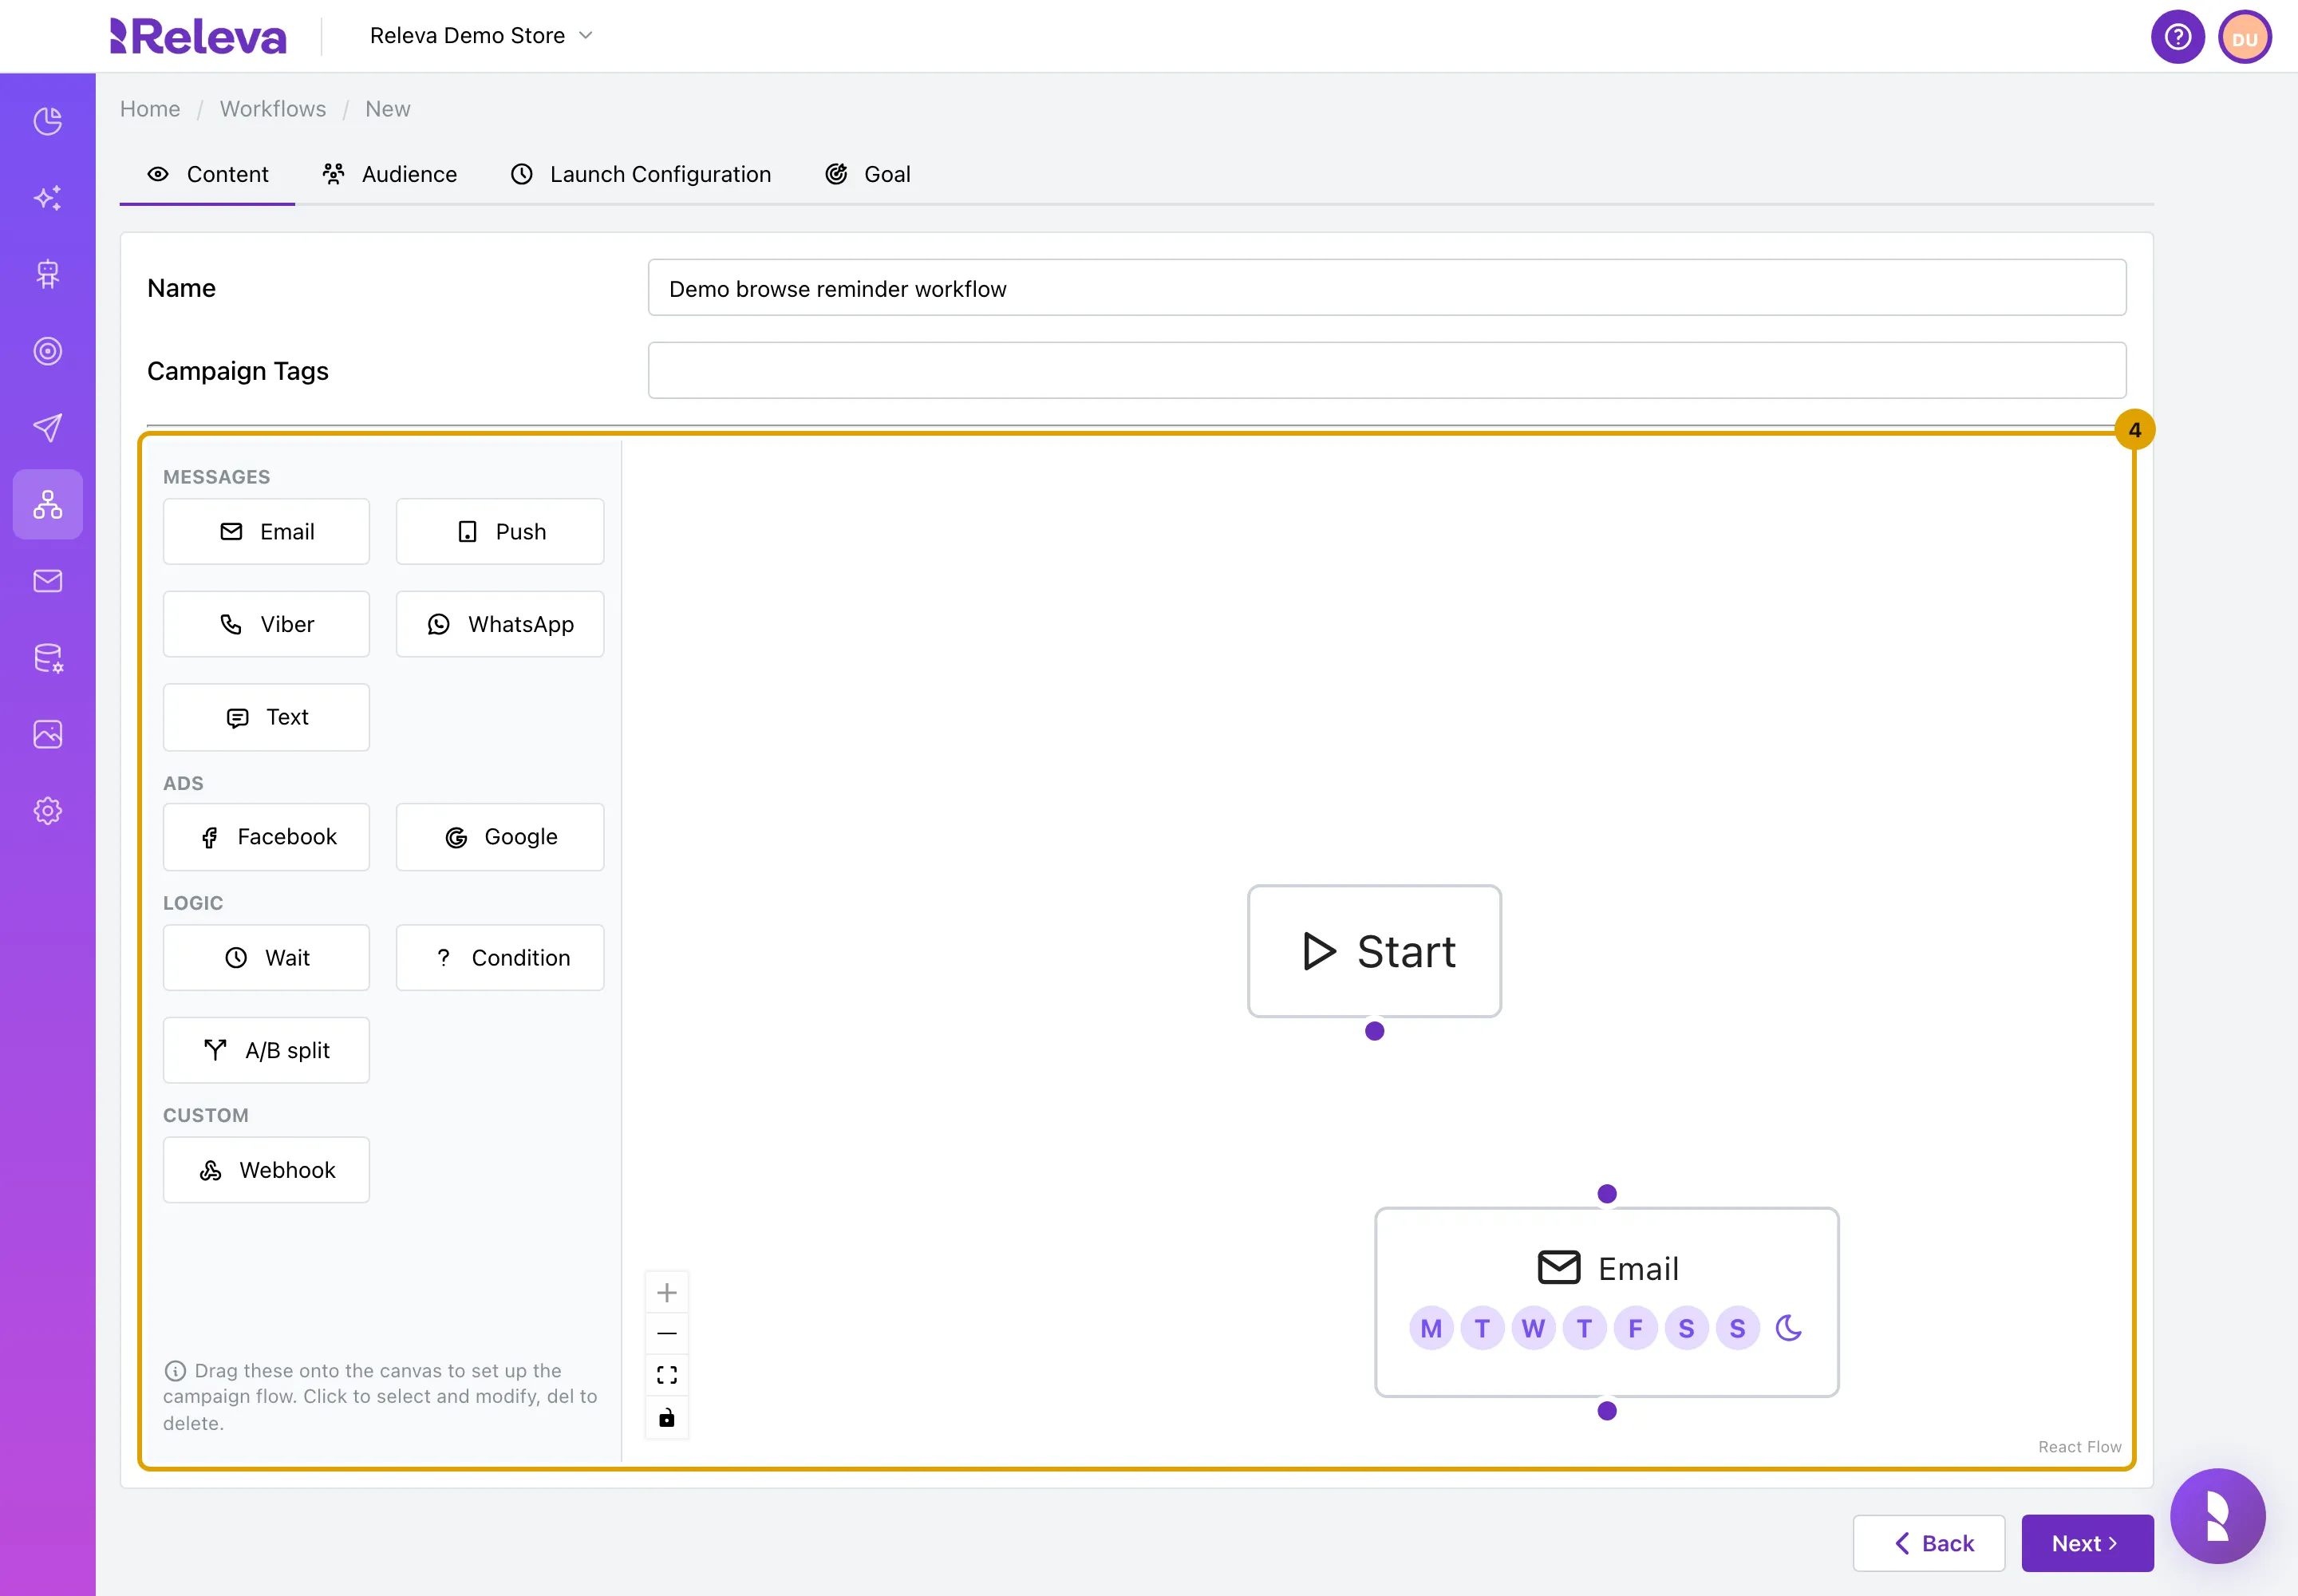
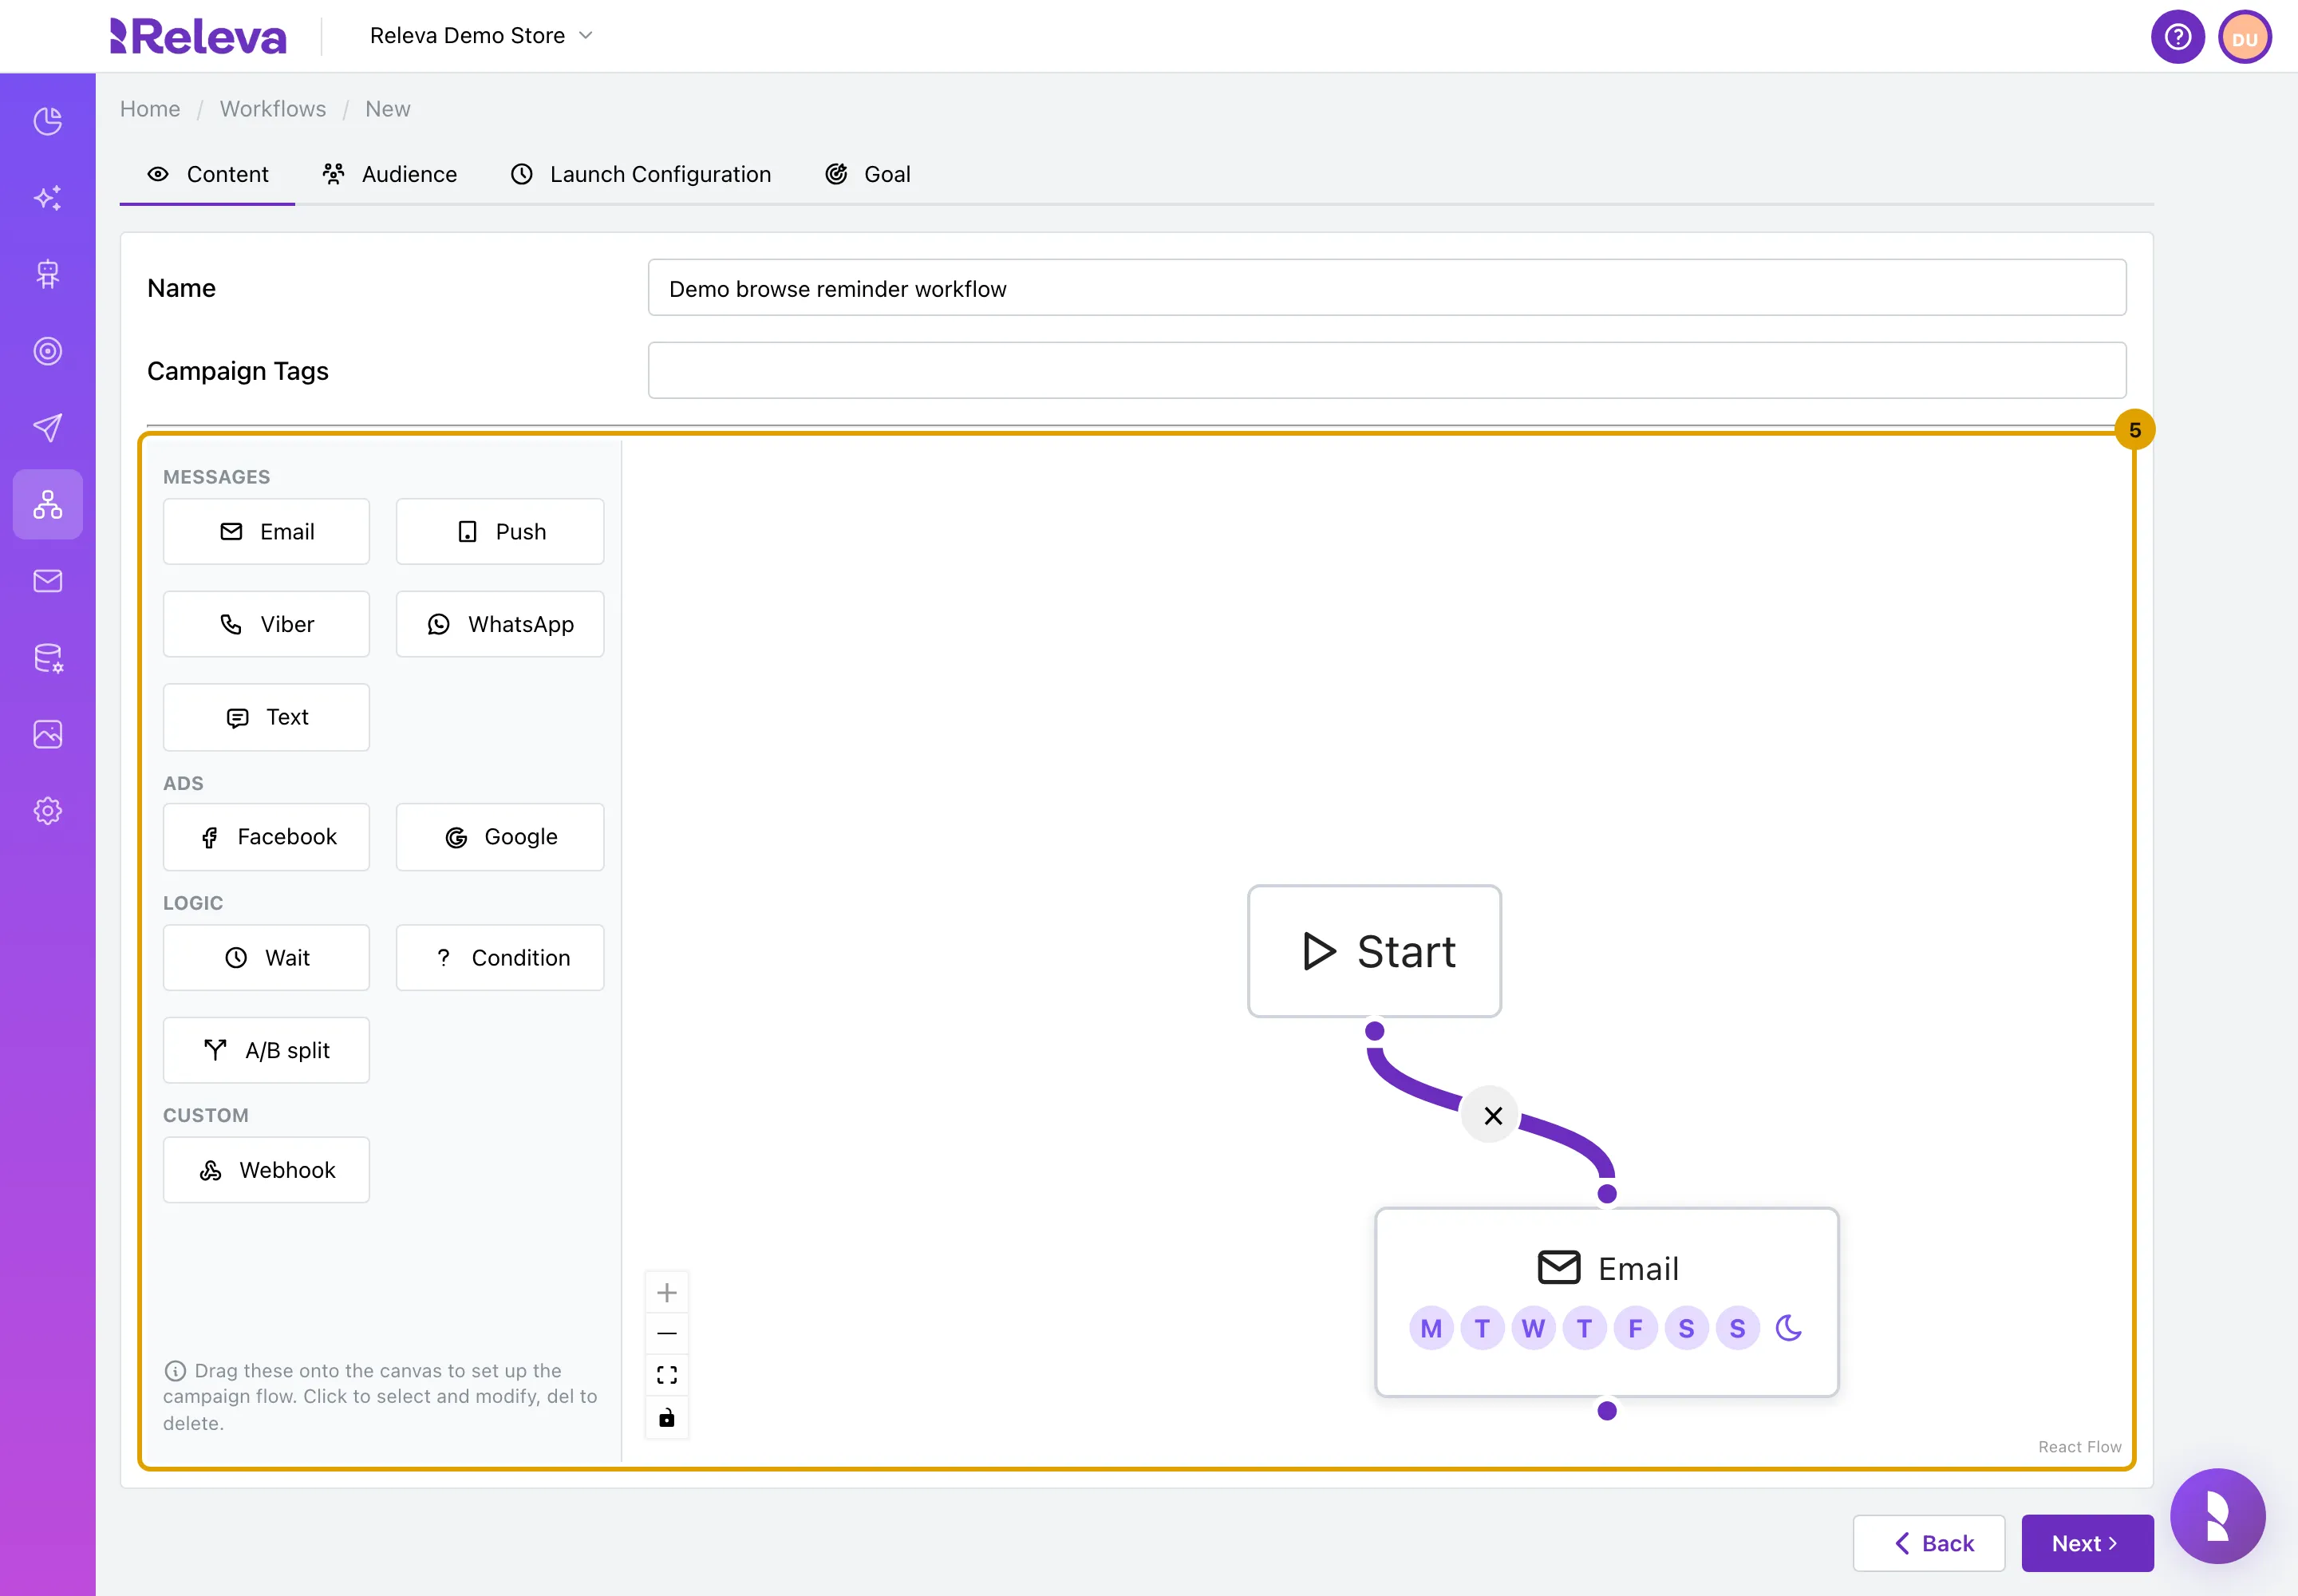
Drag Email from the MESSAGES group onto the canvas, below Start.
The panel also offers Push, Viber, WhatsApp and Text messages, Facebook and Google ads, the Wait, Condition and A/B split logic steps, and Webhook.
-
Drag from the dot under Start to the dot on top of the Email step to connect them.
A step that is not connected to Start never runs. The × on a connection removes it.
-
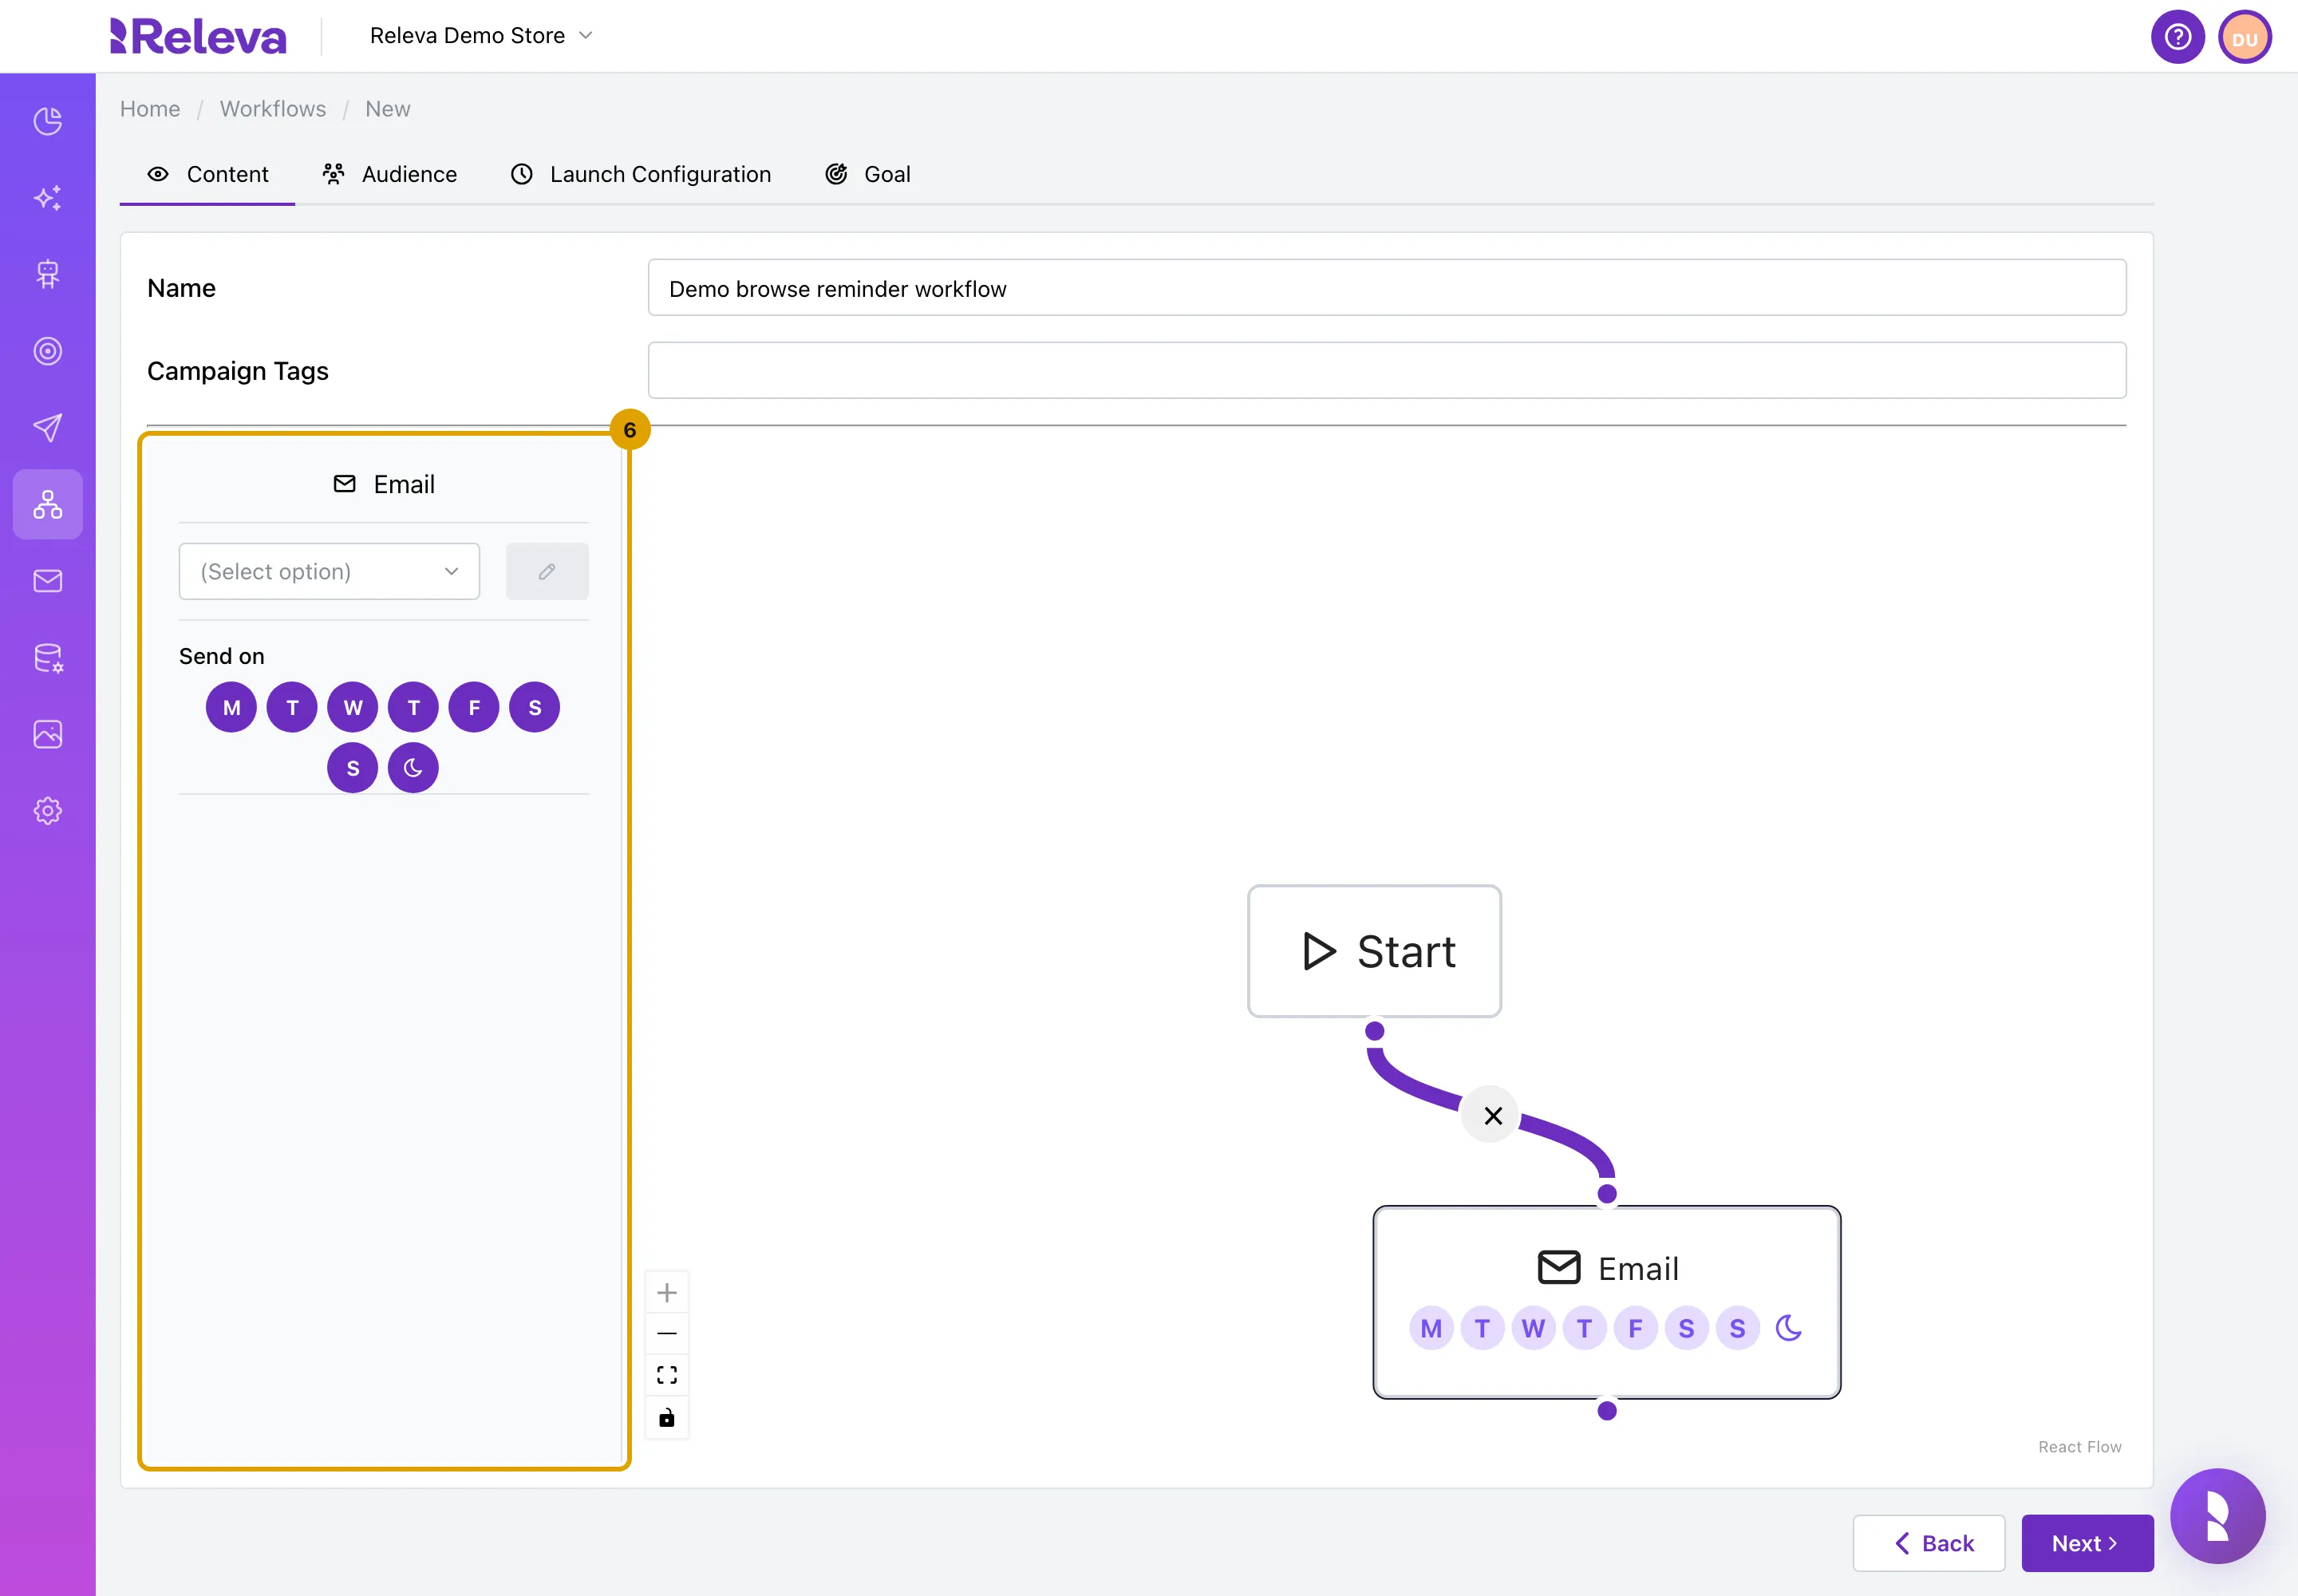
Select the Email step, pick the email to send in the left panel, and keep the days under Send on on which the step may send.
All seven days are on by default. The moon keeps a message until the shop’s quiet hours end. The pencil opens the selected email.
-
Select Next.
-
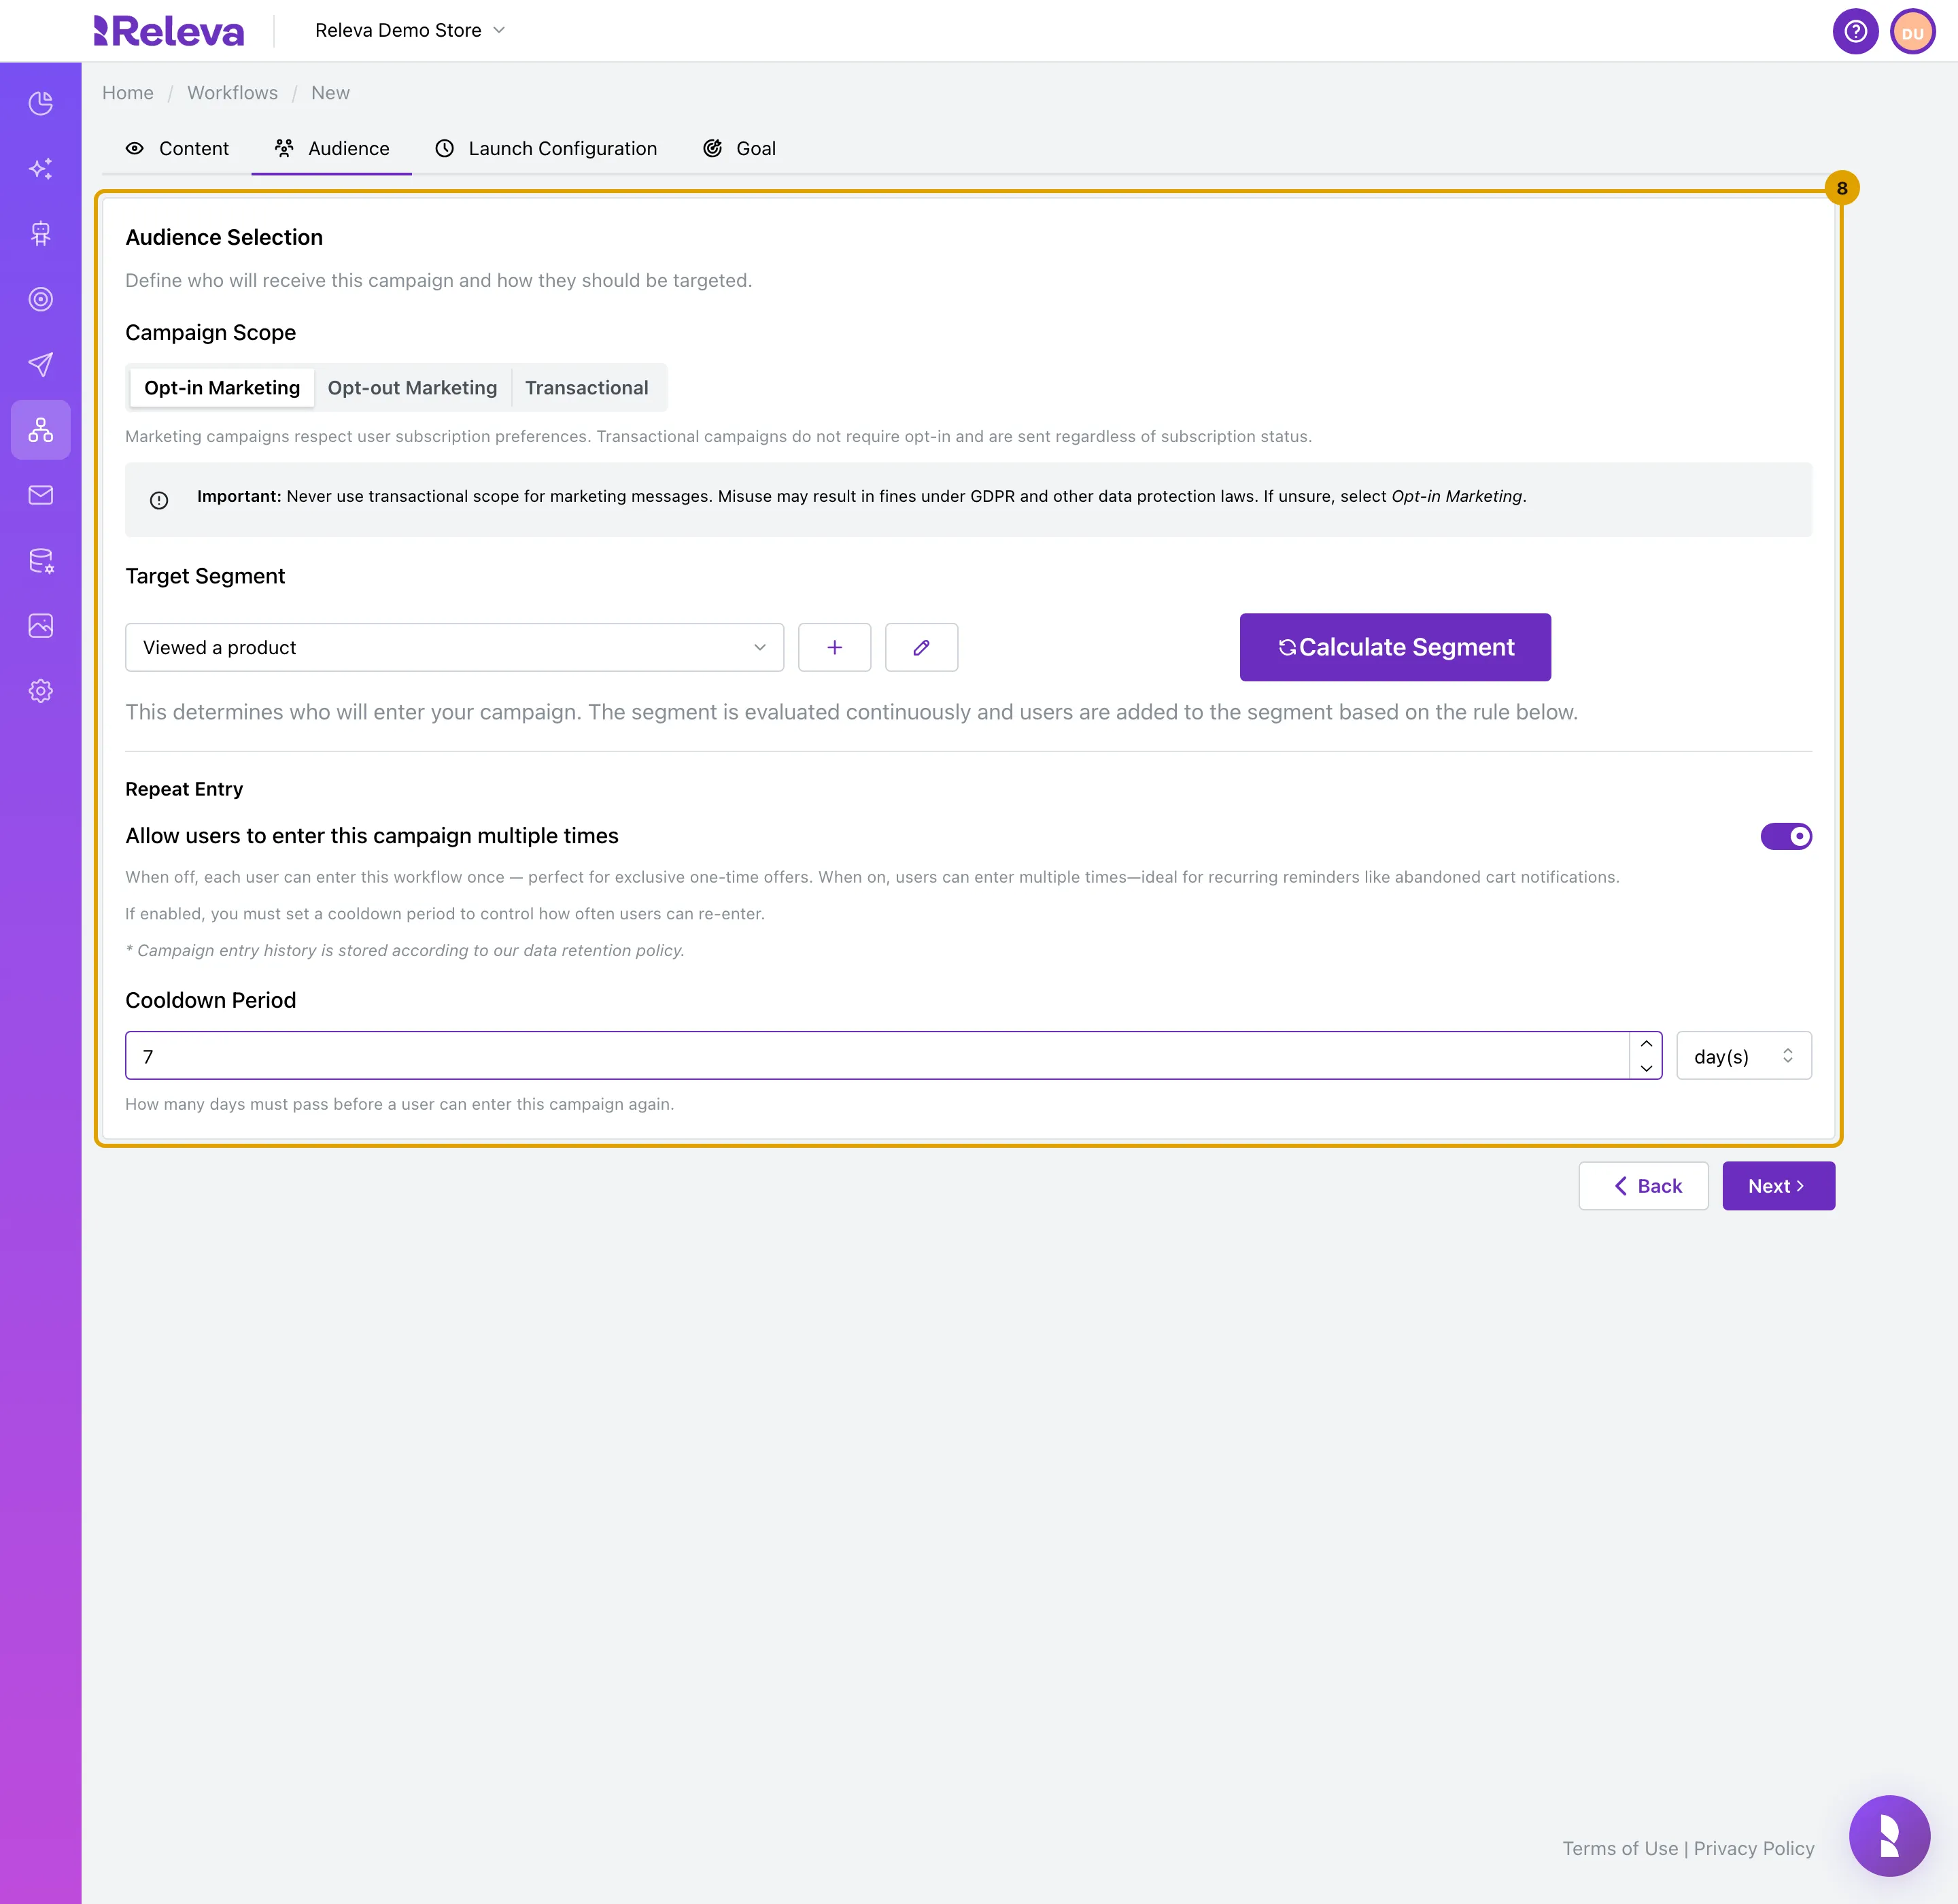
On Audience, keep Campaign Scope on Opt-in Marketing, choose the Target Segment, and set Repeat Entry.
The segment is evaluated continuously: profiles that enter it while the workflow is on go through the steps. With Allow users to enter this campaign multiple times off (the default), each profile goes through the workflow once. Turn it on for recurring reminders and set the Cooldown Period in day(s): 1 to 365. A new workflow starts with 30 days. Keep the unit on day(s): choosing hour(s) sets the days to 0, and Save stays disabled on a continuous workflow. Transactional scope ignores consent; never use it for marketing messages.
-
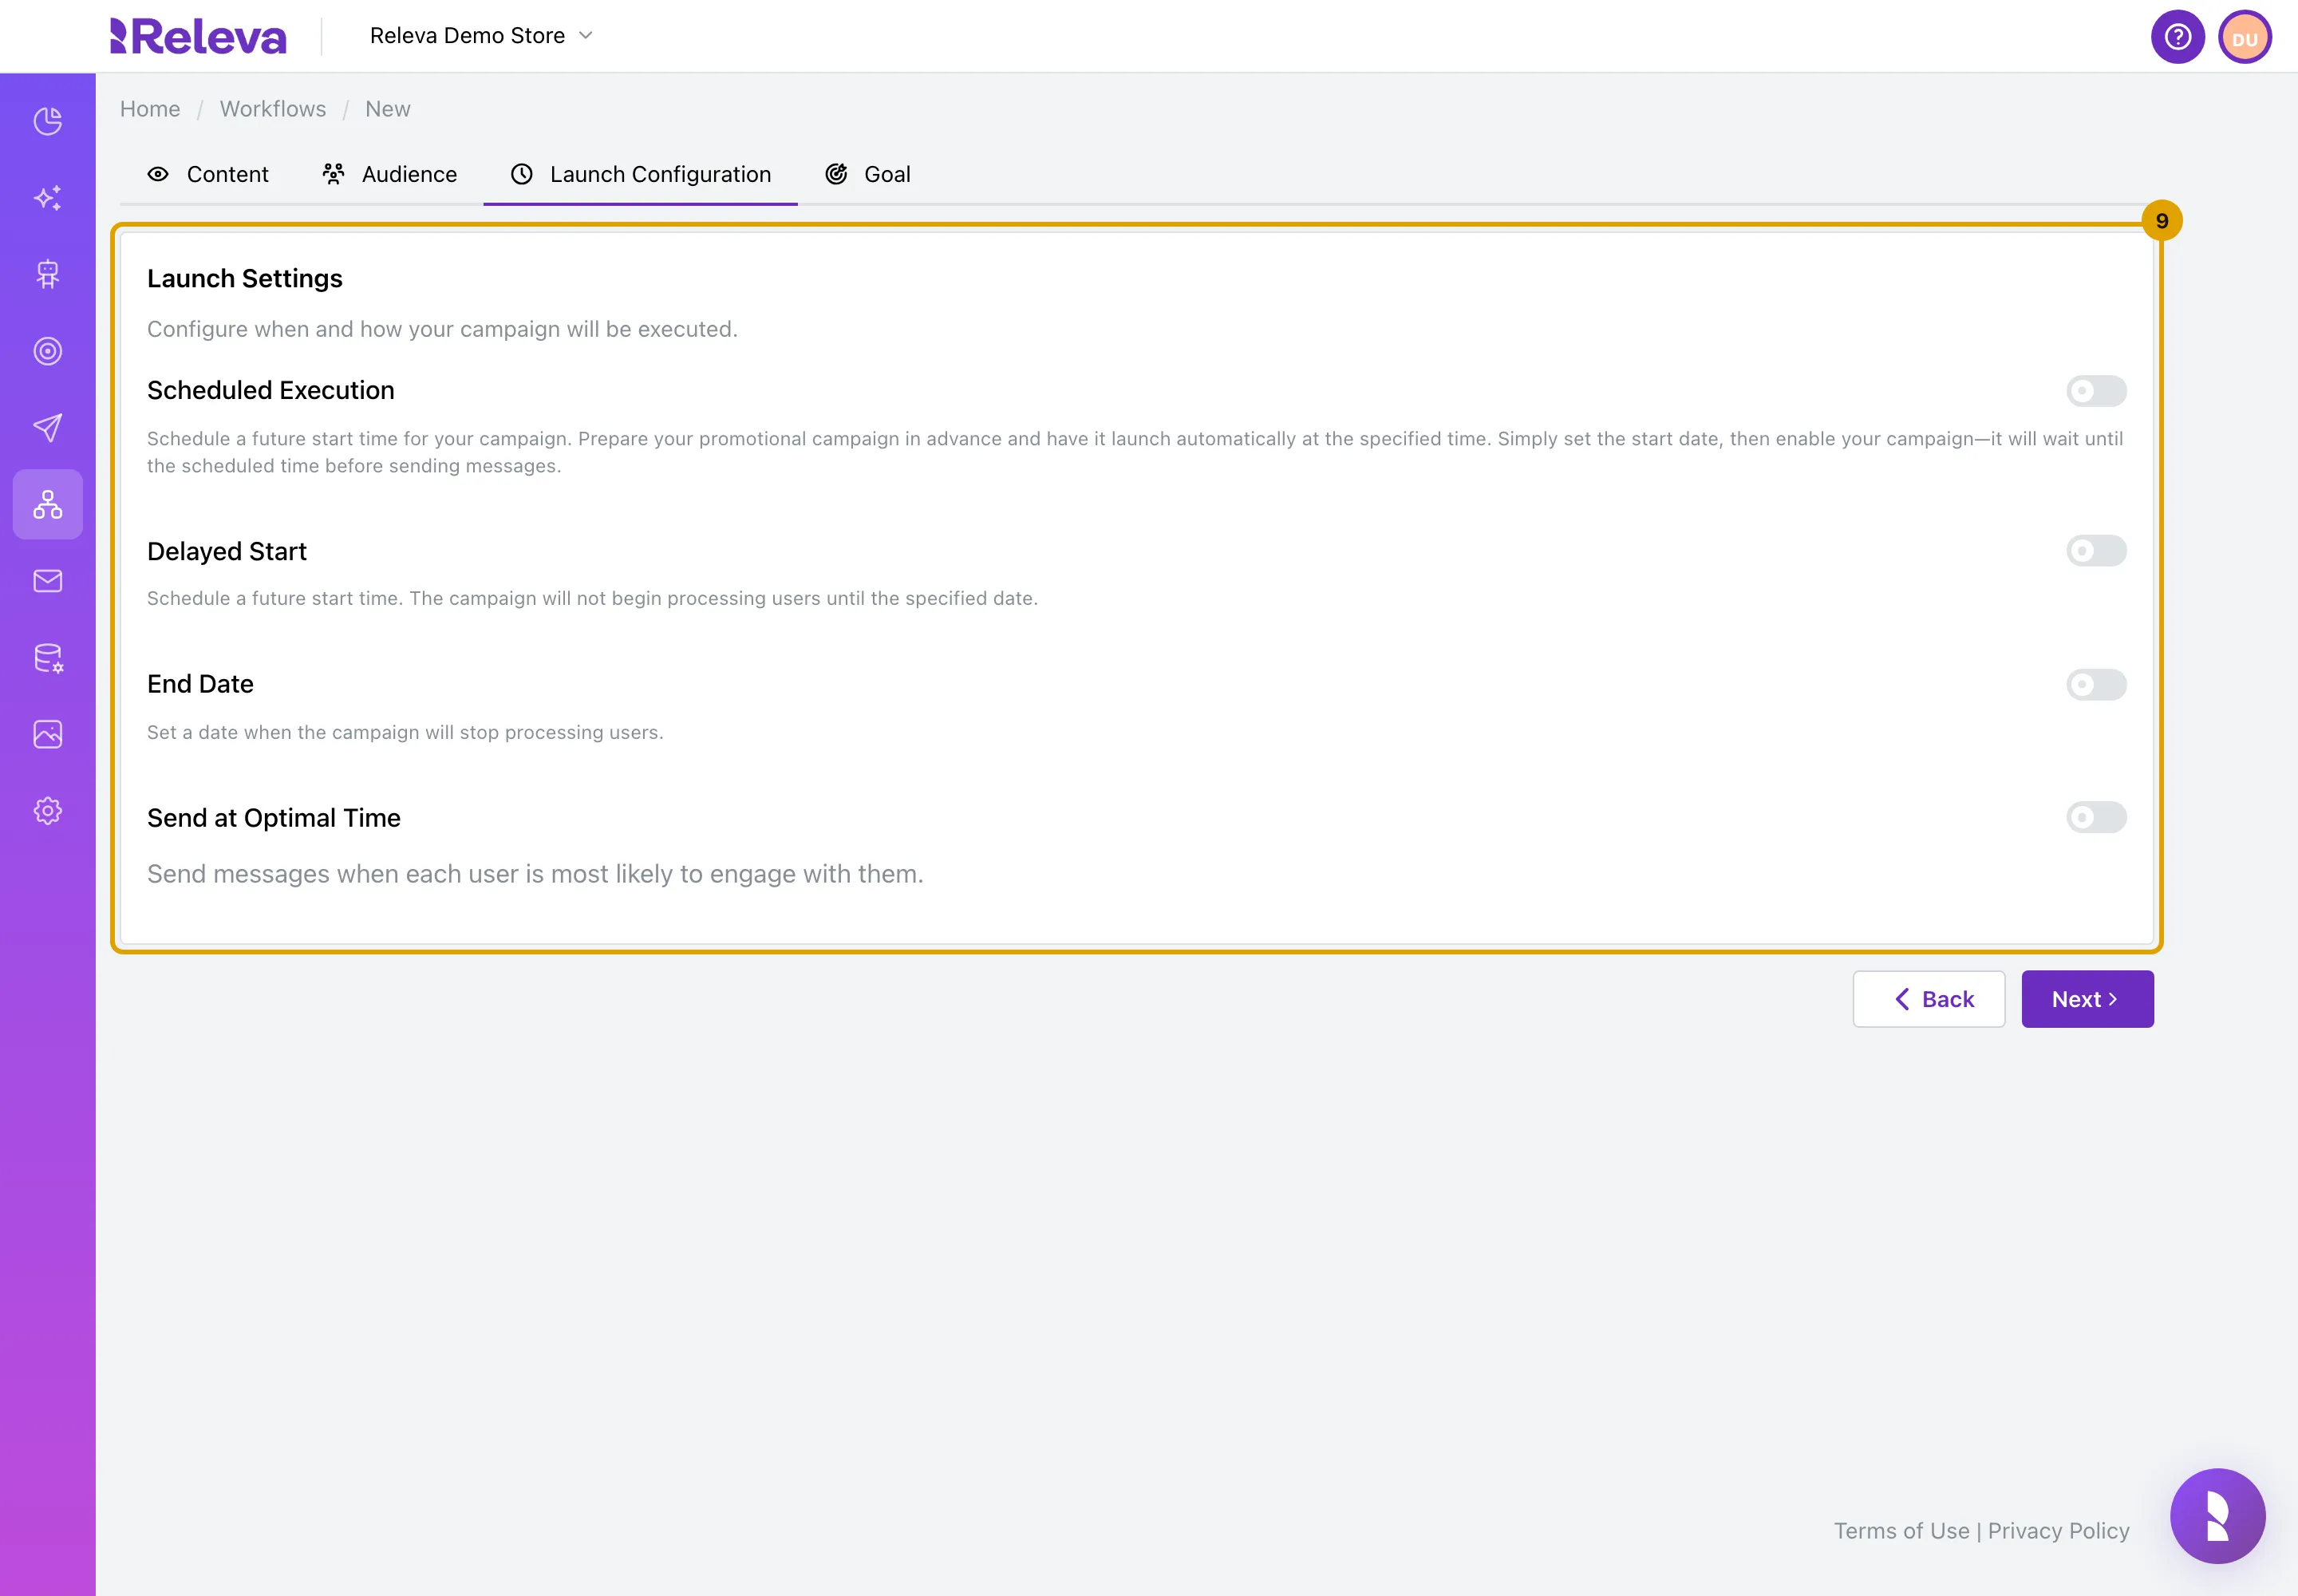
Select Next. On Launch Configuration, leave the switches off to start as soon as you switch the workflow on.
- Scheduled Execution runs the workflow on a repeating schedule instead: every N weeks, months or years, on the days and at the time you pick.
- Delayed Start waits until a start date. It starts with tomorrow’s date.
- End Date stops the workflow on a date. It starts one month ahead.
- Send at Optimal Time sends to each person when they usually engage.
-
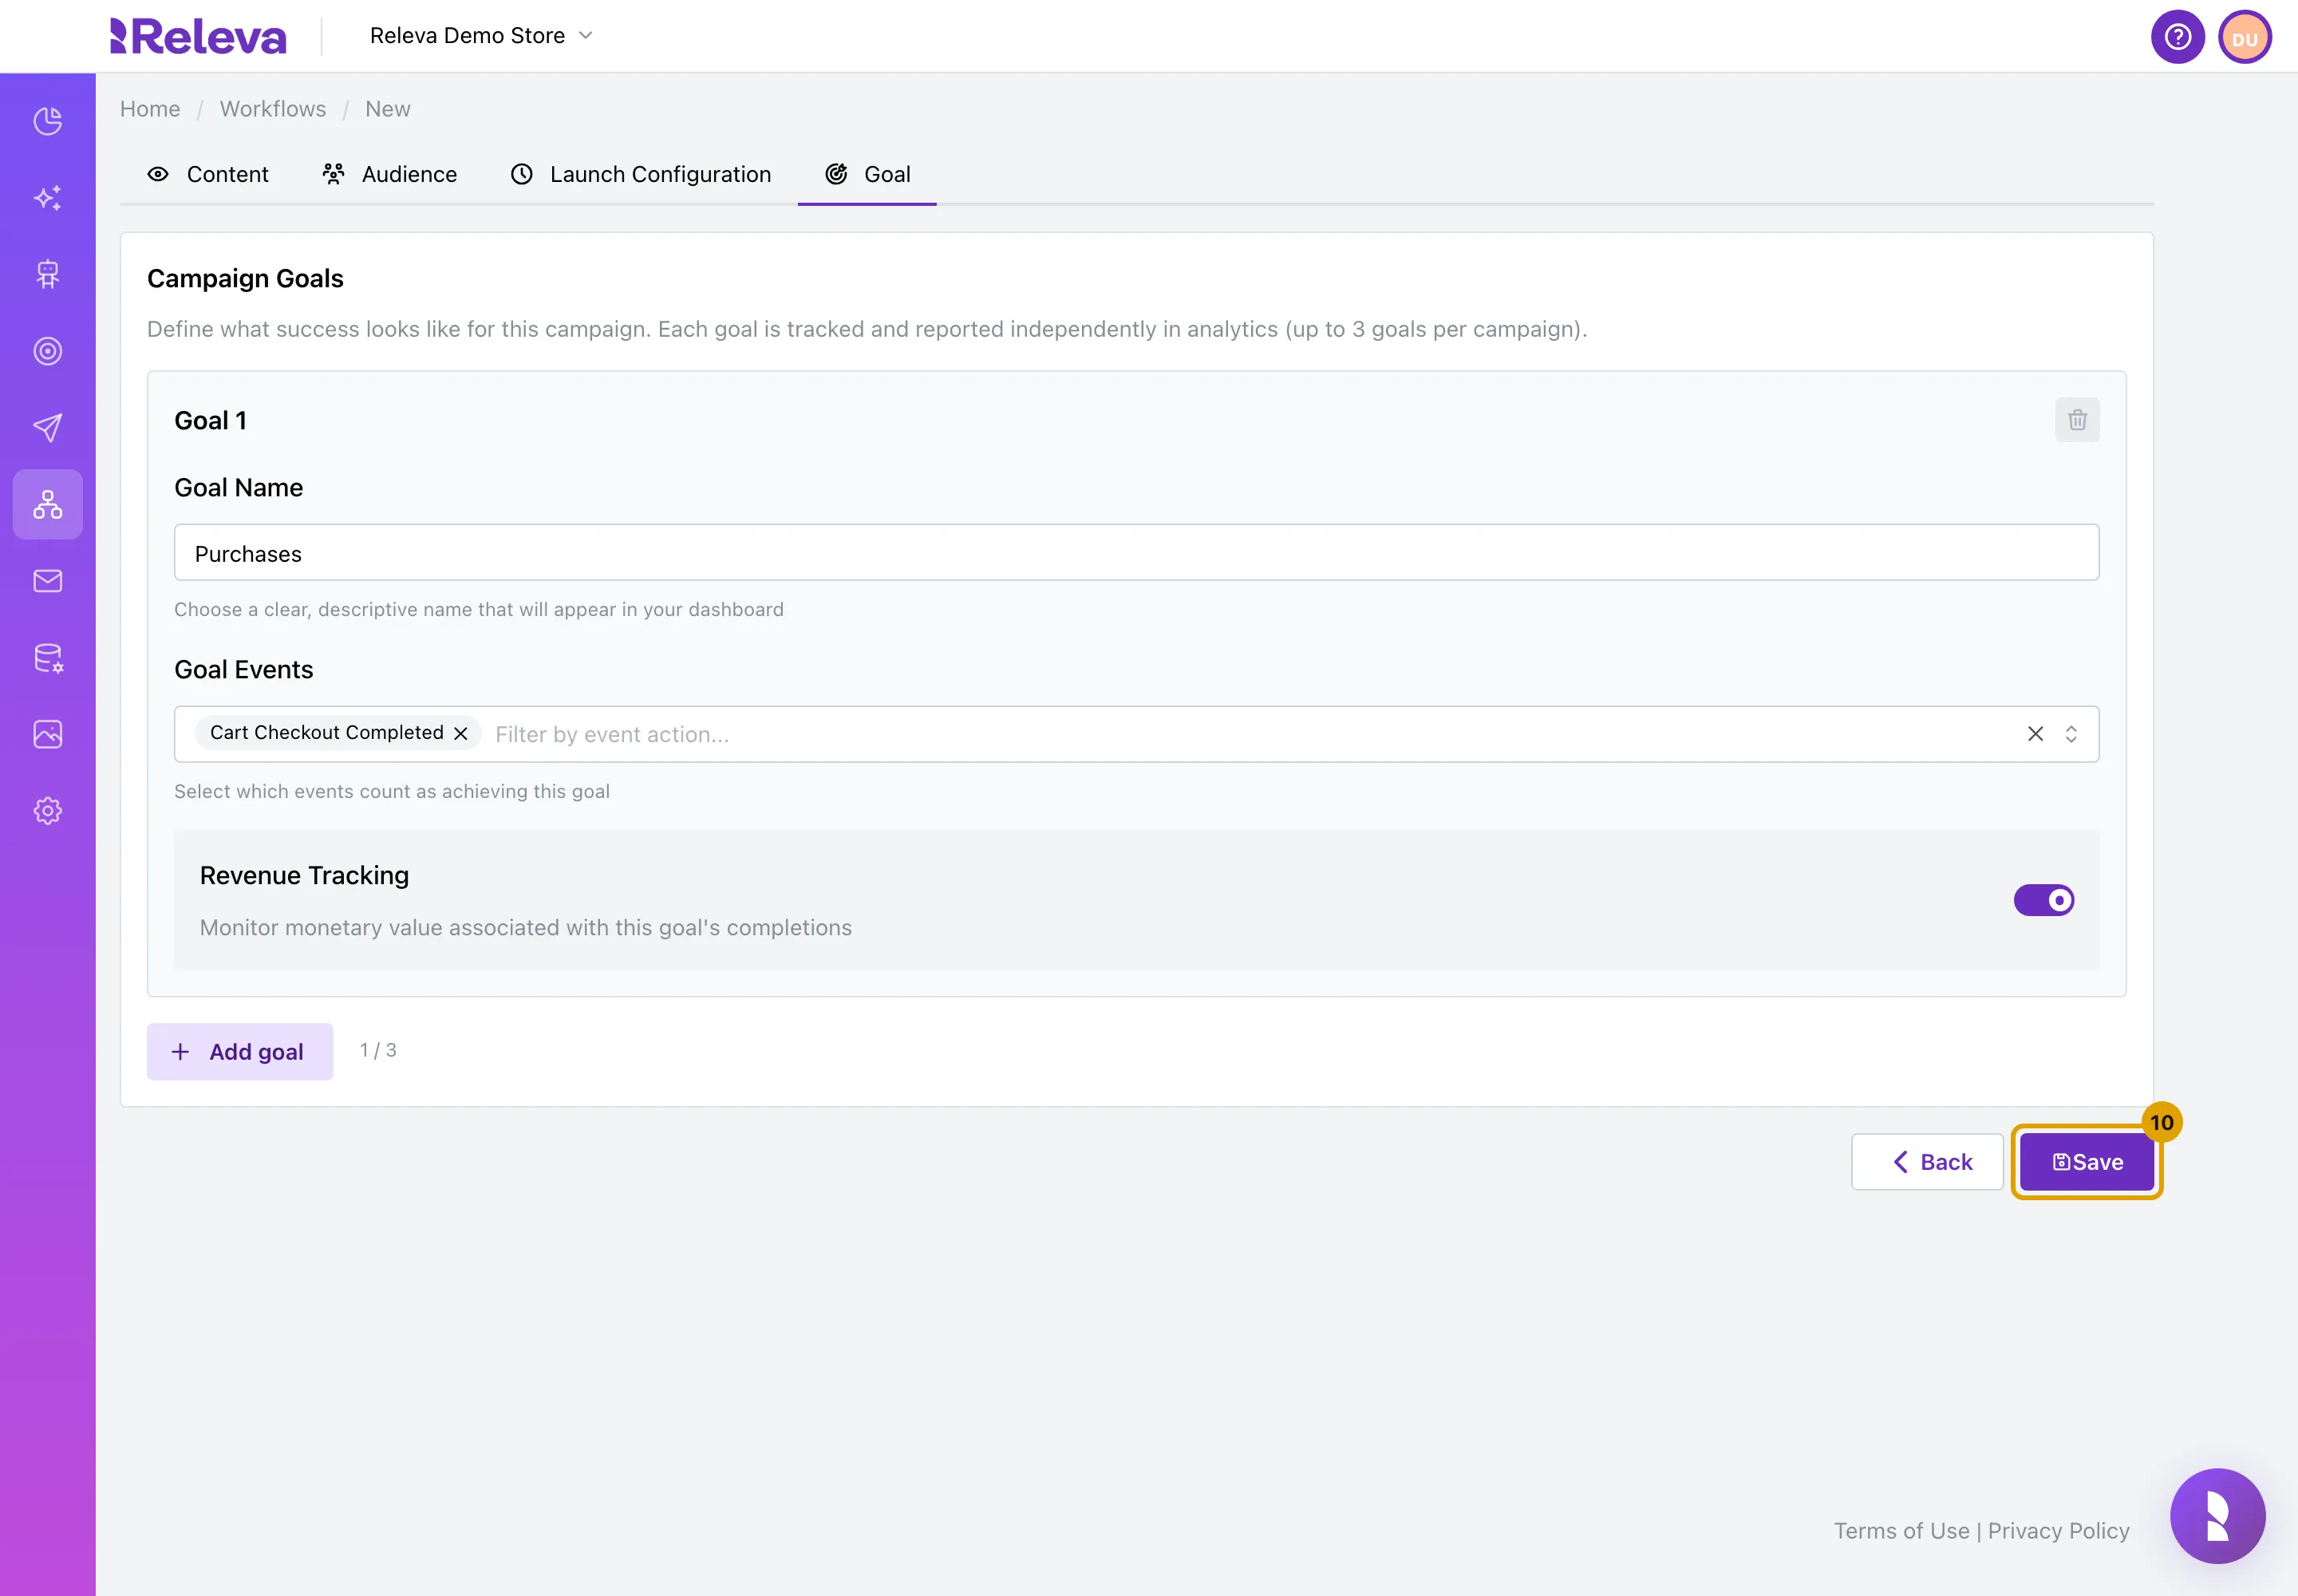
Select Next. On Goal, keep the Purchases goal or change it, then select Save.
Each workflow has up to 3 goals. Save stays disabled while the name is empty, no segment is selected, the cooldown is below 1 day, or a Condition step has no rules.
-
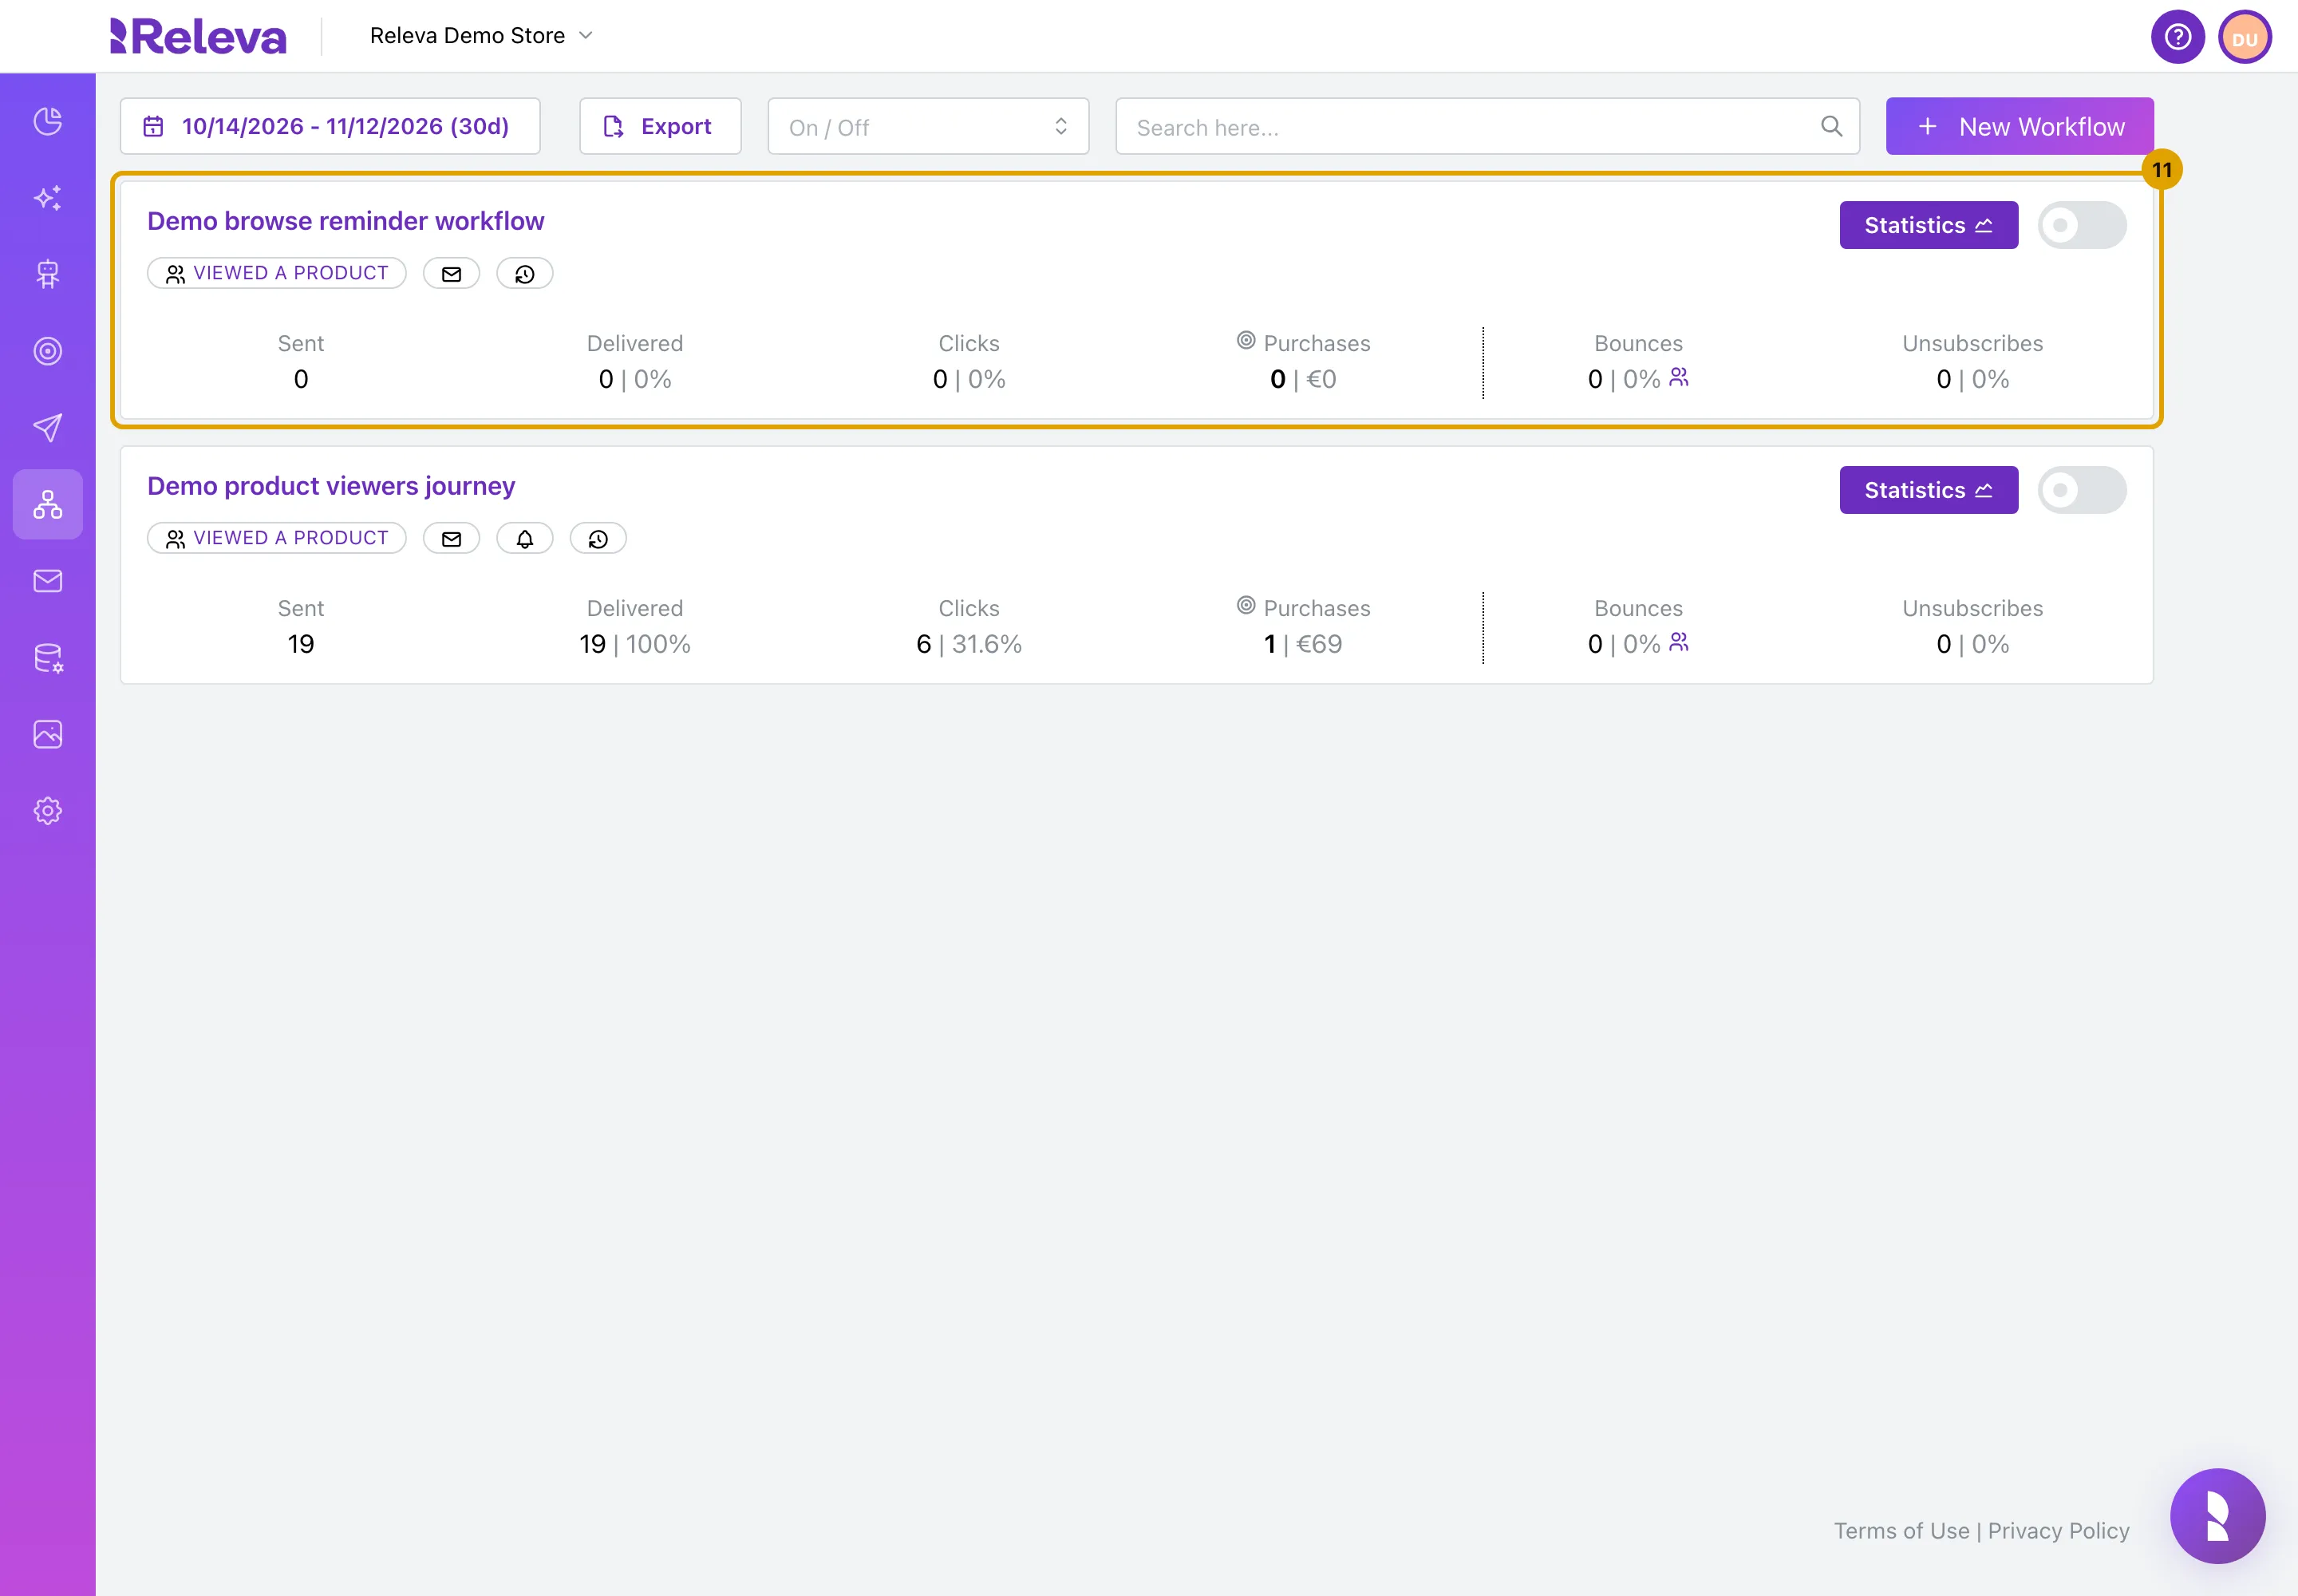
The workflow is saved in the Continuous list, switched off. Turn on its switch when you want it to start.
Saving never sends anything. With a future Delayed Start, the card shows Launch instead of the switch.
Check it worked
Section titled “Check it worked”- The workflow is a card on Workflows › Continuous with its segment as a badge, an icon for each channel, Statistics and an on/off switch.
- After you switch it on, the switch stays on. A workflow with an End Date shows Ends and the date; after that date the card shows EXPIRED.
- Select Statistics to see sends, deliveries, clicks and purchases once profiles have entered.
Troubleshooting
Section titled “Troubleshooting”Name must be unique! Another campaign or workflow in this shop has the same name. Change it.
Save is disabled. The name is empty, no Target Segment is selected, the Cooldown Period is below 1 day or set in hour(s), or a Condition step has no rules yet.
The cooldown field shows “The cooldown period must be between 1 and 365 days.” Continuous workflows need at least 1 day. Enter 1 or more. If you switched the unit to hour(s), switch it back to day(s): an hour-based cooldown keeps Save disabled on a continuous workflow.
The switch is disabled and “Click tracking not ready - check Click Tracking settings” shows next to it. The click-tracking DNS record for your sender domain is not verified, and the workflow has a step that sends links. Add the record under Settings › Messaging and try again.
I cannot change the steps. The workflow is running, so its steps are read-only. Switch it off to change them, or see Change the steps of a workflow.