

Add your Firebase credentials for app push
Releva delivers app push notifications and App Inbox messages through Firebase Cloud Messaging. For that it needs a service account of your Firebase project. You upload it once per shop on Settings › Messaging, tab Push Notifications. Until it is saved, the Android, IOS and App Inbox channels of every push notification stay greyed out.
Tracking, product blocks, banners, stories and surveys do not need this step.
Before you start
Section titled “Before you start”- A Firebase project for your app, with Cloud Messaging enabled. If your Android and iOS apps share one Firebase project (React Native, Flutter, Expo, Ionic), you need one service account file. If each native app has its own Firebase project, you need two.
- The service account JSON file. In the Firebase console open Project settings › Service accounts and select Generate new private key. The file holds a private key: do not commit it or send it by e-mail.
- For iOS apps that register APNs tokens (Expo apps with
expo-notifications): know whether the build you are testing is a development build (sandbox APNs) or a TestFlight or App Store build (production APNs). - Access to the shop in the Releva admin. Any user with access to the shop can upload credentials.
-
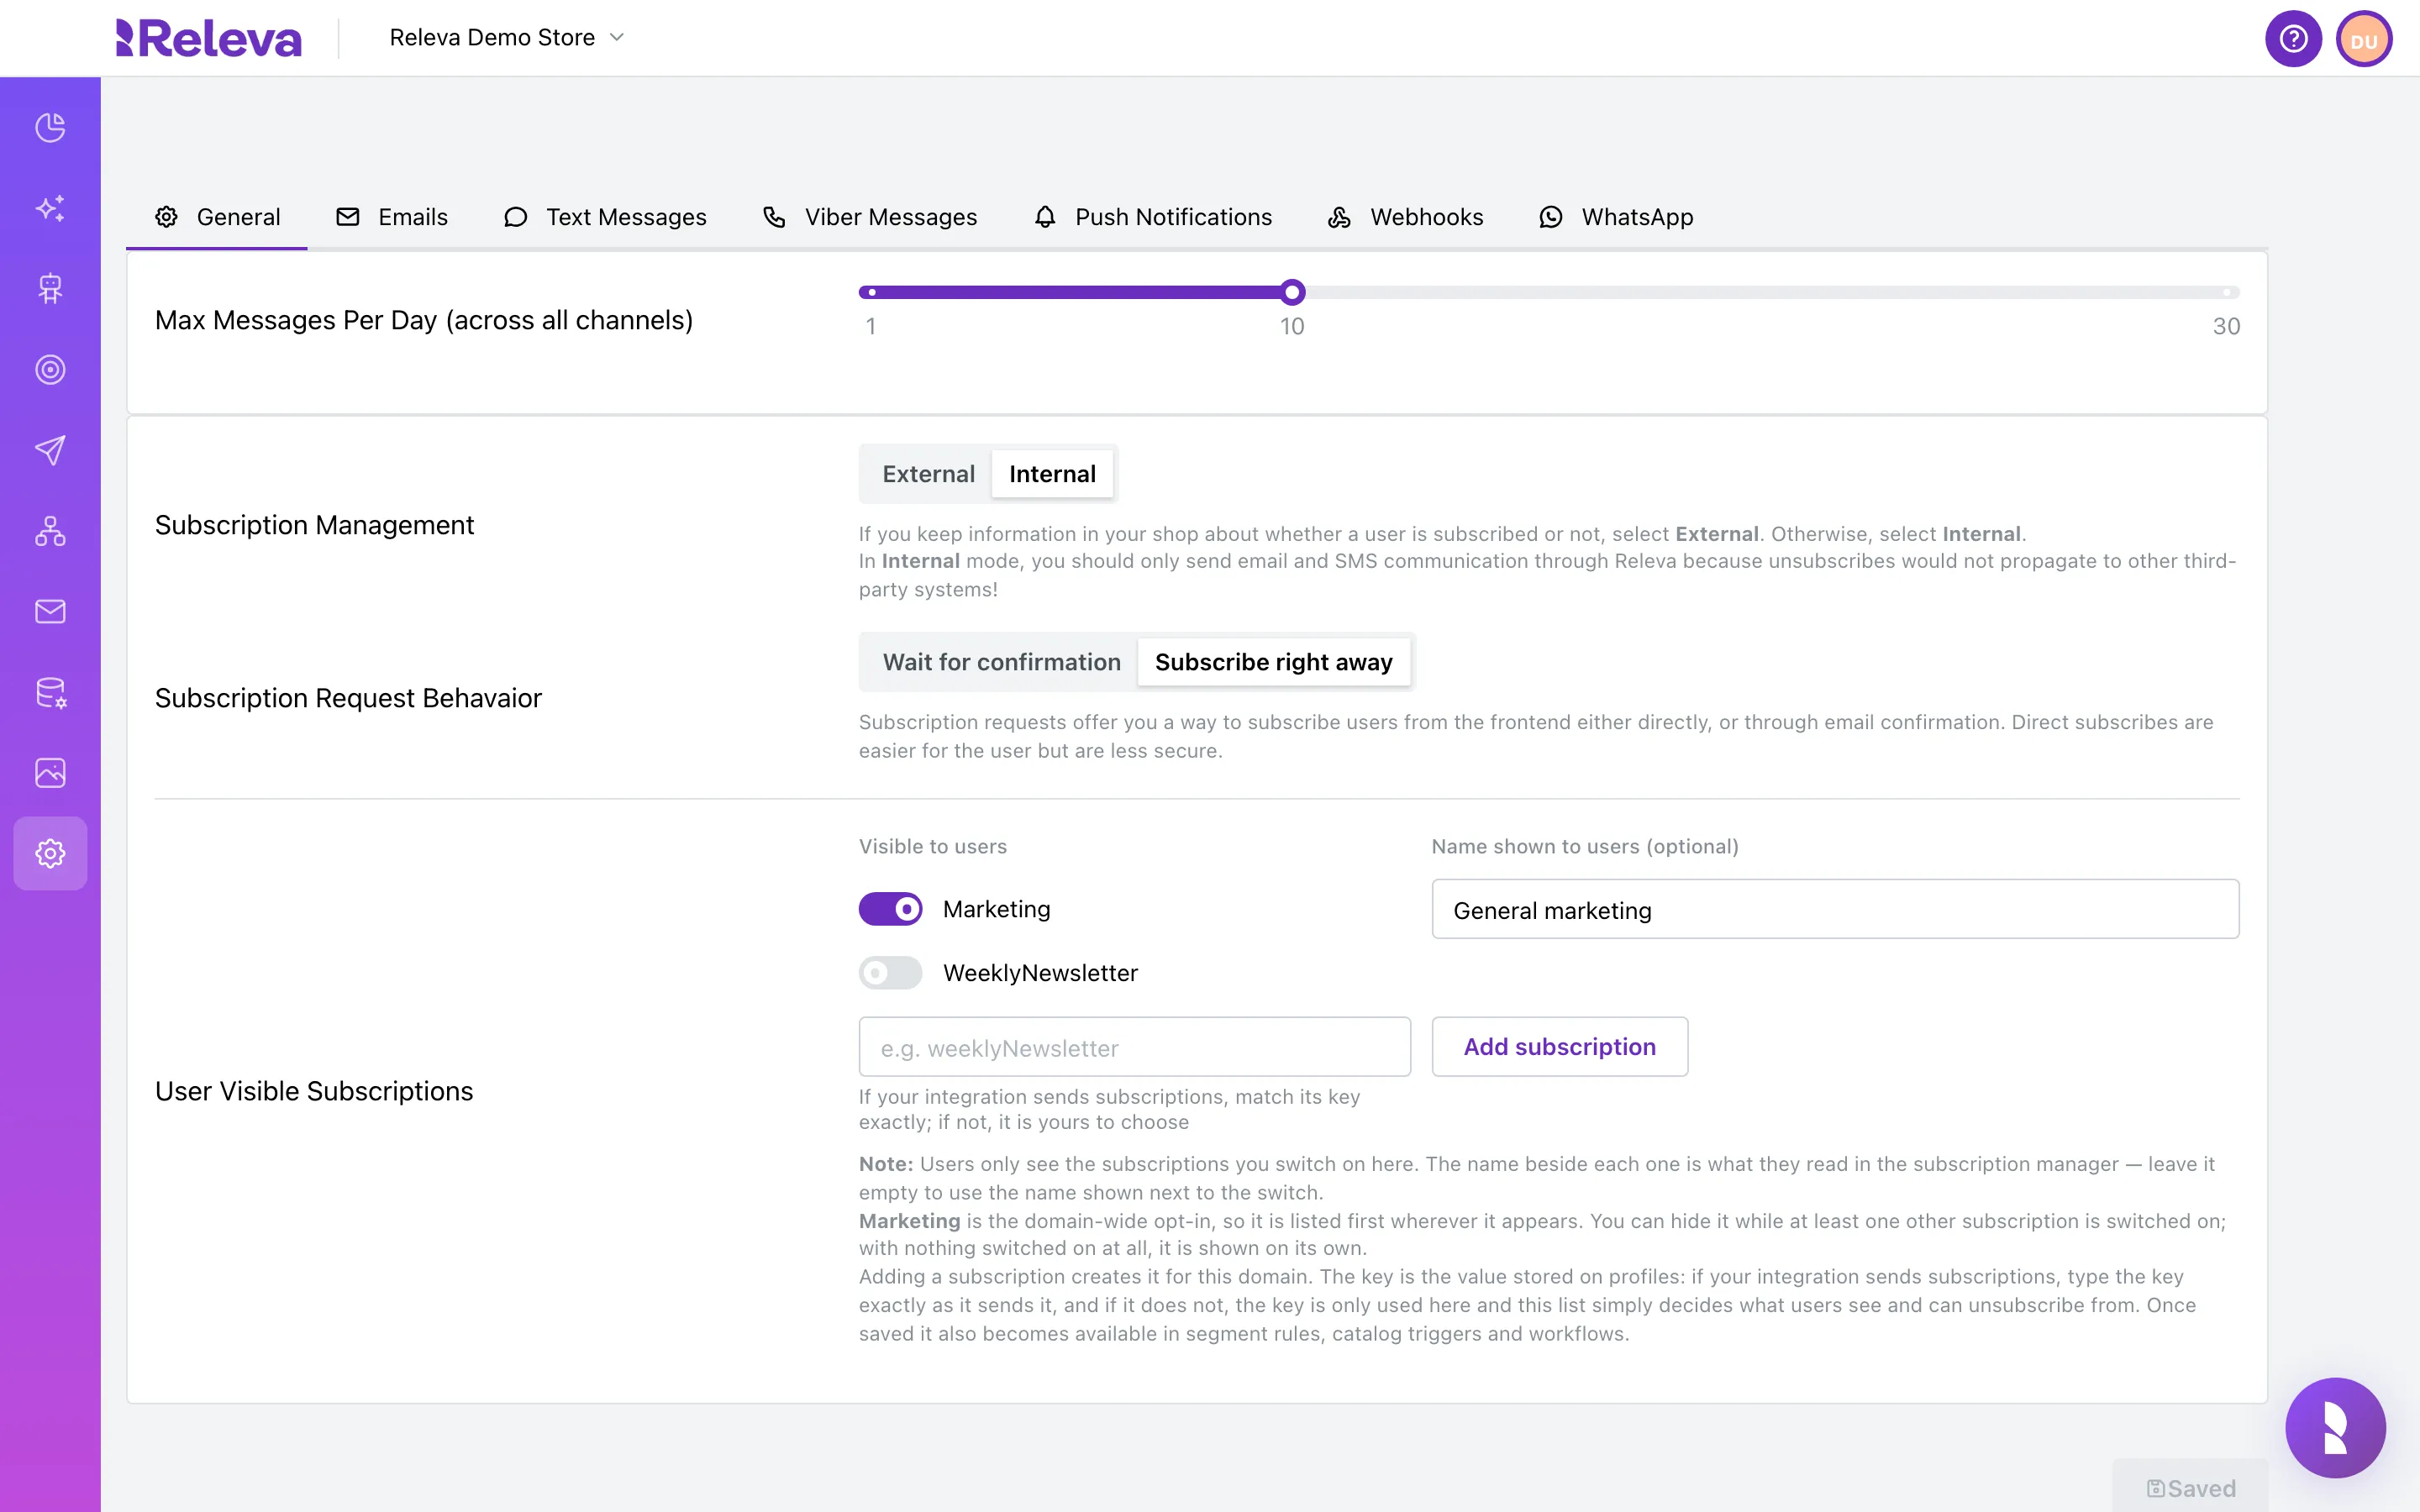
Go to Settings › Messaging.
-
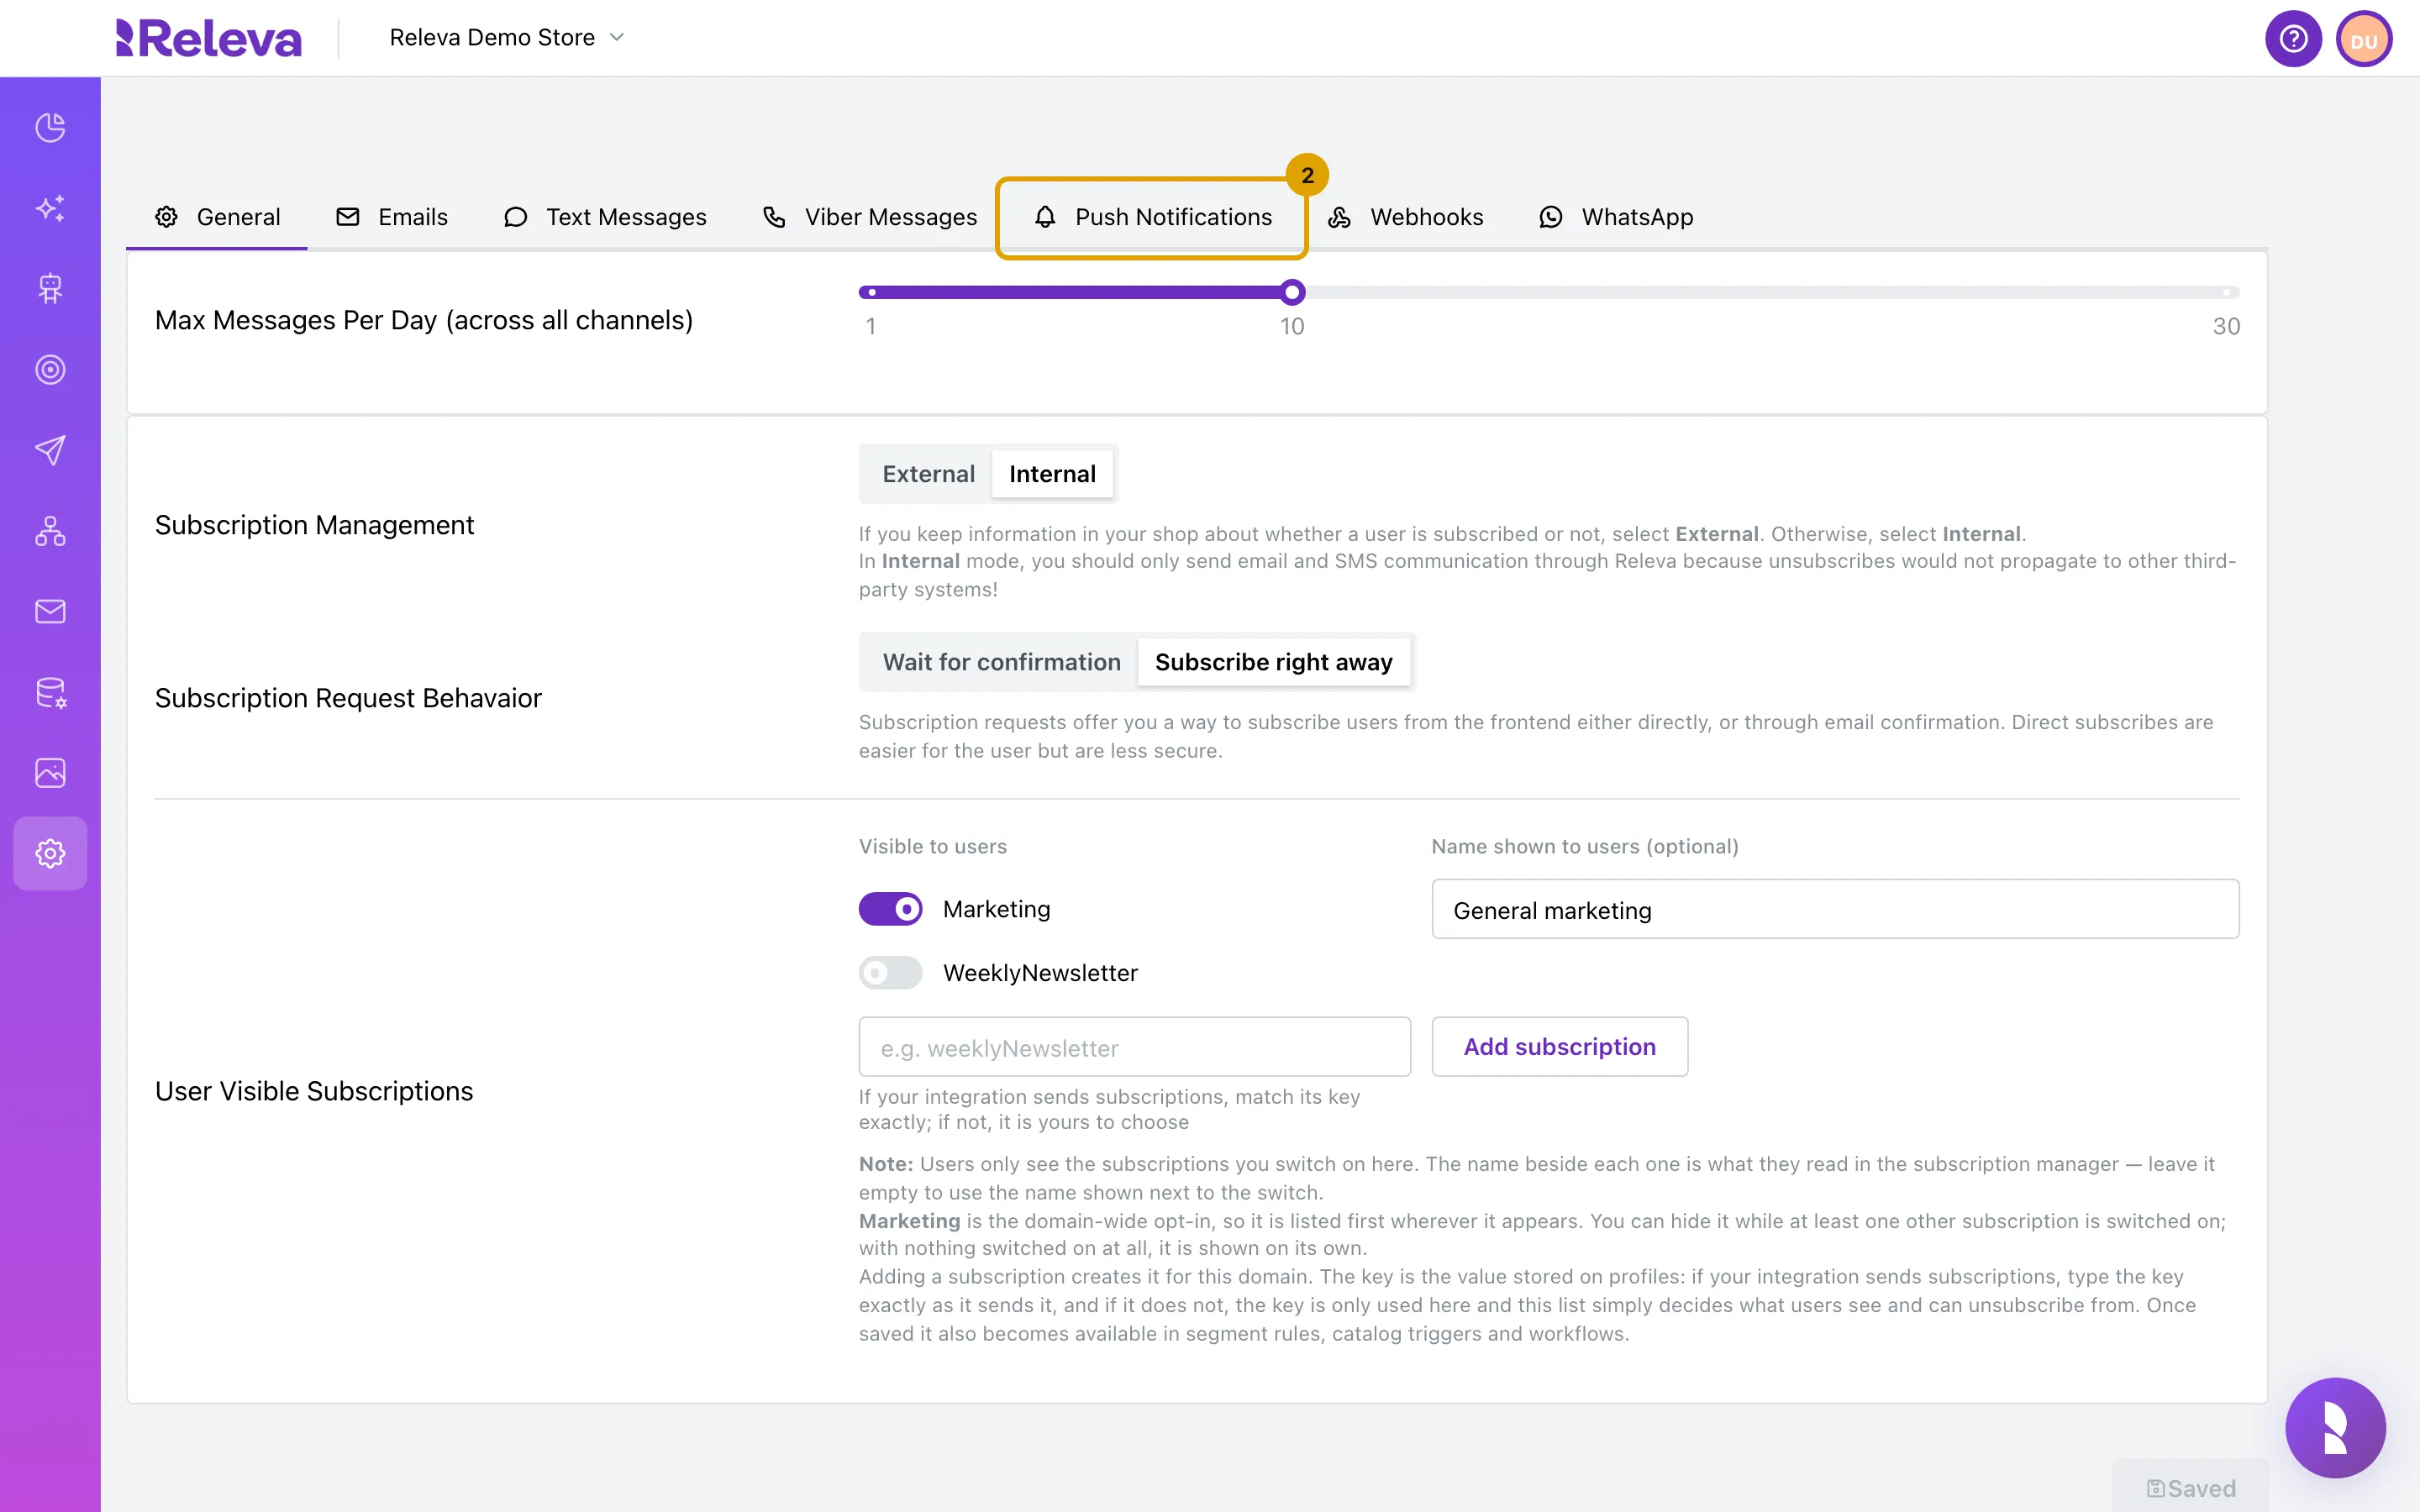
Select the Push Notifications tab.
-
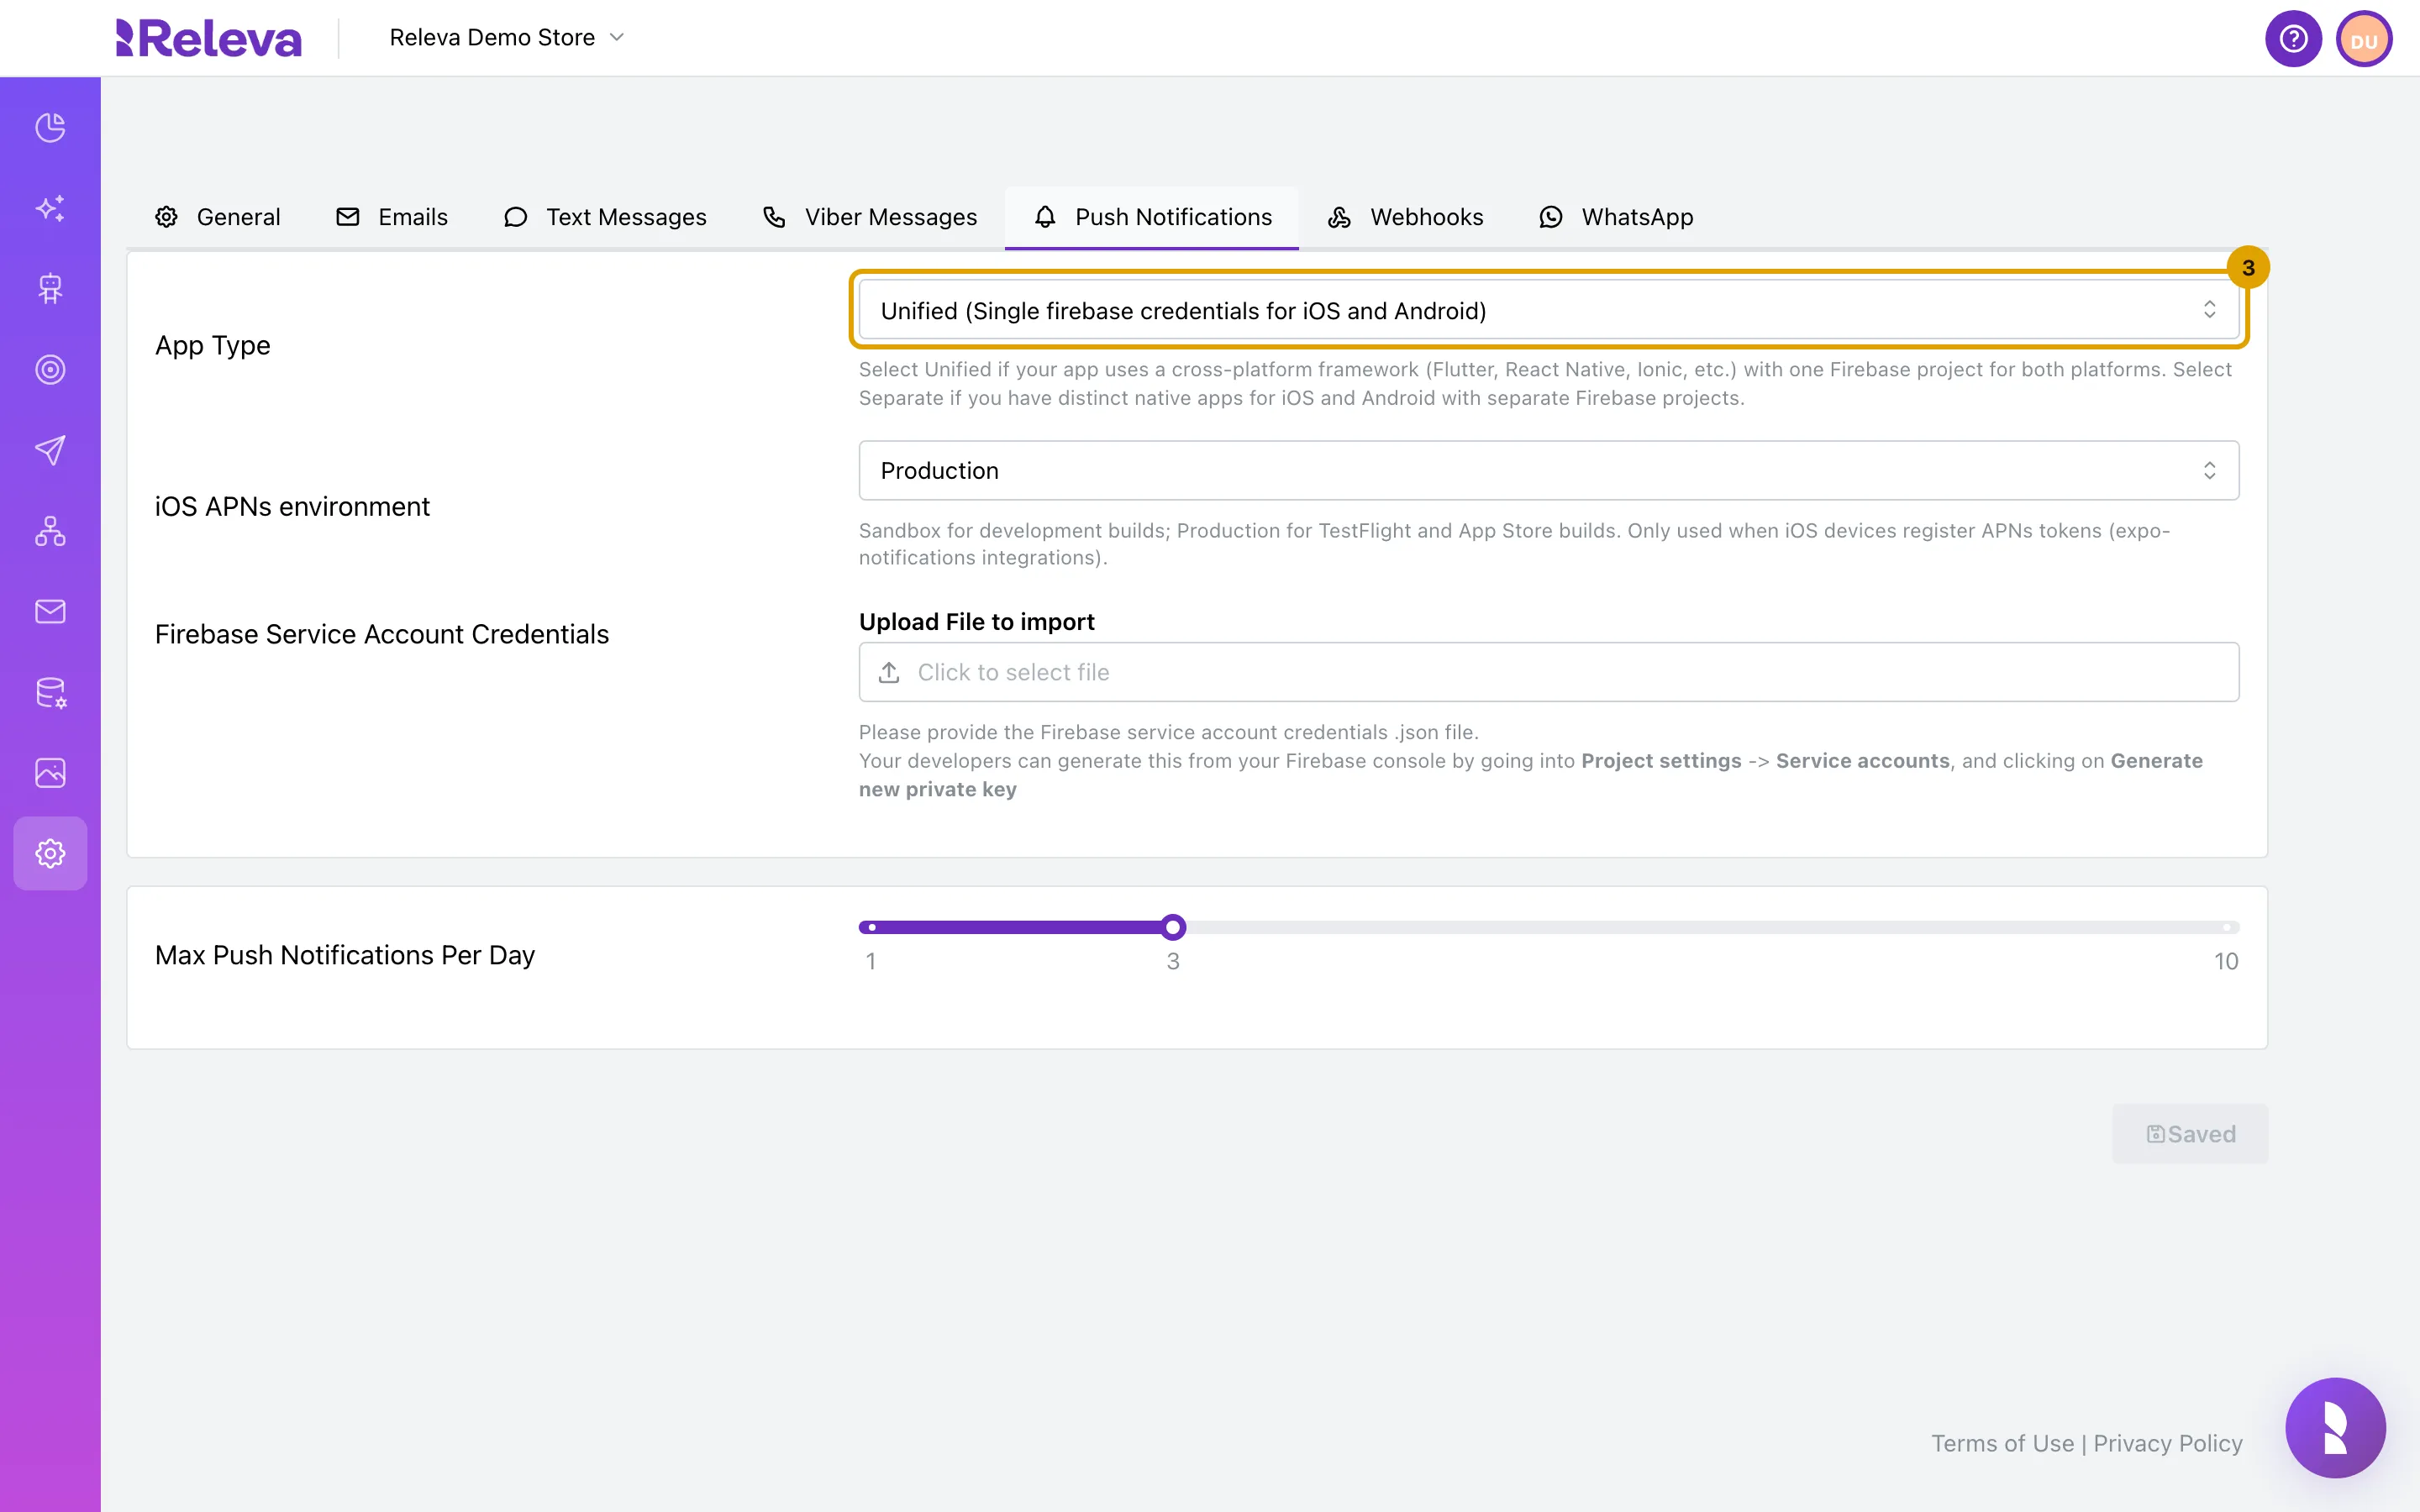
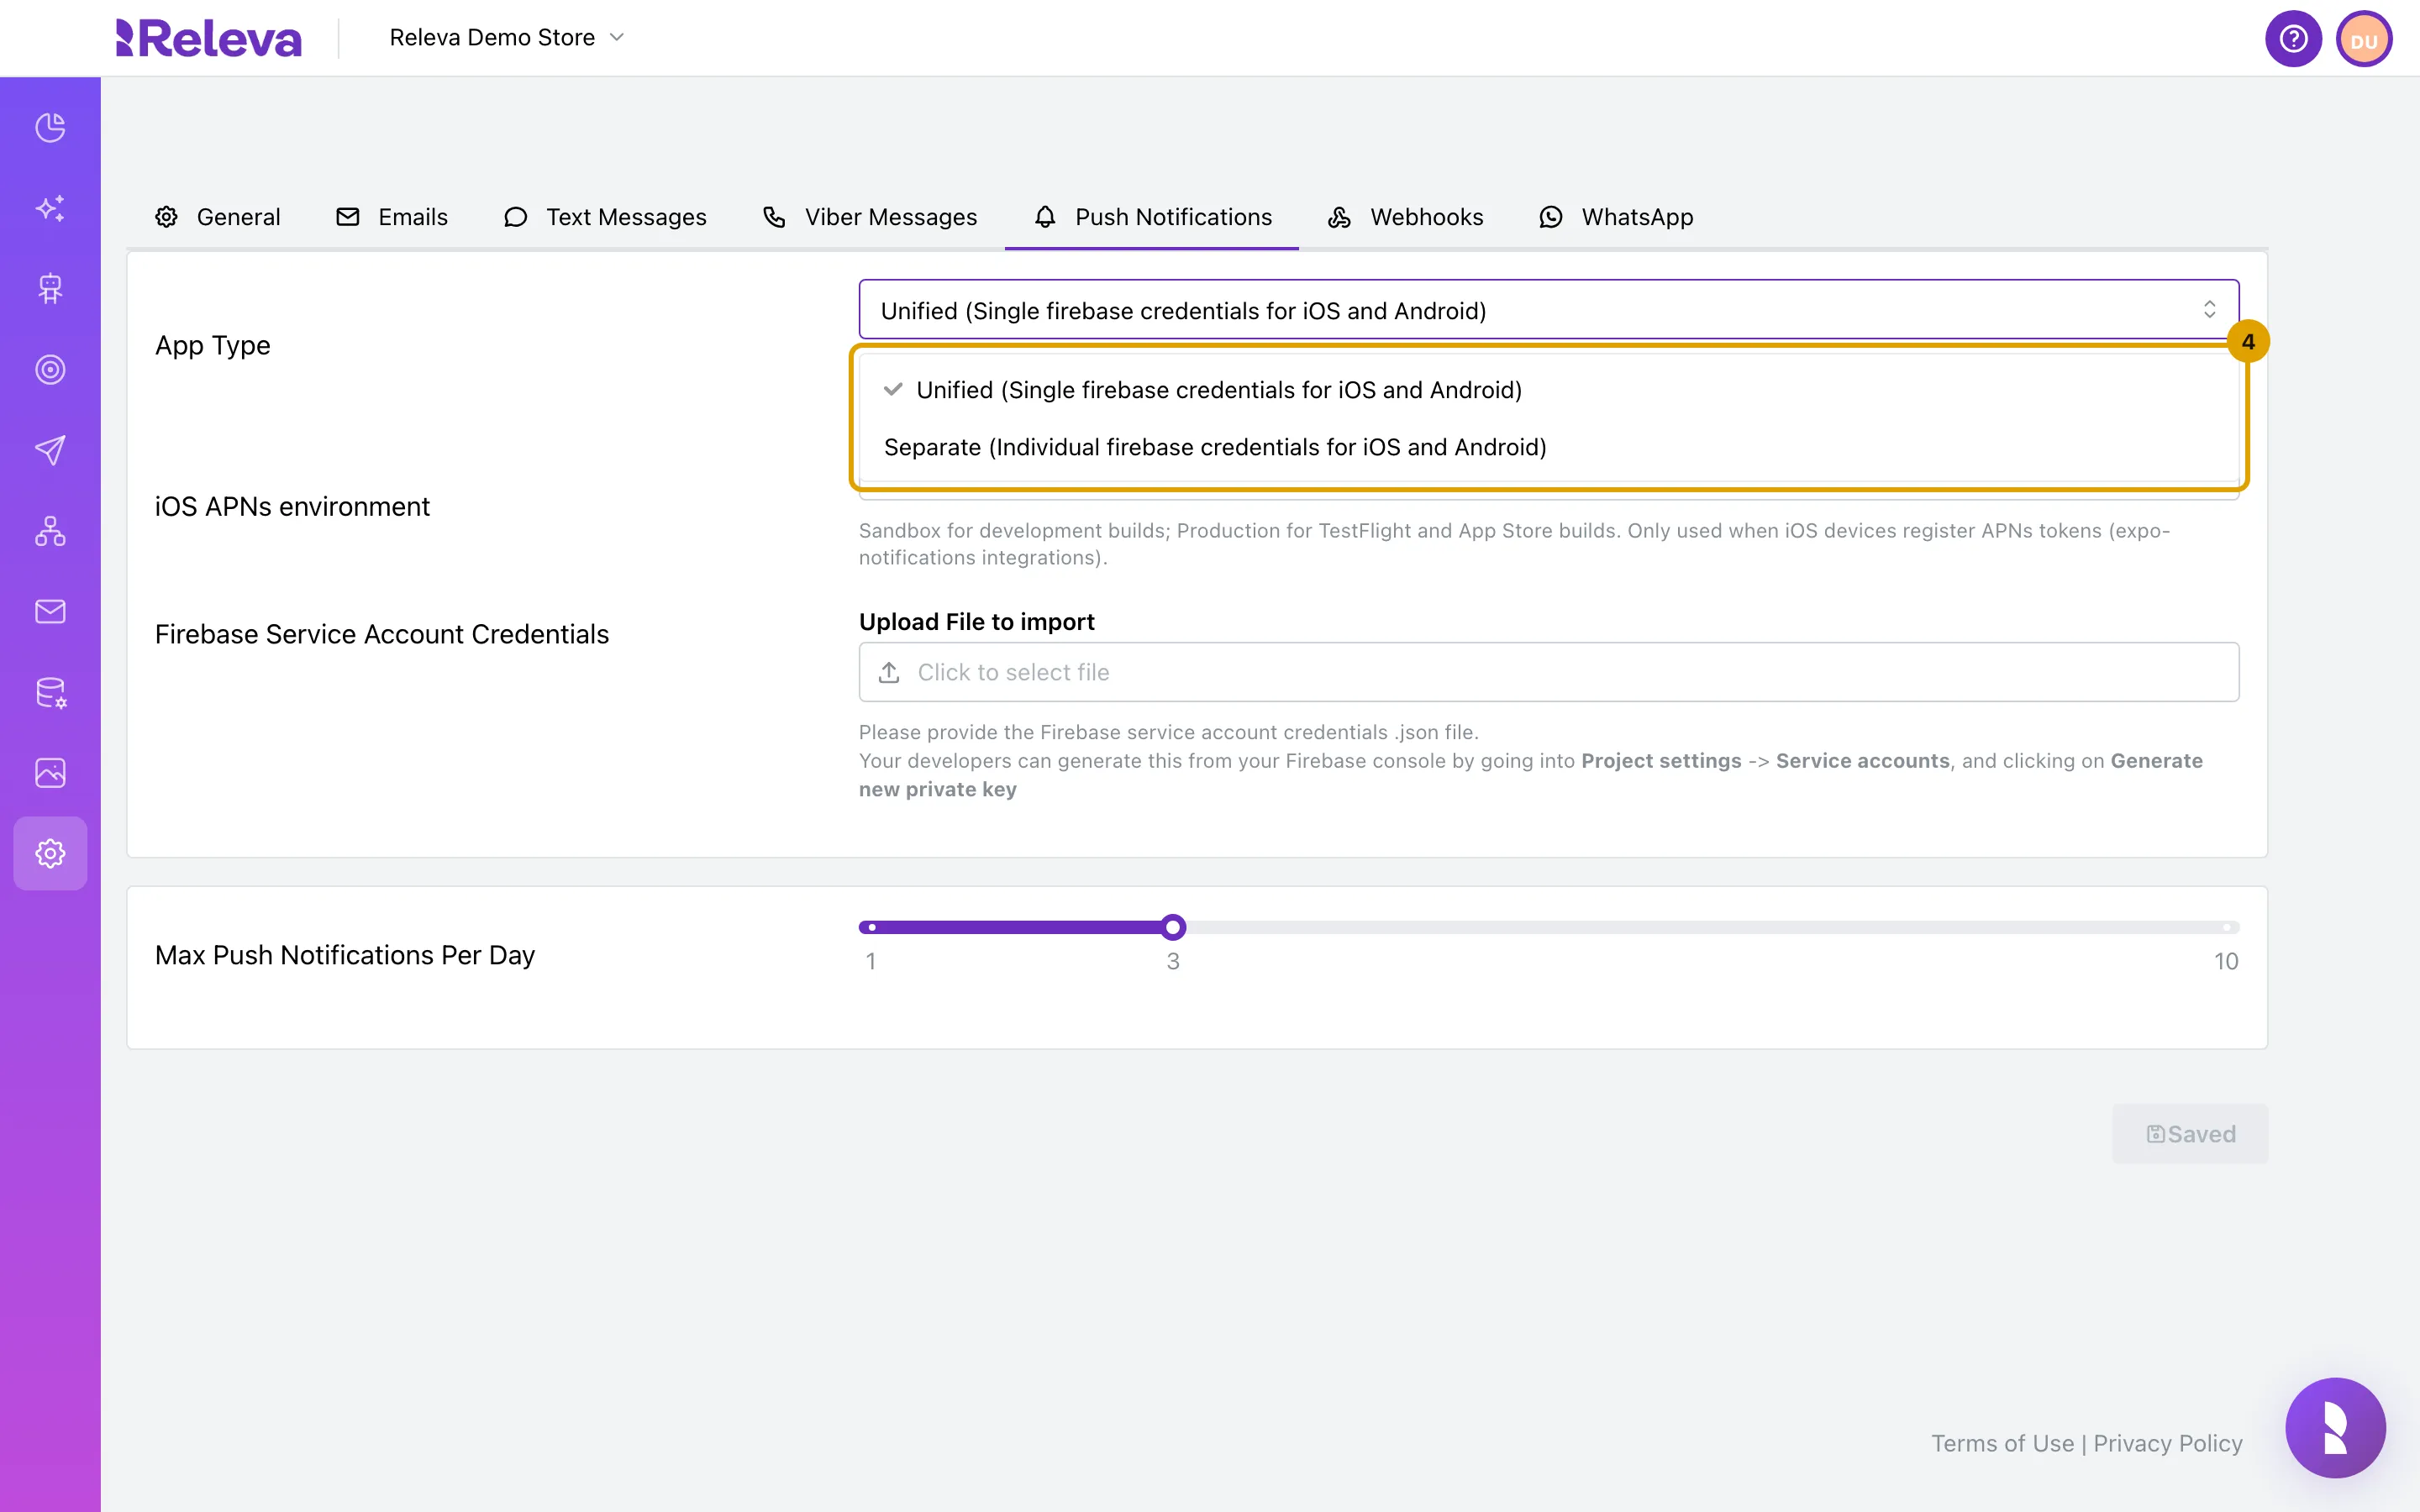
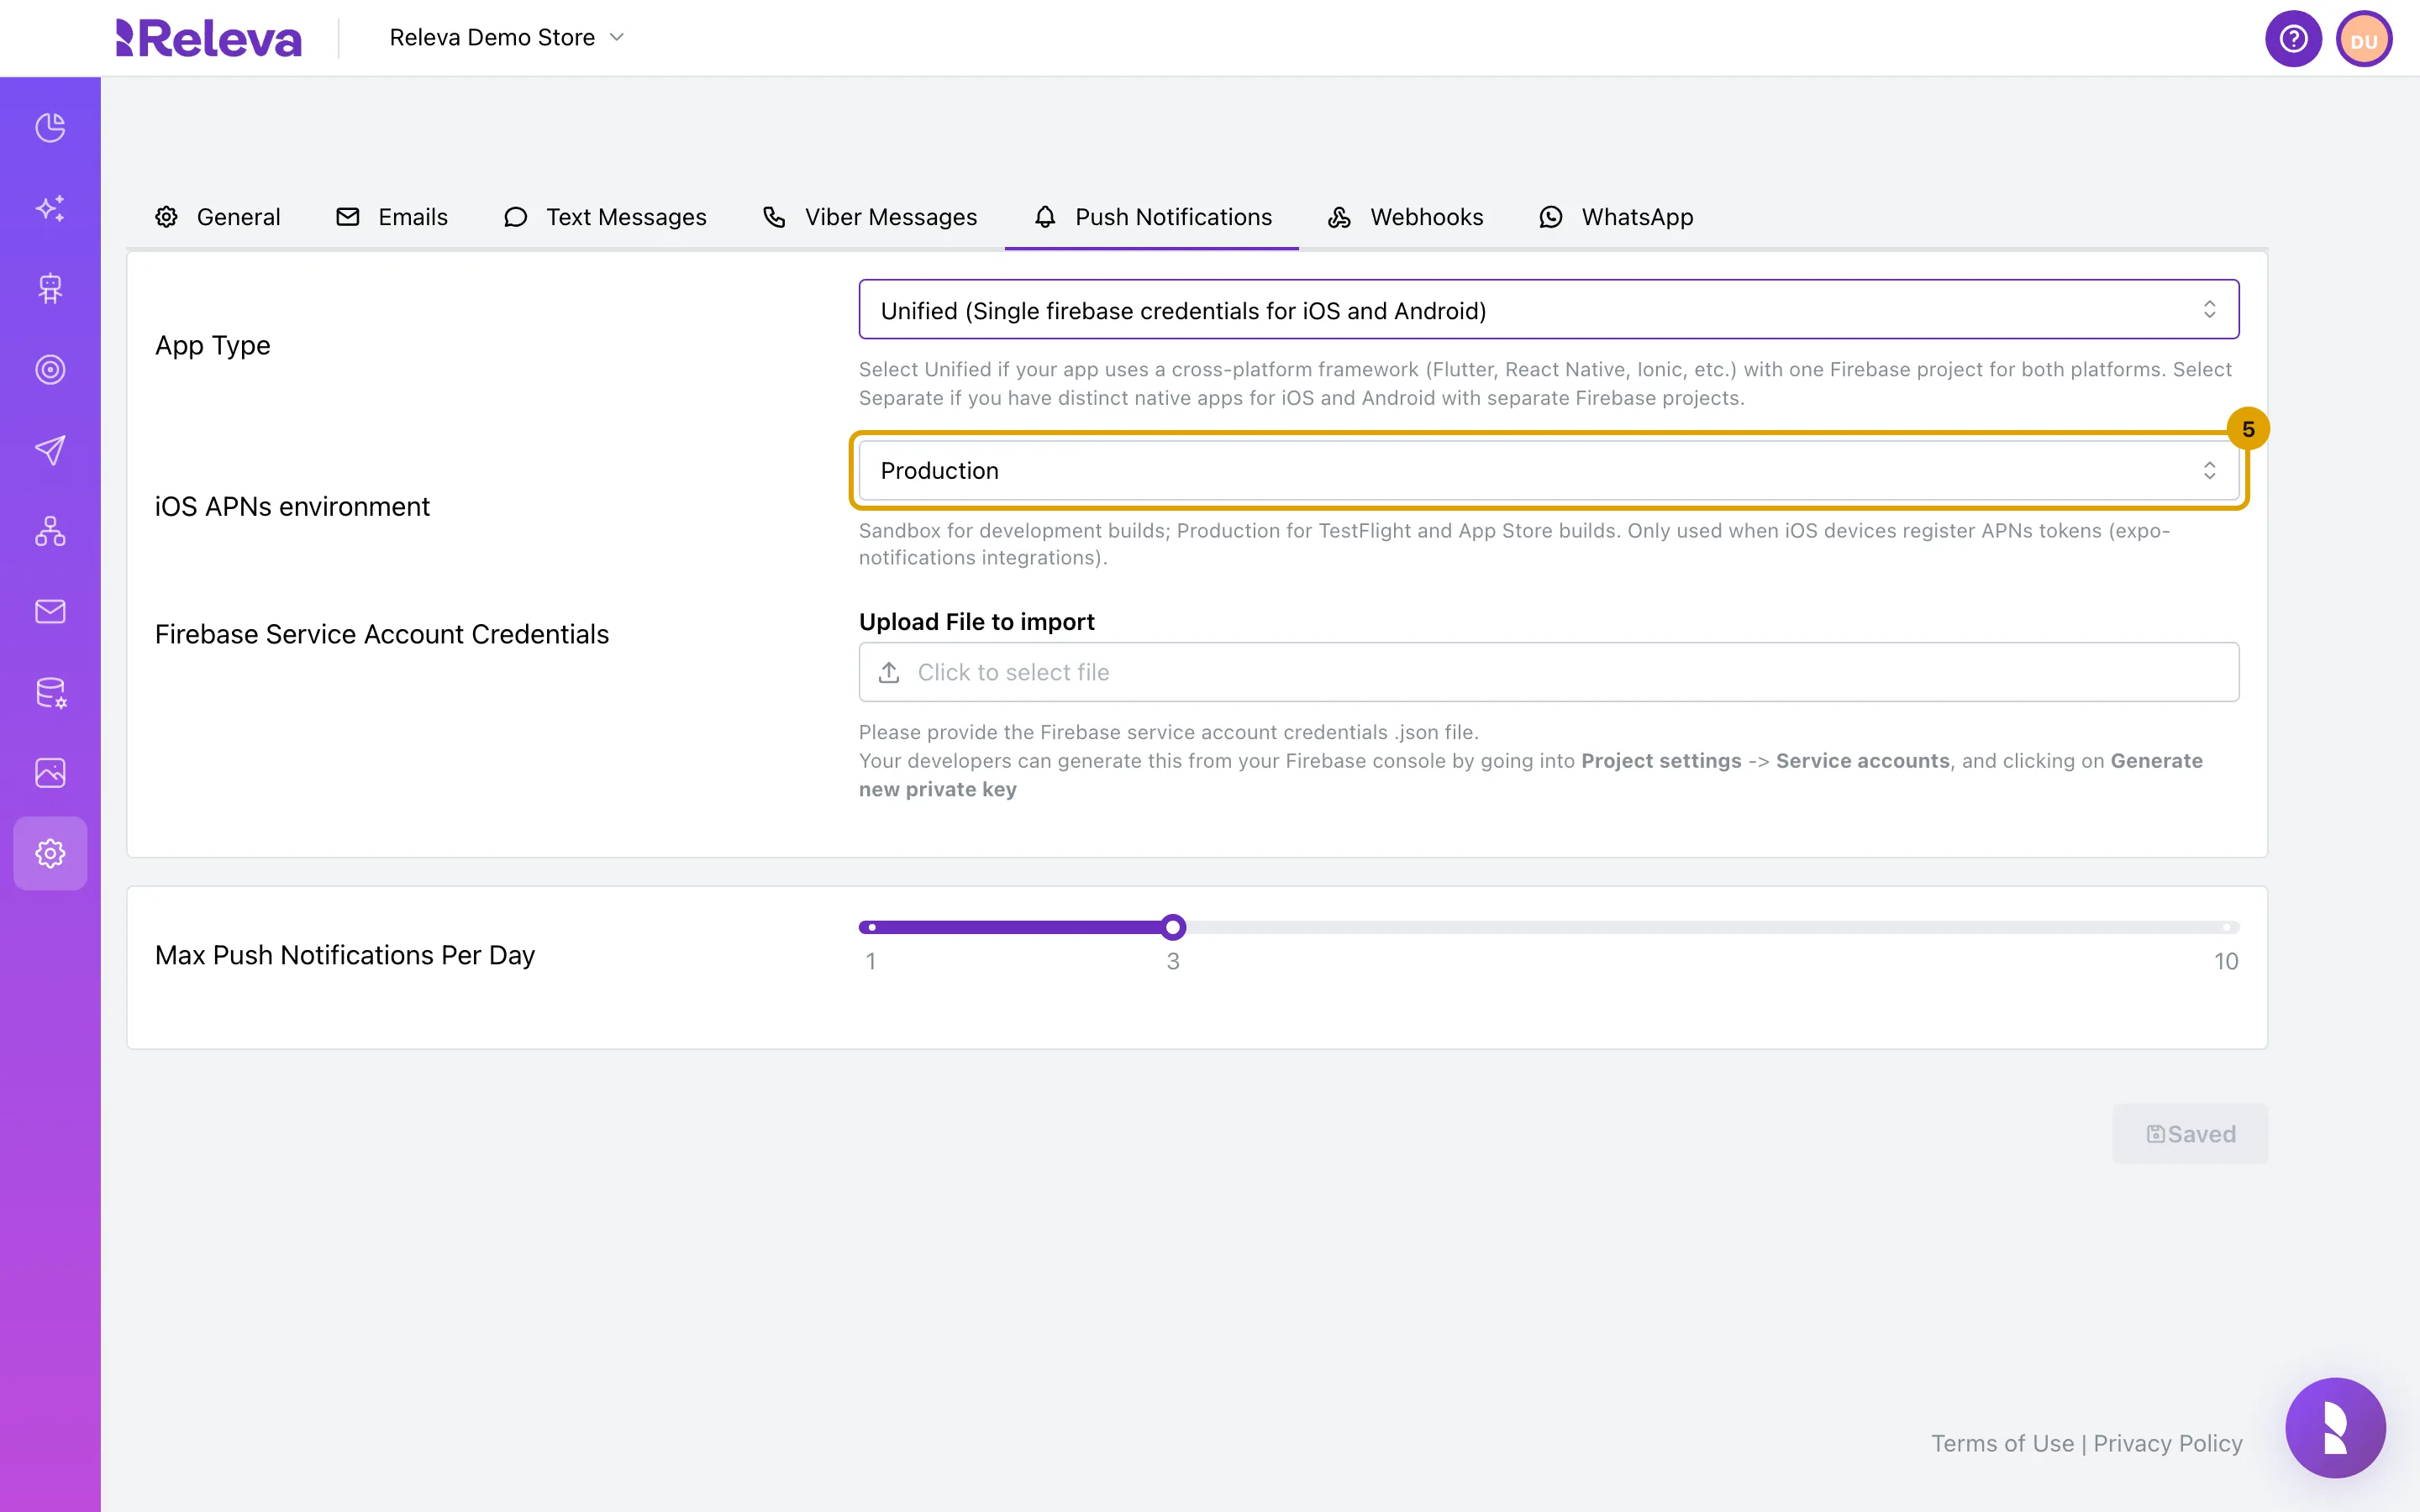
In App Type, choose Unified if one Firebase project serves both your Android and iOS app (React Native, Flutter, Expo), or Separate if each native app has its own Firebase project.
The two options read Unified (Single firebase credentials for iOS and Android) and Separate (Individual firebase credentials for iOS and Android).
-
Unified shows one credentials field; Separate shows iOS Firebase Credentials and Android Firebase Credentials.
-
In iOS APNs environment, choose Sandbox for development builds or Production for TestFlight and App Store builds. It is used only when your iOS app registers APNs tokens (Expo apps with expo-notifications).
The default is Production. Apps that register FCM tokens (the Swift and notifee stacks, Kotlin, Flutter) ignore this setting.
-
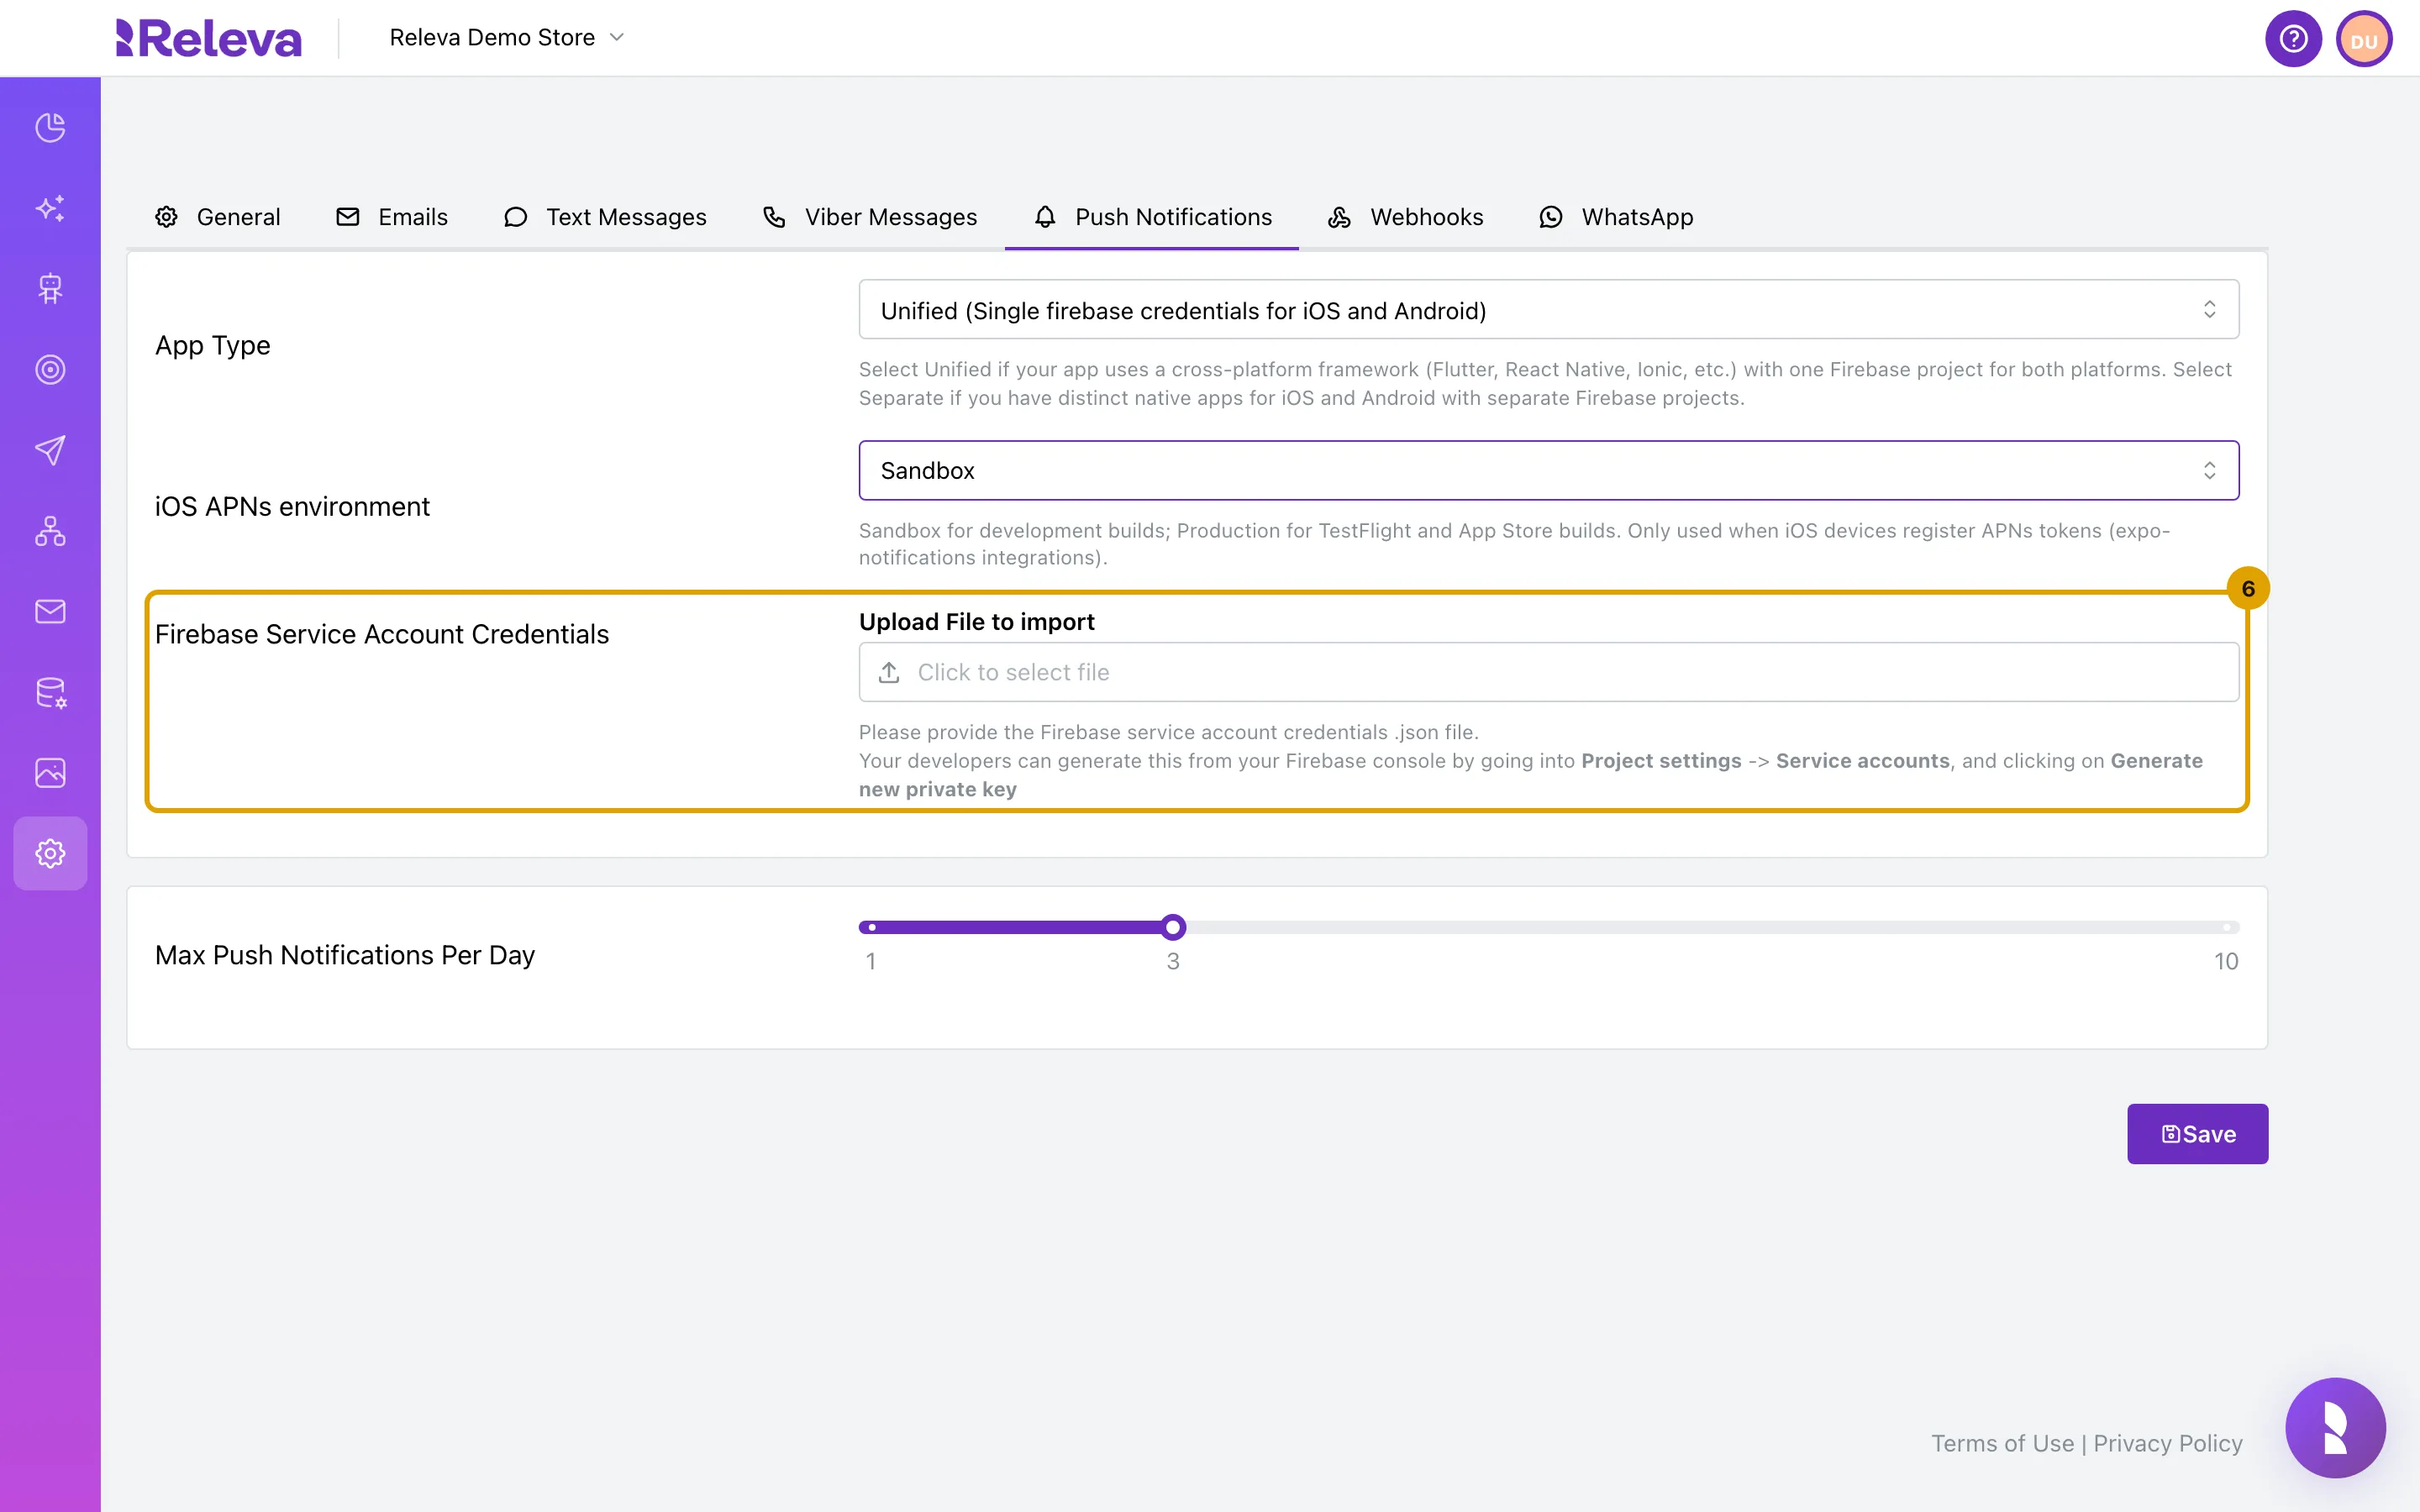
In Firebase Service Account Credentials, select Click to select file and choose the service account .json file from your Firebase console (Project settings › Service accounts › Generate new private key).
With Separate, do this once for iOS Firebase Credentials and once for Android Firebase Credentials. The screenshots show the empty field of the demo shop; no file was uploaded while recording.
-
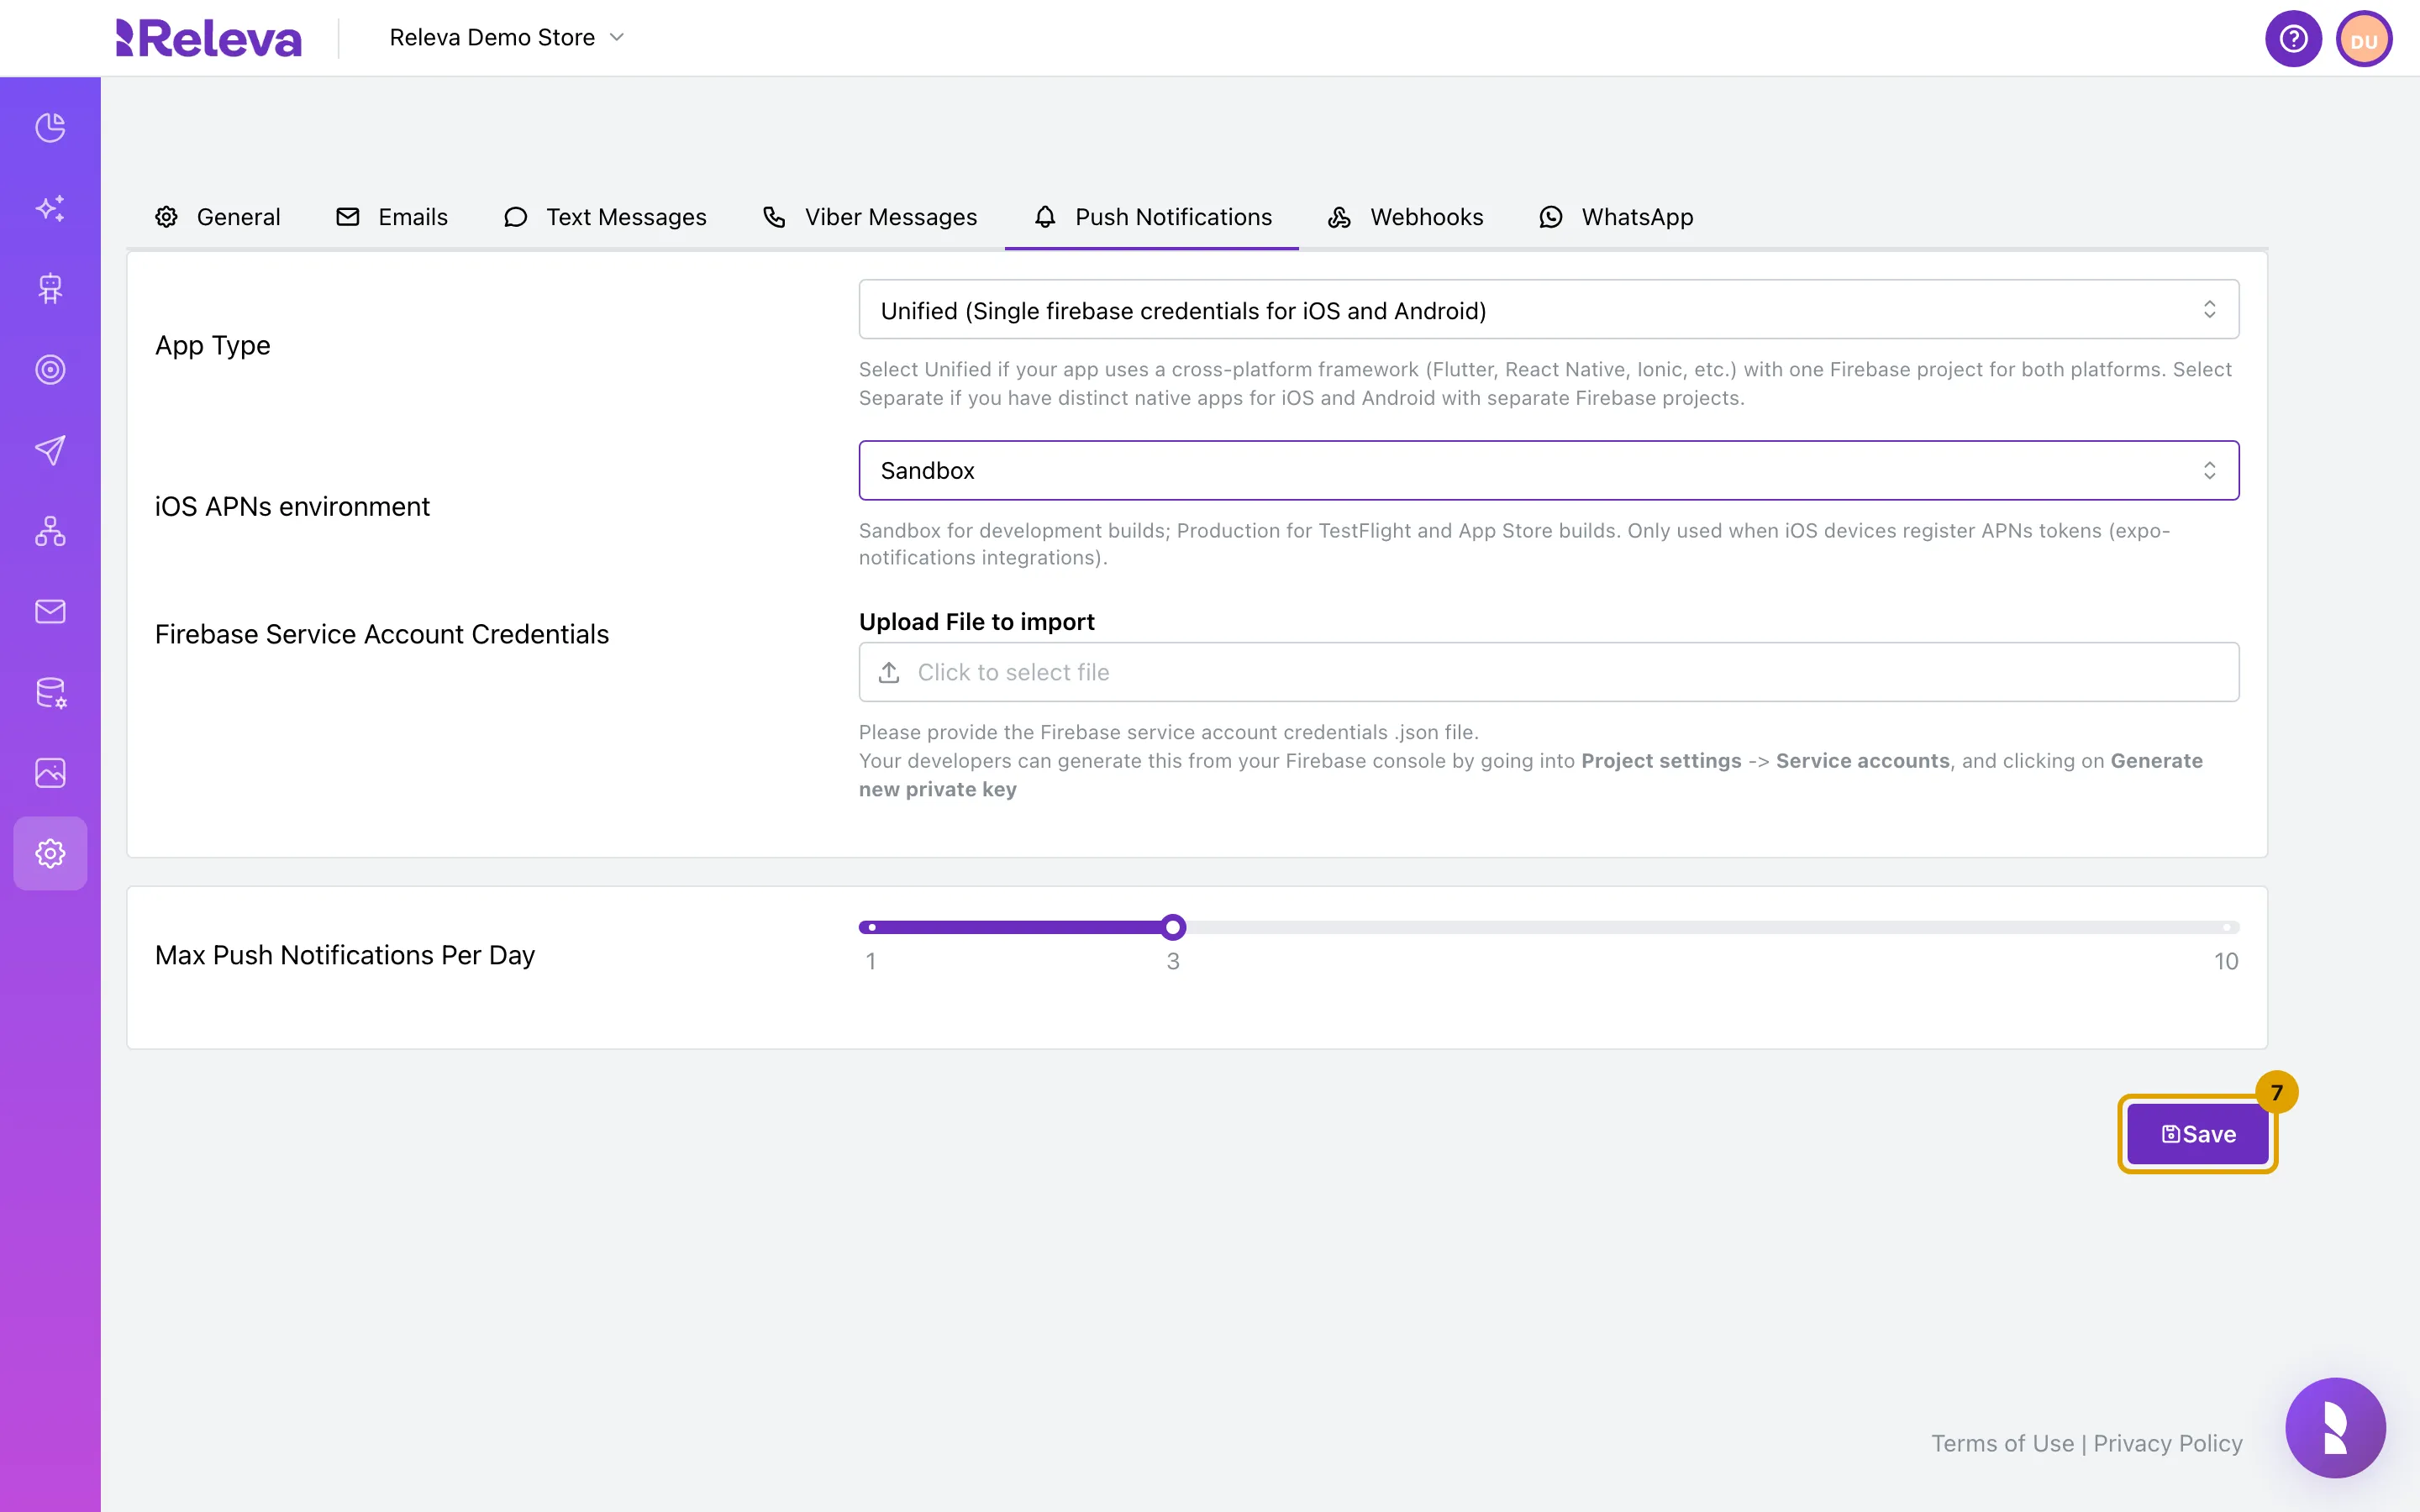
Select Save. The button changes to Saved and the service account’s e-mail address appears above the field with a Delete button.
The button reads Saved and stays greyed out until you choose a file or change App Type or iOS APNs environment.
The Max Push Notifications Per Day slider on the same tab is the per-customer daily limit for all push channels; see The daily limit.
Check it worked
Section titled “Check it worked”- The service account e-mail (
...@<project>.iam.gserviceaccount.com) shows above the upload field after a reload. The private key is never shown again. - On Marketing Channels › Push Notifications › New push Notification, Android, IOS and App Inbox can be ticked under Channels.
- Send yourself a test push from a saved notification with Test › Send to a Real User once your app has registered a token. See Testing.
Releva does not validate the file against Firebase when you save it. A wrong or revoked key is accepted and fails only when a push is sent.
Troubleshooting
Section titled “Troubleshooting”Invalid JSON file. The chosen file is not JSON. Download the service account again from the Firebase console; do not use google-services.json or GoogleService-Info.plist, which are app configuration files, not a service account.
Android, iOS, and App Inbox require Firebase credentials. This note under Channels on the push form means no credentials are saved for the shop. Upload them and save; reload the push form.
Android is disabled — no Firebase credentials found for this platform. (or iOS is disabled). With Separate, only one platform has a file. Upload the other one.
Firebase did not accept the request on a test send. The service account is for the wrong project, was revoked, or Cloud Messaging is not enabled in that project. Generate a new key and upload it again; the new file replaces the old one for that platform.
APNs token could not be imported into FCM. Status: INTERNAL. returned to an Expo app on iOS. The build’s APNs environment does not match iOS APNs environment. Development builds need Sandbox; TestFlight and App Store builds need Production. The same message with other statuses is listed in the push notifications reference.
You switched App Type. Switching from Unified to Separate or back does not delete the credentials uploaded under the other mode. The push sender uses the credential of the current mode (the both file in Unified, the per-platform files in Separate). Use Delete, confirm Are you sure you want to delete these credentials? and select Save to remove a file you no longer want stored.